Add Roles to Existing Users
Got feedback or spotted a mistake?
Leave a comment at the end of this page or email contact@krishagni.com
Add Roles to Existing Users
- Admin Admin (Unlicensed)
- Ankita Chavan
- Kruti Nandu (Unlicensed)
Owned by Admin Admin (Unlicensed)
Last updated: Dec 21, 2021 by Ankita Chavan
Steps to Import CSV
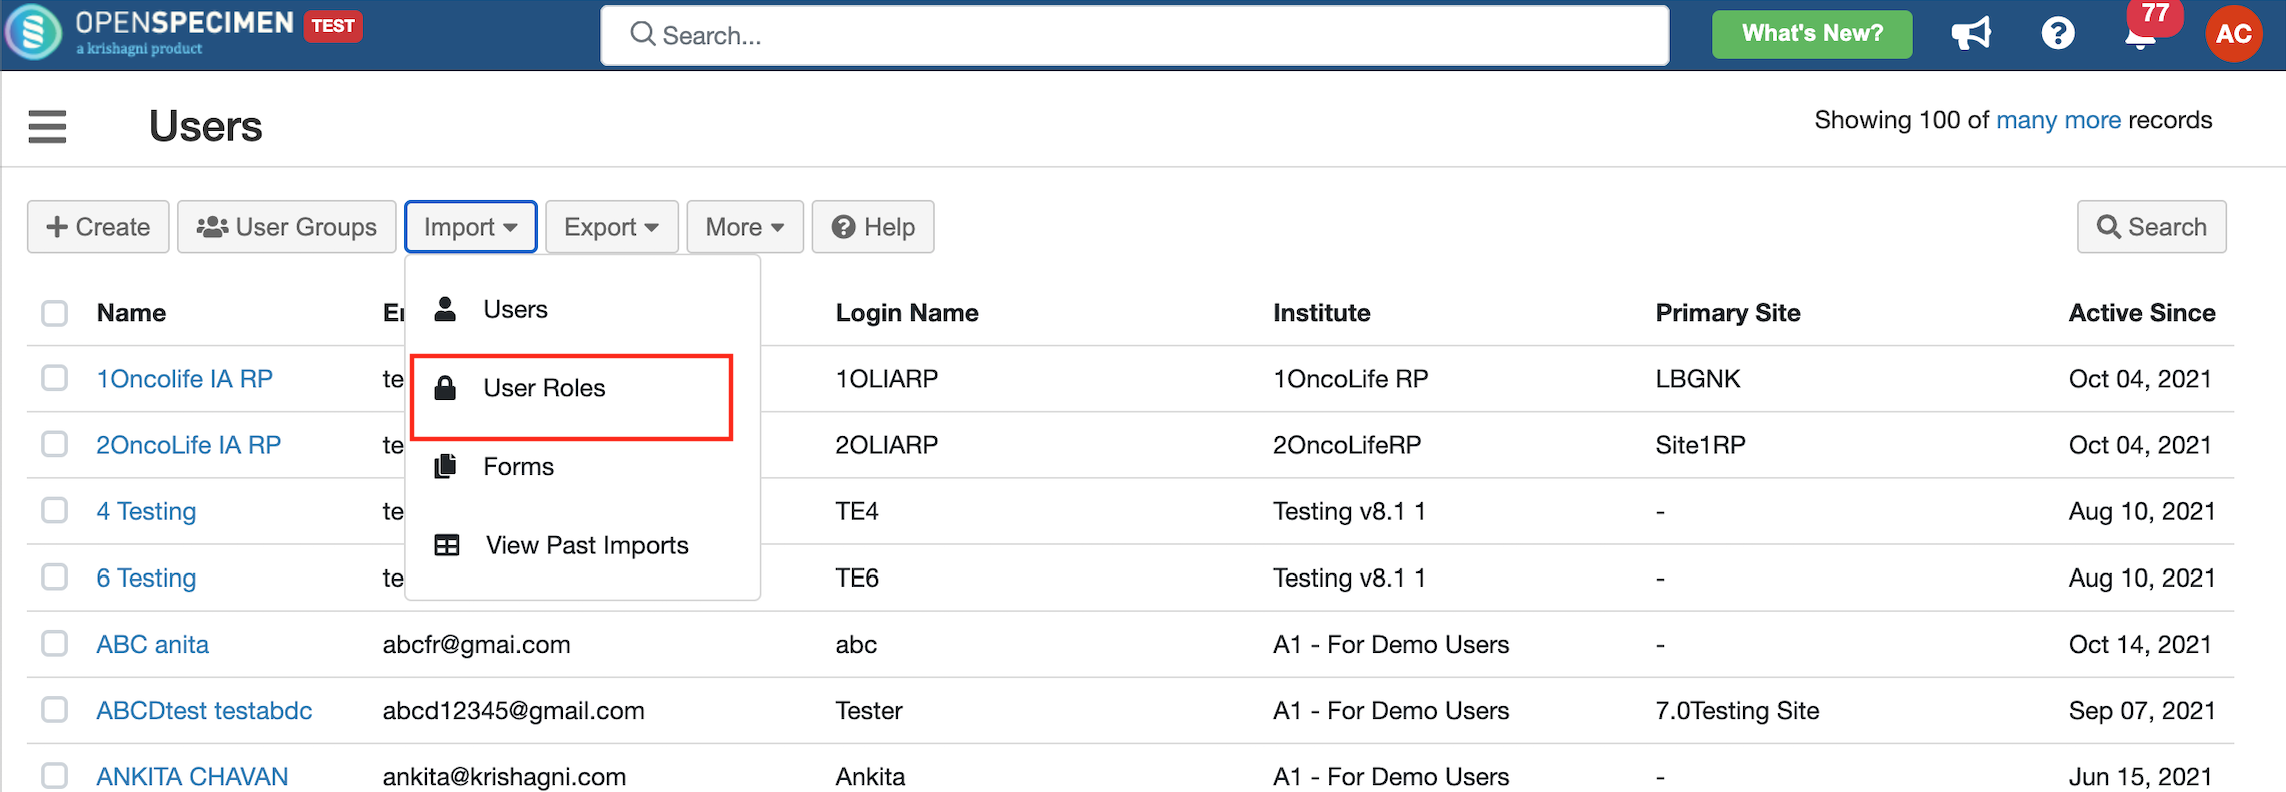
- Log in as an admin user and go to the users' list page.
- Click on 'Import' button and select option 'User Roles'.
- Click on 'Download Template File' to download the template file.
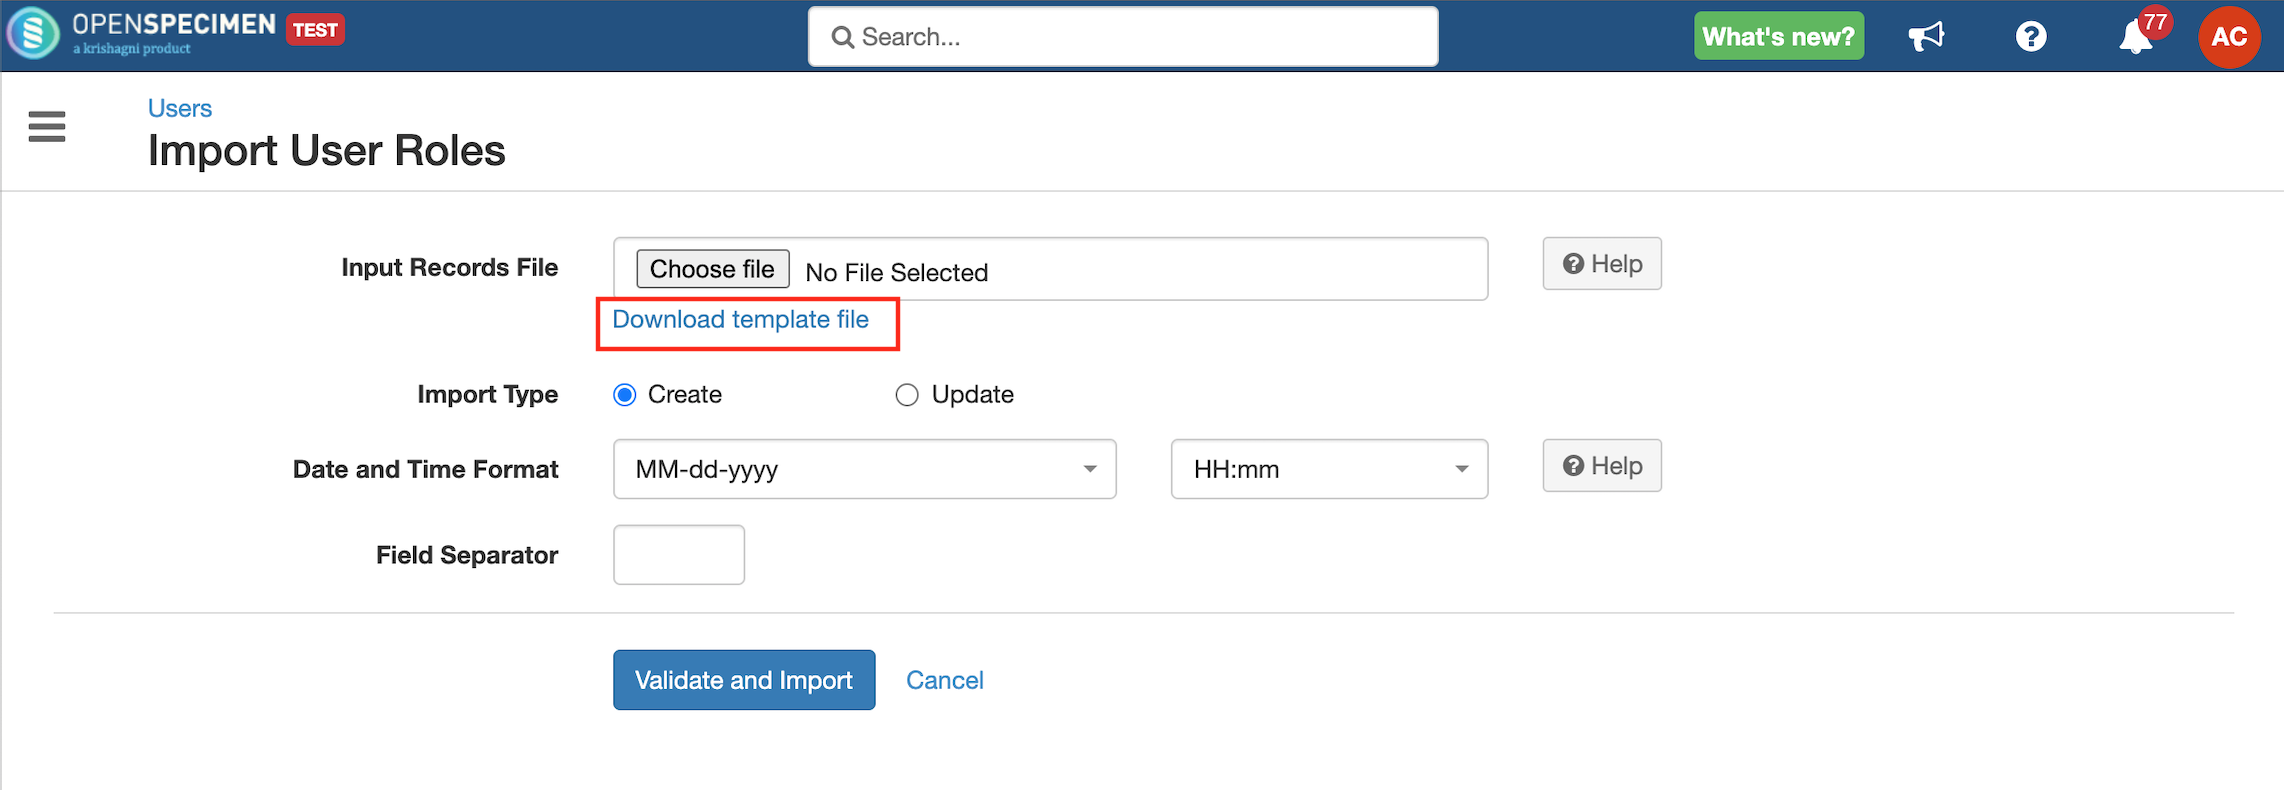
- Enter all valid data in the template file as mentioned in the 'Data Dictionary' table below.
- Upload the filled template file in the 'Input Records File' field, select 'Import Type' as 'Create' to add or 'Update' to update user roles.
- Click on the 'Validate and Import' button.
- Refer to 'Import status' to check the status of the import job.
Sample CSV
Data Dictionary
Column Name | Datatype | Mandatory? (Create) | Mandatory? (Update) | Description | Permissible Values | Validations |
|---|---|---|---|---|---|---|
| Identifier | Number | No | Yes | System auto-generated unique number for every user. | Mandatory while updating roles if the Email Id column is blank. | |
| Email Address | String | Yes | Yes | Email address of the user to which role has to be added. | ||
| Role#1#Name | String | Yes | No | A role that is to be assigned to the user. |
| |
| Role#1#Site Name | String | Yes | No | The site to which the role is applicable. | Enter a valid site name or leave blank to set for "All Current and Future". Add an extra column for the user role on multiple sites. E.g. Role#2#Site Name, Role#3#Site Name, etc. You can add "All Current and Future" to update all sites. | |
| Role#1#CP Short Title | String | Yes | No | Collection protocol to which the role is applicable. | Enter a valid collection protocol name or leave blank to set for "All Current and Future". Add an extra column for the user role on multiple CPs. E.g. Role#2#CP Short Title, Role#3#CP Short Title, etc. You can add "All Current and Future" to update all sites. |
, multiple selections available,
Related content
Roles and Privileges
Roles and Privileges
Read with this
New Participants CSV
New Participants CSV
More like this
Users Template
Users Template
More like this
Users Management (Video)
Users Management (Video)
More like this
Participant Registrations CSV
Participant Registrations CSV
More like this
User Forms Template (v8.0)
User Forms Template (v8.0)
More like this
Got feedback or spotted a mistake?
Leave a comment at the end of this page or email contact@krishagni.com