Got feedback or spotted a mistake?
Leave a comment at the end of this page or email contact@krishagni.com
Configuring Cart Export Columns
- Shraddha Ranpise (Deactivated)
- Srikanth Adiga
- Poornima Govindrao
Owned by Shraddha Ranpise (Deactivated)
Last updated: Sept 27, 2018 by Srikanth Adiga
Introduction
Until v5.1, the columns of the specimen cart export was fixed. Starting v5.1, you can configure the columns using a saved query at the system level.
Step 1: Create a Query
Create a saved query with columns that you want to be displayed in the cart report.
Step 2: Configure the Query
- As a super admin, go to home page and click on ‘Settings’ card
- Click on ‘Common’ module or search for the property ‘Cart Specimens Report’
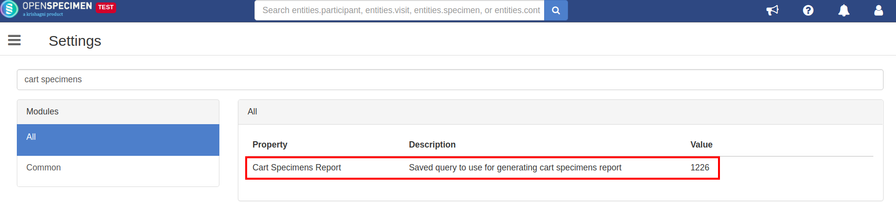
Click on the property ‘Cart Specimens Report’ and set the identifier of the saved query under ‘New Value’ field and click on ‘Update’ button

Step 3: Download Report
- Go to the specimen carts list page and click on the cart whose report has to be exported
- Select the specimens from a list whose details has to be exported
- Click on ‘More’ button and select ‘Download Report’ to export the cart specimens report
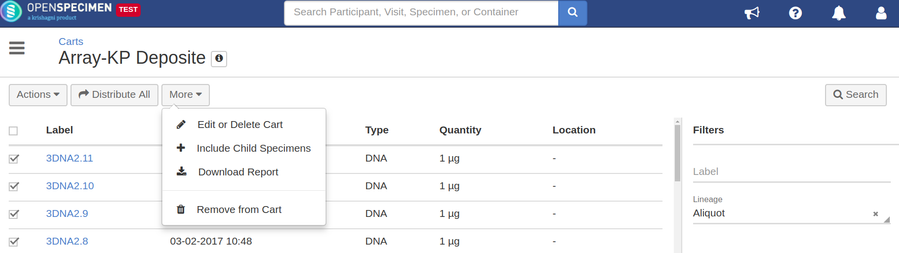
- Check the columns from the exported file. It should be the same as columns defined in the query
, multiple selections available,
Got feedback or spotted a mistake?
Leave a comment at the end of this page or email contact@krishagni.com