Leave a comment at the end of this page or email contact@krishagni.com
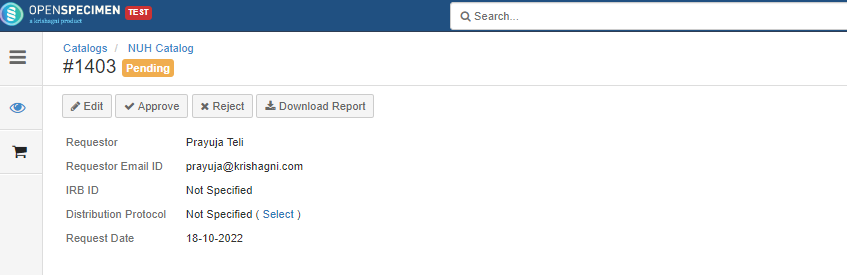
View and Process Request
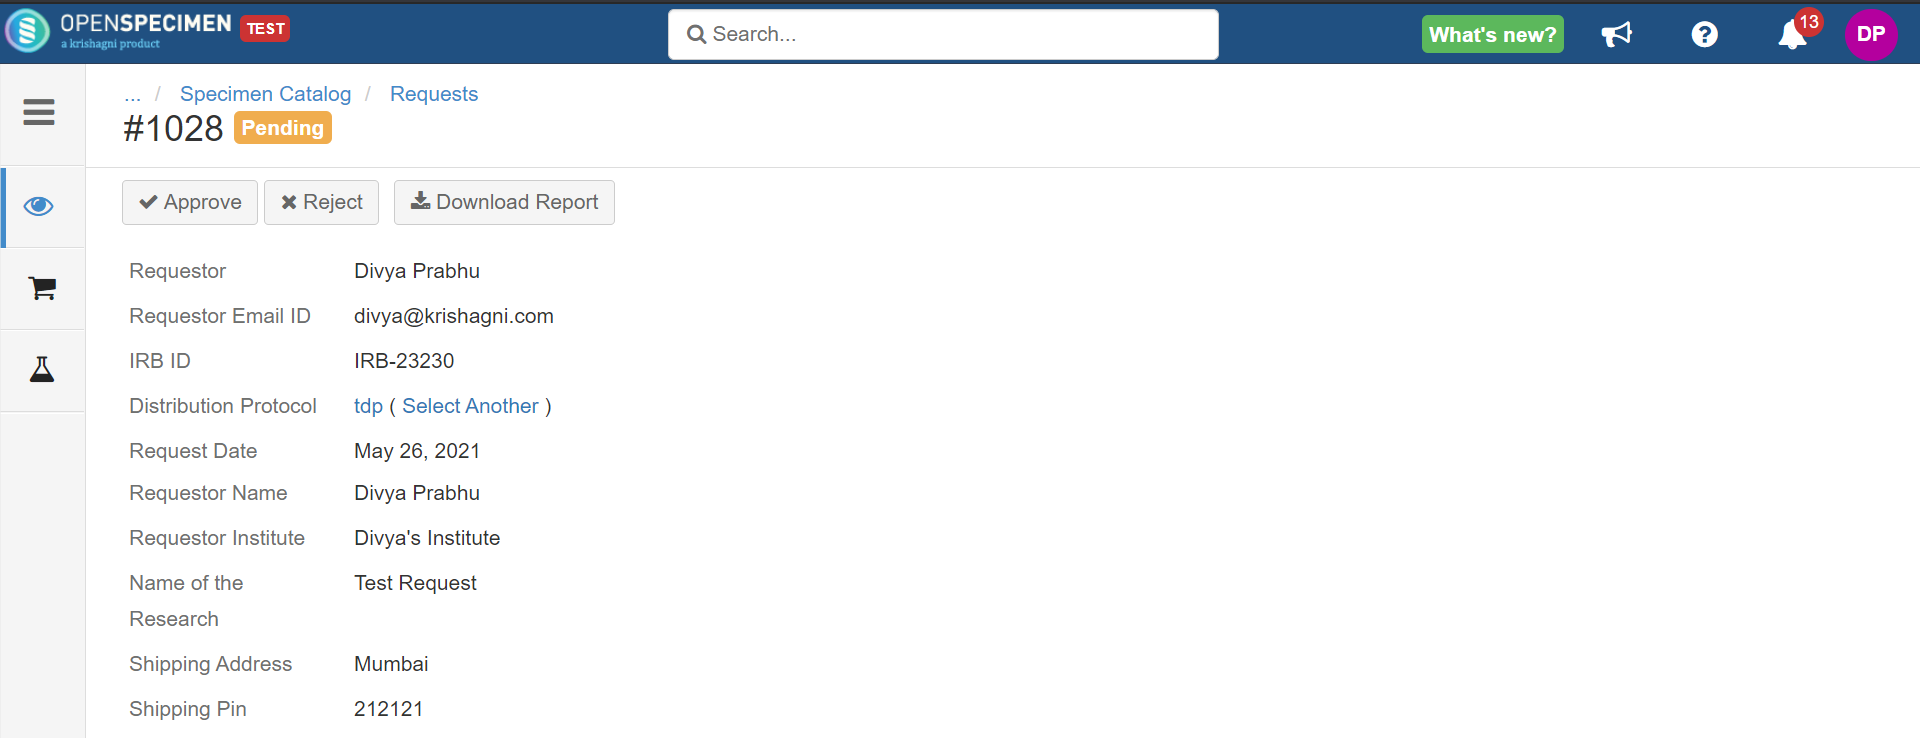
Once the researcher has requested the specimens, the request managers will be notified via email. The request managers can reject or approve the request in full or partial.
- The request managers can see the 'Catalogs' card in the navigation menu.
- They can only see the catalogs on which they are request managers.
View Request
From email notification
- Click on the 'View Request' button from the email sent by the system.
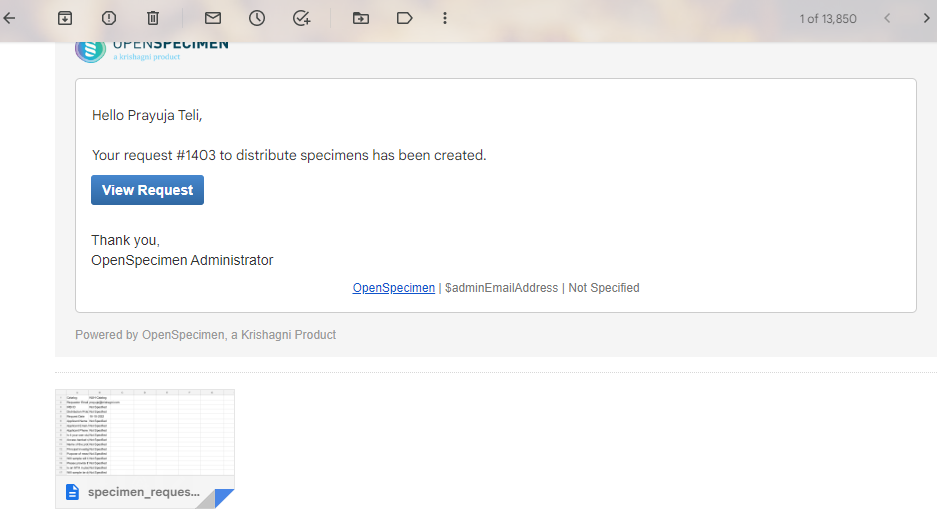
- On clicking 'View Request', the system will navigate you to the request's overview page.
Note:
The “View Request” button appears in the following emails:
- Emails were sent to the request managers.
- Emails are sent to the requestor, who is also an OpenSpecimen user.
From Collection Protocol
- Navigate to collection protocols.
- Click on the' More' button from the participants/specimens list view page.
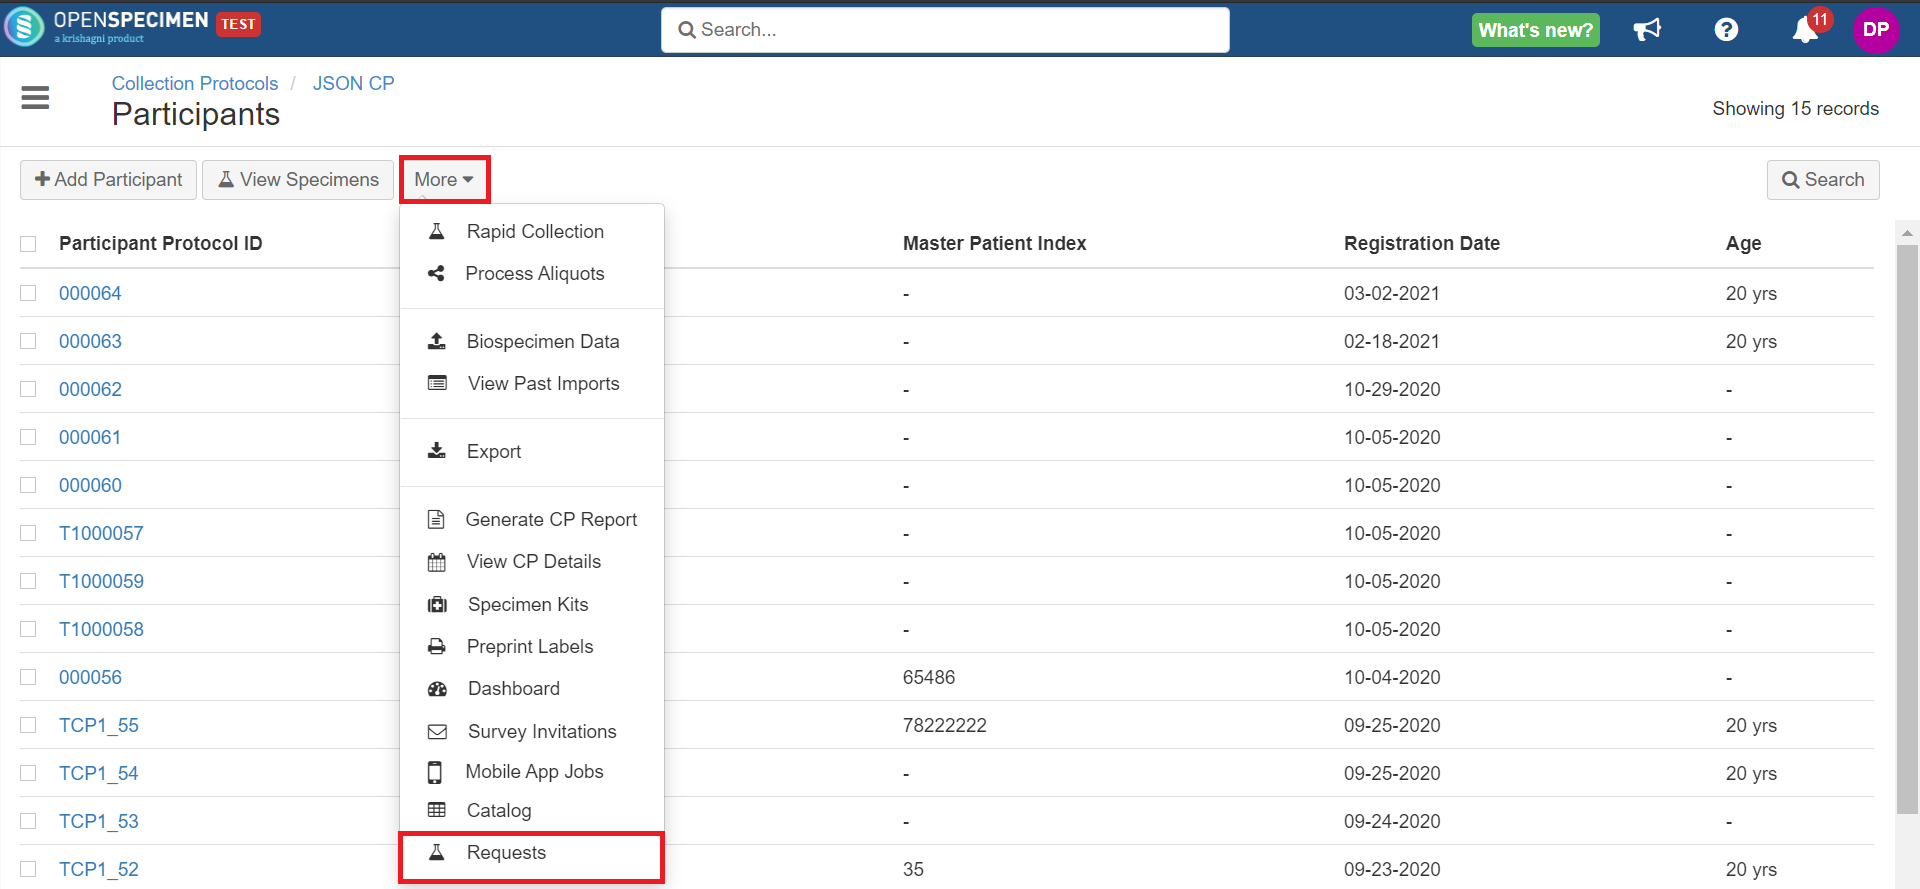
- Click on any pending requests from the list to view the request.
Note: Researchers cannot access requests from the collection protocol page.
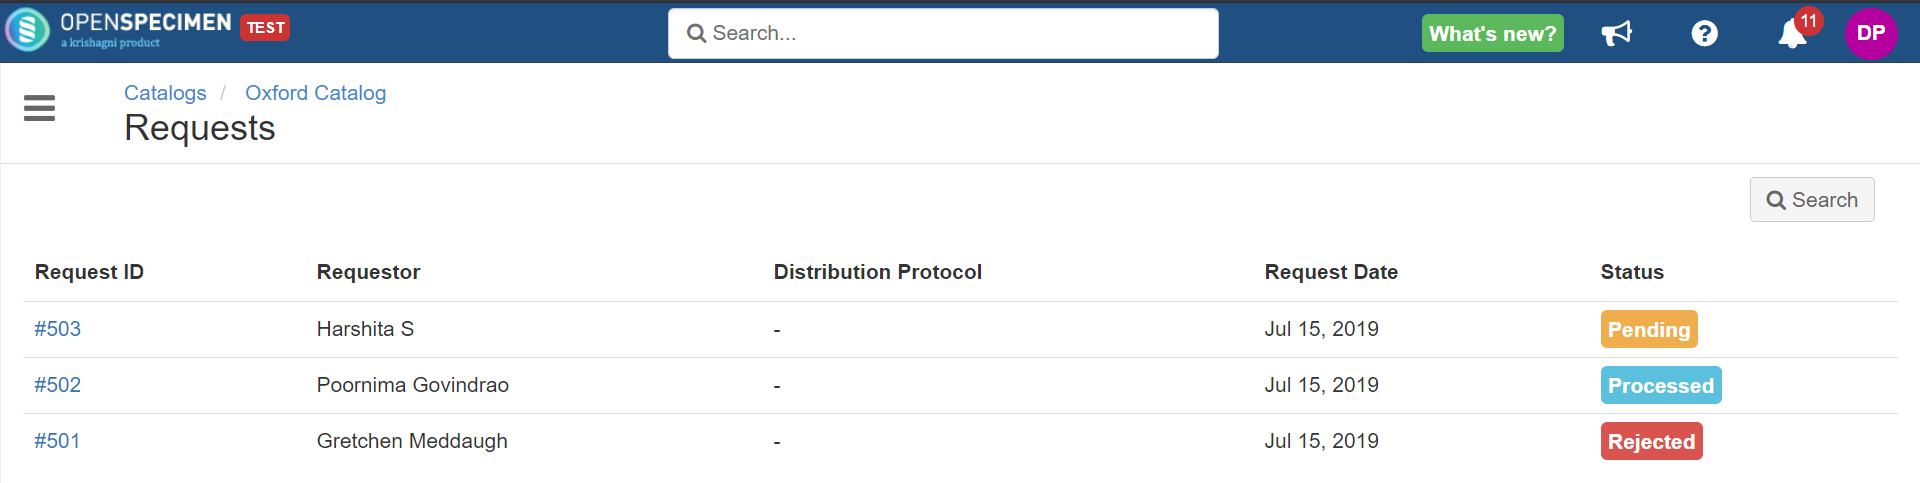
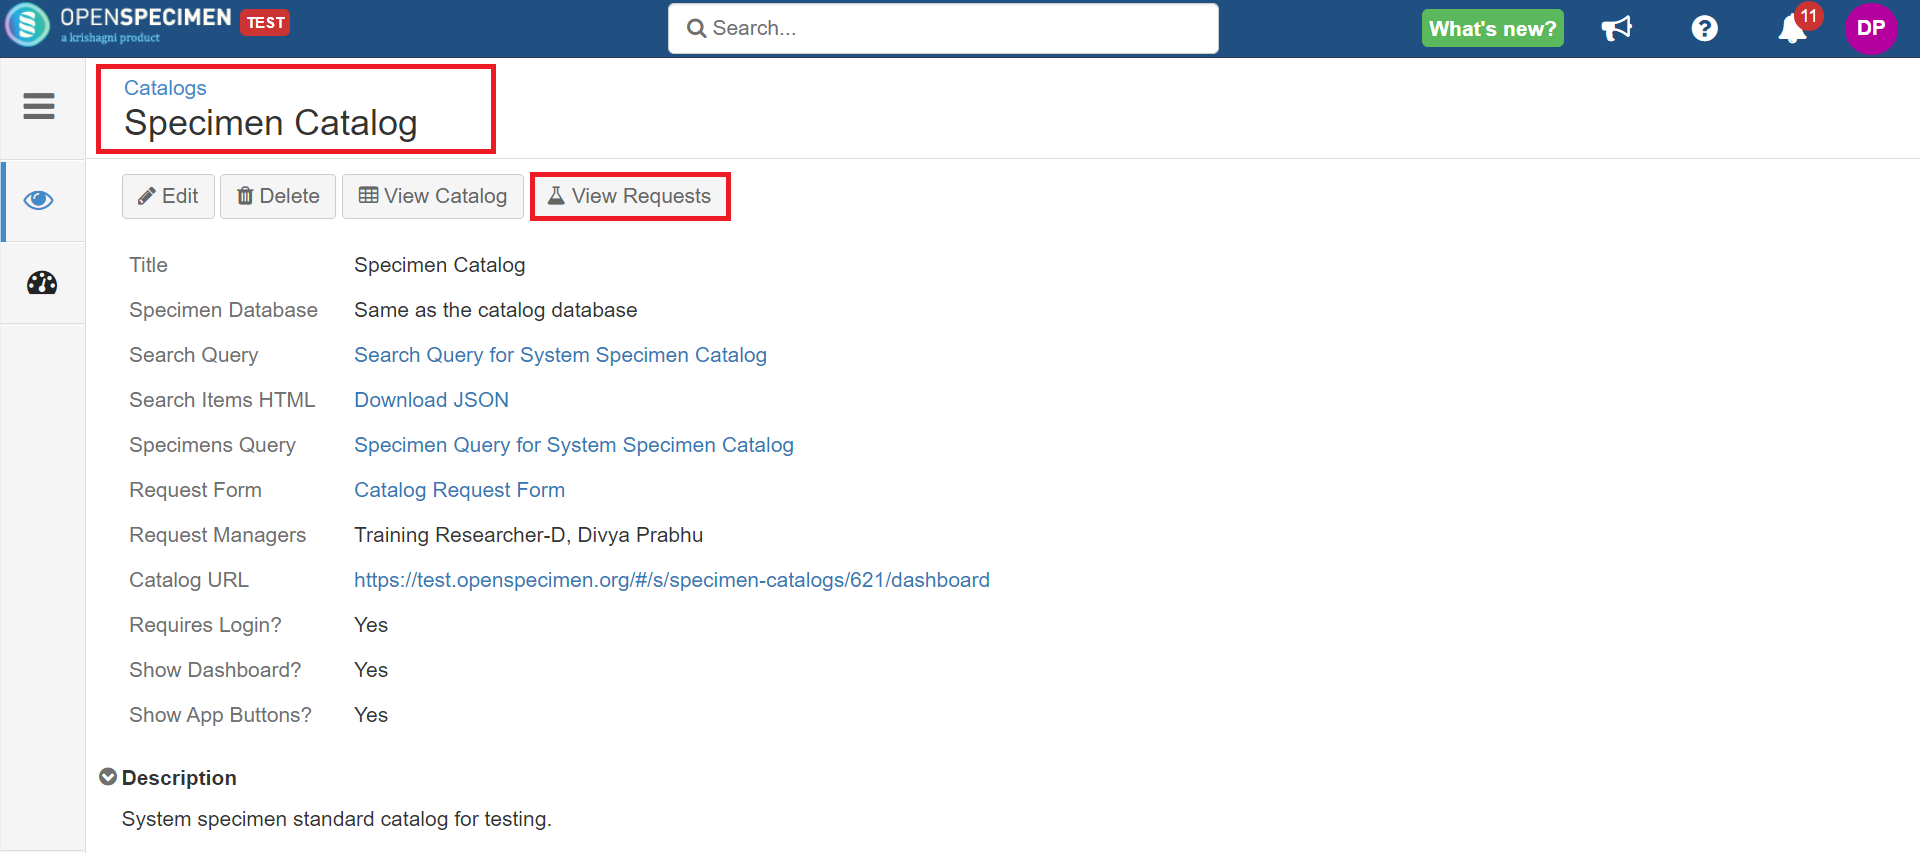
From Catalog
- You can view the requests by going to the respective catalog page.
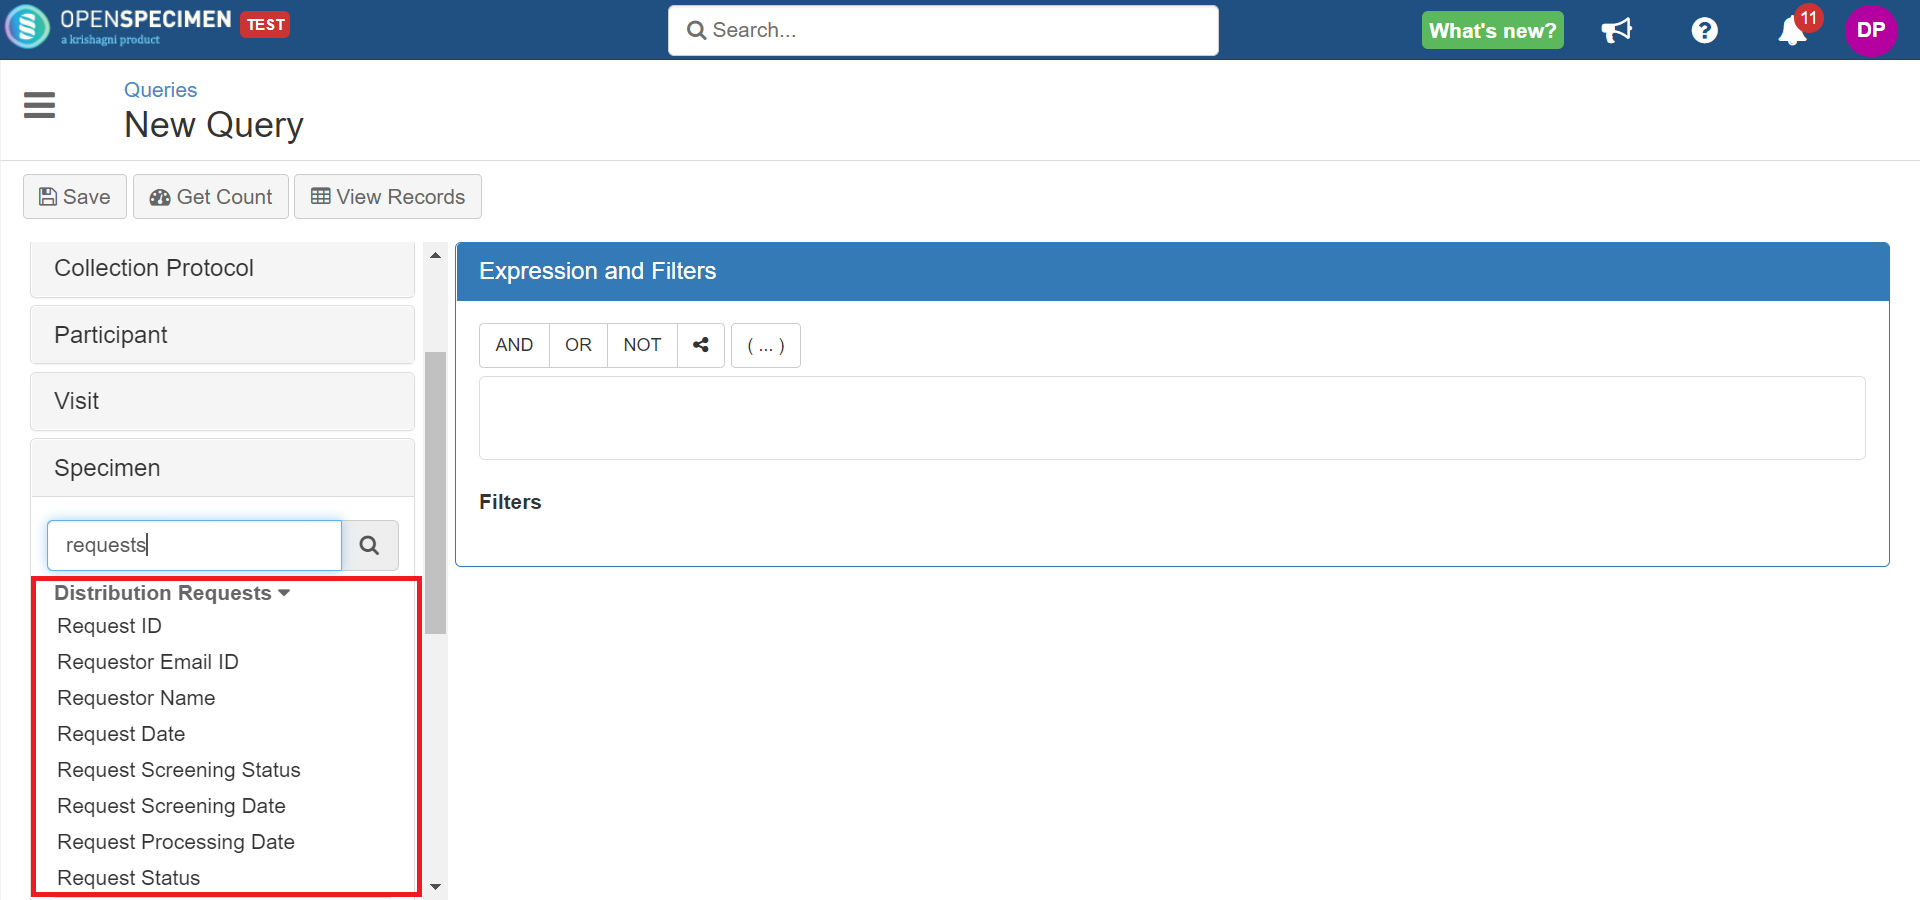
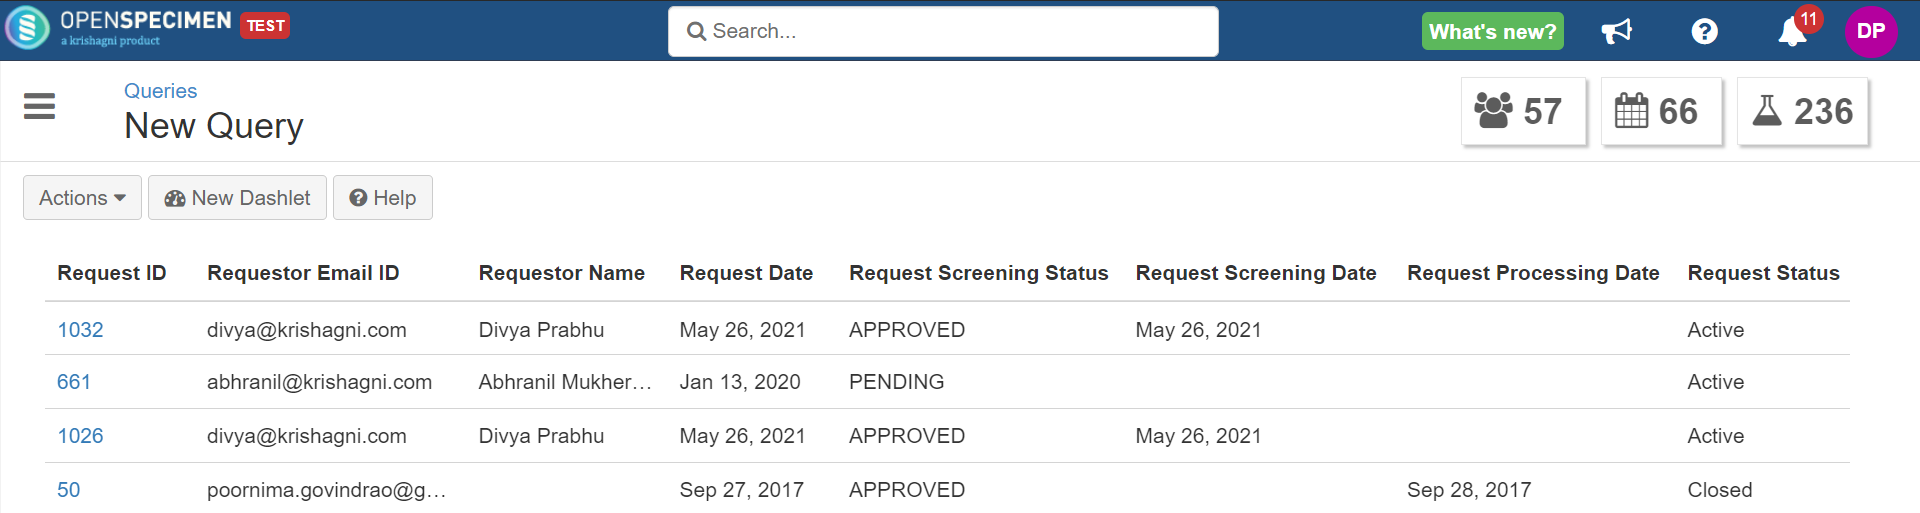
From Query Interface
You can create a query to get the specimen request details through the query interface.
The following request fields are available for each specimen under the specimen's query form:
- Request ID
- Request Date
- Requestor
- Requester Email ID
- Request Screening Status
- Request Screening Date
- Request Processing date
- Request Status.
Refer to the wiki page for more details on creating a query.
Specimens Query Form:
Request Query Results:
View Requested Specimens
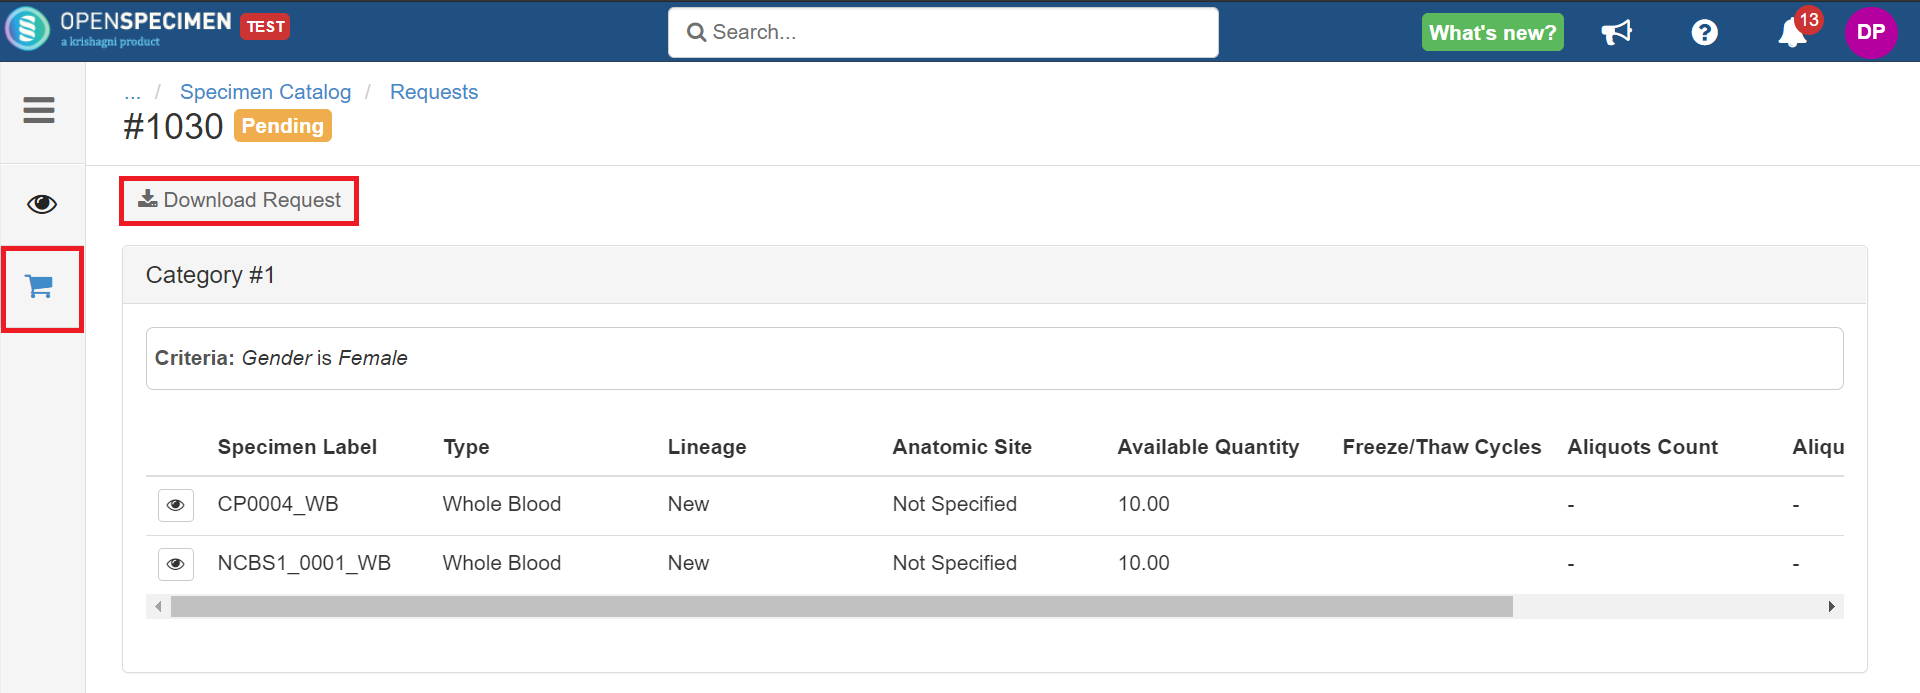
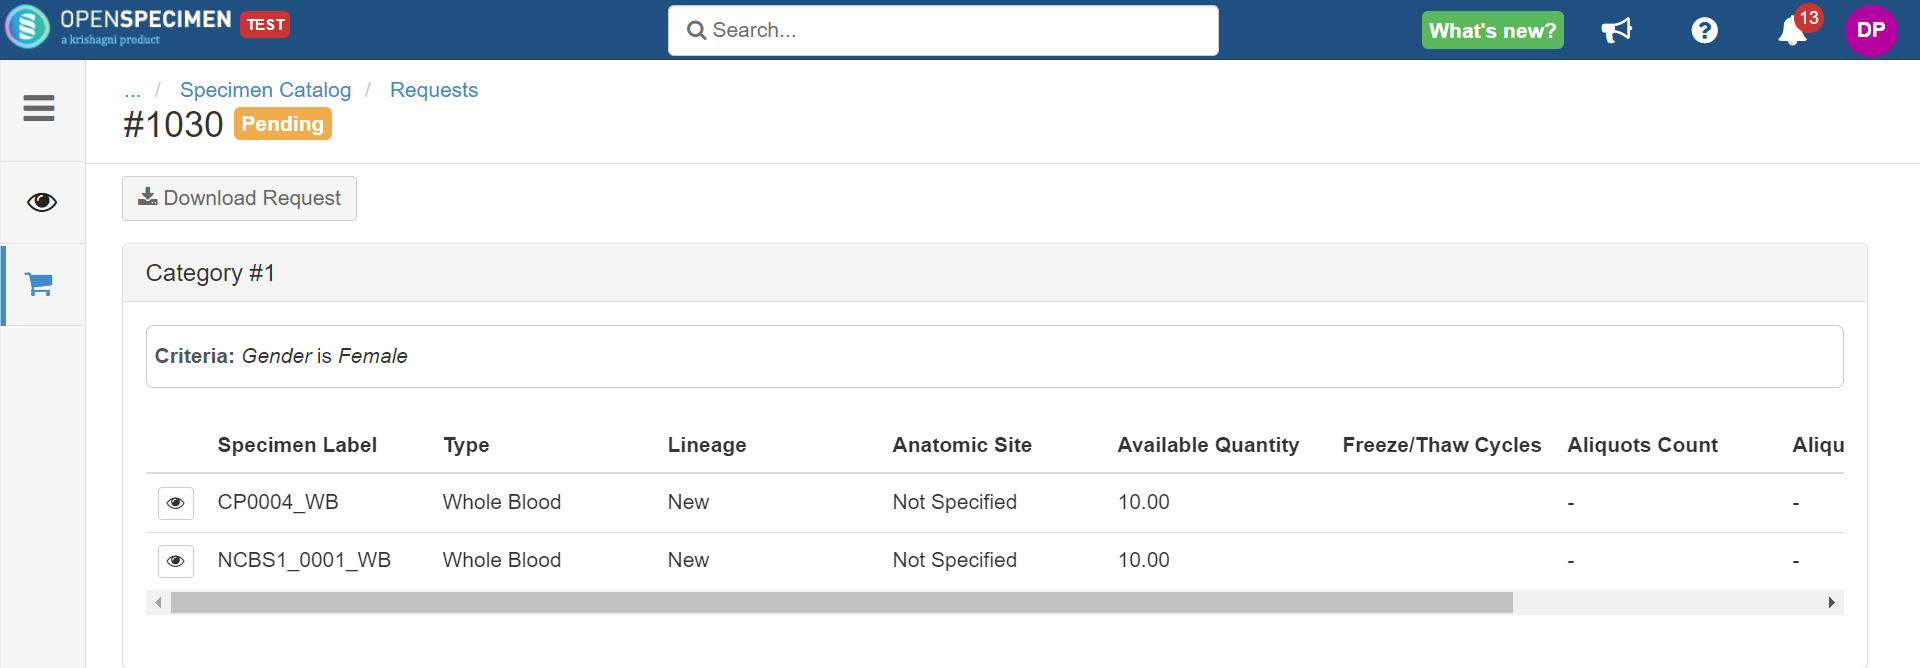
Click on the 'Cart/Specimens' icon from the left-side menu of the requests overview page to view the list of requested specimens.
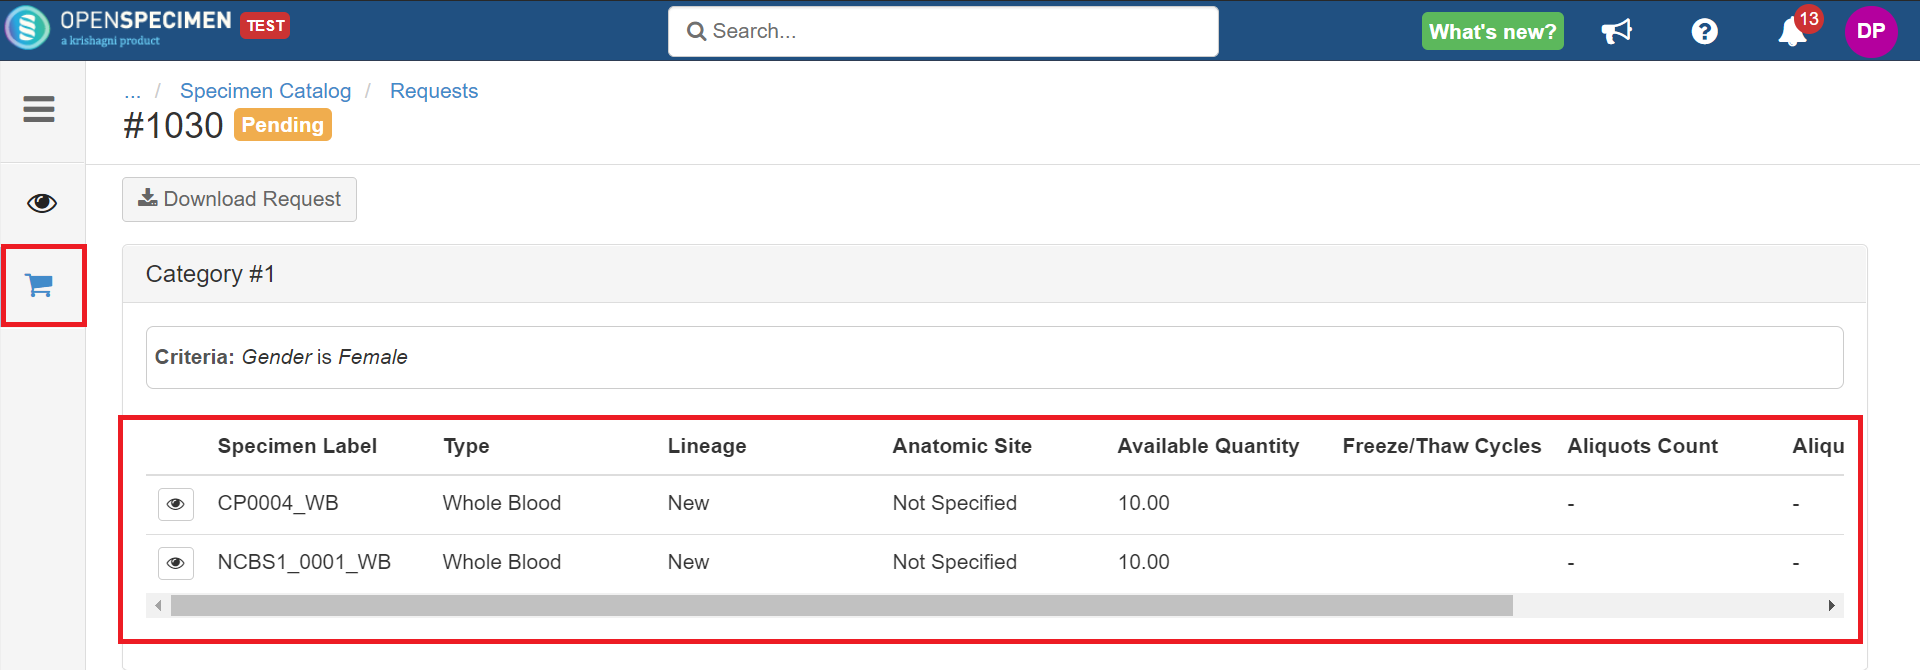
Note:
Request managers will be able to view the cart tab. Once they add and approve the specimens, tissue bankers can distribute them to researchers.
Download Requested Specimens Report
If there is a 'Cart' icon on the left-hand side of the request overview page, click on the icon → Download request.
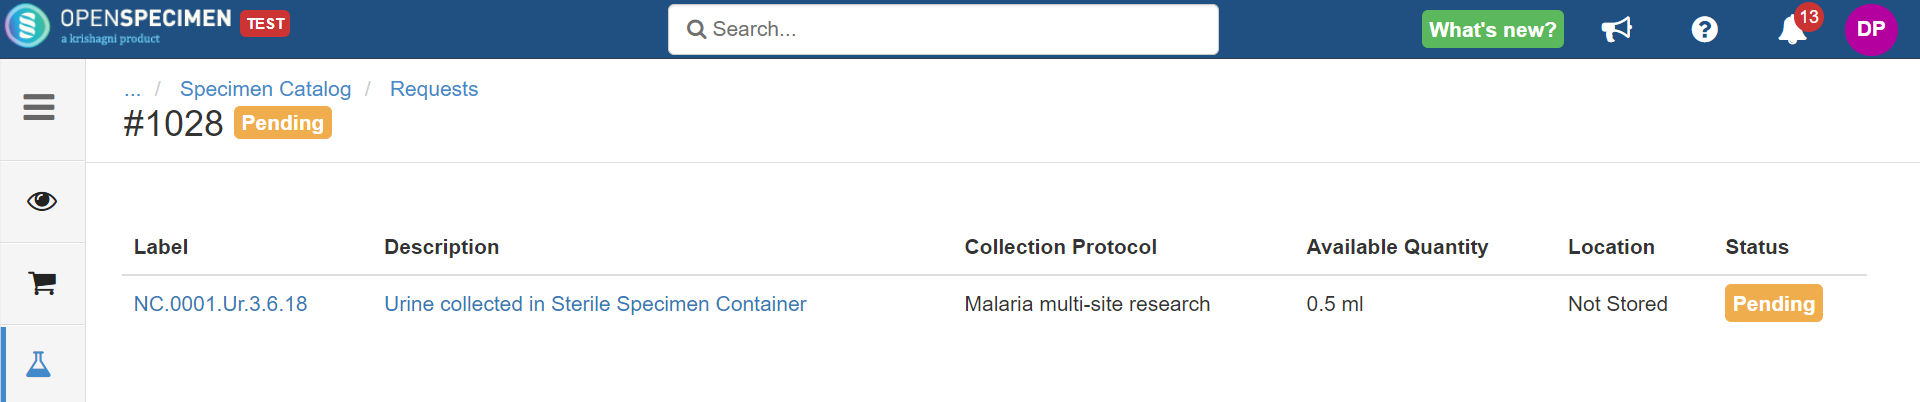
If there is a 'Specimens' icon on the left-hand side of the request overview page, click on 'Download Report'.

Adding Requested Specimens to the Cart
If there is a 'Cart' icon on the left-hand side of the request overview page, you must select specimens and add them to the cart to distribute them.
- Click on the 'Cart' tab that leads to the list of specimens that have been requested.
2. Select specimens by clicking on the row or the overview icon that leads to another screen with specimen details. Ensure the specimen 'identifier' is one column among all the other details.

3. An 'Add' button appears at the top after selecting the specimen by clicking on the row. Click on the 'Add'.
4. If there is no Distribution Protocol selected in the request, a popup appears, allowing you to choose a distribution protocol.

5. After deciding the DP and clicking 'Done', another tab, 'Specimens', appears on the left-hand side of the request overview page.
6. You can now approve the request and distribute the specimens. You can also download the report.
Error while Adding Specimens to Cart
While carrying out the steps above, you might receive this error at step 3 (clicking the 'Add' button).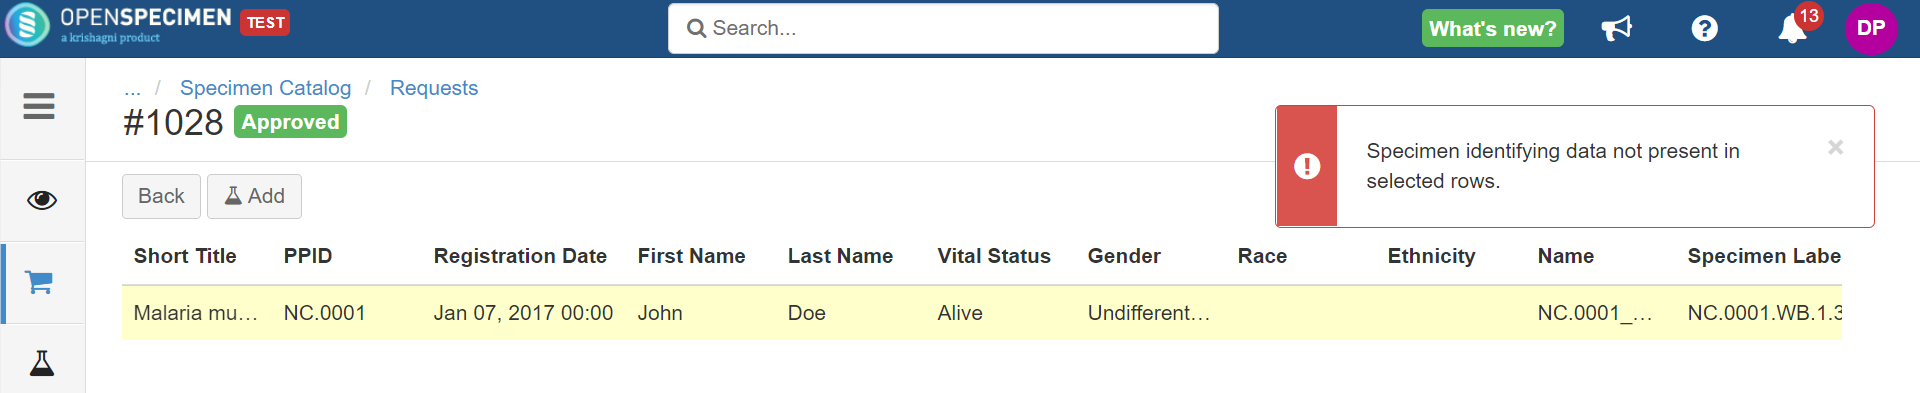
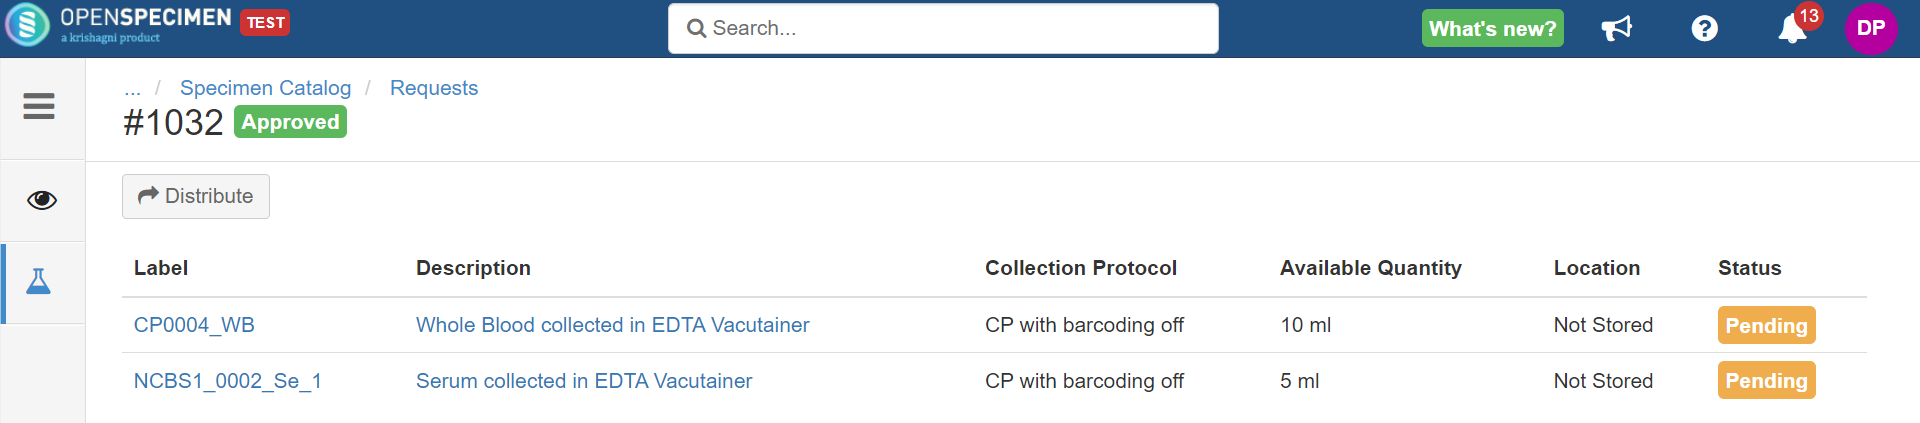
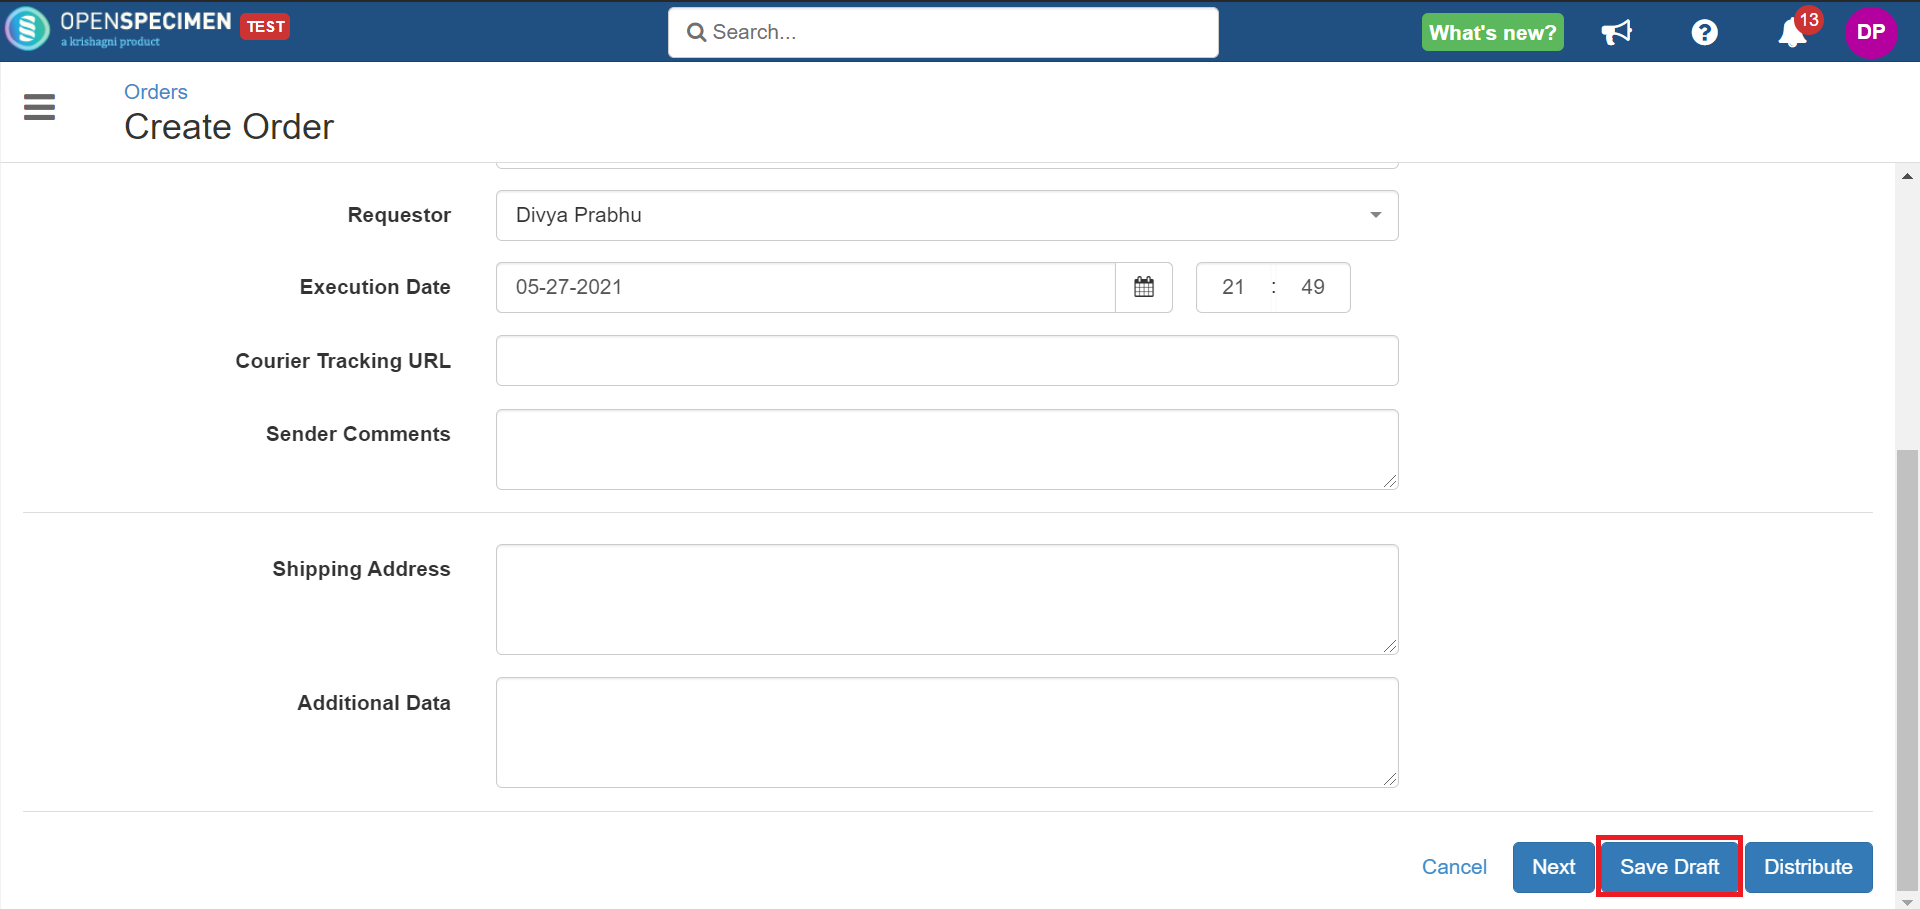
Distribute Requested Specimens
Once the request is 'Approved', the 'Distribute' option appears on the requested specimens list page.
- Click on the 'Distribute' button from the specimens list page of the approved request.
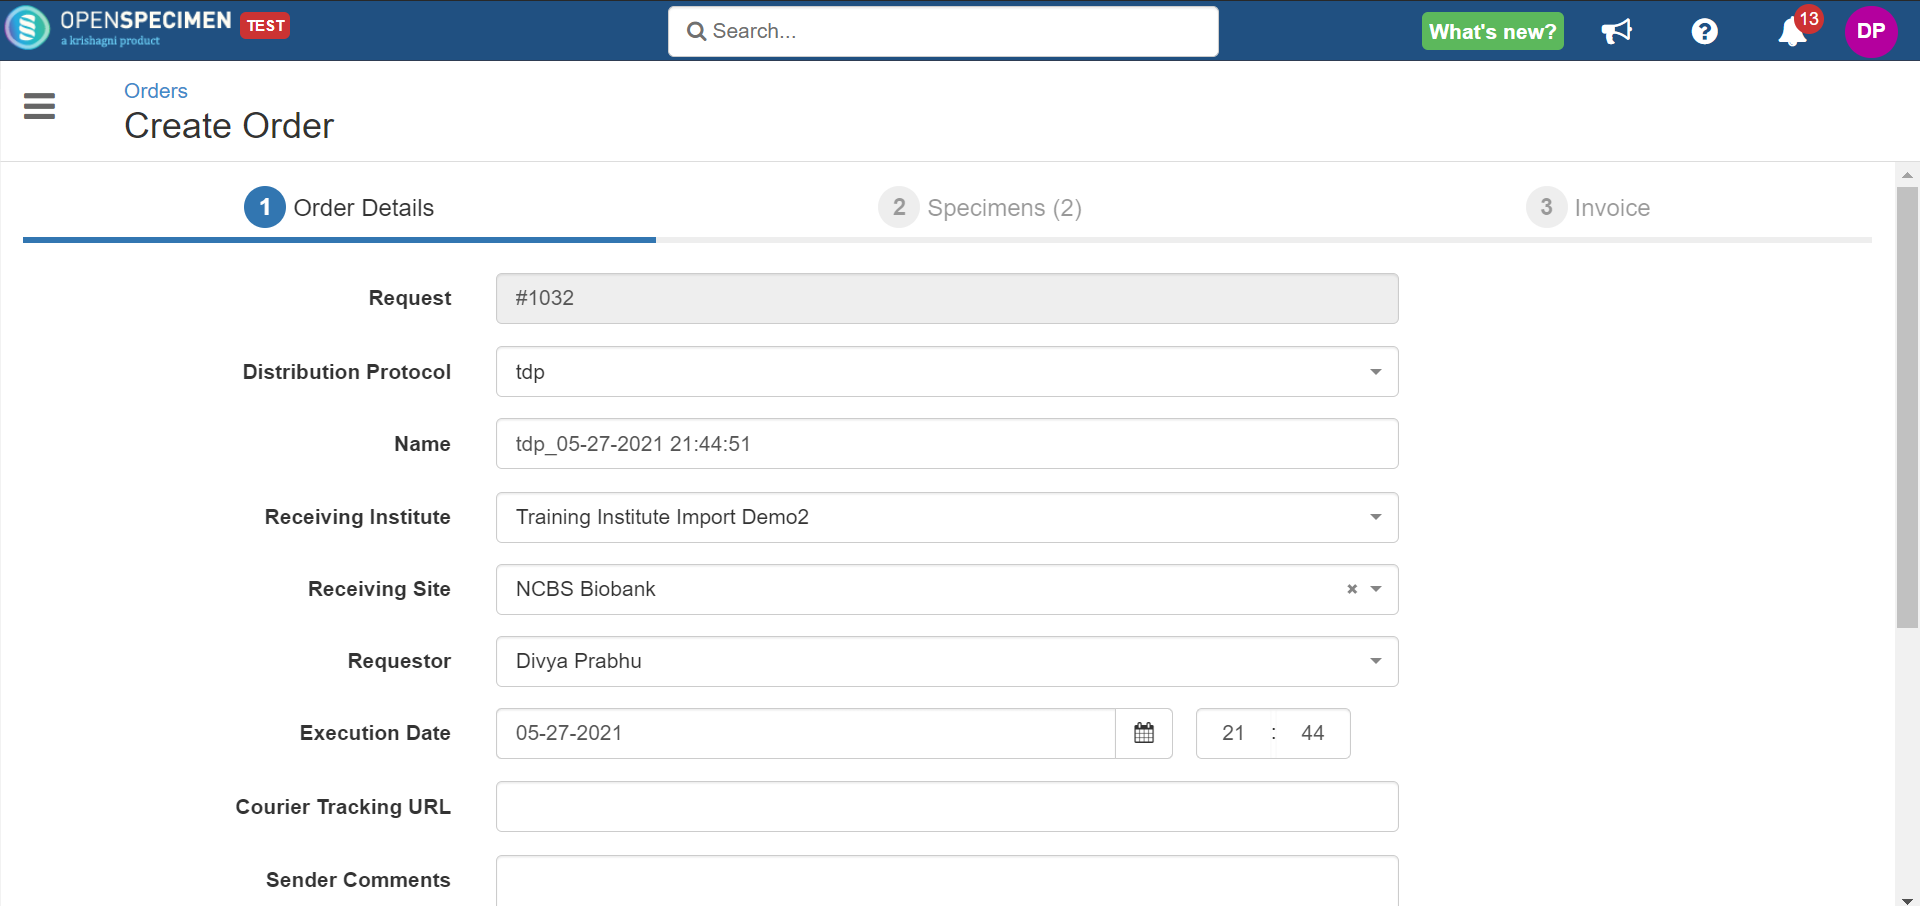
- Select any desired distribution protocol from the list, enter all details and click on the 'Next' button.
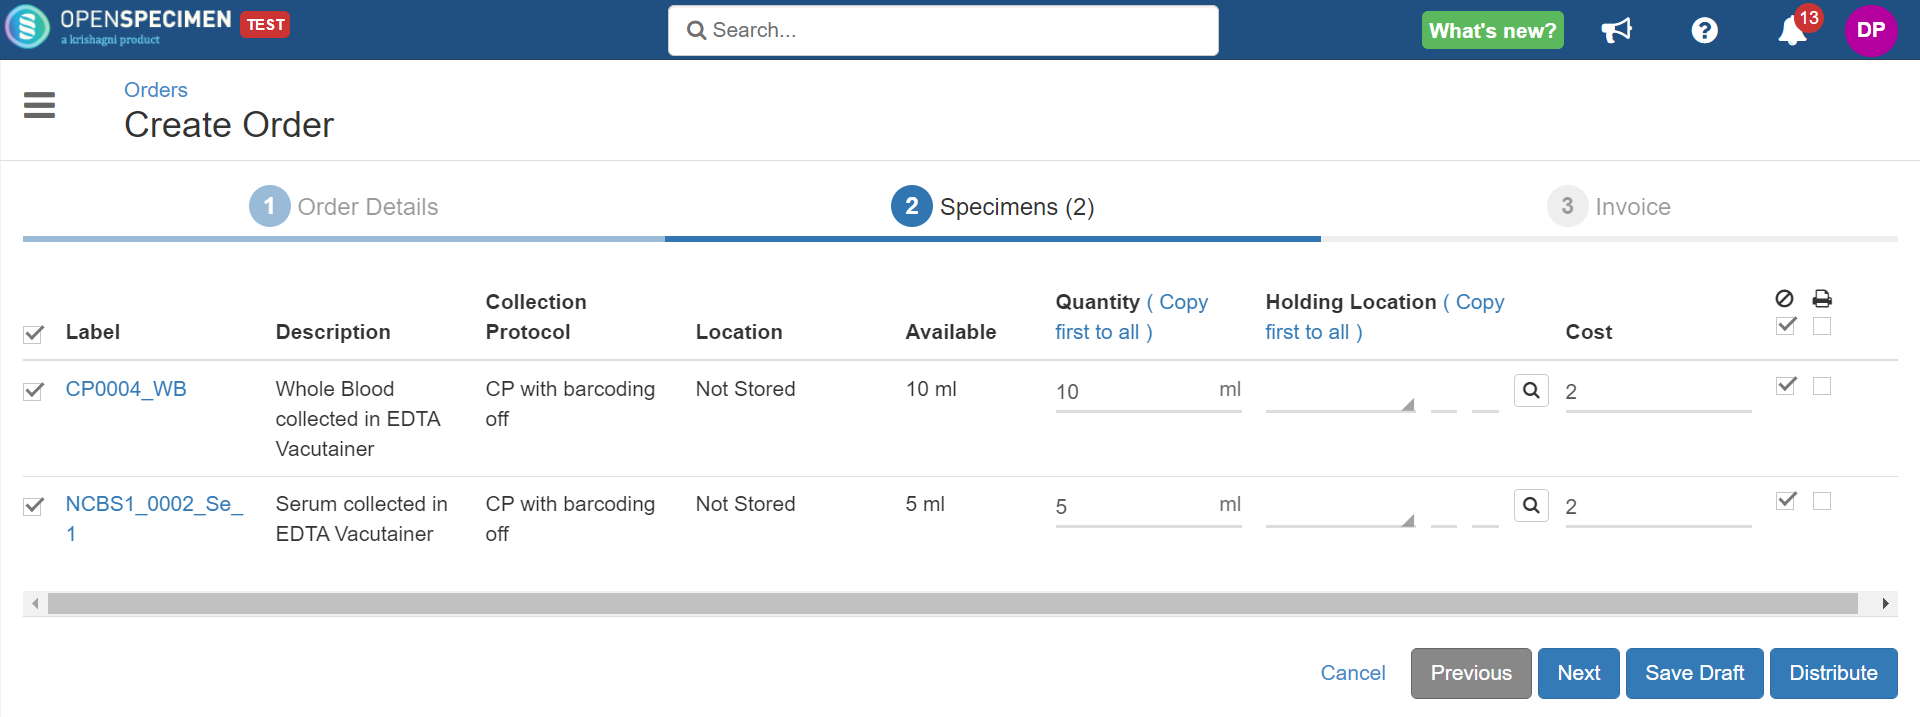
- Check the checkbox of specimens to be distributed, add the cost of the specimens and click on the 'Next' button.
- Enter invoice details, if any, and click the 'Distribute' button.
- You will be able to view the created order of requested specimens.

- You can save any order as a draft by clicking the 'Save Draft' option.
- If the IRB ID of any DP is added in the 'Confirm Request' form, the system defaults that DP to distribute the requested specimen.
Leave a comment at the end of this page or email contact@krishagni.com