Introduction

When new groups intend to use OpenSpecimen, it is recommended that their setup is first done on the test server for verification and training. This includes setting up their user accounts, sites, studies, forms, freezers, etc. Once the setup is ready to go live, OpenSpecimen allows admins to move the administrative setups from test to production easily.

This page will guide you in moving the setup from the test server to the production server step-wise.

1. Dropdowns

If there were any changes made in dropdown values like specimen types, collection containers, etc, make sure this is moved first.

note

Only Super Admins can modify values via the dropdown manager.

Only Super Admins can modify values via the dropdown manager.

Refer to https://openspecimen.atlassian.net/wiki/x/bYDEAw for more details on how to modify dropdown values.

2. Institutes

Navigate to 'Institutes'.

If there is only one institute, you can create it manually.

For two or more institutes, you can use bulk import. Follow the steps:

  • Select all the institutes you want to move from the test server, and click on the 'Export' button.

  • Import this file back on the production server. Refer to the wiki page for details.

note
  • Please make sure to remove the 'Identifier' column from your CSV file before importing it to the production server.

  • The 'Identifier' column is only used to update.

  • Please make sure to remove the 'Identifier' column from your CSV file before importing it to the production server.

  • The 'Identifier' column is only used to update.

3. Sites

Navigate to 'Sites'.

If there is only one site, you can create it manually.

For two or more sites, you can use bulk import. Follow the steps:

  • Select all the sites you want to move from the test server, and click on the 'Export' button.

  • Import this file back on the production server. Refer to the wiki page for details.

note
  • Please make sure to remove the 'Identifier' column from your CSV file before importing it to the production server.

  • The 'Identifier' column is only used to update.

  • If the site has any site coordinator(s), remove the column before importing your file. You can make those changes once you import the user roles in the 6th step.

4. Users

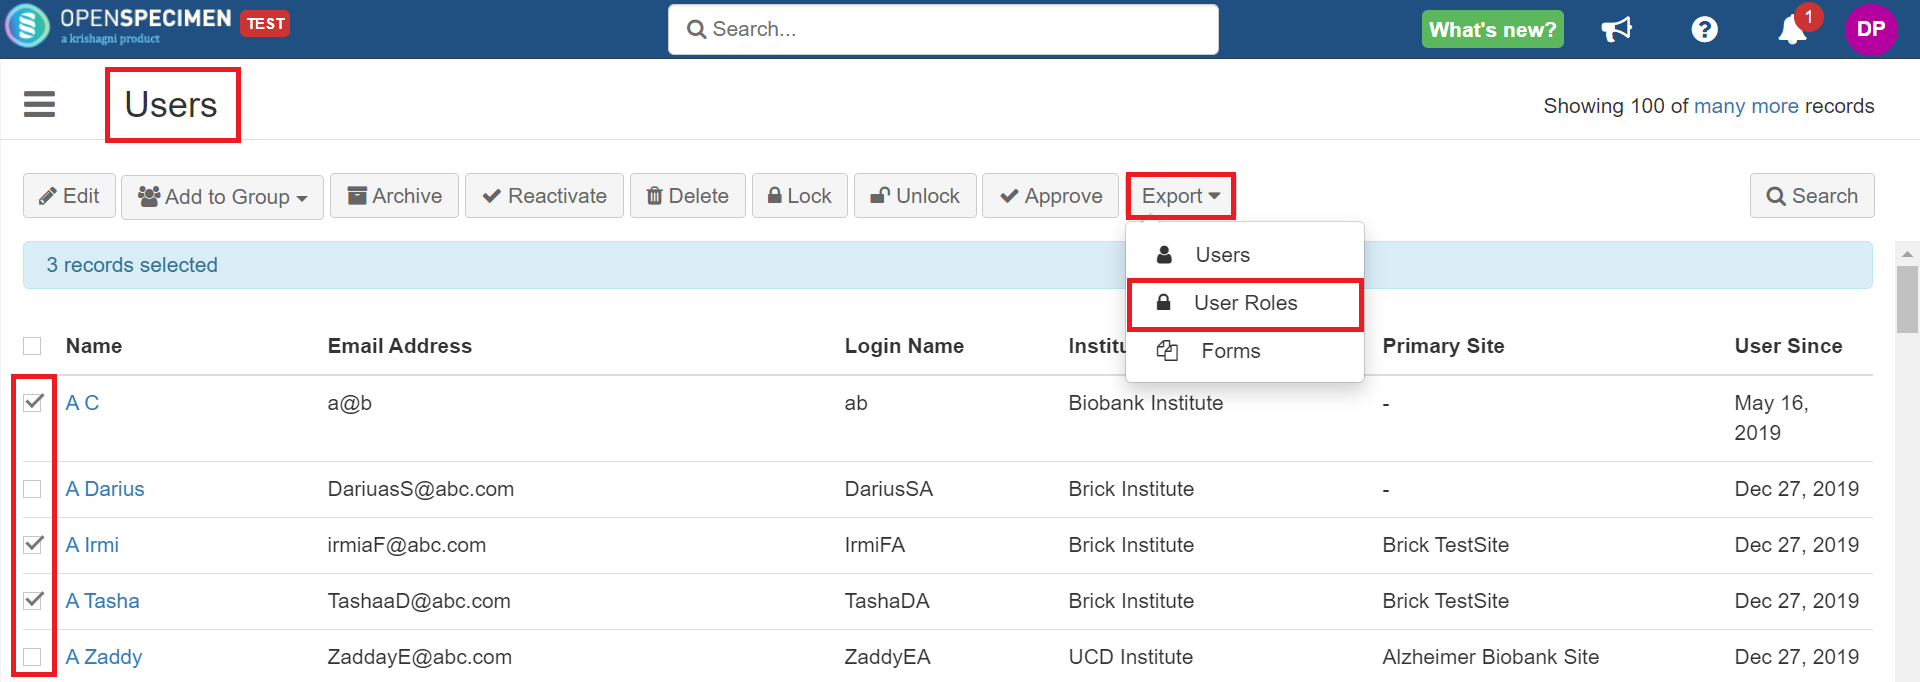
  • Navigate to 'Users'.

  • Select all the users you want to move from the test server, and click on 'Export' → Users

  • Import this file back on the production server. Refer to the wiki page for details.

note
  • Please make sure to remove the 'Identifier' column from your CSV file before importing it to the production server.

  • The 'Identifier' column is only used to update.

  • Please make sure to remove the 'Identifier' column from your CSV file before importing it to the production server.

  • The 'Identifier' column is only used to update.

5. Consents

Make sure you have added all the consent statements required for the CP. Refer to the wiki page for more details.

6. Collection Protocol
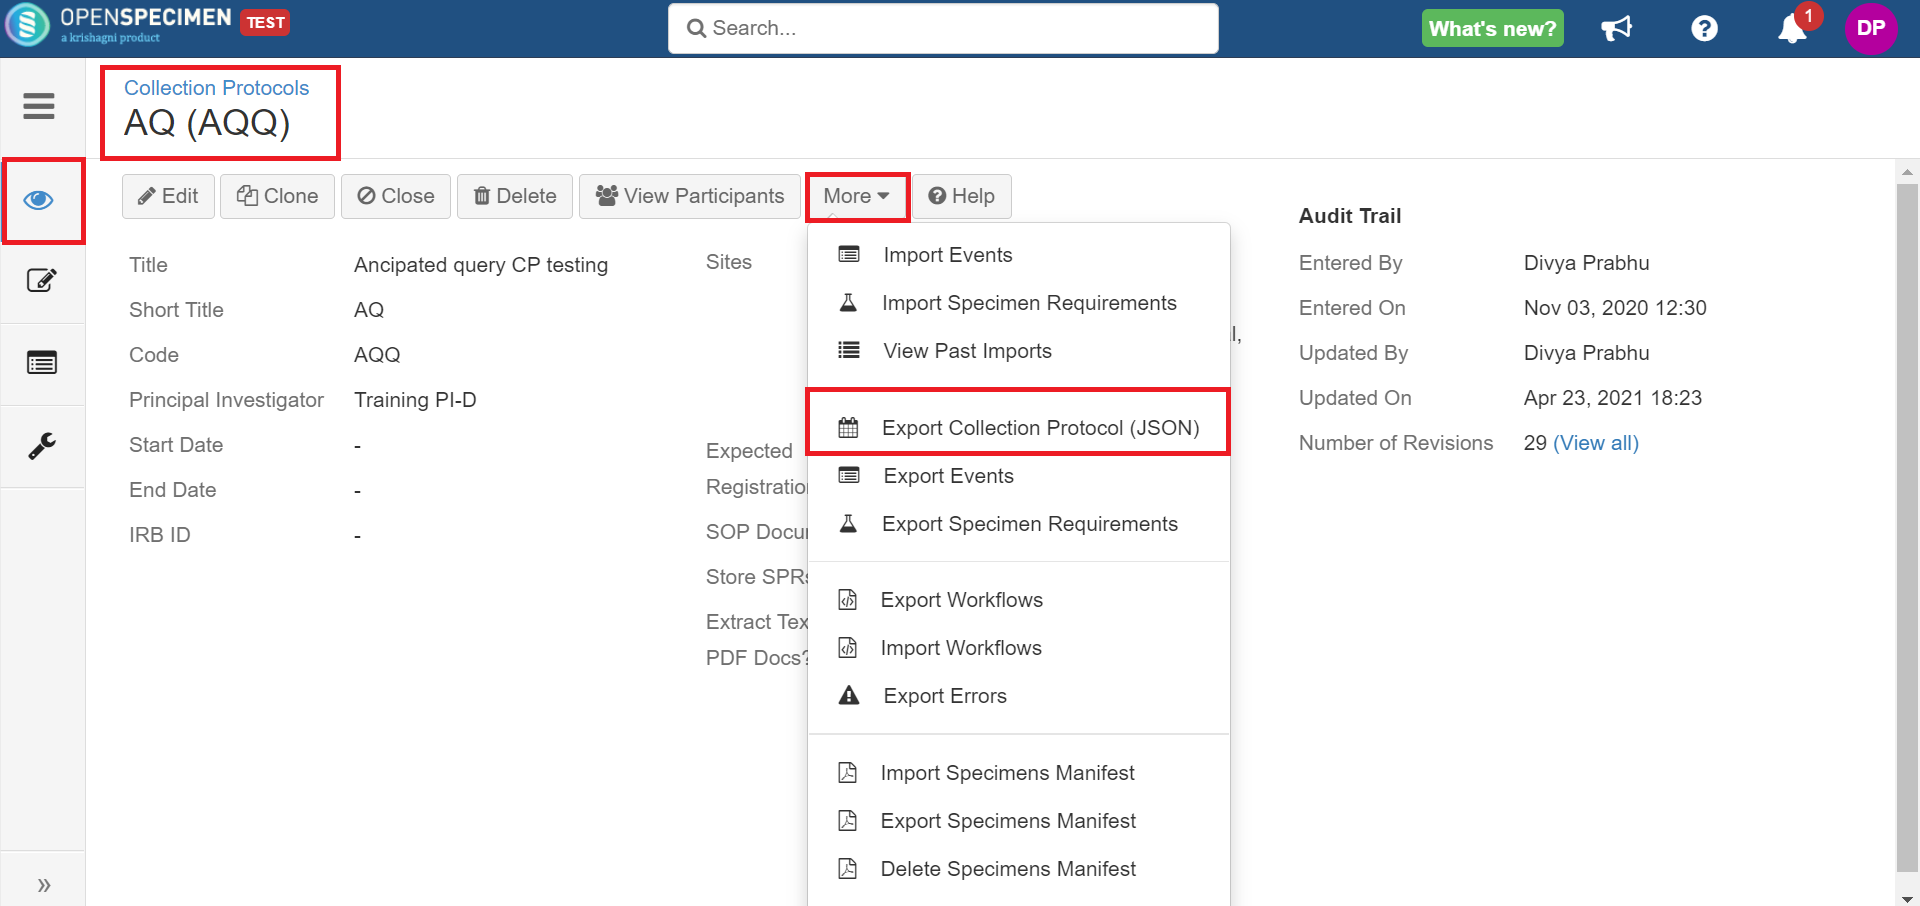
  • Navigate to ‘Collection Protocols'.

  • Go to the CP overview page → More → Export Collection Protocol (JSON).

  • Import this file back on the production server. Refer to the wiki page for details.

note

Importing CP definition to the production server will also import CP events, label formats, and CP workflow (if any).

Importing CP definition to the production server will also import CP events, label formats, and CP workflow (if any).

7. User Roles

  • Navigate to 'Users'.

  • Select all the user roles you want to move from the test server, and click on 'Export' → User Roles

  • Import this file back on the production server. Refer to the wiki page for details.

note
  • Please make sure to remove the 'Identifier' column from your CSV file before importing it to the production server.

  • The 'Identifier' column is only used to update.

  • Please make sure to remove the 'Identifier' column from your CSV file before importing it to the production server.

  • The 'Identifier' column is only used to update.

8. Container Types

  • Navigate to ‘Containers' → Click on 'Types’.

  • Select all the newly created types (if any), and click on 'Export.'

  • Import this file back on the production server. Refer to the wiki page for details.

note
  • Please make sure to remove the 'Identifier' column from your CSV file before importing it to the production server.

  • The 'Identifier' column is only used to update.

  • Please make sure to remove the 'Identifier' column from your CSV file before importing it to the production server.

  • The 'Identifier' column is only used to update.

9. Containers

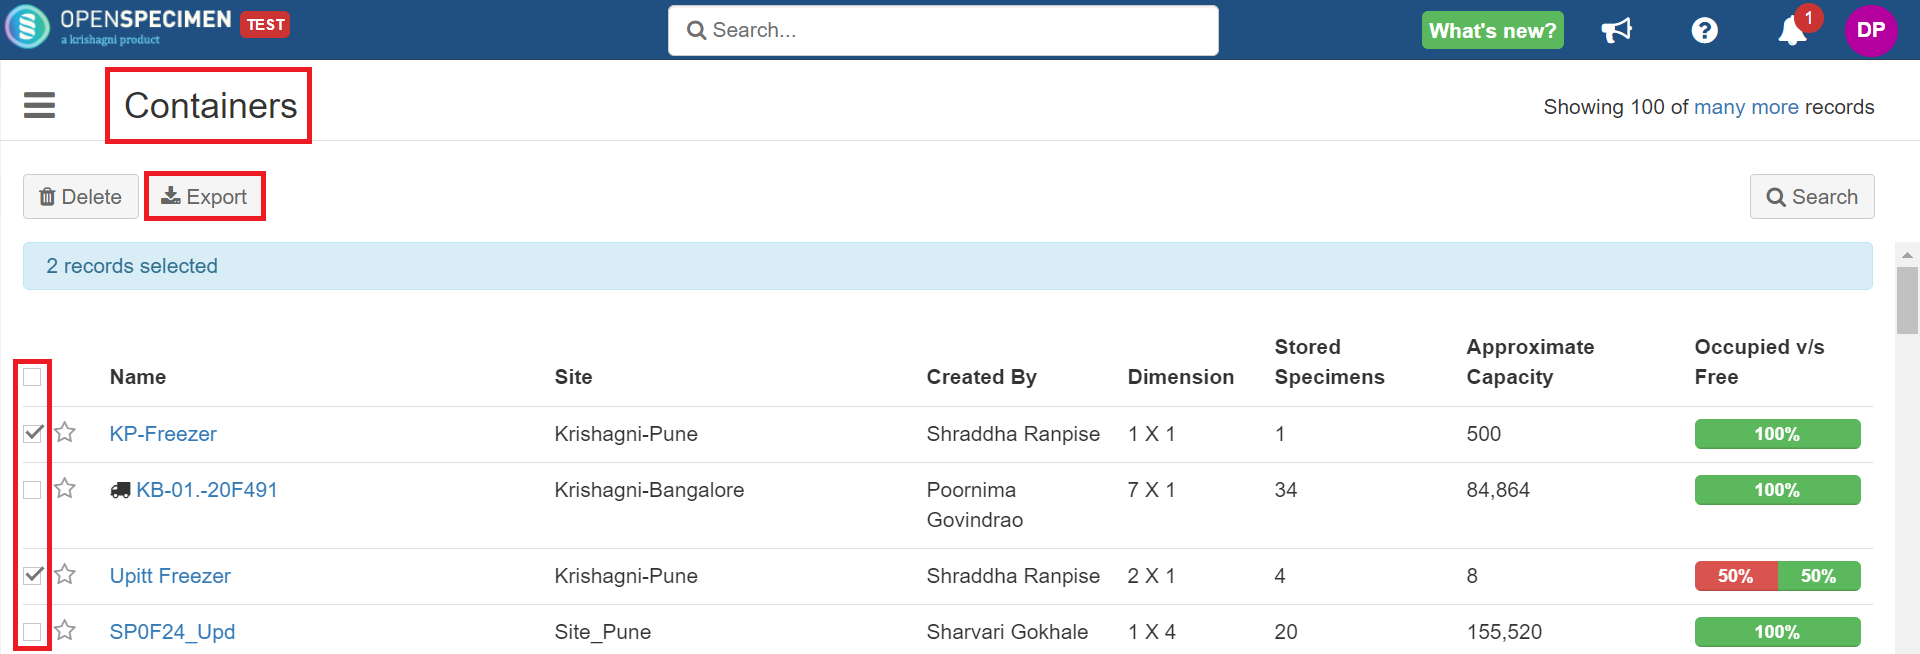
  • Navigate to ‘Containers'.

  • Select all the containers you want to move from the test server, and click on 'Export'.
  • Import this file back on the production server. Refer to the wiki page for details.

note
  • Please make sure to remove the 'Identifier' column from your CSV file before importing it to the production server.

  • The 'Identifier' column is only used to update.

  • Please make sure to remove the 'Identifier' column from your CSV file before importing it to the production server.

  • The 'Identifier' column is only used to update.

10. Forms

  • Navigate to ‘Forms'.

  • Export the forms you want from the test server. Refer to the 'Export' section on the wiki page.

  • Import the forms back one by one on the production server. Refer to the 'Import' section on the wiki page.

  • Once done, you can attach the forms at respective levels. Refer to the wiki page.