Introduction
A site may ship whole boxes of specimens to another site. When receiving site receives these boxes, they store them as is in their freezers. OpenSpecimen allows you to track this workflow of shipment of containers from one site to another.
Below are prerequisites to ship/receive containers using OpenSpecimen:
- Both shipping site and receiving site should use the same instance of OpenSpecimen.
- To ship containers, you need to have access to the site where containers are stored.
- You cannot ship containers from multiple sites within one shipment.
- When receiving a shipment, you can store the received containers in the parent containers of the receiving site only.
Create
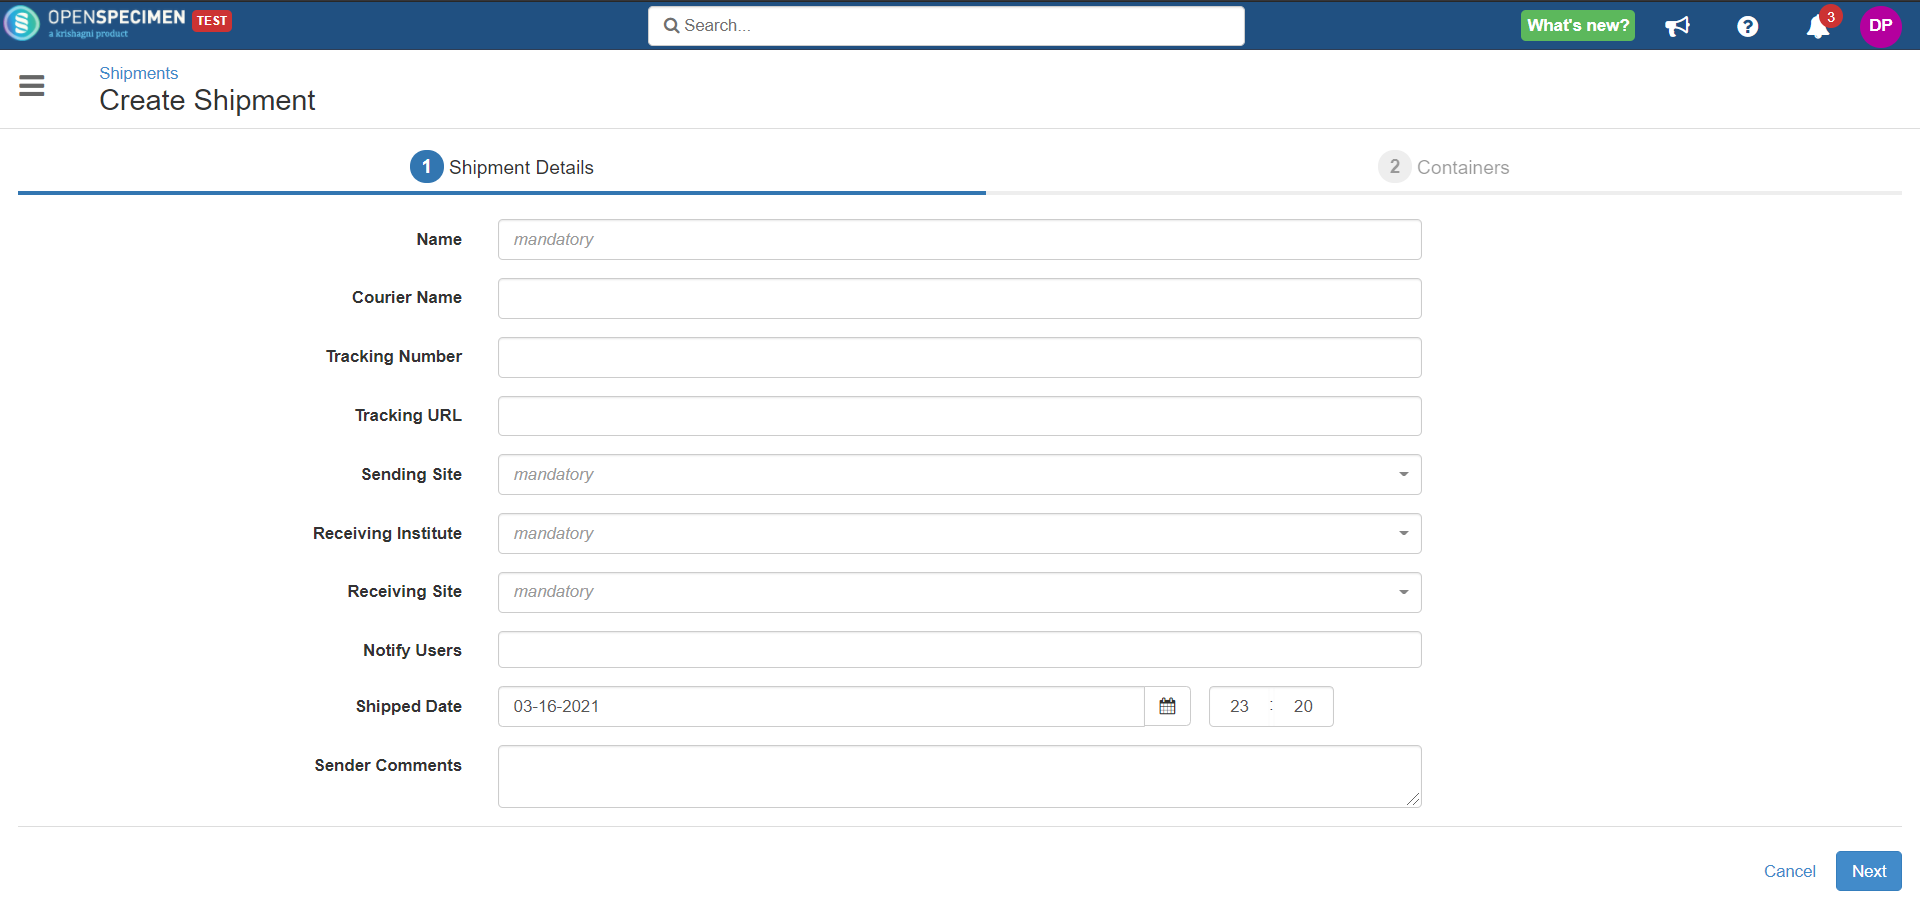
- From the ‘Shipments’ list page, click on the ‘+ Create’ button and select the option ‘Containers’
- Enter all valid details, select sending site and receiving site, and click on the ‘Next’ button.
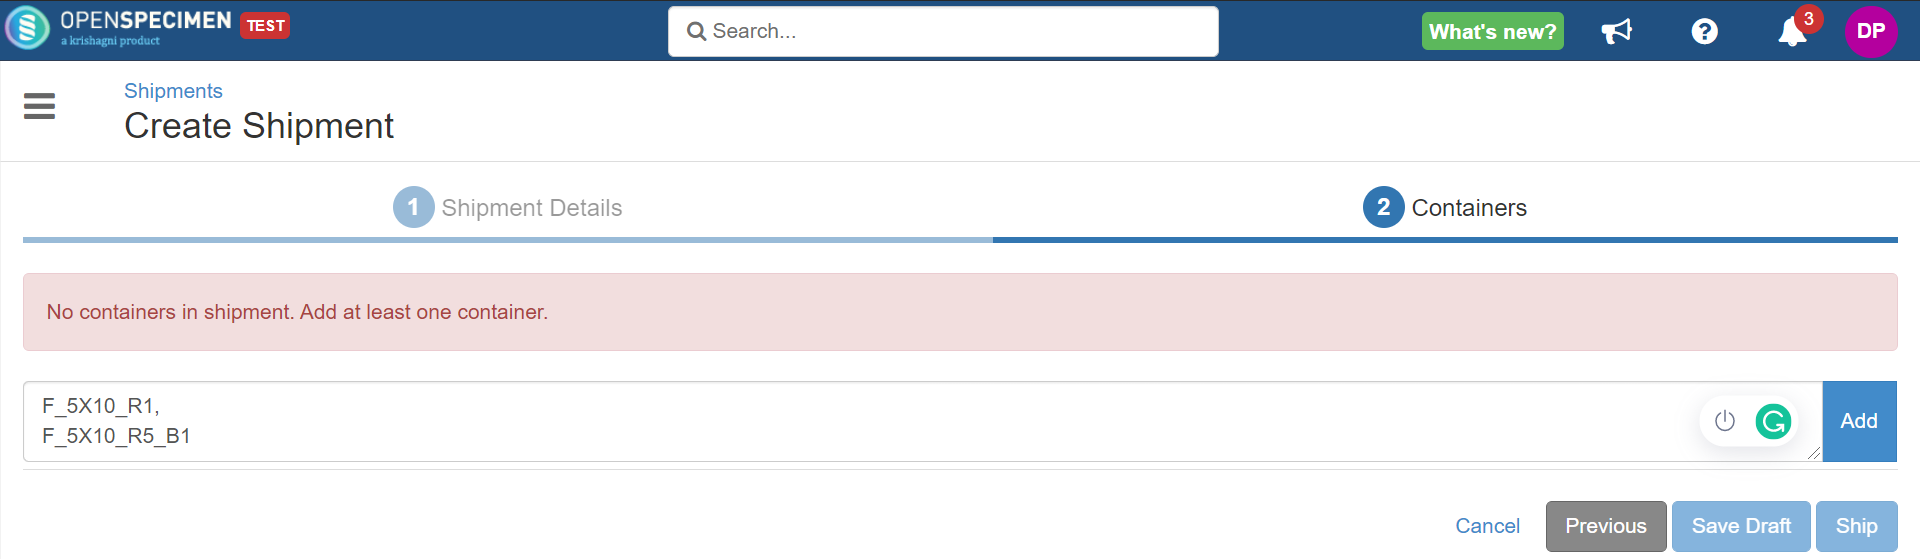
- In the next screen, enter the container names separated by a comma, tab, or new line and click on the ‘Add’ button.
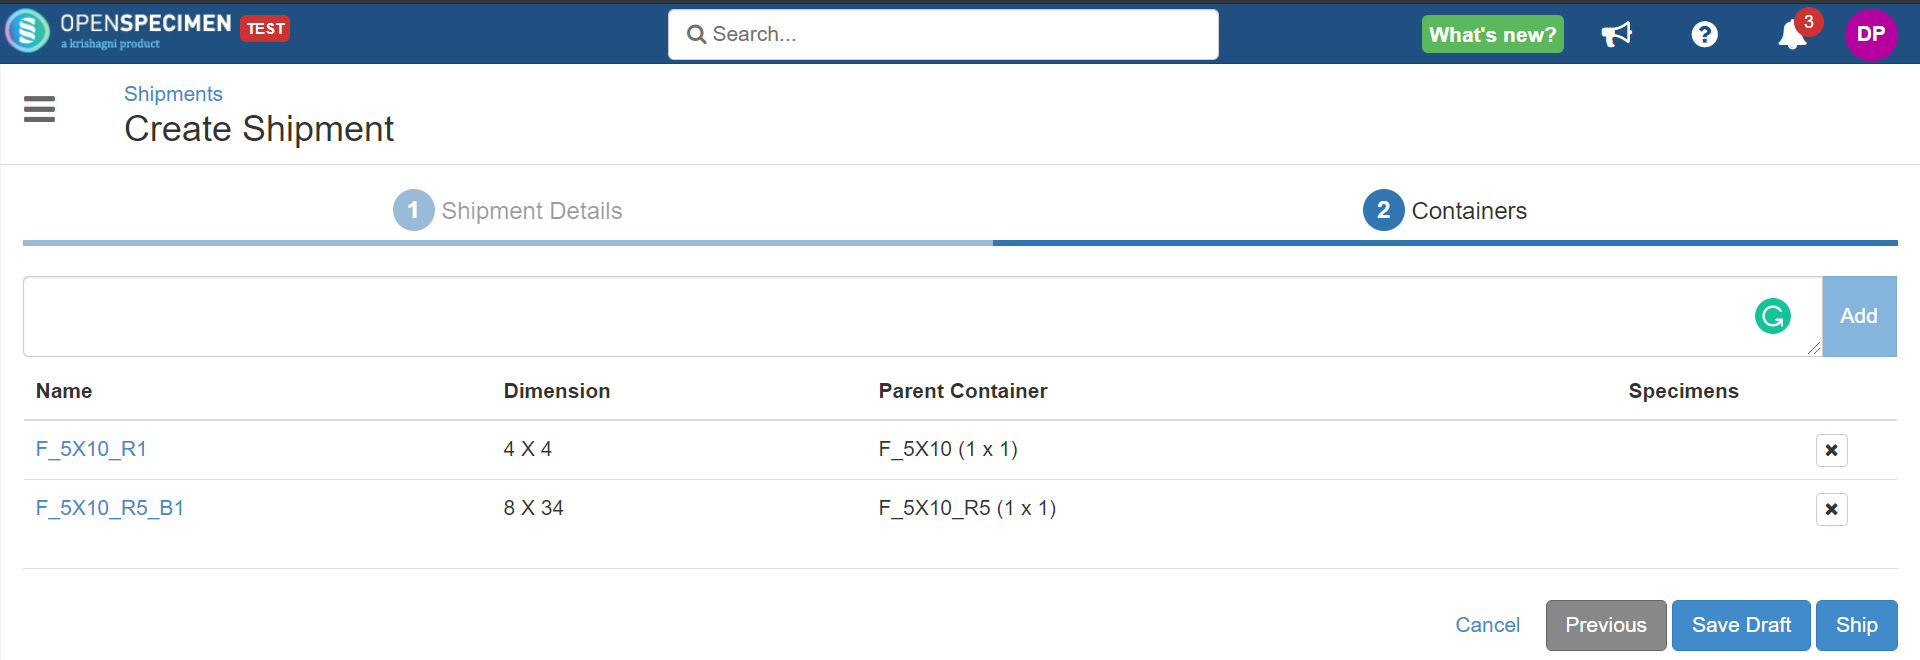
Check the list of containers to be shipped, make changes, if any, and click on the ‘Ship’ button.
- The users selected under the field ‘Notify Users’ while creating a shipment will be notified when the container is shipped.
- You save the shipment as a draft by clicking the ‘Save Draft’ button.
Once the shipment is “Shipped“, you cannot edit the “Notify Users“ field.
You can see the “Notify Users“ field on the overview page for the Shipped shipments but cannot see it on the edit screen.
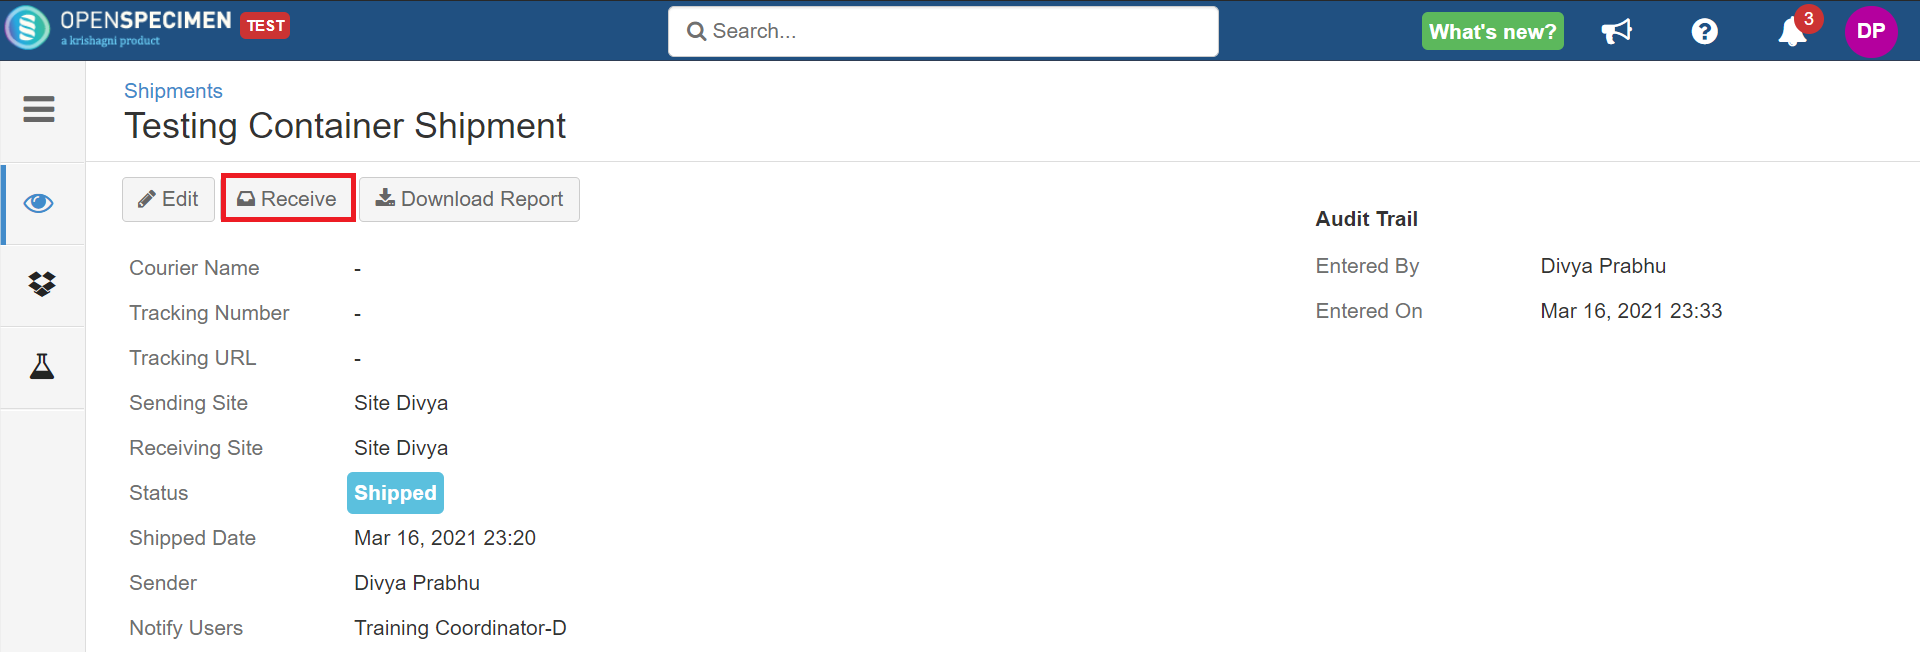
Receive
- To receive the container shipment, log in as a user from the receiving site and select the ‘Shipments’ card from the home page.
- Select the newly created container shipments from the list.
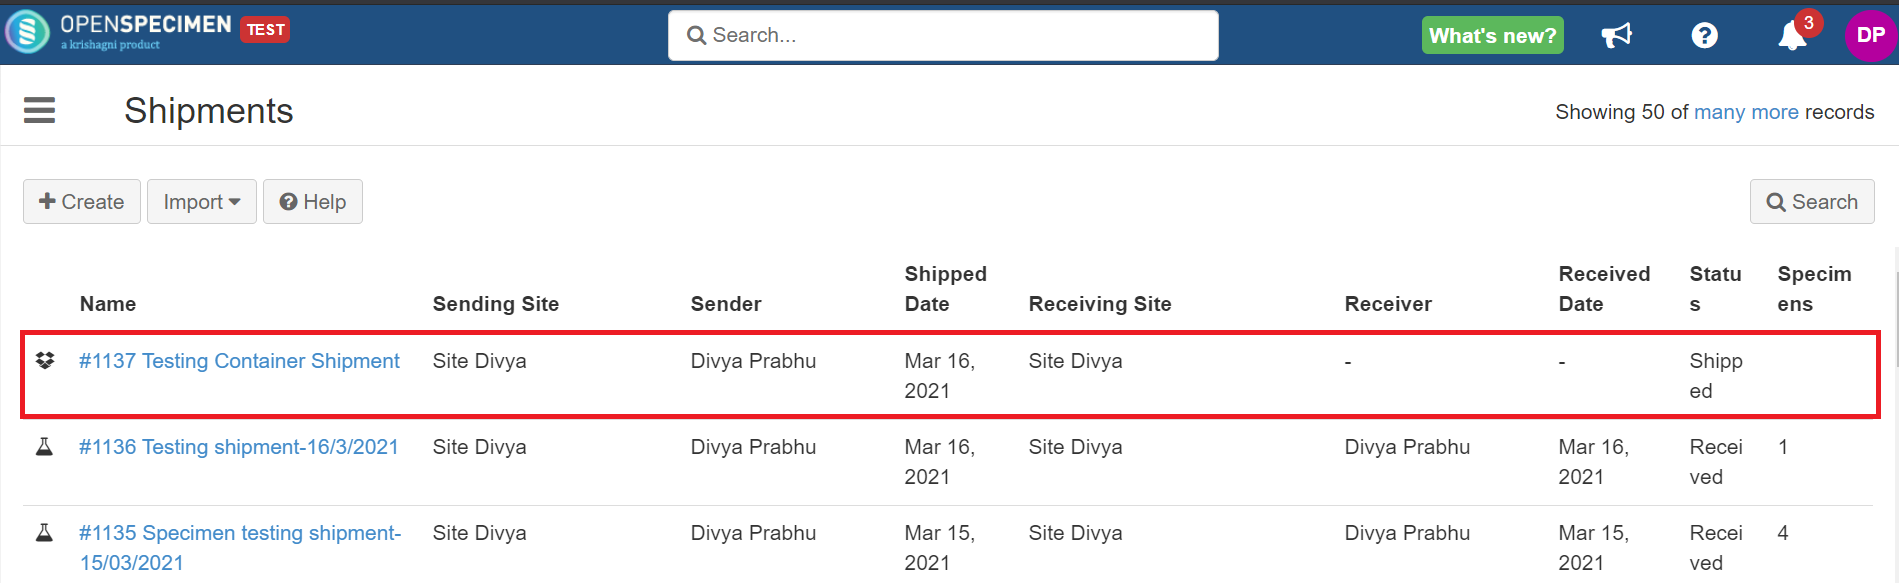
- Click on the ‘Receive’ button from the shipments overview page.
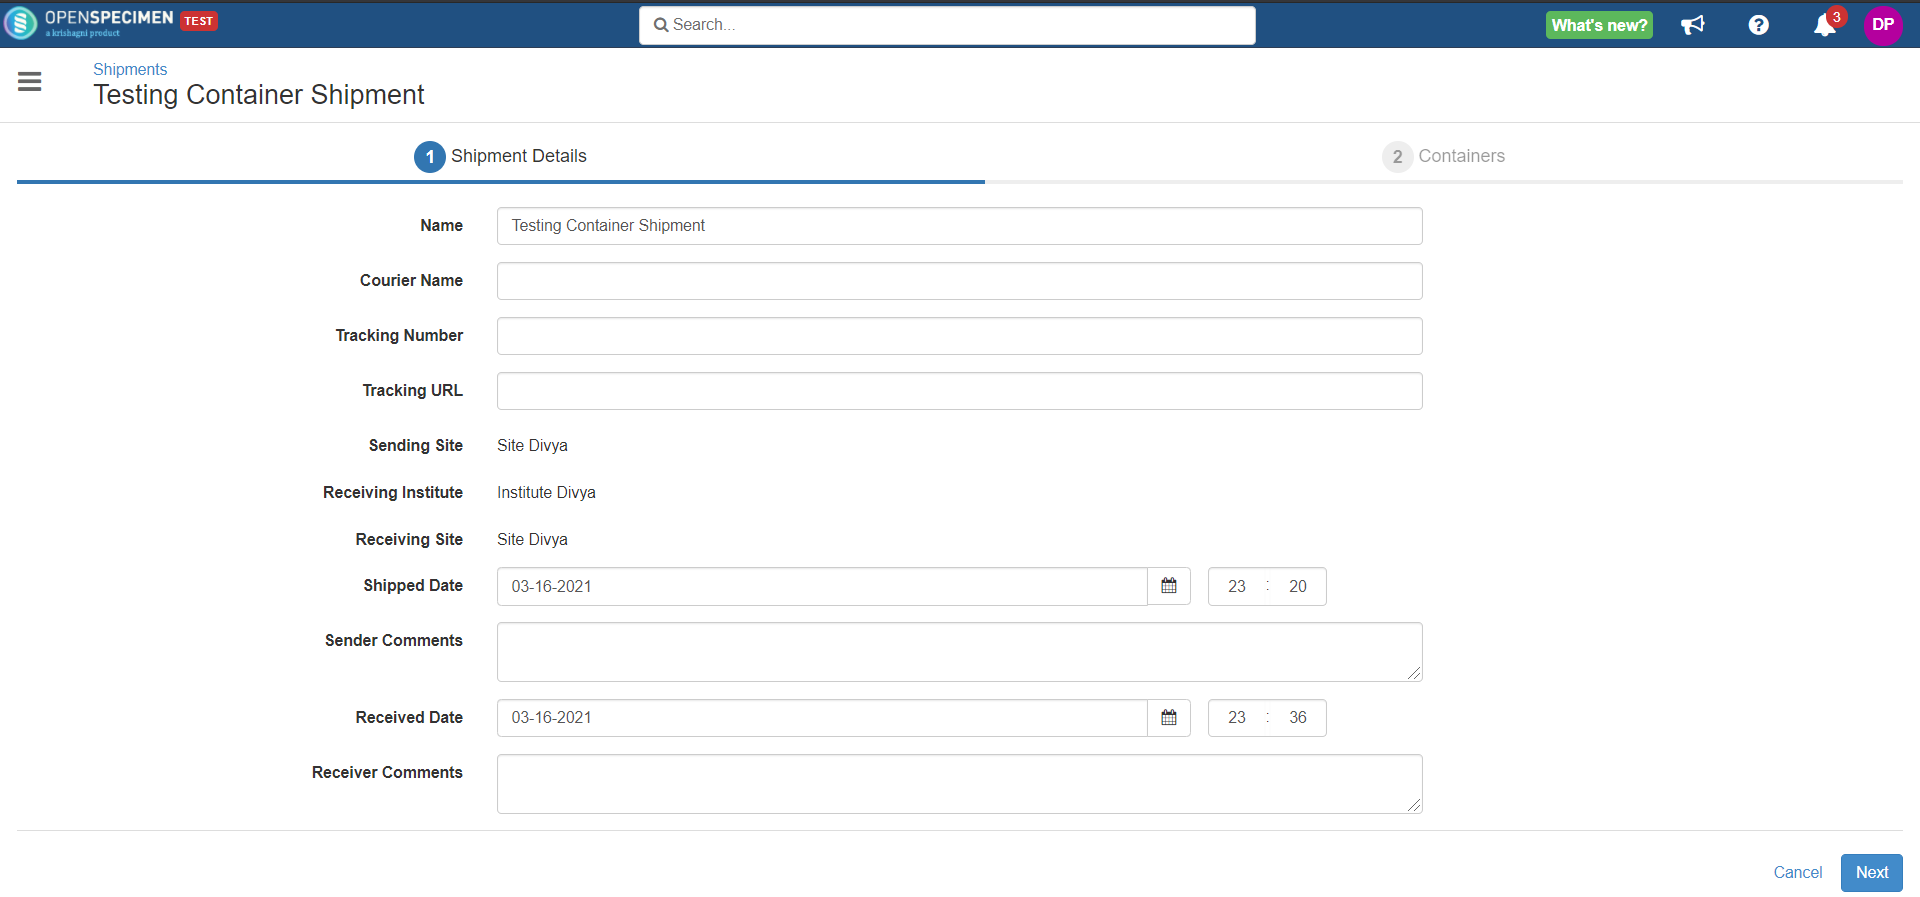
- Review the shipment details and click on the ‘Next’ button.
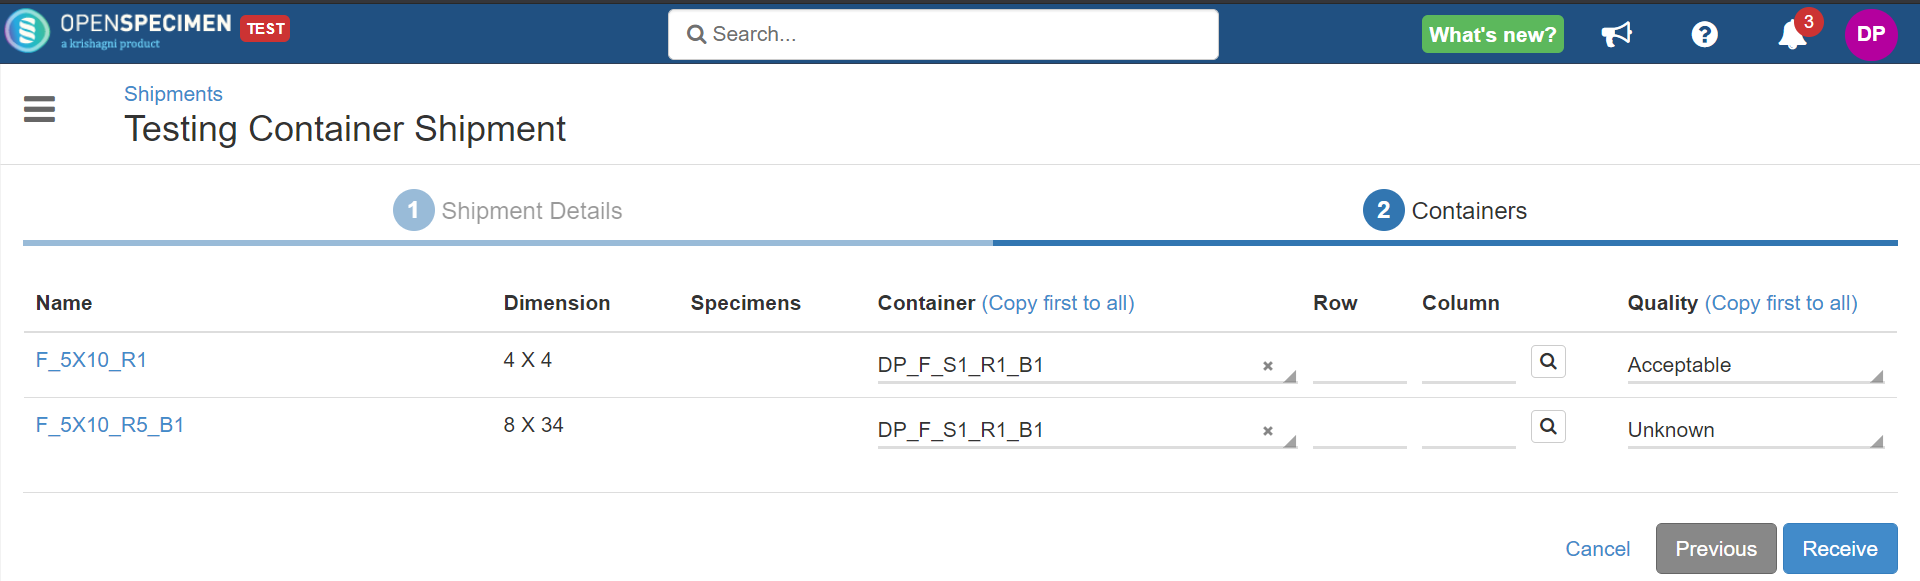
- Select parent containers from the receiving site to store the shipped containers and click on the ‘Receive’ button.
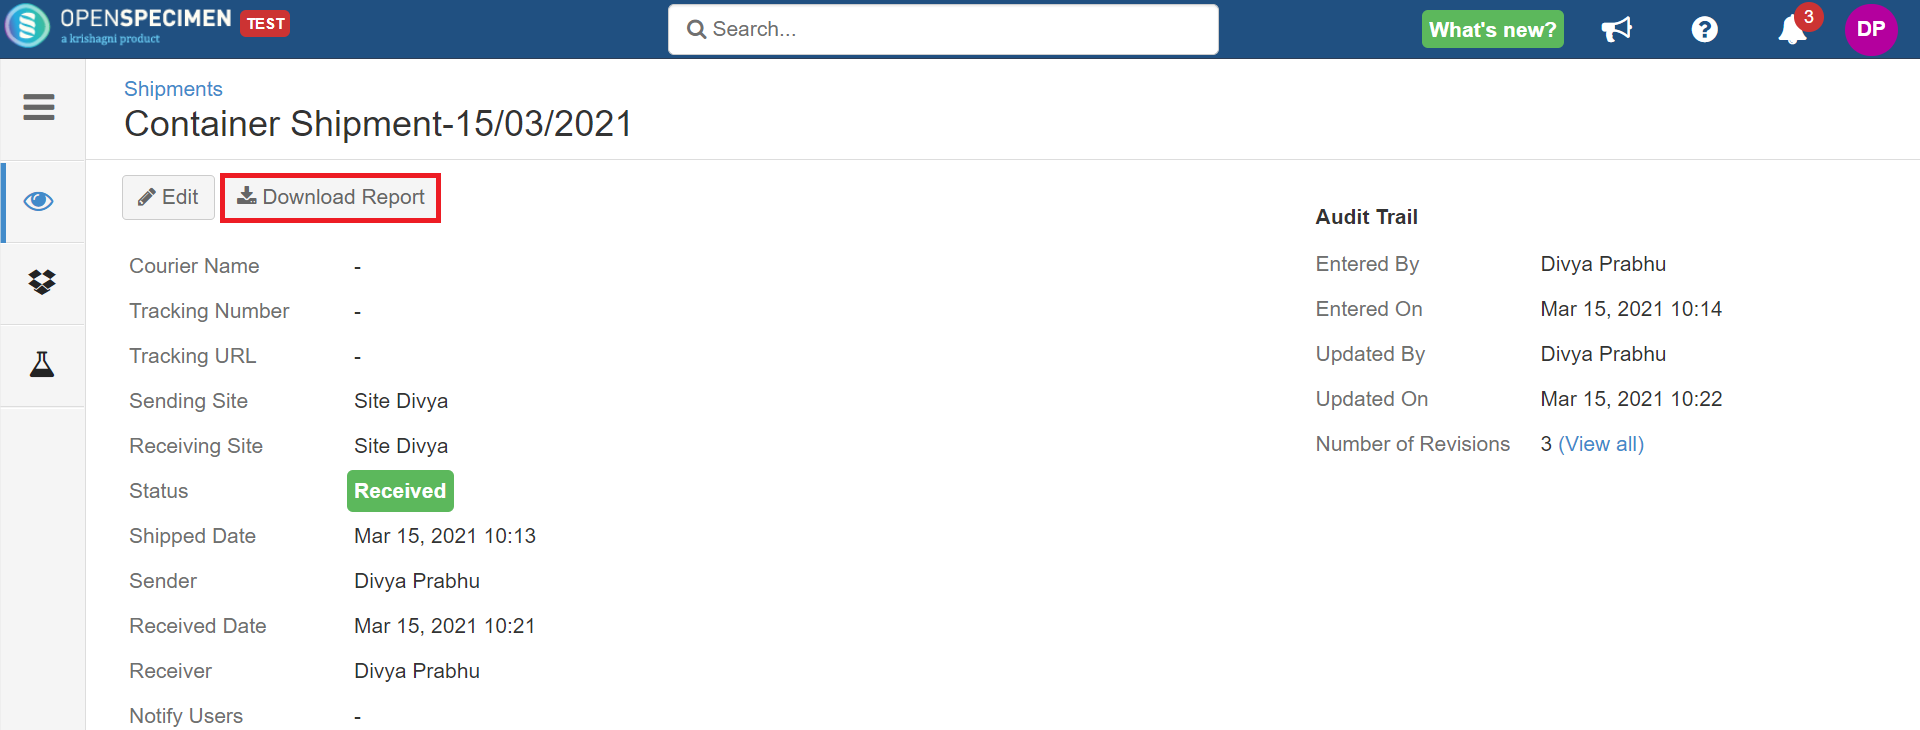
- Click on the ‘Download Report’ button from the shipments overview page to download the shipment report.
- The sender of the shipment will be notified when the container is received at the receiving site.
Once the shipment is ”Received”, you cannot edit the “Notify Users“ field.
You can see the “Notify Users“ field on the overview page for the Received shipments but cannot see it on the edit screen.
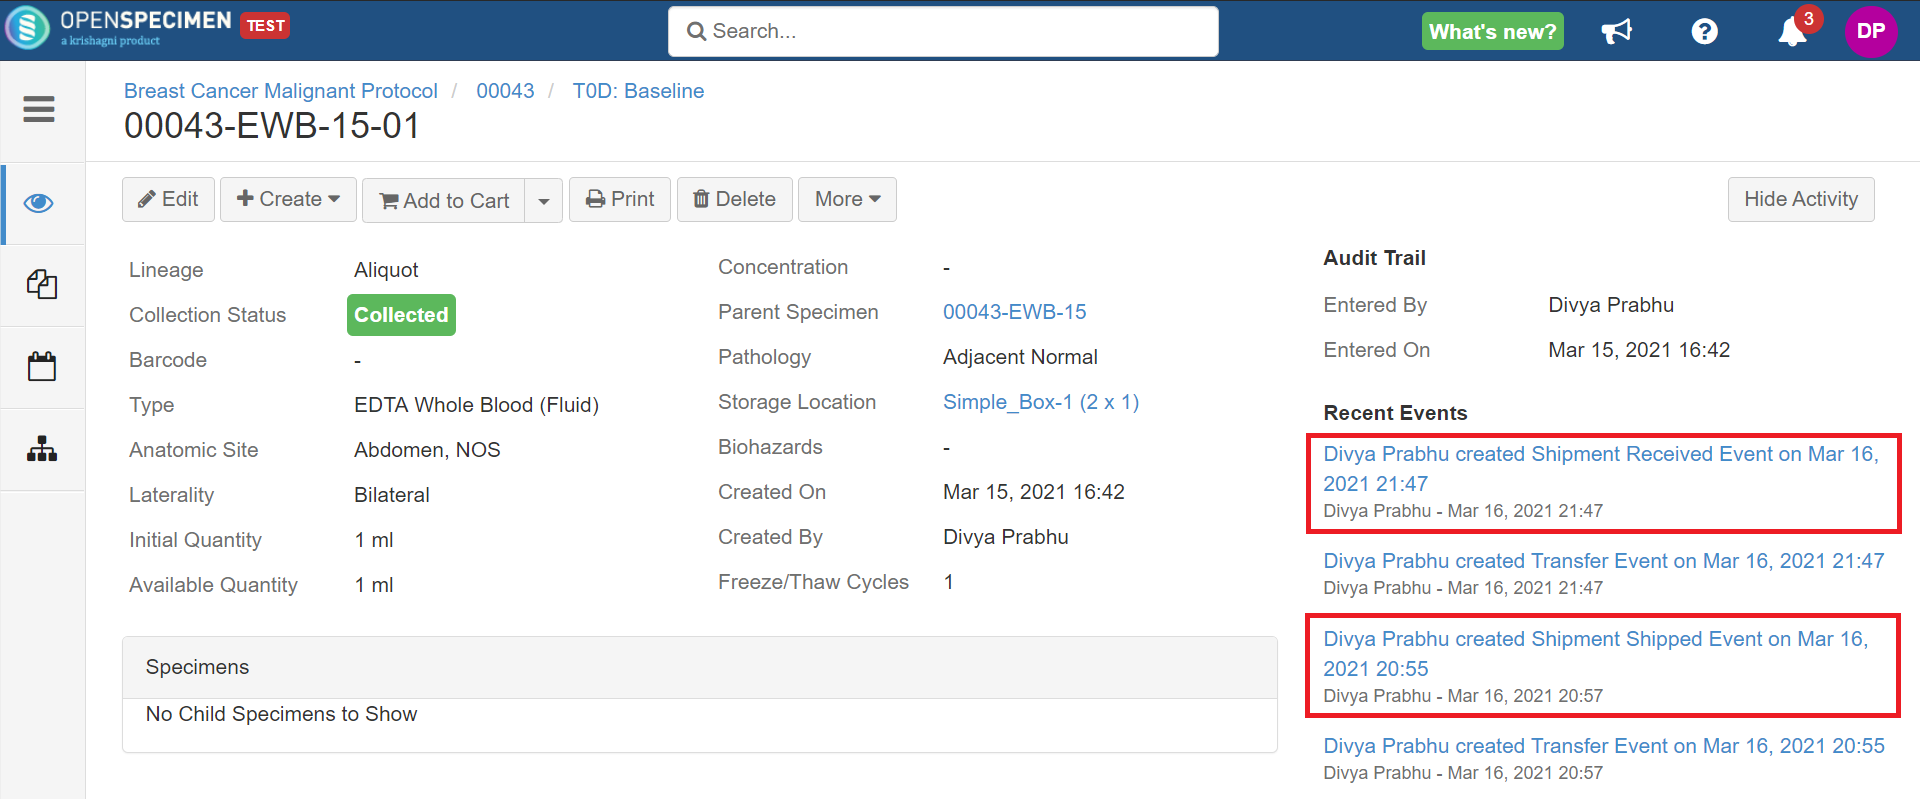
The system adds ‘Shipment Shipped Event’ and ‘Shipment Received Event’ respectively for the specimens stored in the shipped or received containers.
Create in bulk
You can create the shipment of containers holding the specimens in bulk. For more details, refer to 'Create/Update Container Shipments'.