Create
You can create groups of users from the same institute. User Groups (UGs) will help in the easier management of users linked with an object. This will remove the need to add/remove users individually from multiple places.
Note
Multi-institute user groups are not supported.
Any user with user add/edit privilege can add/edit UG.
You can edit UG that is created by other members of the group.
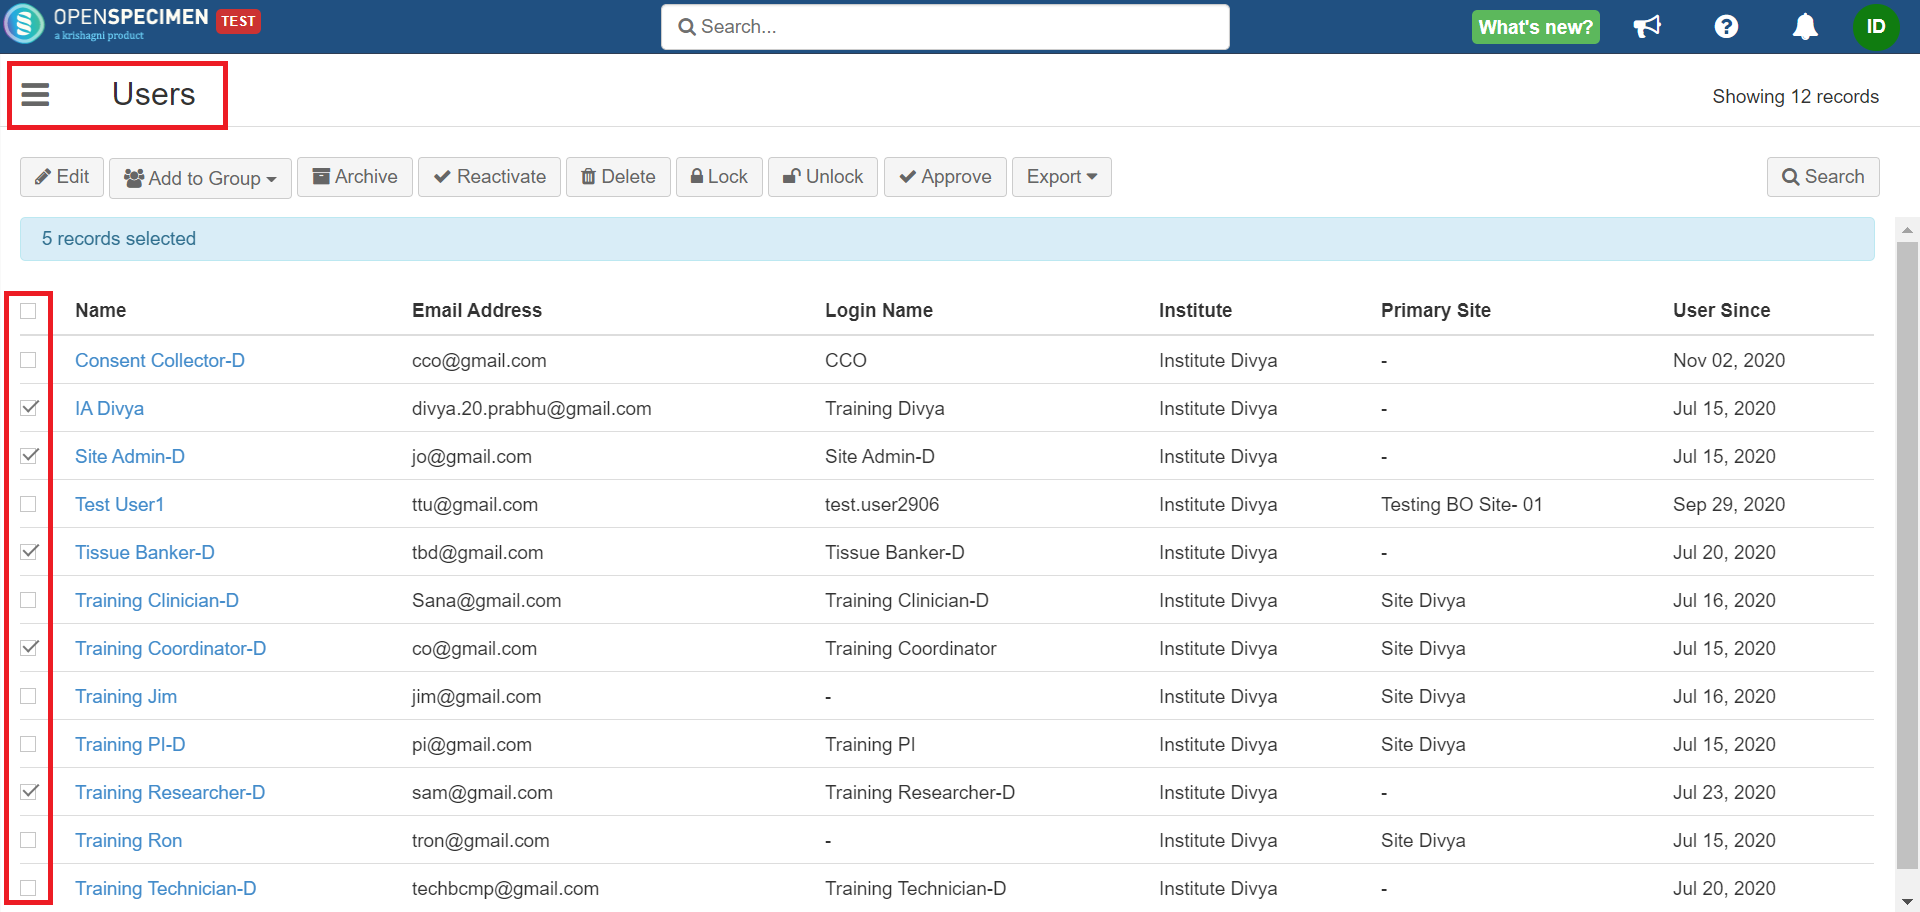
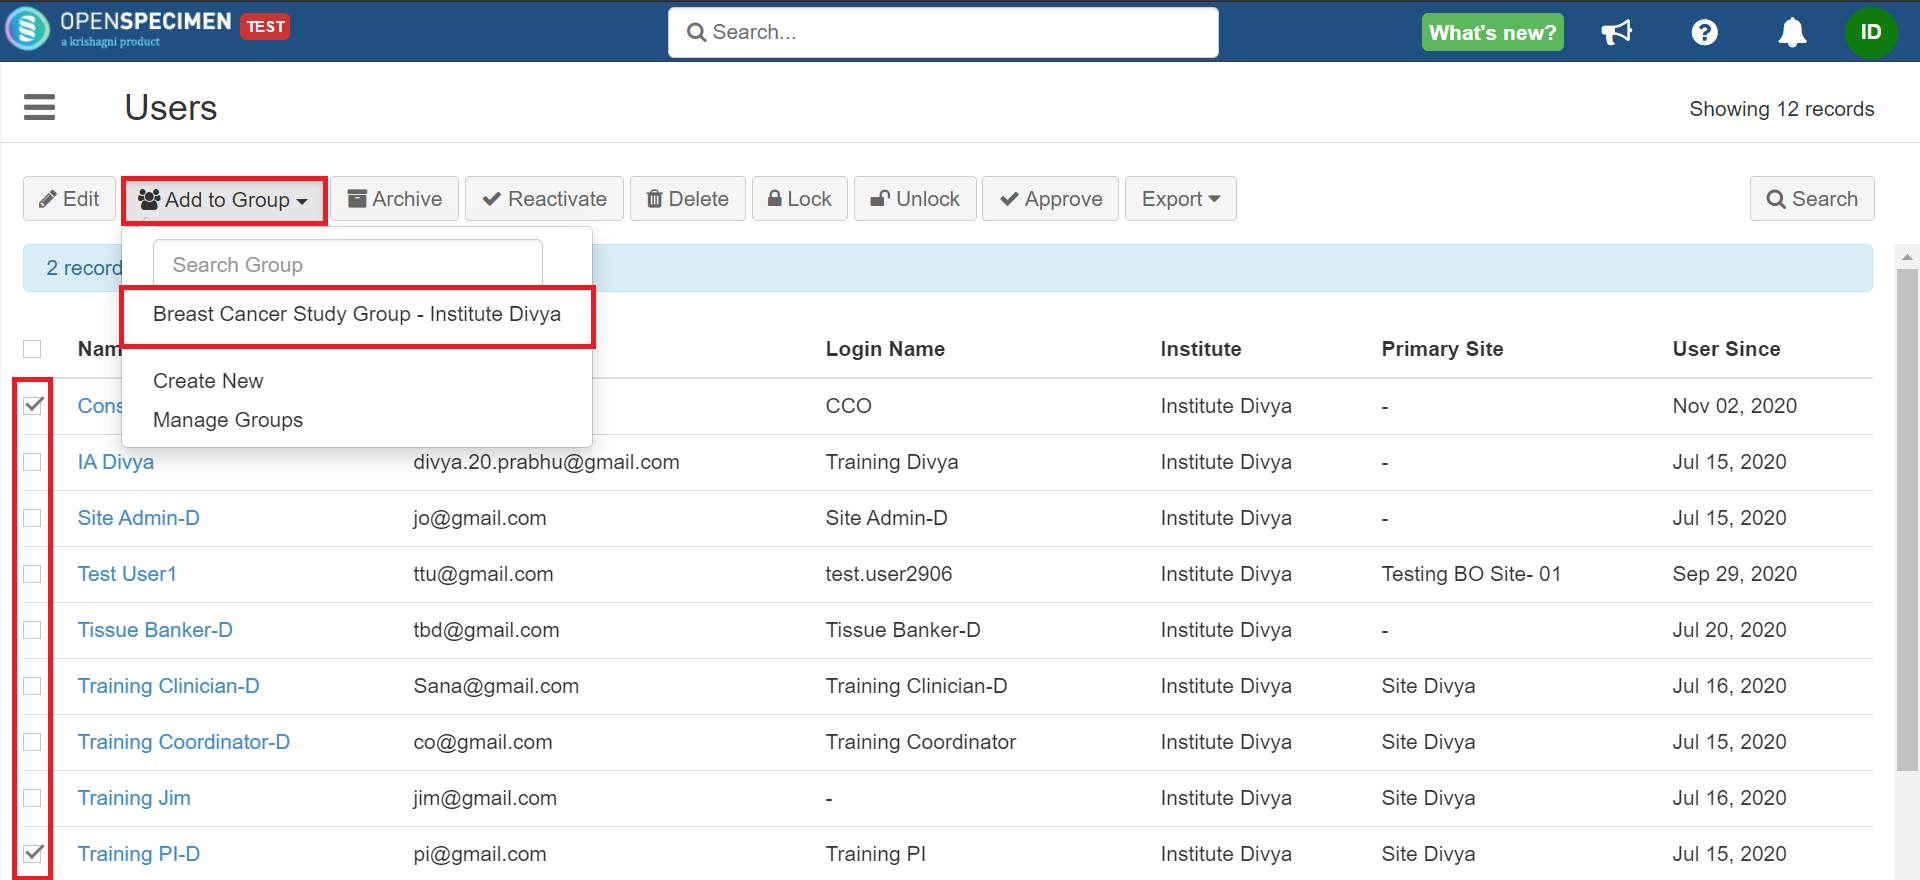
Navigate to 'Users' and select the users you want to add to your group.
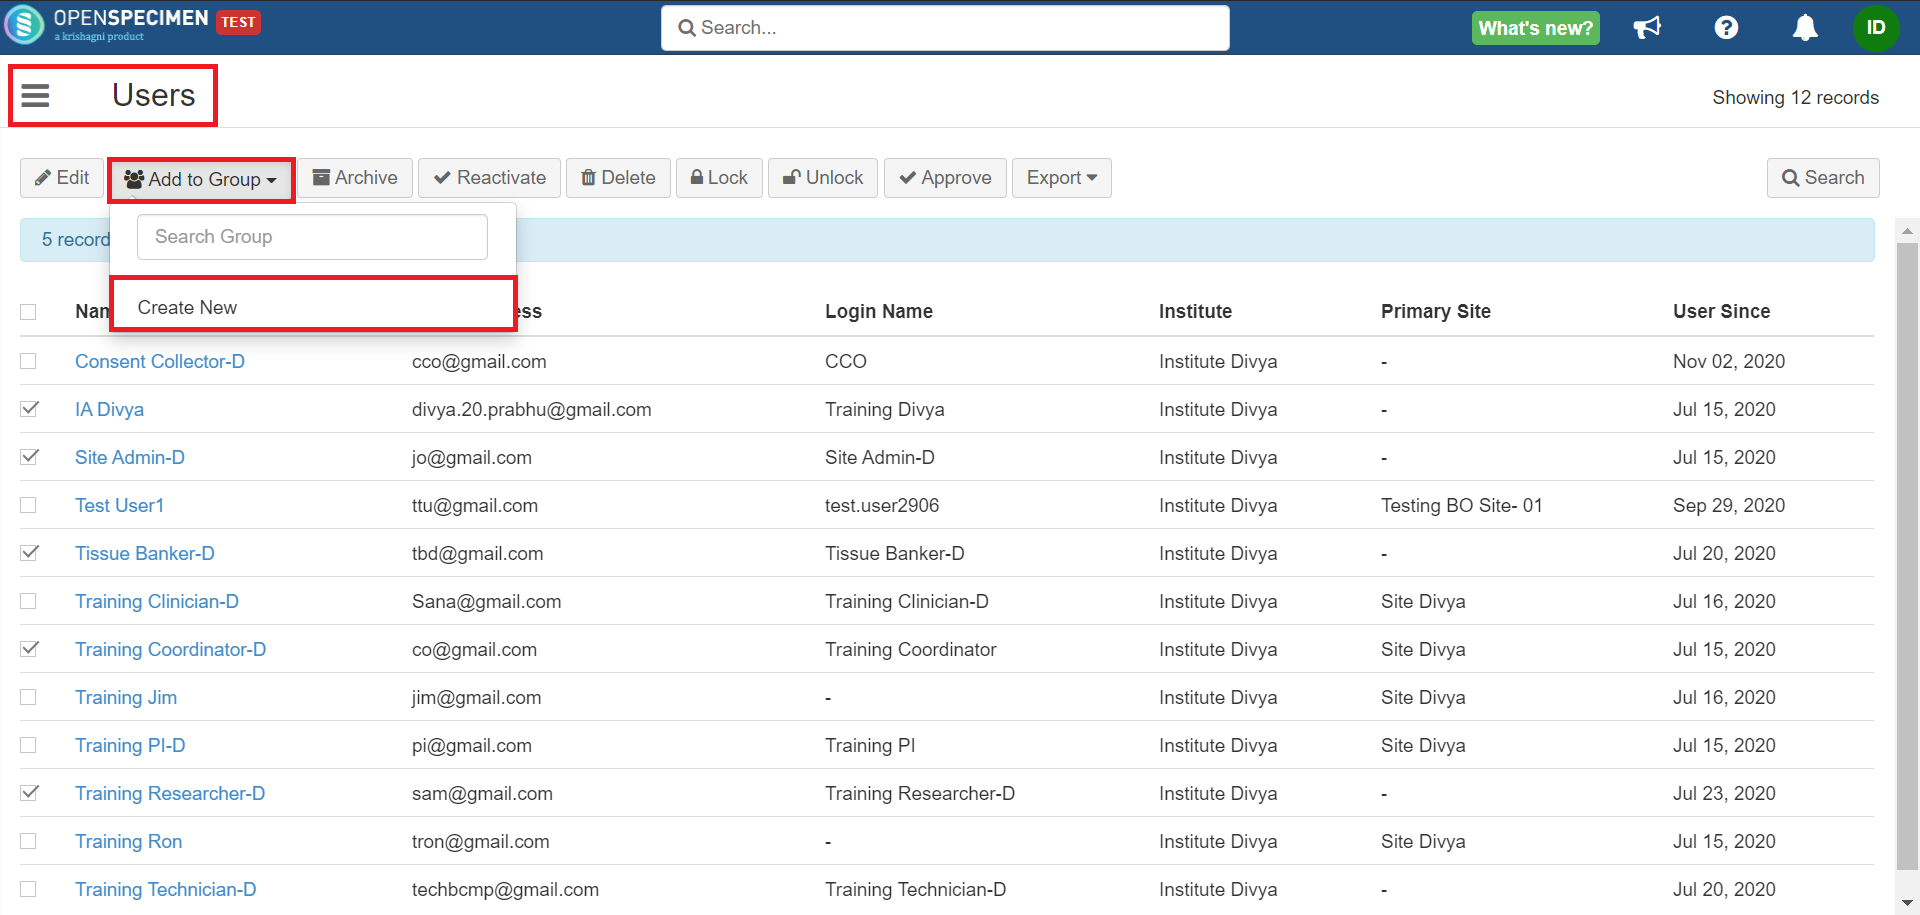
Click on the 'Add to Group' button and click on 'Create New'.
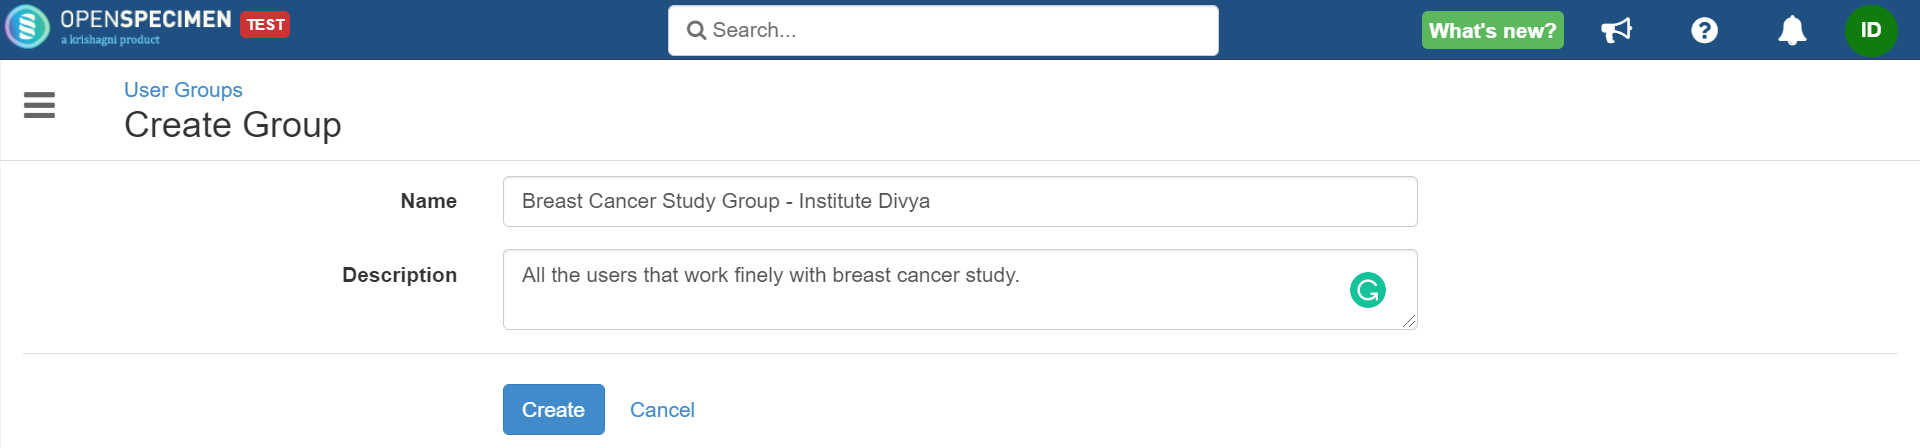
Add 'Name' and 'Description' of the group and click on 'Create'.

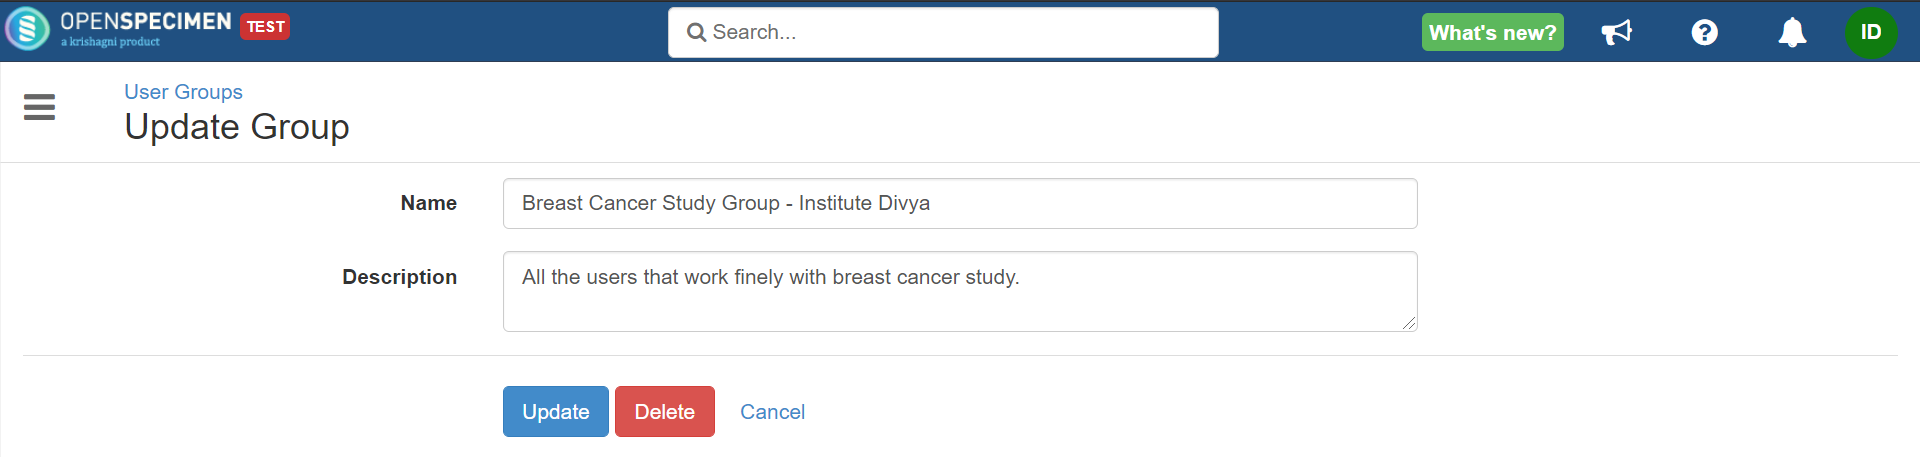
Edit
If you want to edit the UG name or description, you can click on the 'Edit' icon, add changes, and update.

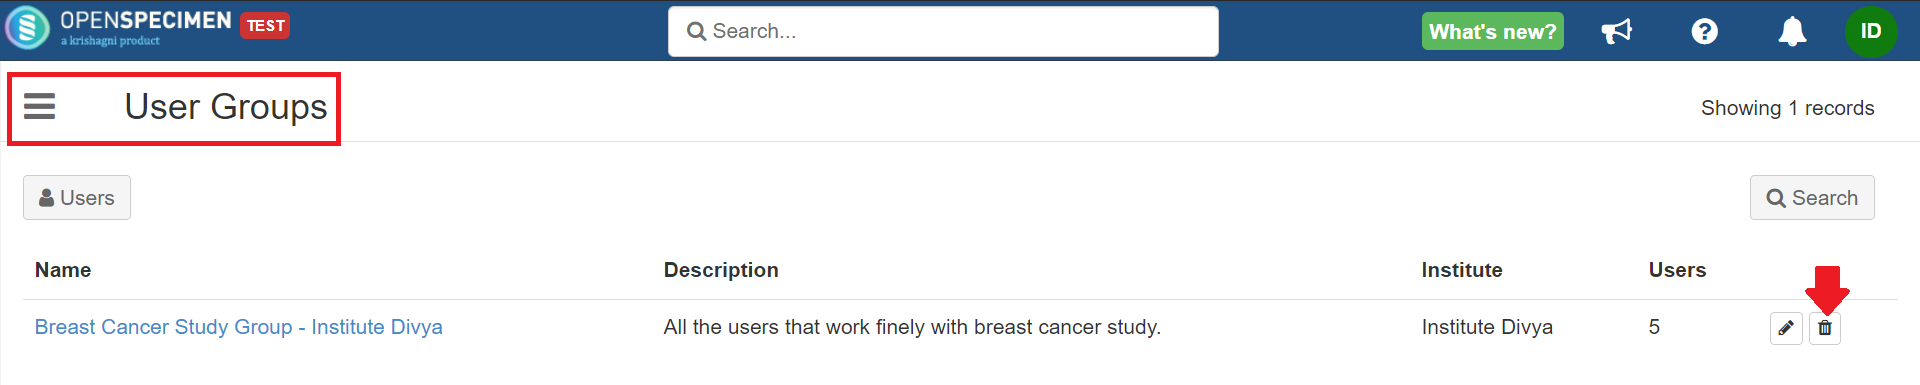
Delete
You can delete the UG by clicking on the bin icon.

Add Users
You can add more users to your existing user group. This would be useful when new members join your team.
Select the users you want to add → Click on Add to Group → Select the existing UG.
Remove Users
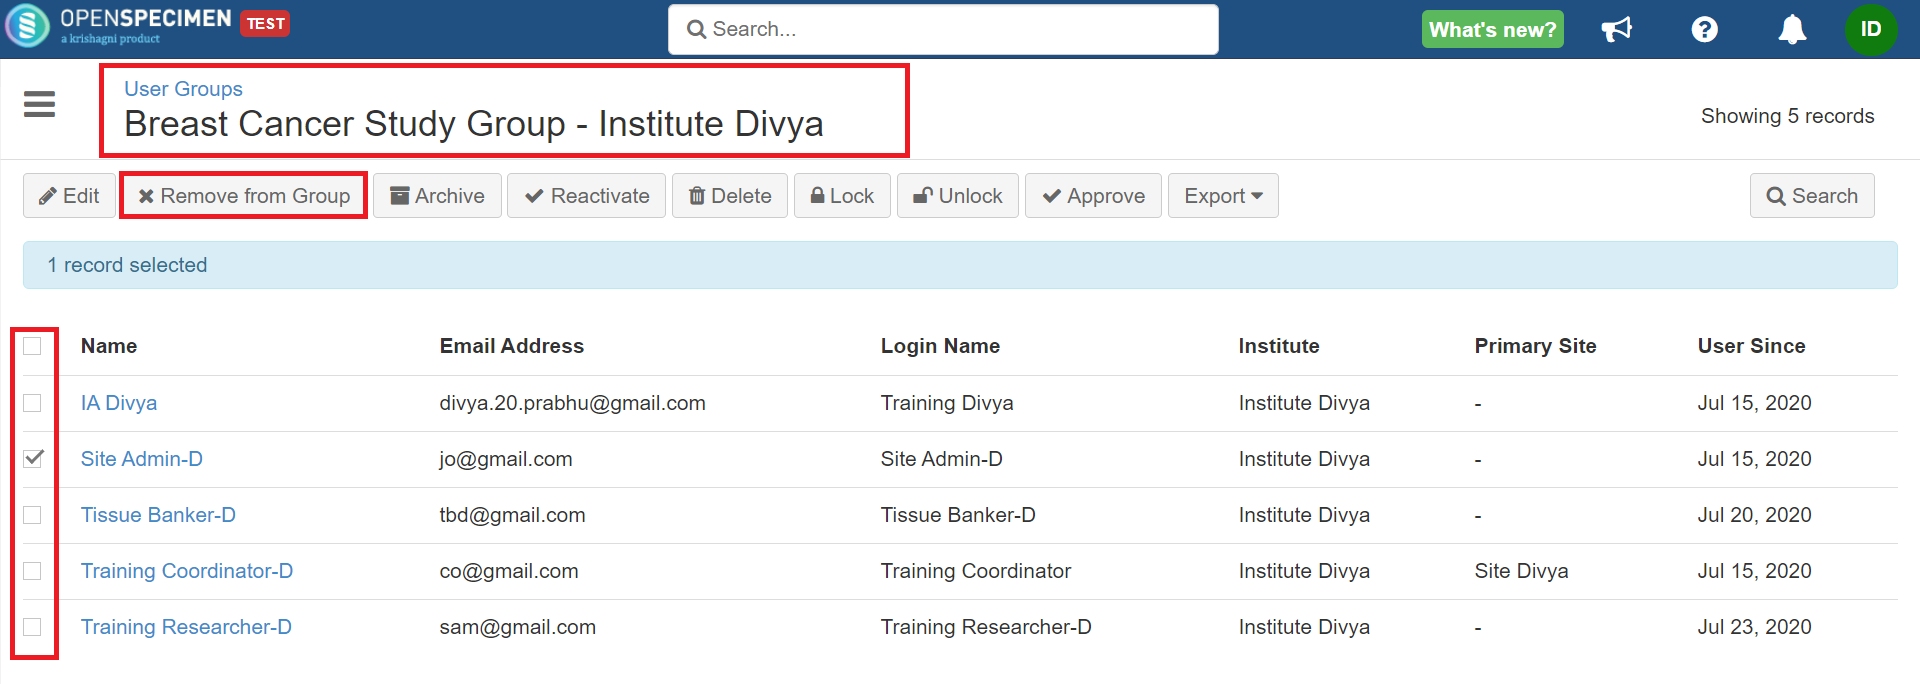
Go to the desired UG.
Select users that you want to remove → Click on the 'Remove from Group' button.
Note
The 'Remove from Group' option will only appear when you select one or more users.
Share Carts
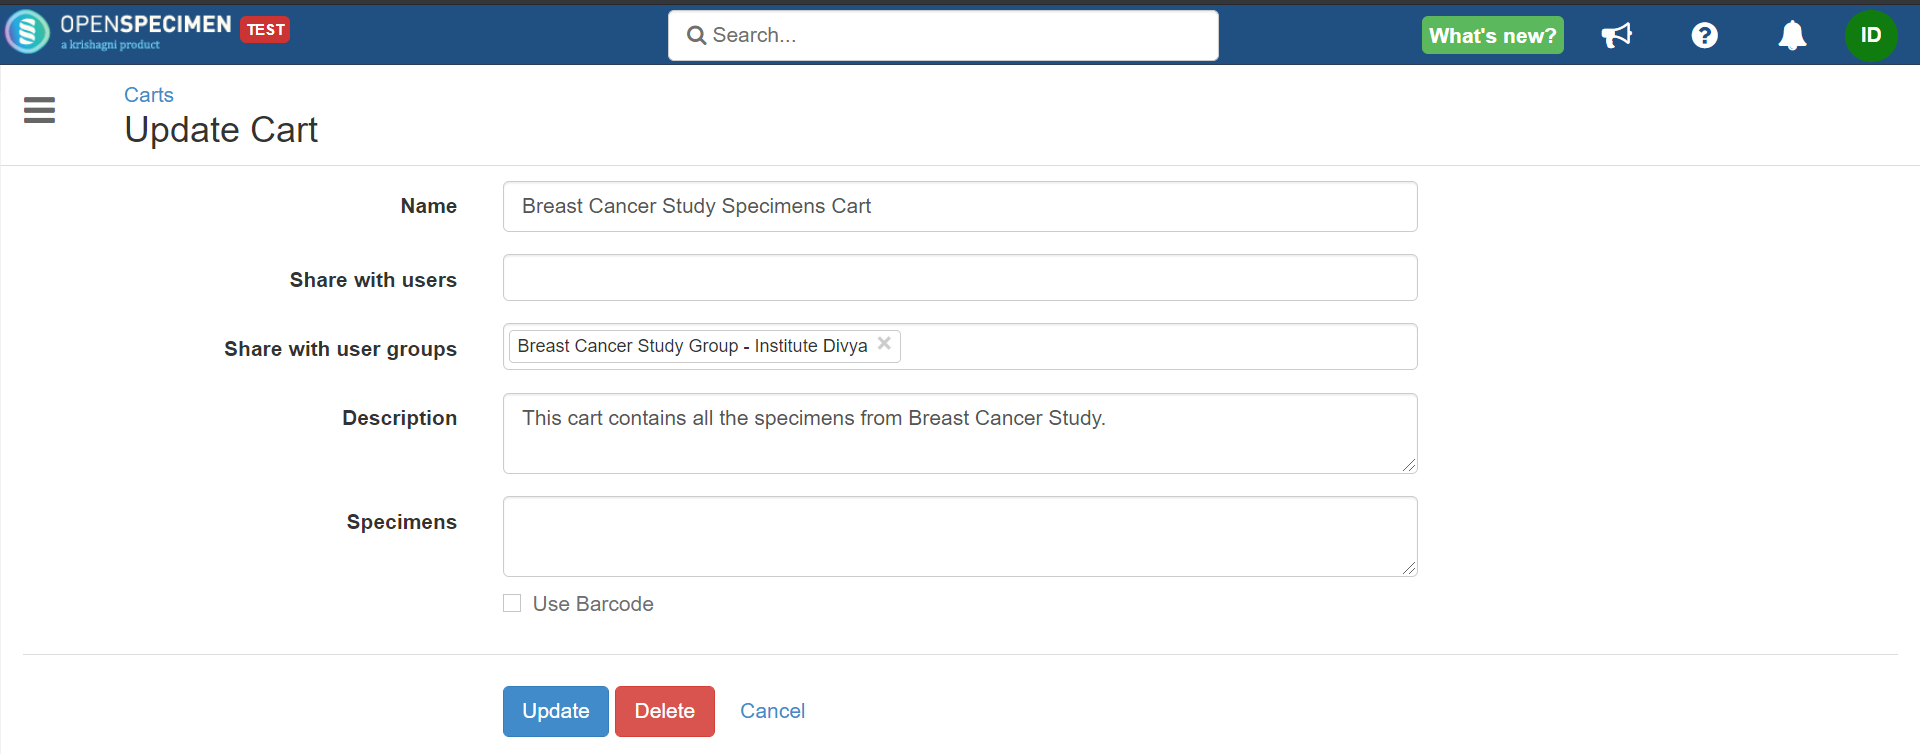
When you create a specimen cart and want to share it with other users of the same institute, you can create a UG and share the cart with the group. This way, you do not have to add all the users one by one.
To share the specimen cart with UG, create a cart. Refer to the wiki page for information on specimen carts.
Click on 'Share with user groups' and select your group.
Share Queries
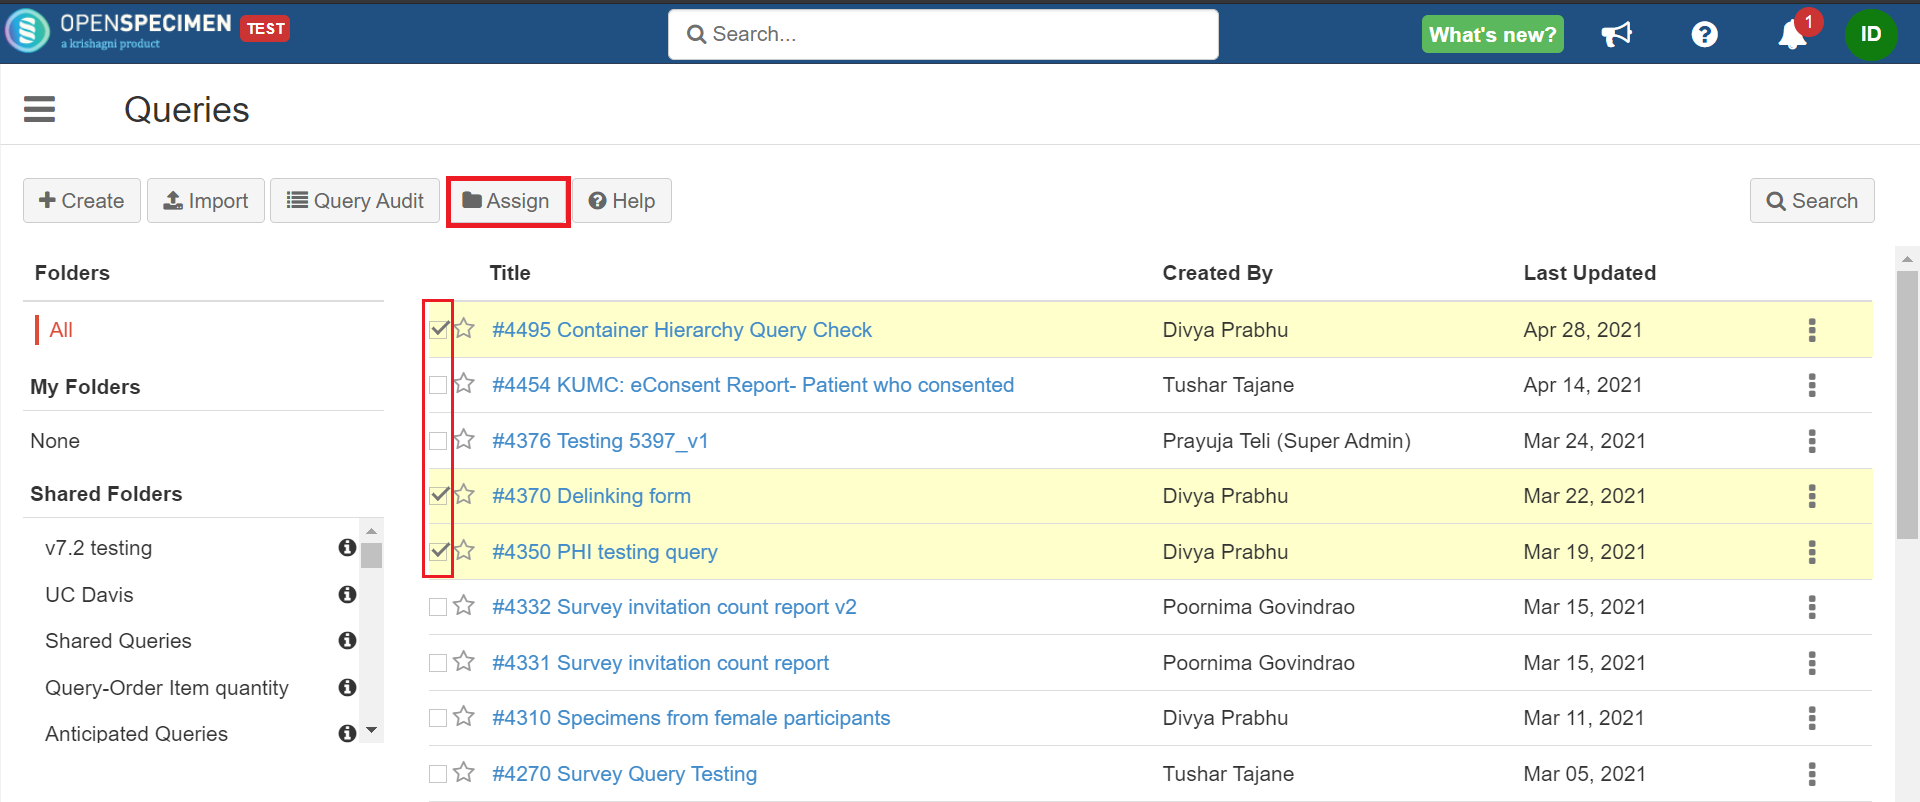
You can share your query folders with UG, and all the group members will be able to view the queries within the shared folder. Refer to reporting section on the wiki page for information on creating queries and share queries section for information on query folders.
Select all the queries you want to share with the users.
Click on the 'Assign' button.
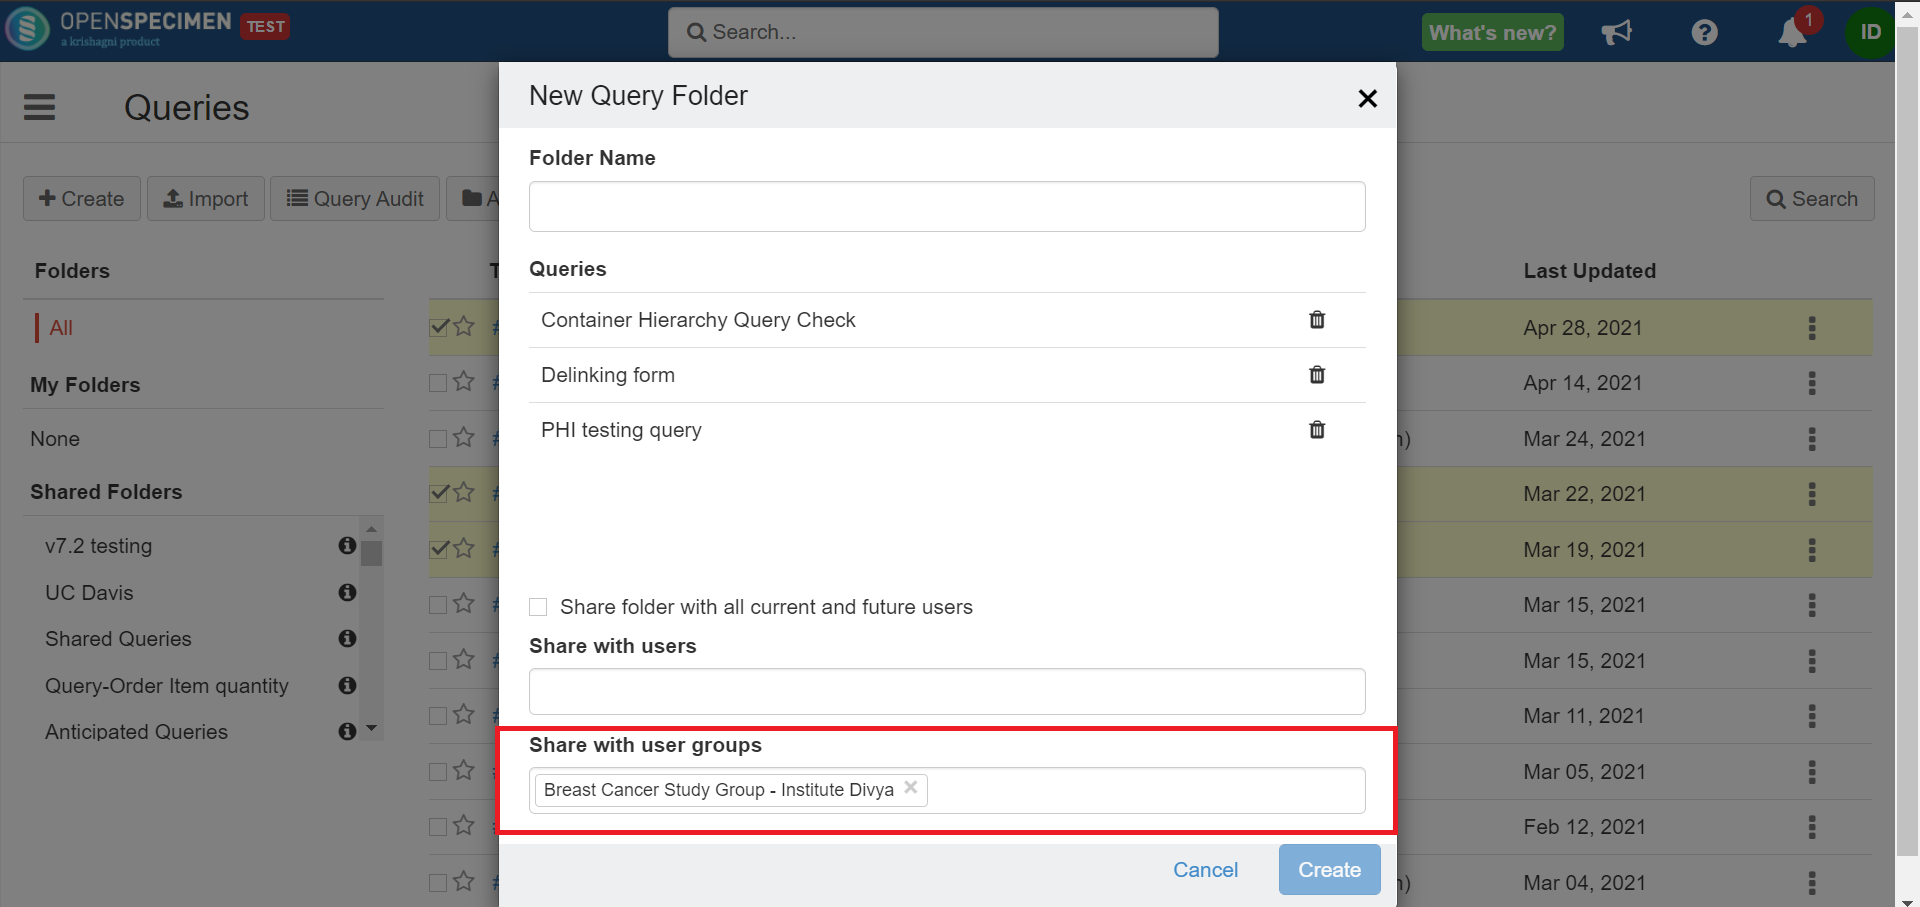
Click on 'Create New Folder'.

Click on 'Share with user groups' → Select the UG.
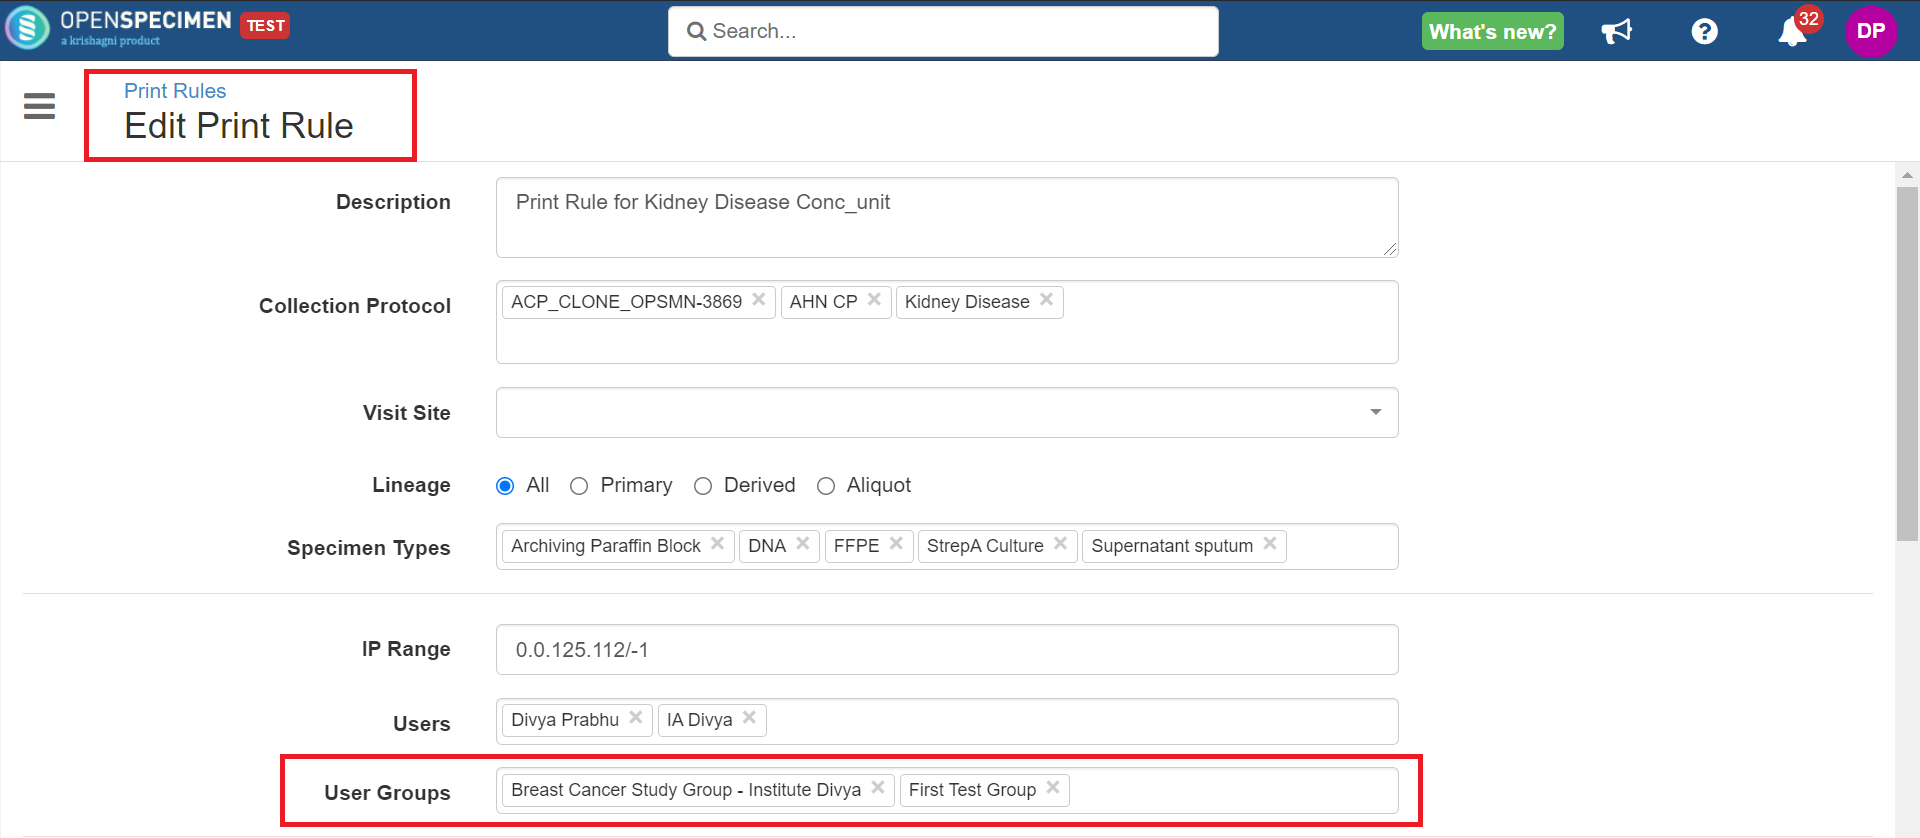
Share Print Rules
Once you create a print rule, you can add user groups rather than adding individual users. Refer to the wiki page for more details on print rules.
Navigate to 'Extras' → Print Rules
Create a new print rule or edit an existing print rule.
Click on 'User Groups' and select the groups.