Leave a comment at the end of this page or email contact@krishagni.com
Managing Catalogs
- Shraddha Ranpise (Deactivated)
- Prayuja Teli (Unlicensed)
- Divya Prabhu (Unlicensed)
Introduction
OpenSpecimen supports creating multiple specimen catalogs. The catalogs can be private (needs login) or public (accessed without login). Catalogs can also be CP-specific. Each catalog will have its URL that can be shared with researchers.
More info and Video...
To learn more about how catalogs can help your biobank and an introductory video: Specimen Catalog and Requests.
Catalog configuration allows users (admins) to choose the views of the Dashboard, Catalog, Cart, and Request they would like to expose to the researchers. Refer to Catalog: Configurable Views for more details
Anatomy
The catalog has four parts:
- Search query: Decides which specimens and columns are displayed in the catalog result view.
- Specimen query: Decides the columns to display in the specimen request view under catalog.
- Request form: For requestors to enter details of the request. E.g., Project ID, requestor name, project, MTA details.
- Dashboard: Visual graphs for the catalog (pie chart, counters).
Create
Pre-requisites
- Super admin, institute admin, and any other user with a role create/edit privilege on the 'Catalog' resource should be able to create/edit the catalogs.
- Saved queries will be set as input(search/specimen query) for the catalog. Refer to the wiki a page for more information on queries.
- Make sure to add a specimen identifier column in the query you use as 'Specimen Query'. On missing, the identifier request manager won't be able to distribute the samples.
- The request form is to be added to the catalog while creating it.
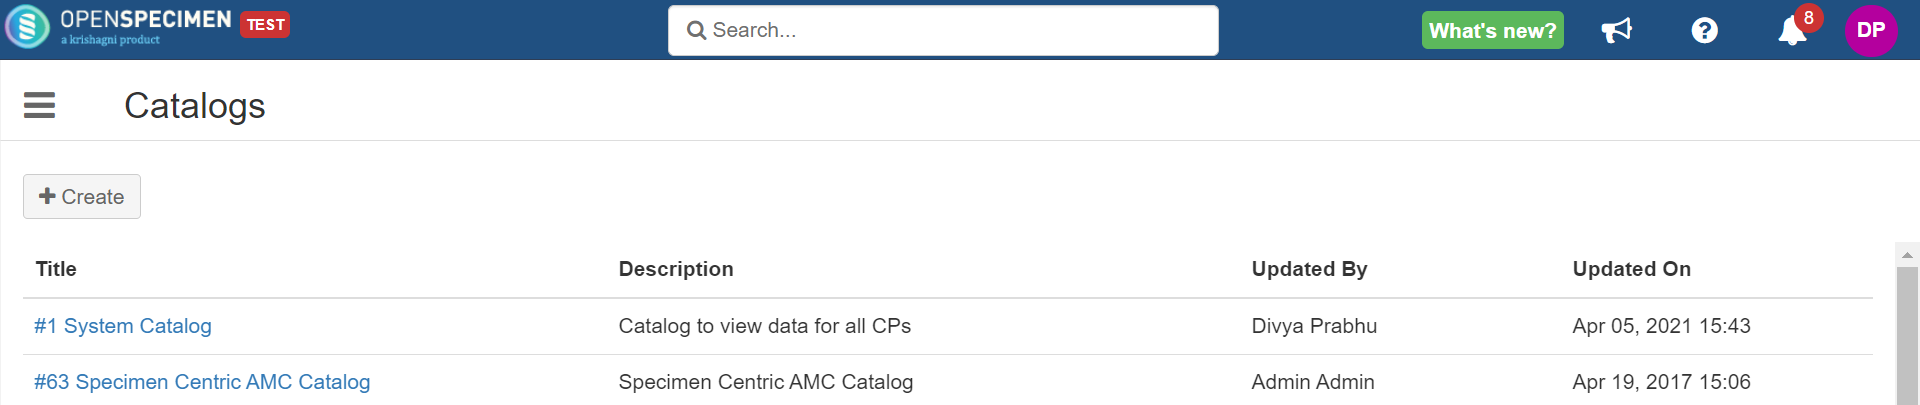
- Navigate to 'Catalogs'.
- Click on the '+Create' button from the catalogs list page.
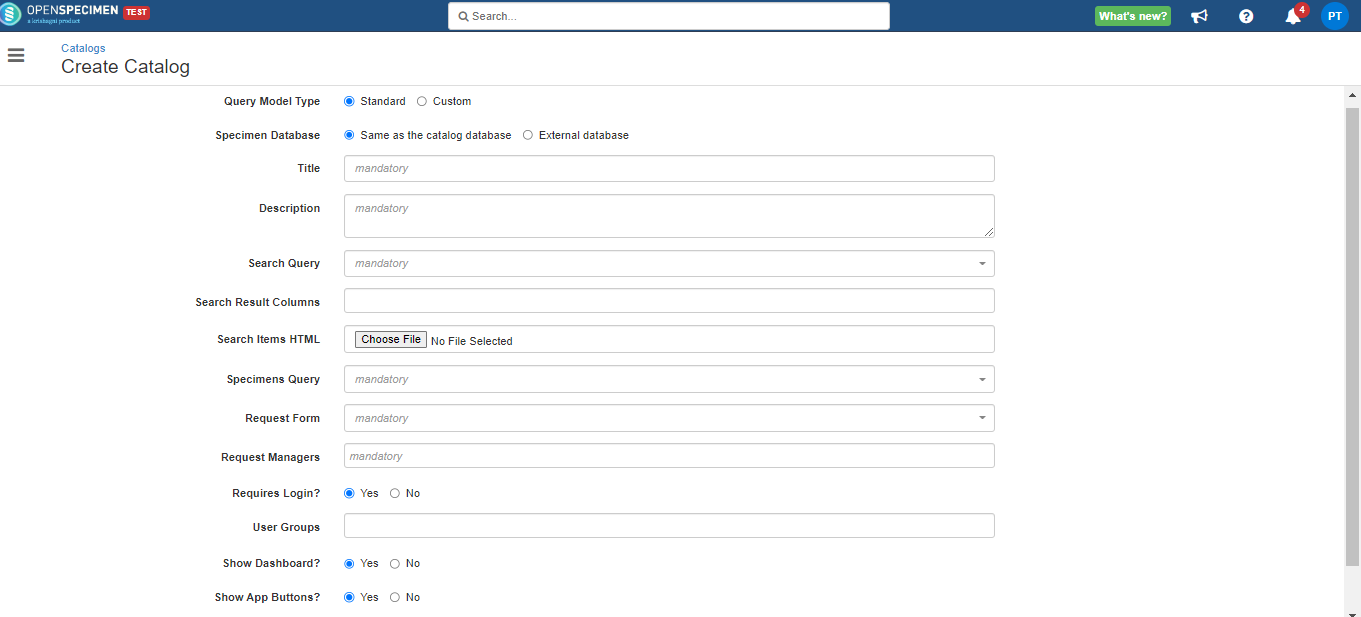
- Enter all the valid details → Create.
Note:
You can use a custom form that you have created as a request form or use the system-generated 'Specimen Request Details' form.
- Similarly, the admin can create multiple catalogs.
- If you are signed in to OpenSpecimen and want to view any catalog, you can click on the "Catalog URL".

- If you want to share the catalog URL with others who are not logged in to OpenSpecimen or make the catalog publicly available, you will have to select the URL as shown below:
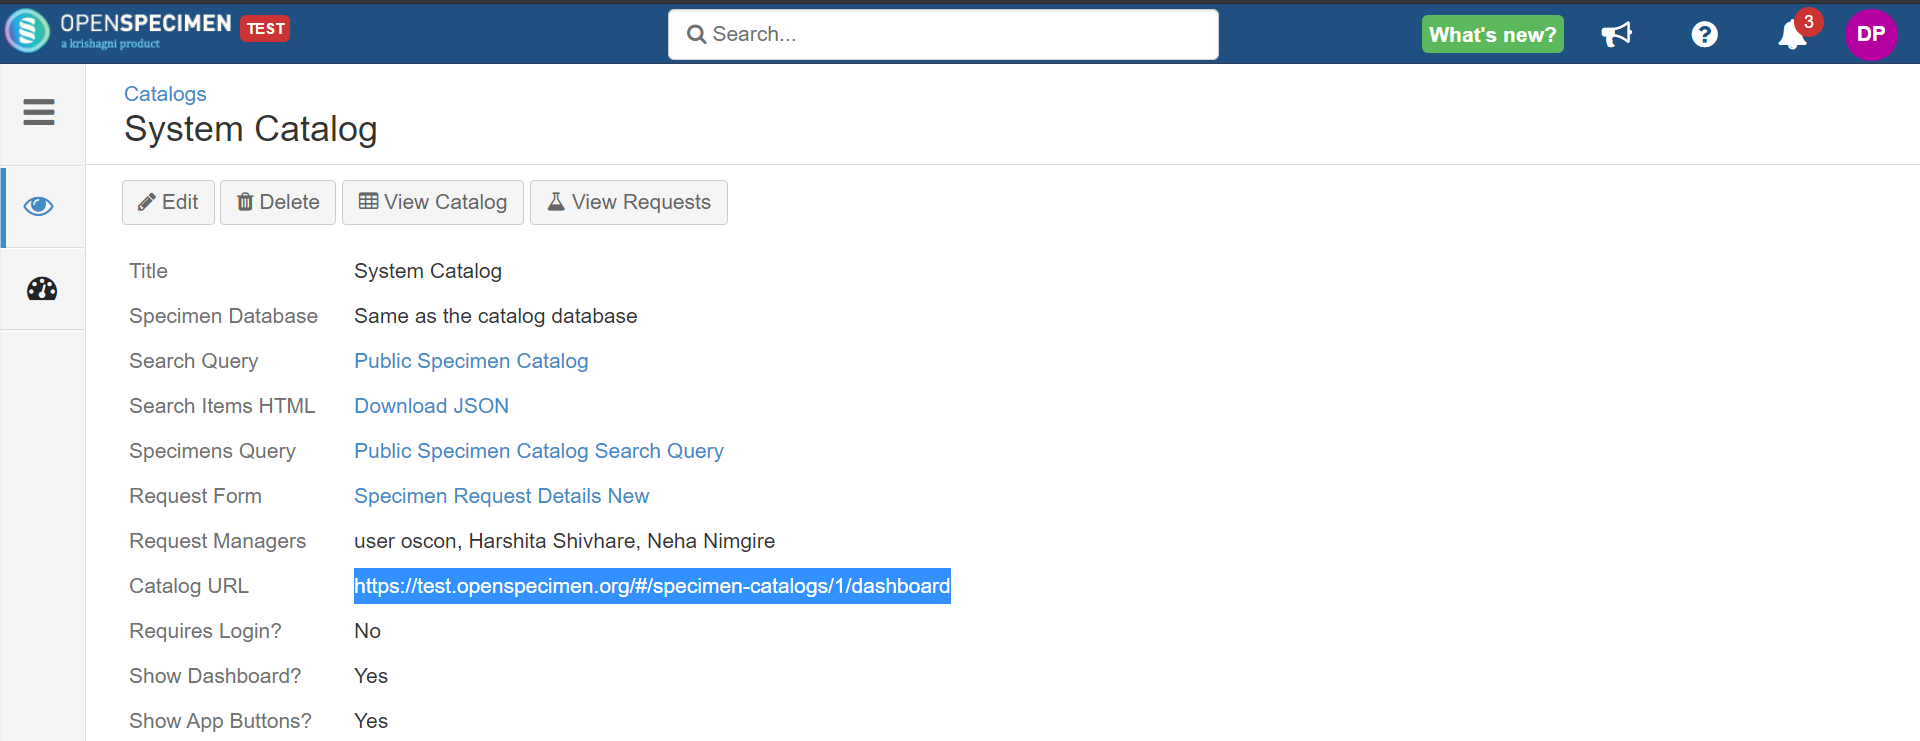
- The user with the catalog URL can access the catalogs and look for the specimens of interest.
- Users can access this without login if the catalog is set with 'Requires Login' as 'No'.
Note:
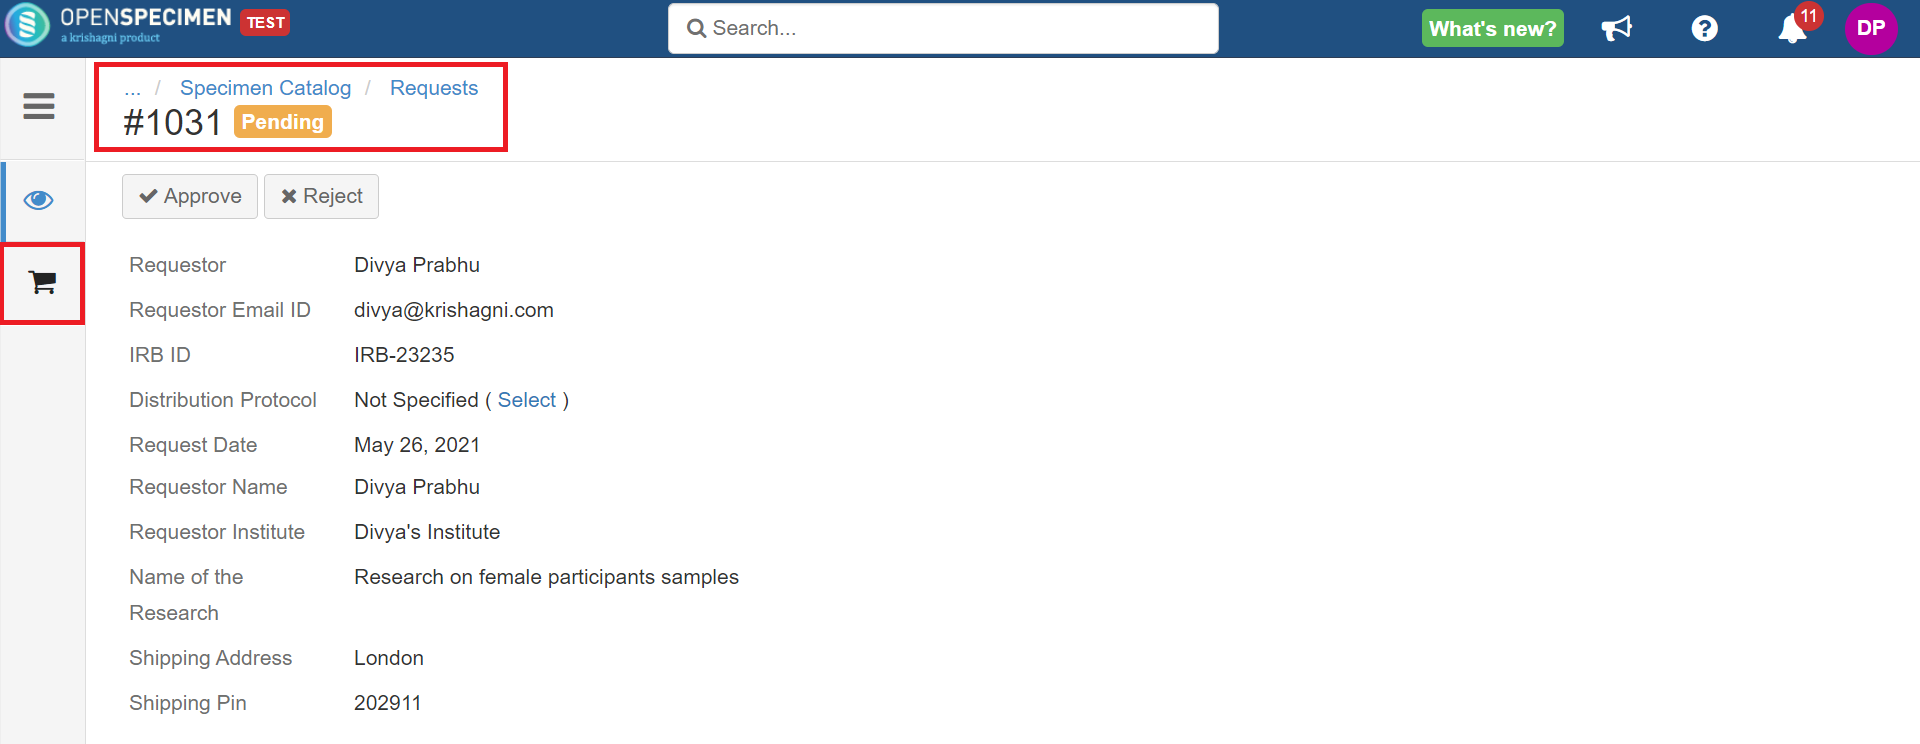
Case 1:
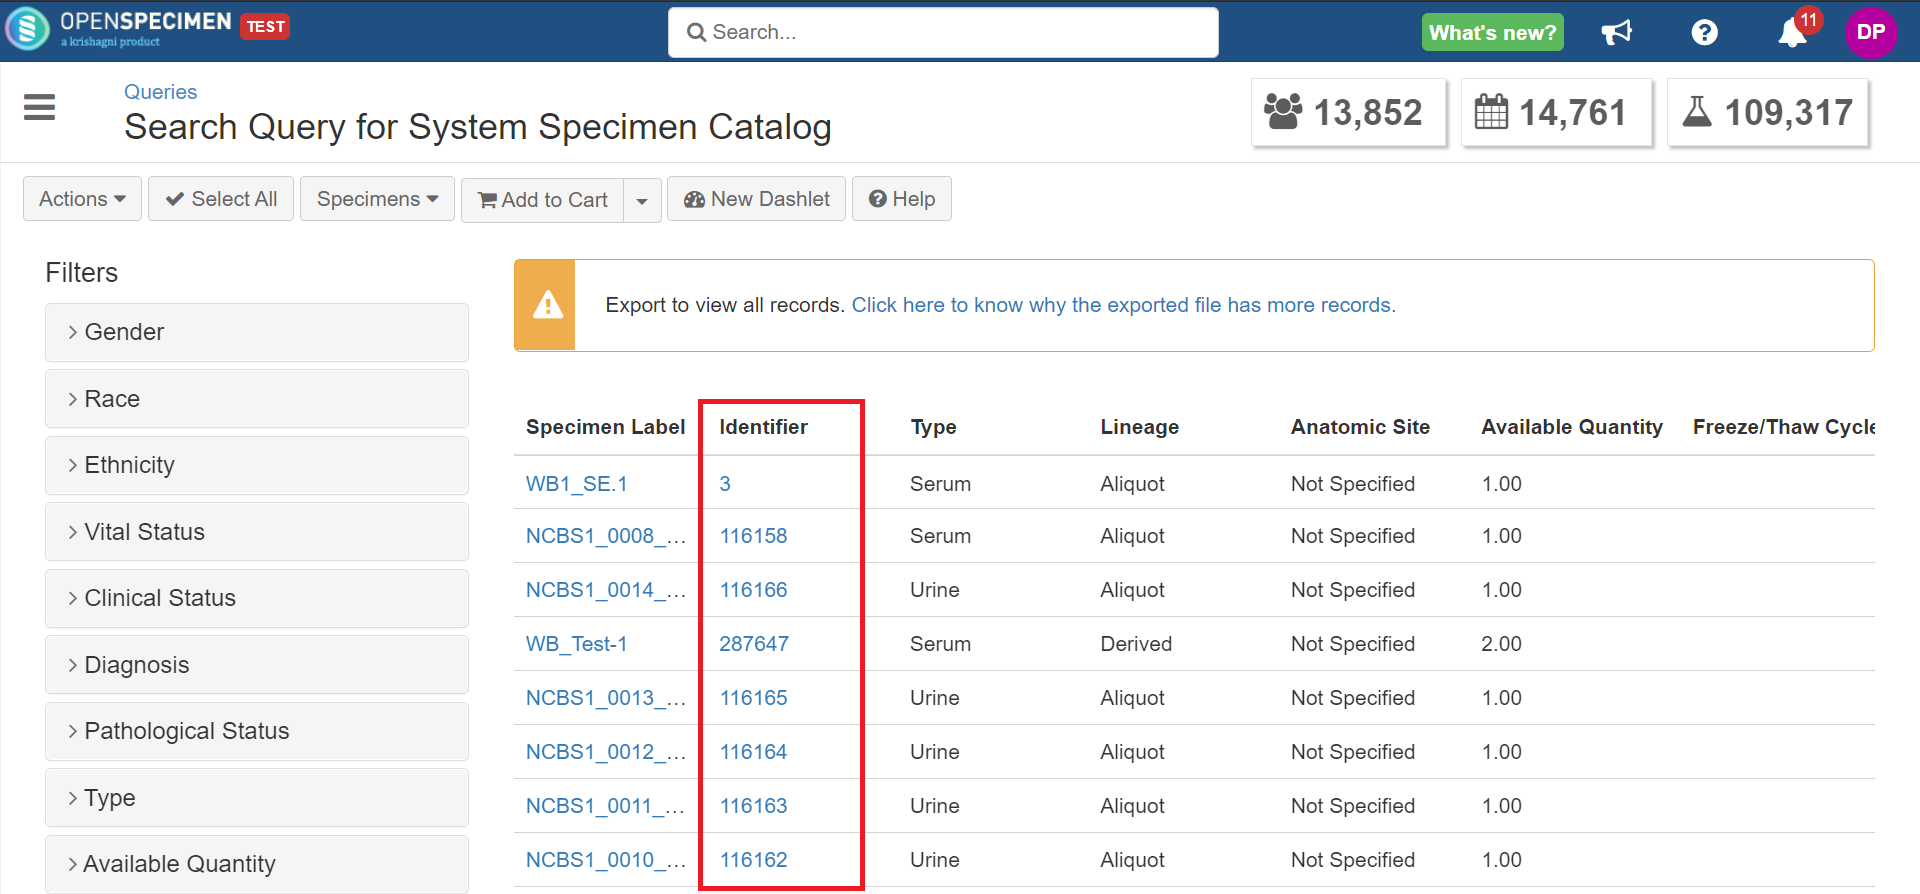
- If your catalog's 'Search Query' has a specimen 'Identifier' column, the request overview page will have the 'Specimens' tab on the left-hand side.
- Once the request is approved, you can distribute all the requested specimens.

Case 2:
- If your catalog's 'Search Query' does not have a specimen 'Identifier' column, the request overview page will have the 'Carts' tab on the left-hand side.
- Once you approve the request, you must select the specimens you want to distribute → Add to the cart → Distribute. Refer to wiki a page for more details.
- After selecting the URL, you can copy it (Ctrl + C) and Paste it (Ctrl + V) wherever you want. The right-click. → Copy link address method will not work in this case.
Help URL Display
Users can add catalog-specific Wiki or SharePoint points to help the researchers to use the catalog. Users with 'Update' access to the catalog can add/update these details. This configured help button will appear beside the catalog's name on the result view page.
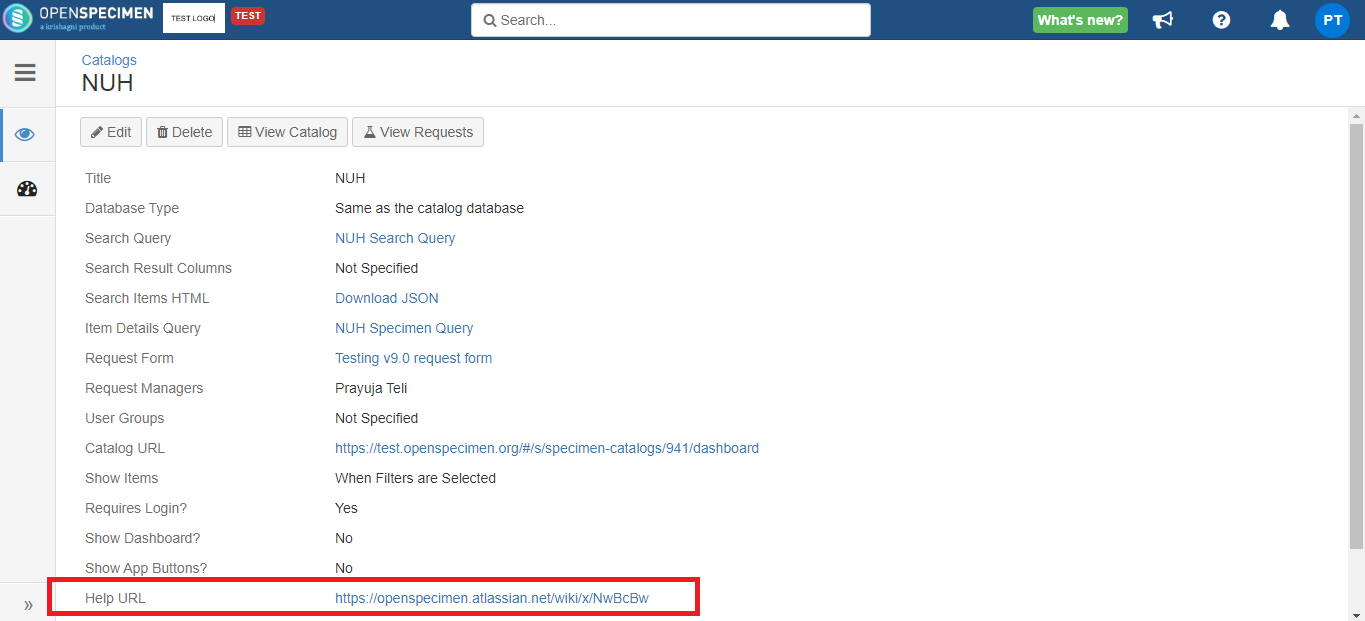

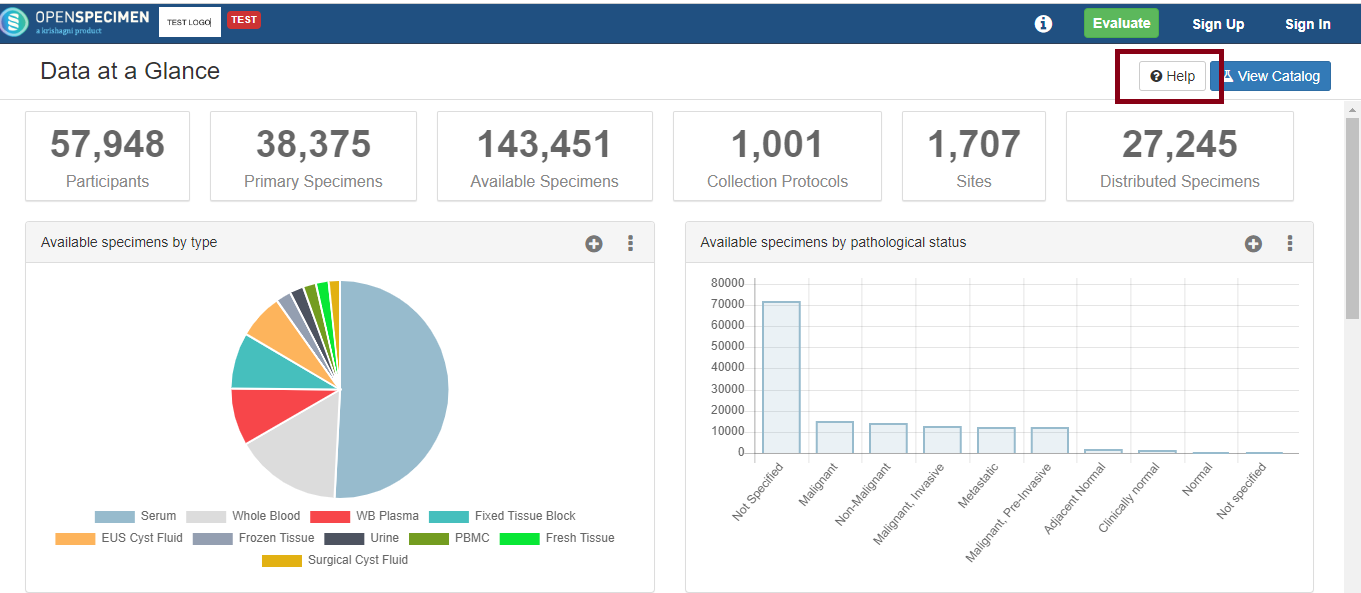
The 'Help' button is also displayed on the dashboard.
View More Details Feature (v8.2)
Having vast numbers of columns on a catalog screen to request specimens causes user performance issues. To avoid that, you can configure the view more feature, showing the required columns in the specimen details popup screen as below:
This popup screen field can be configured via ‘Specimen Query’ by adding wished columns.
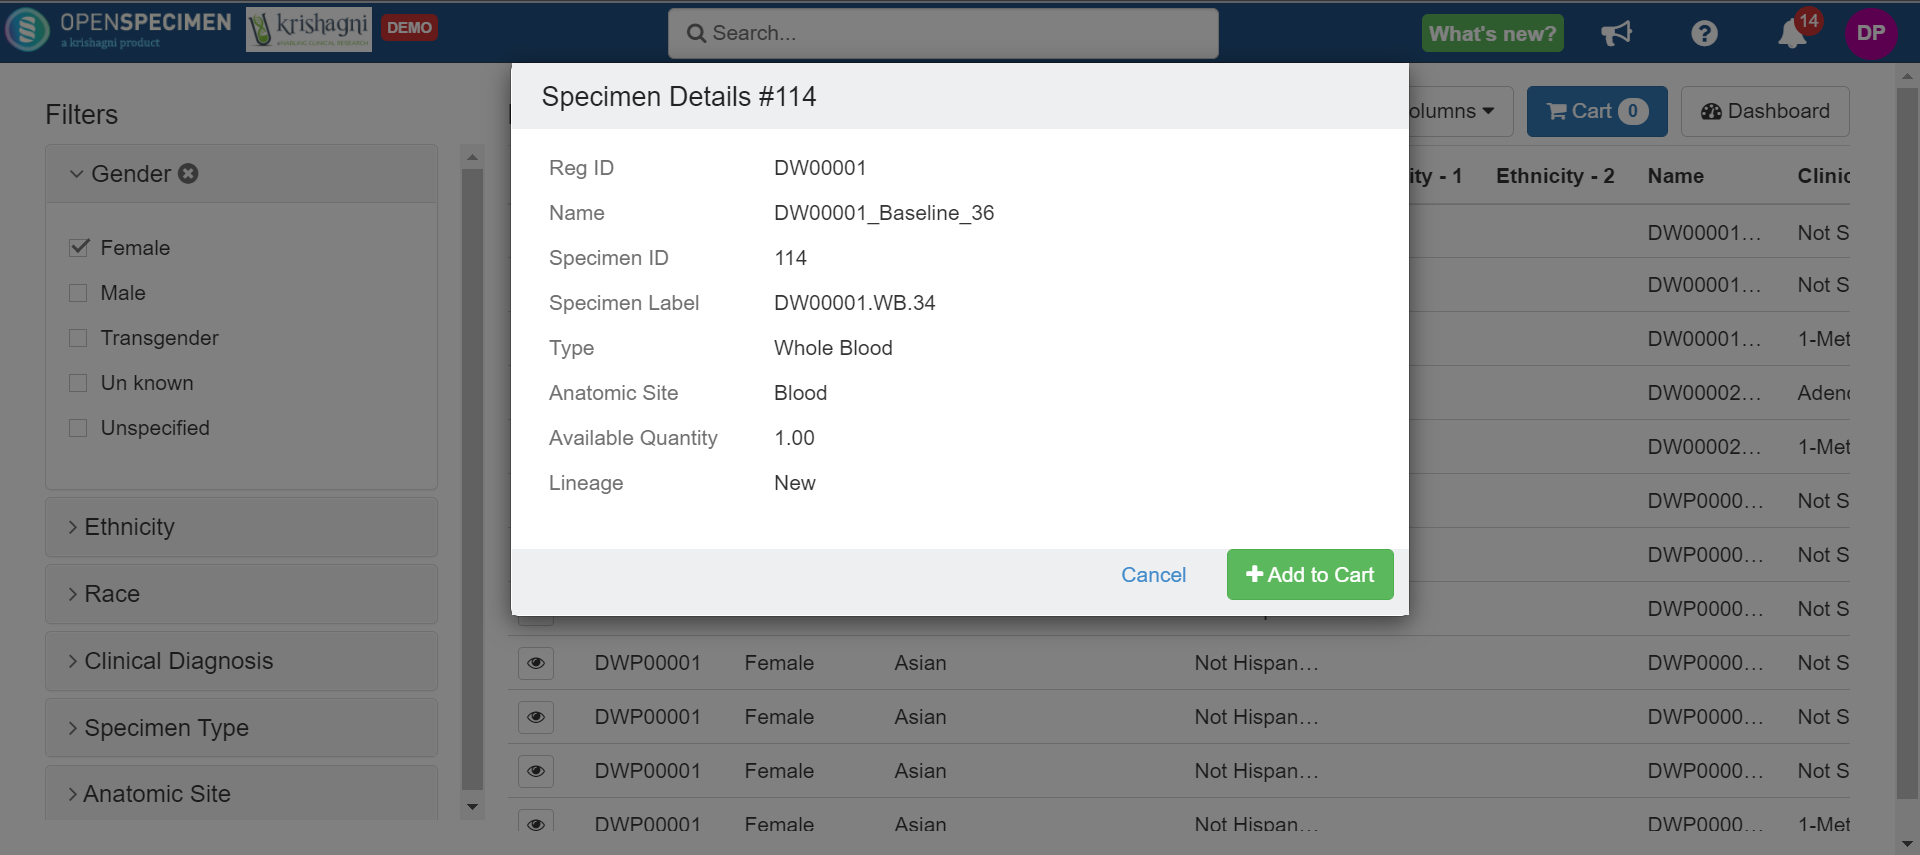
This feature is supported only for non-count-based catalogs, which is #case 1 above.
- Create a search query with the required conditions and columns. Ensure that the specimen 'Identifier' column is included in this query.
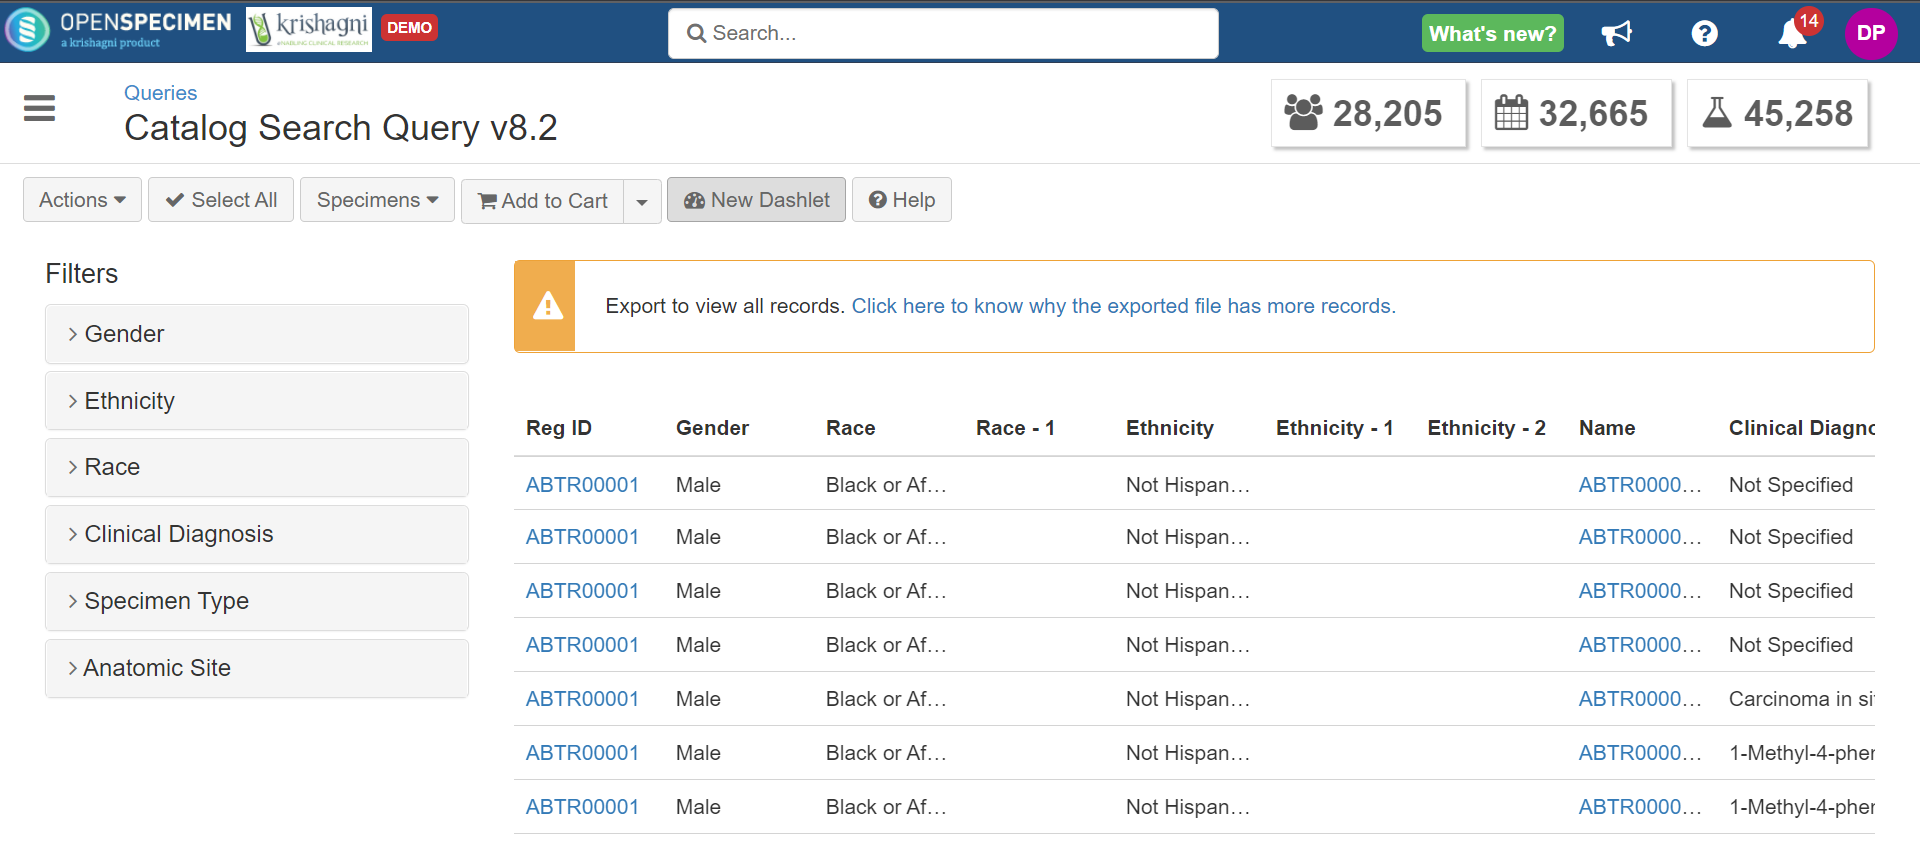
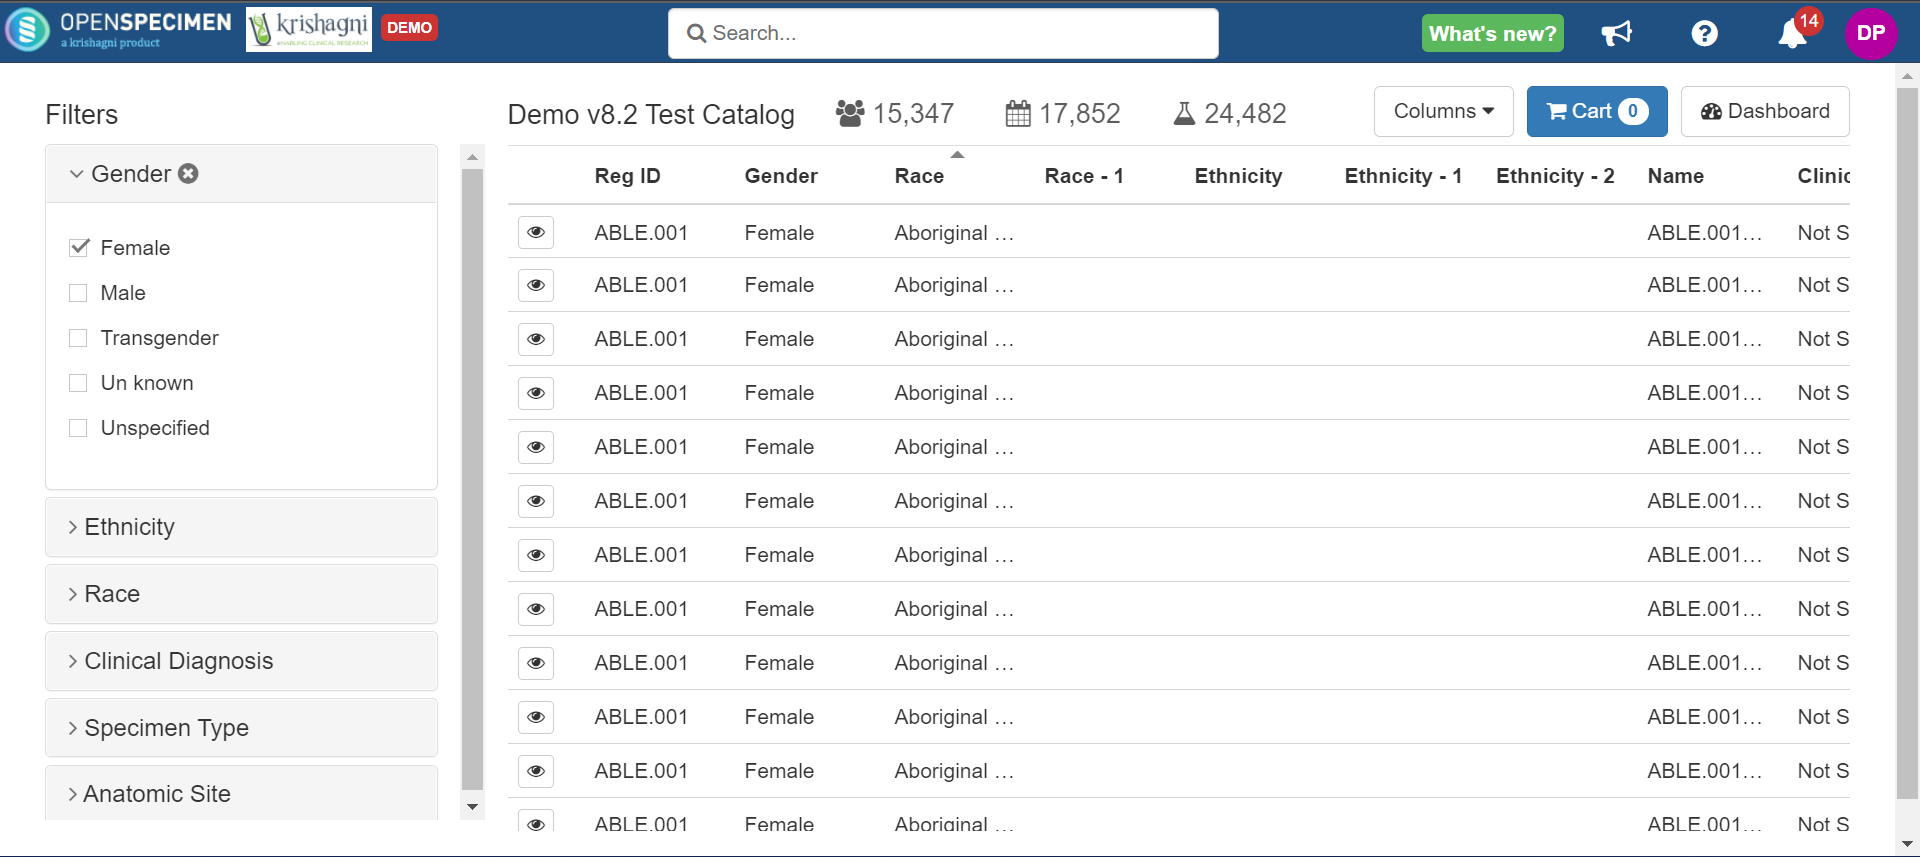
- The columns added in this query will be shown on the catalog page as below:
- Create a specimen query that will include all the required fields related to the patient, visit, and specimen.
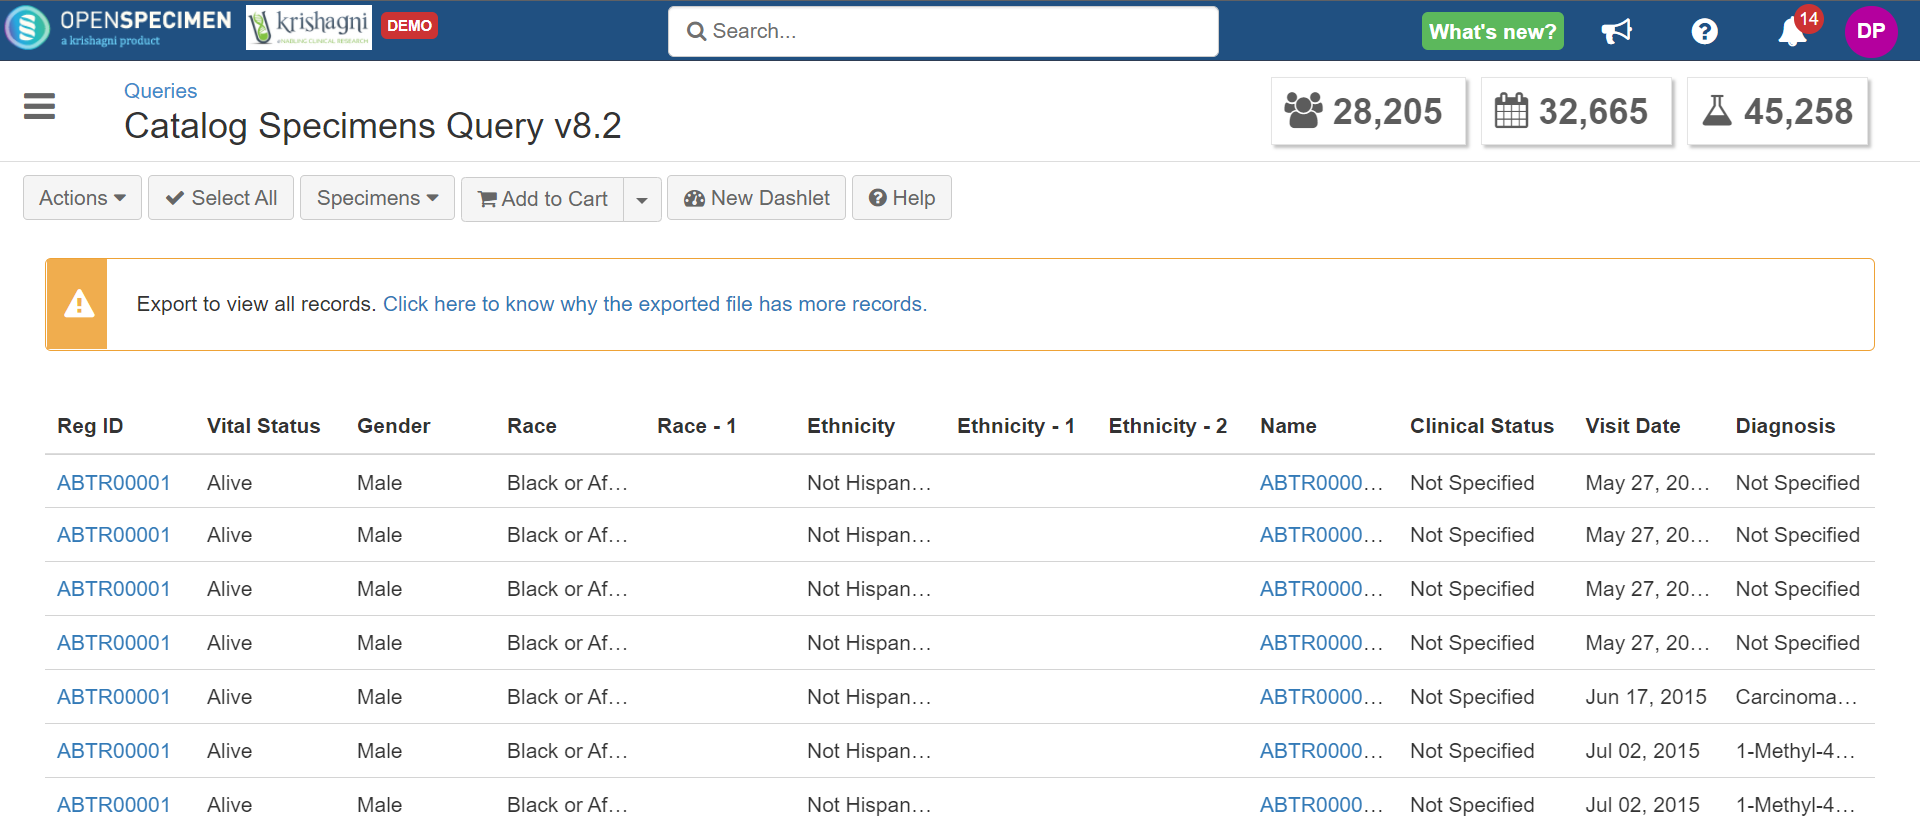
- This will appear on the specimen details screen.
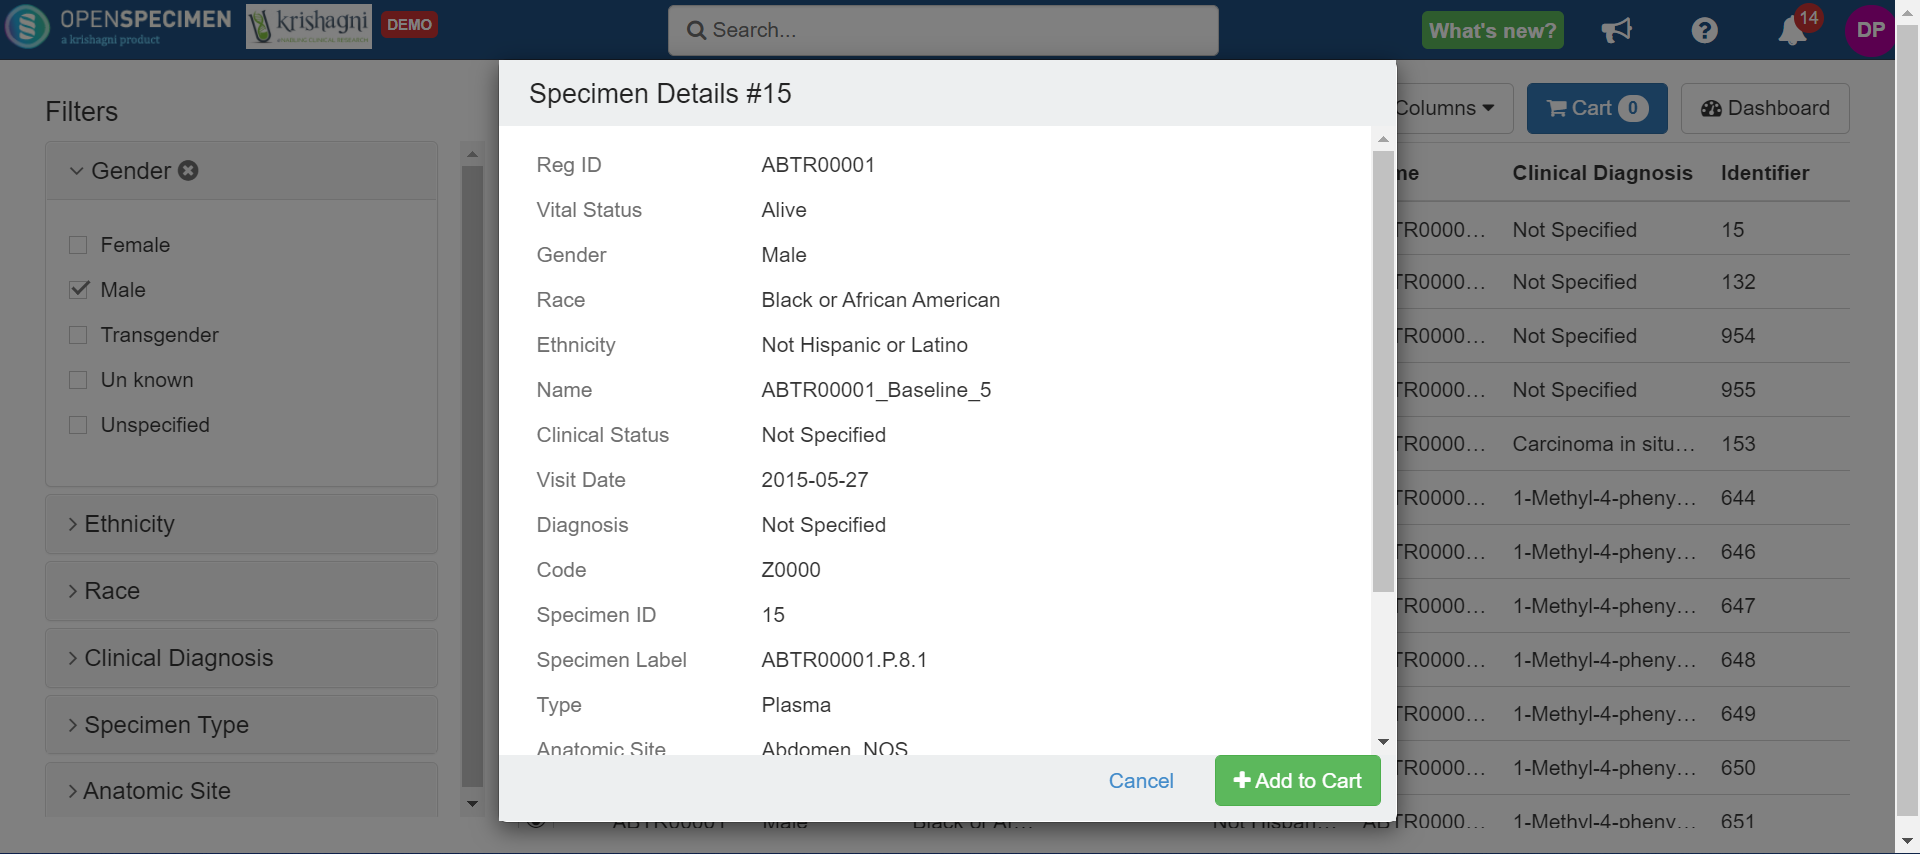
- By using the 'Add to cart option from the Specimen details screen, you can add the specimens to the cart to request.
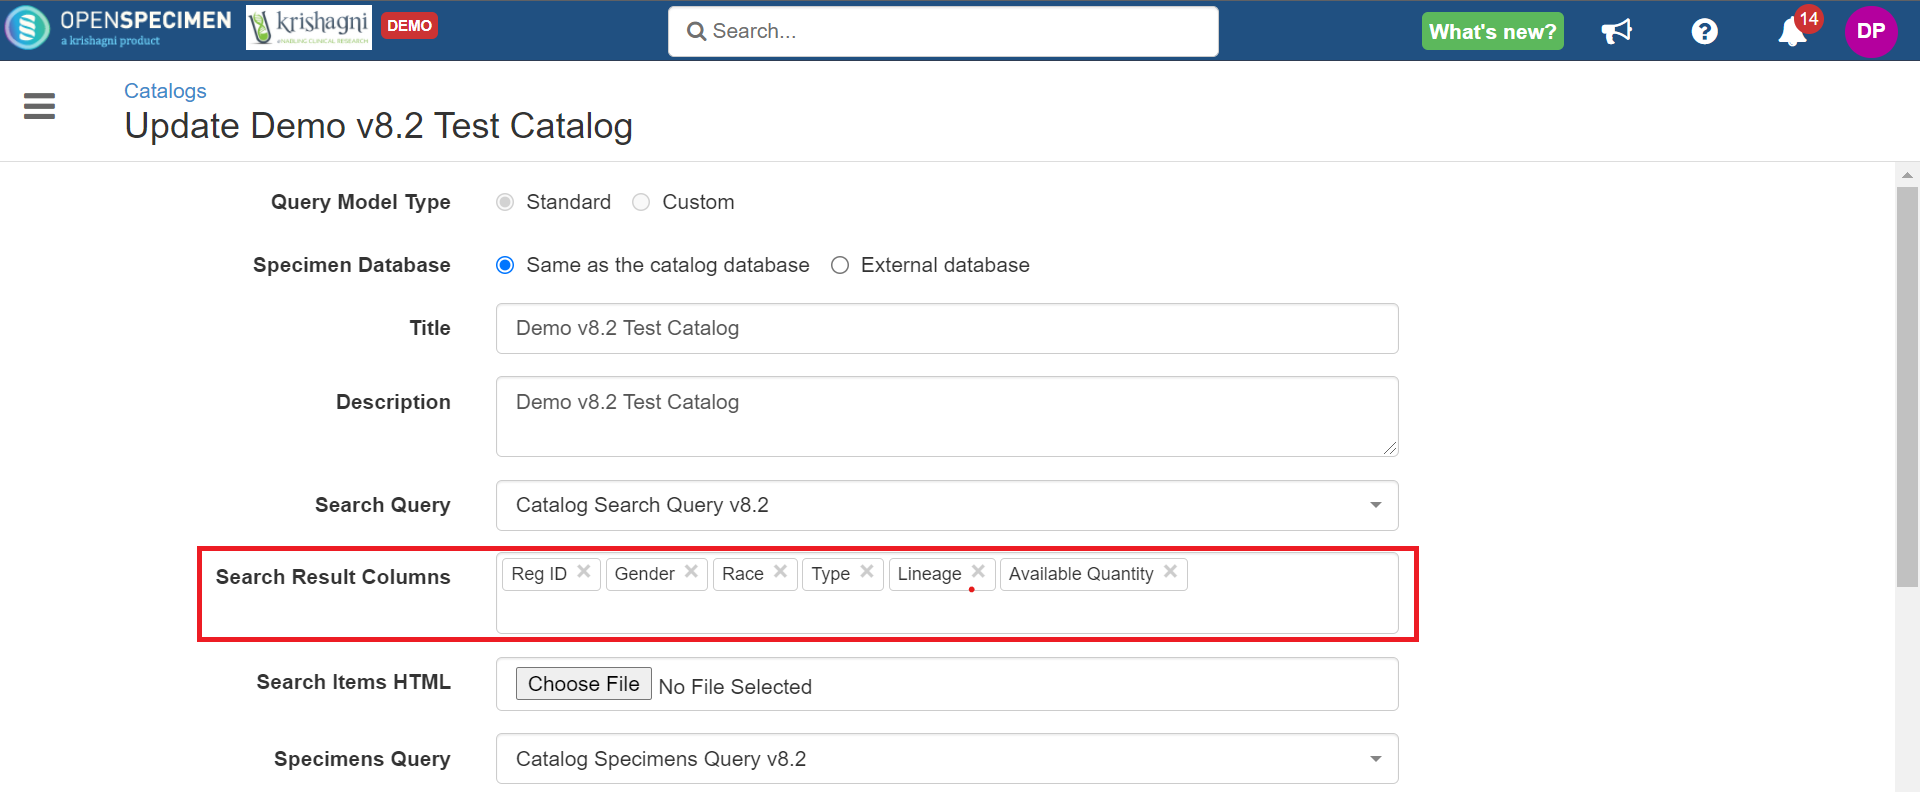
Add Columns Feature (v8.2)
When researchers' needs are based on different data, they wish to see only specific data. You can configure the catalog result view using the 'Add Column' feature.
Adding Subset of Fields on Catalog Result View
- Navigate to catalog → Edit→ Search Result Columns → Add default columns you wish to see on the catalog result view.
- This will be the subset where you can add minimum columns like specimen label, identifier, type, etc., which will be default columns on the catalog result view.
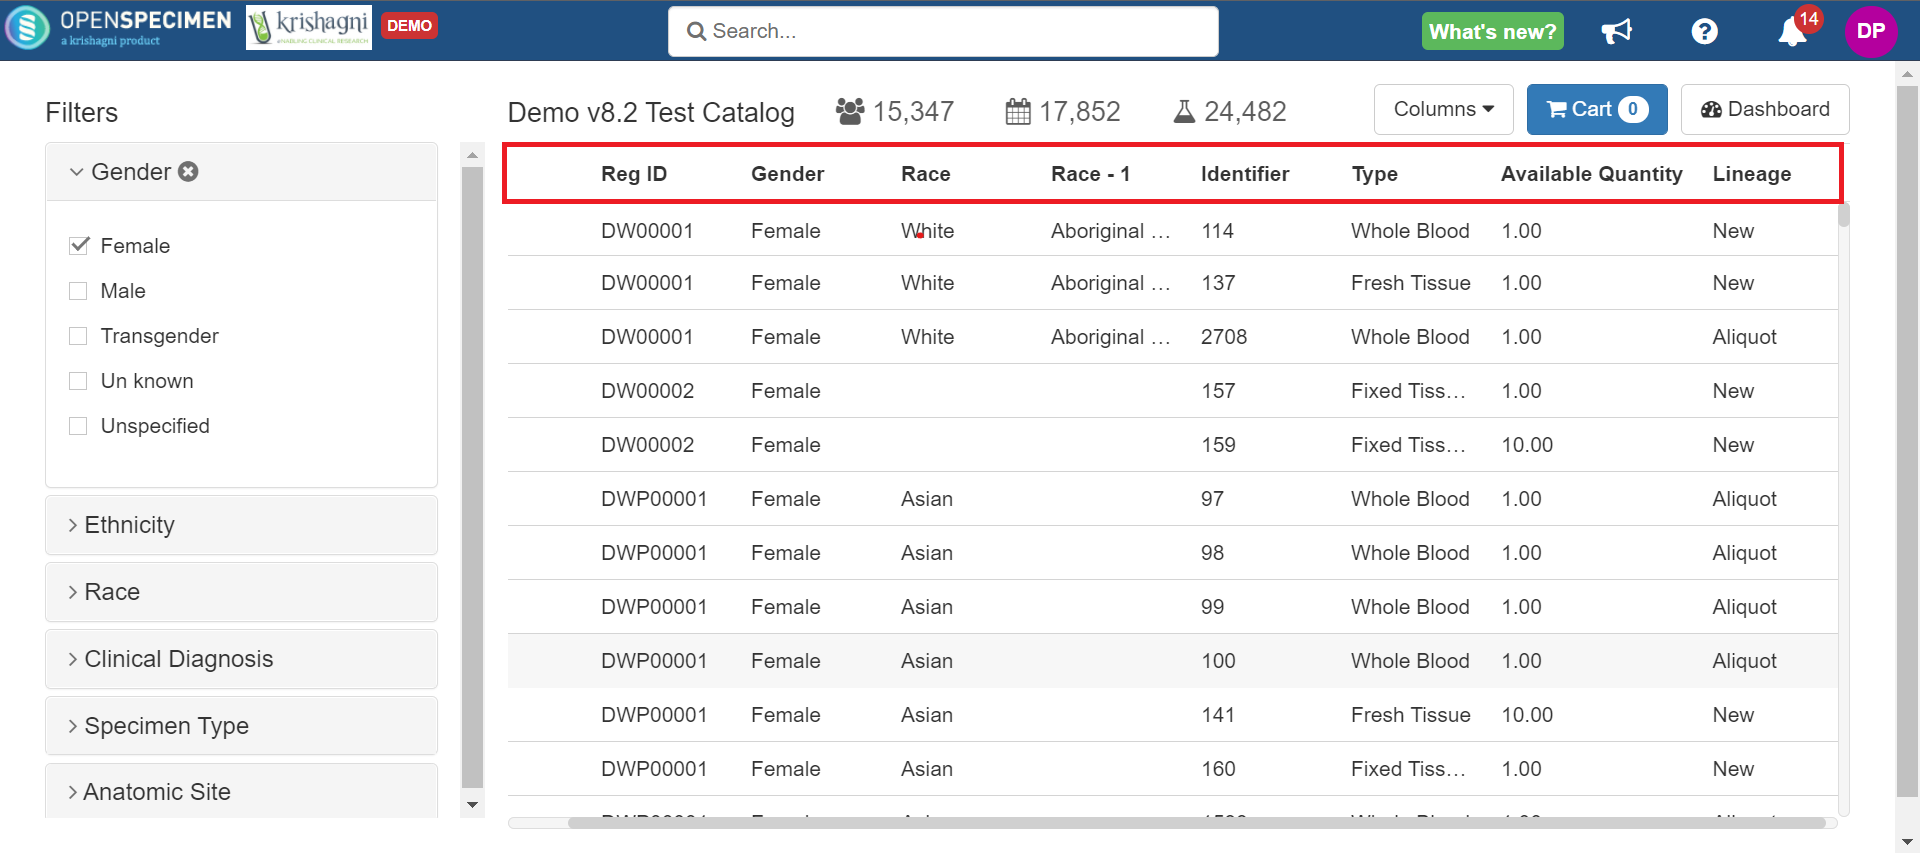
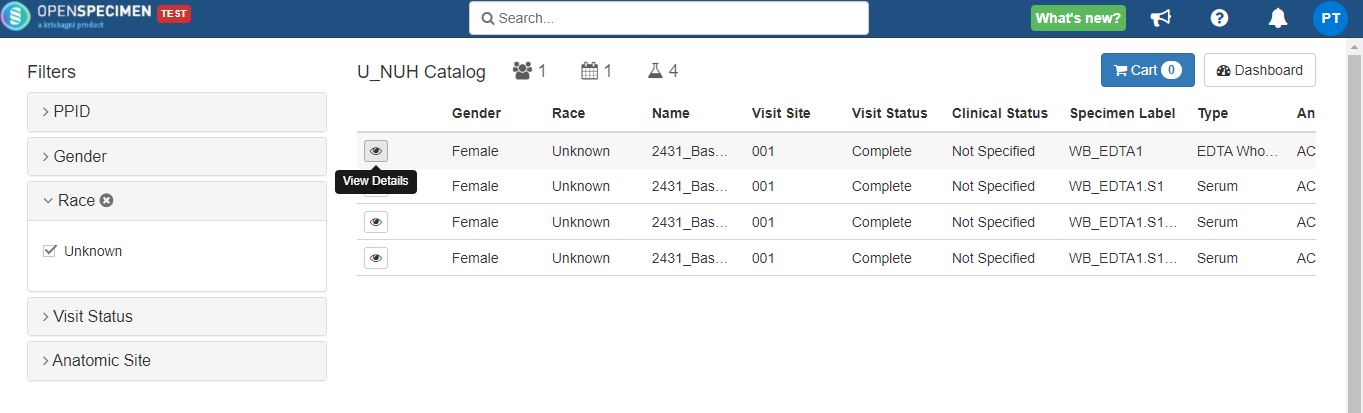
Selecting Fields based on Requirements
There is a 'Columns' button on the view catalog page where you can select extra columns that you wish to add to the catalog result page. This list is as same as the 'Search Query' columns used to create the catalog.
You can update the Search Query' if you want to add/remove any fields from this list.
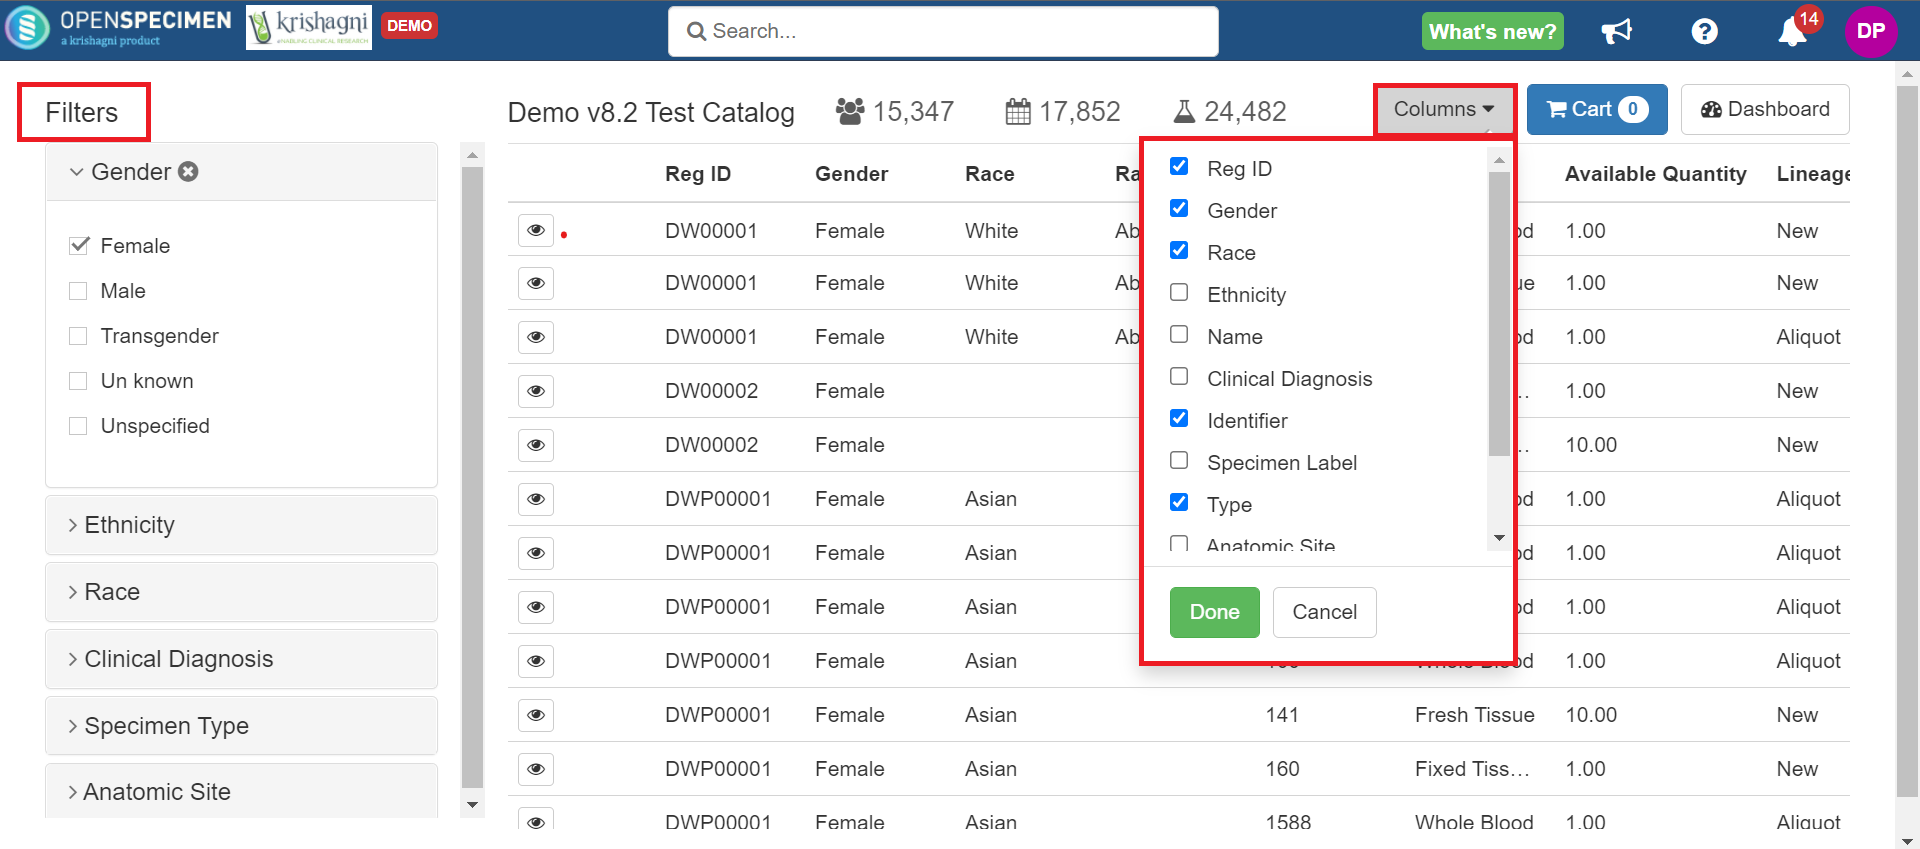
The 'Columns' button will appear only after selecting at least one filter from the catalog view.
The selected specimen are highlighted below.

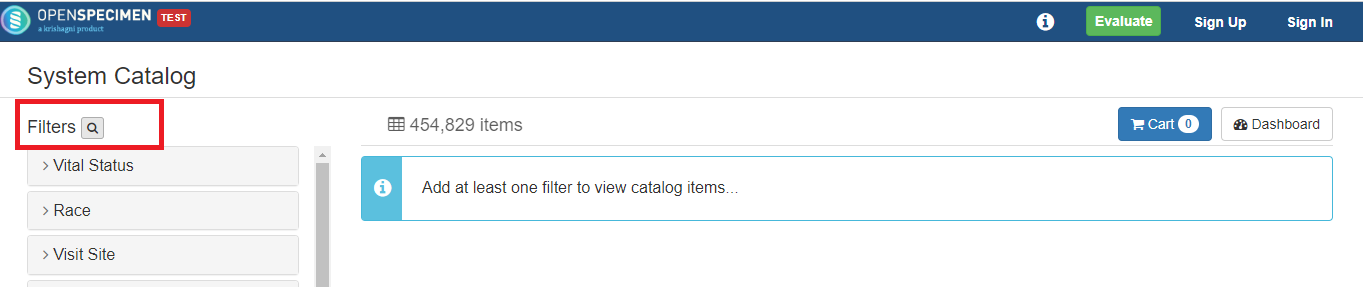
Search Filters (v9.1 onwards)
v9.1 version onwards, you can search for specific filter names while selecting them via many. It looks like the one below at the top left corner of the catalog.
Click on the search icon and type the filter name.
CP-specific Catalog
Admins can create catalogs that CP-specific users can access by setting the catalog at the CP level.
- Create a CP-specific search and specimen query. Refer to the wiki a page for more information on queries.
- Create a catalog using the CP-specific search and specimens query.
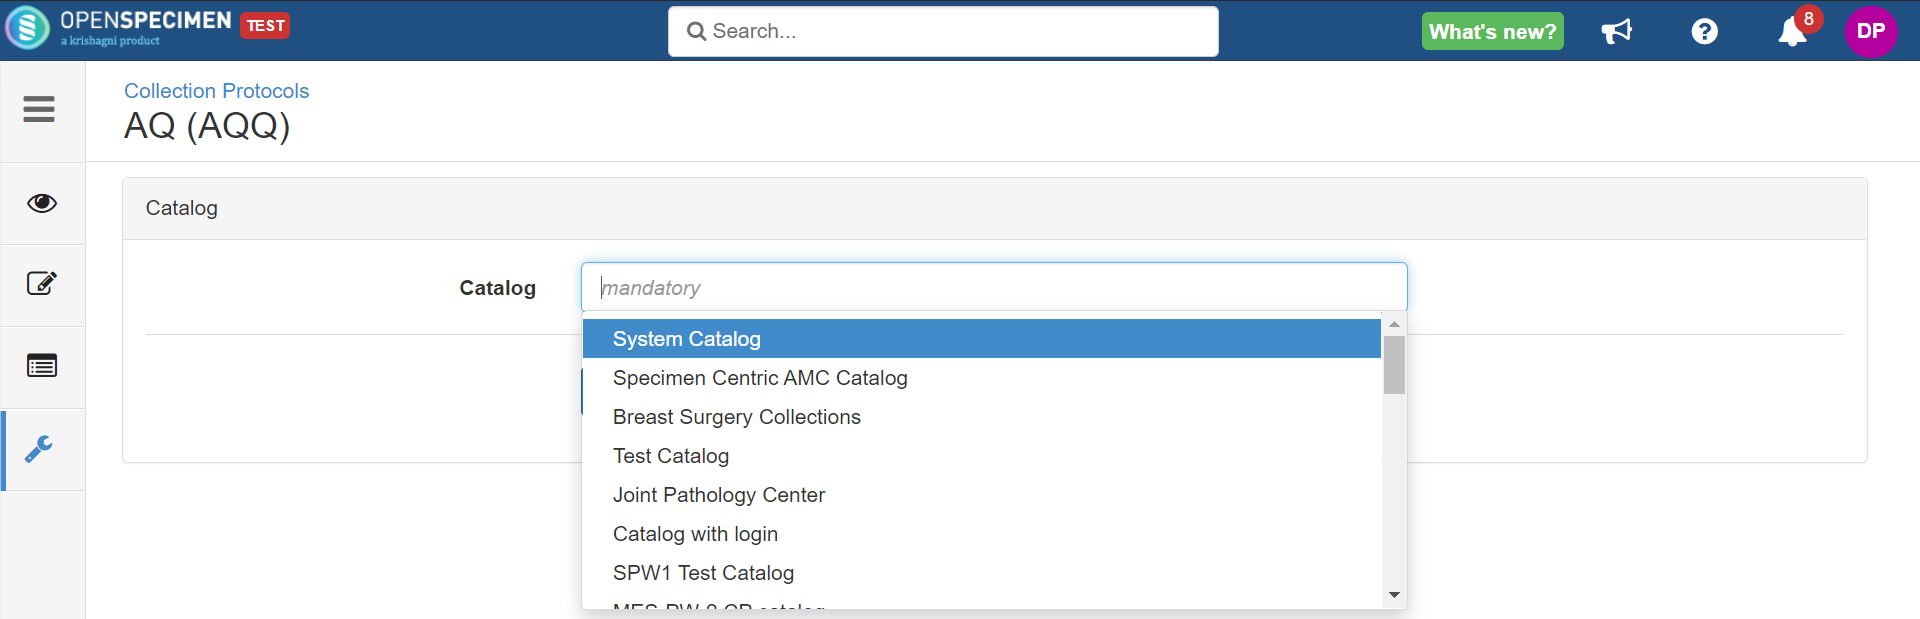
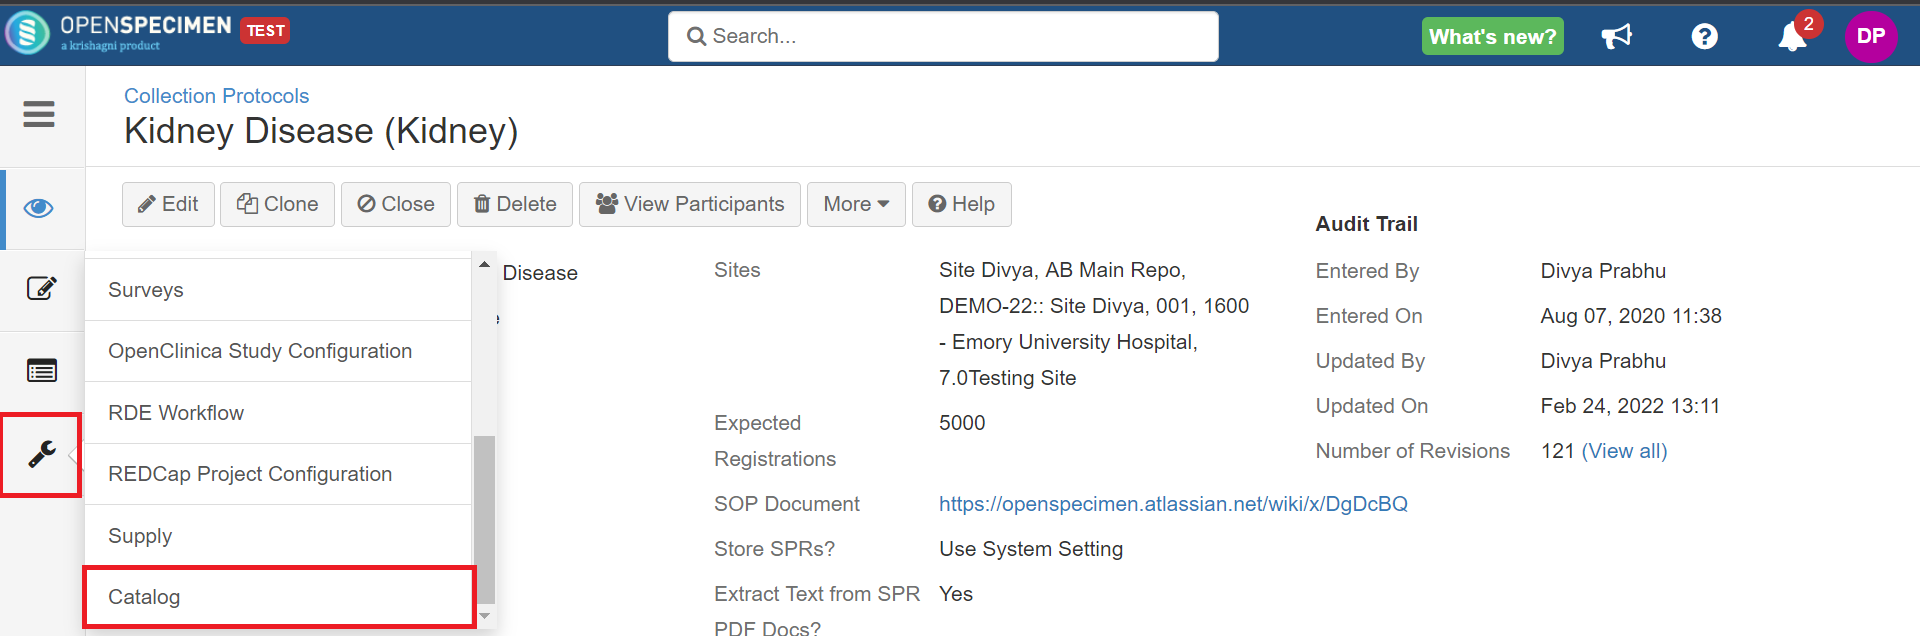
- Go to the Collection Protocol overview page → Settings → Catalog
- Click on the 'Add' button, select the catalog created with CP-specific queries and click on the 'Save' button.
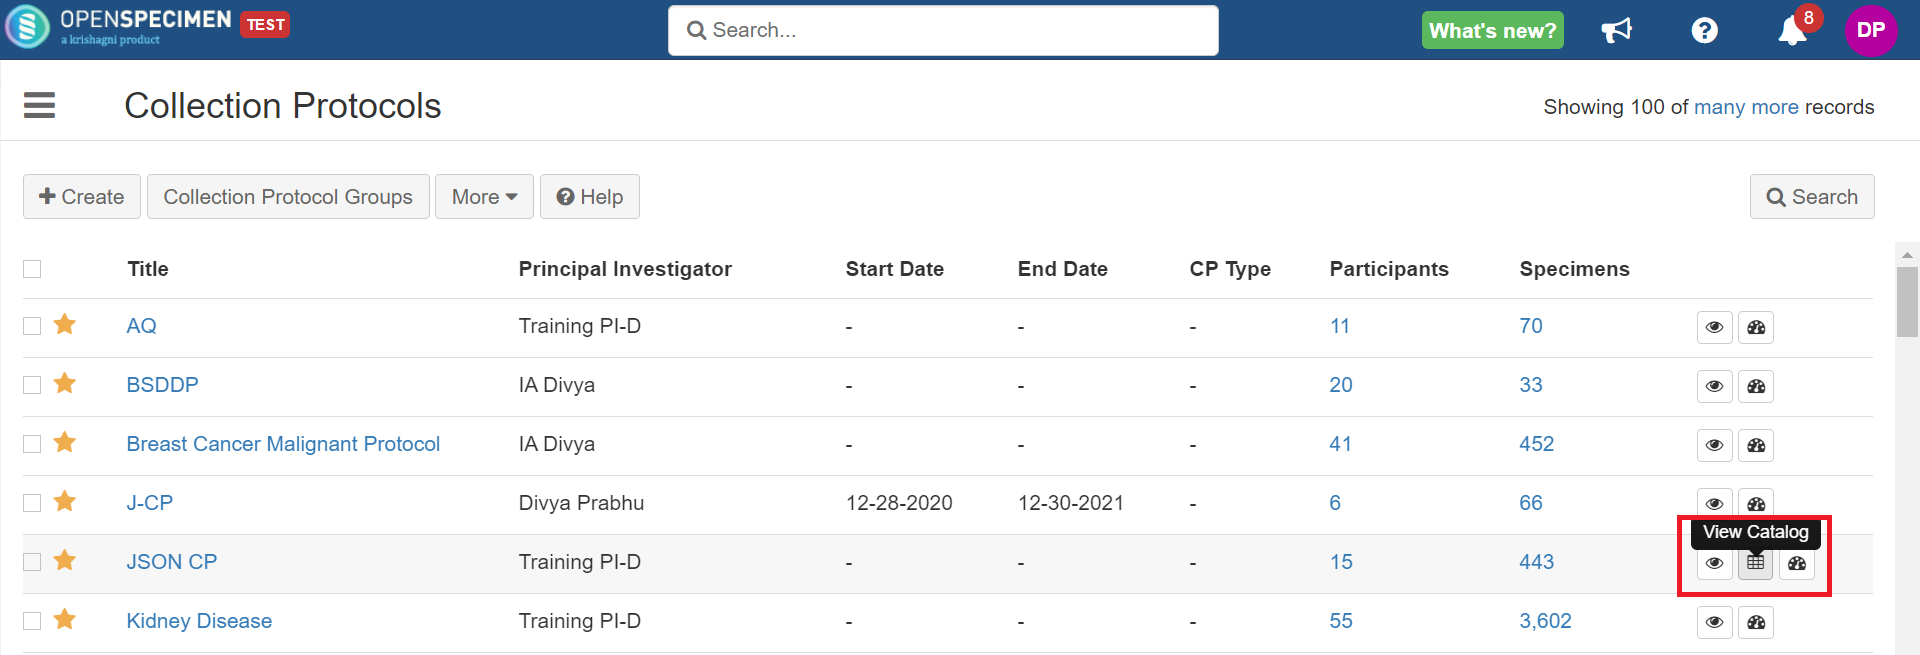
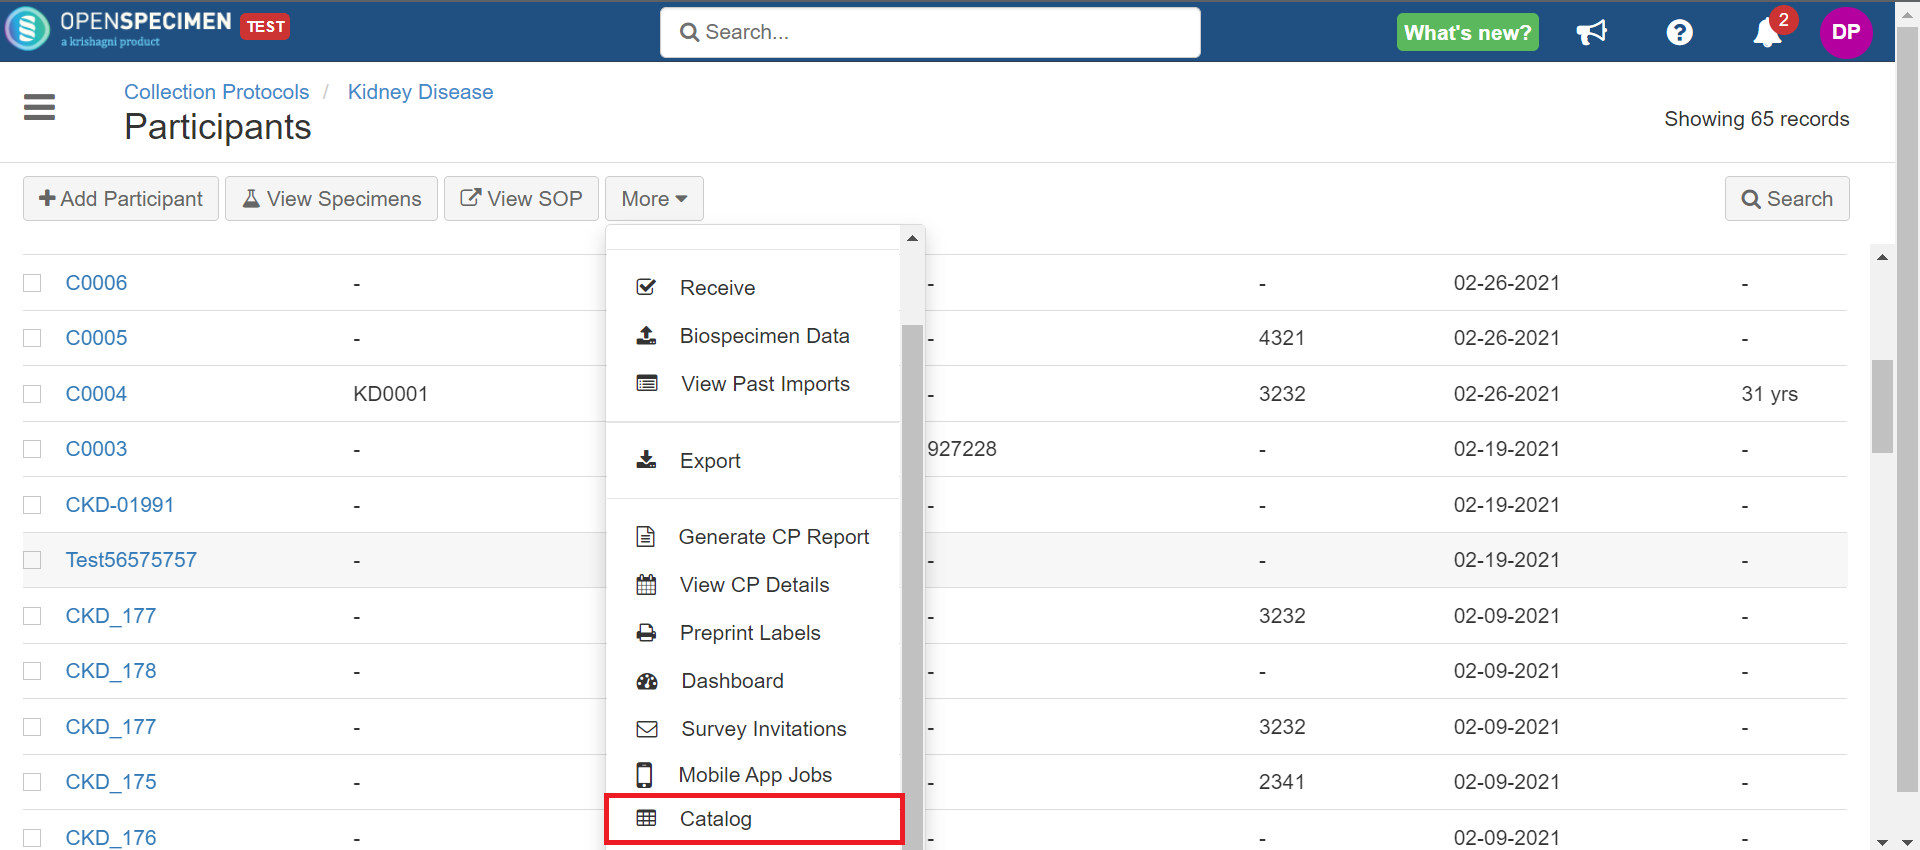
- On the collection protocol list page, the user can view the 'View Catalog' icon and other icons. Click the 'View Catalog' icon.
If you have built a search query for a specific CP by mentioning the CP name in "Select a Collection Protocol", and when you go to the query results, it shows the data within that CP. Whereas when you navigate to the catalog, it displays all specimens across the system. It ignores the CP you specified in the 'Select a Collection Protocol' query.
To solve this issue, you can do one of the below-mentioned options:
#1 Link the catalog to the CP and navigate to the catalog within the CP as shown below:
OR
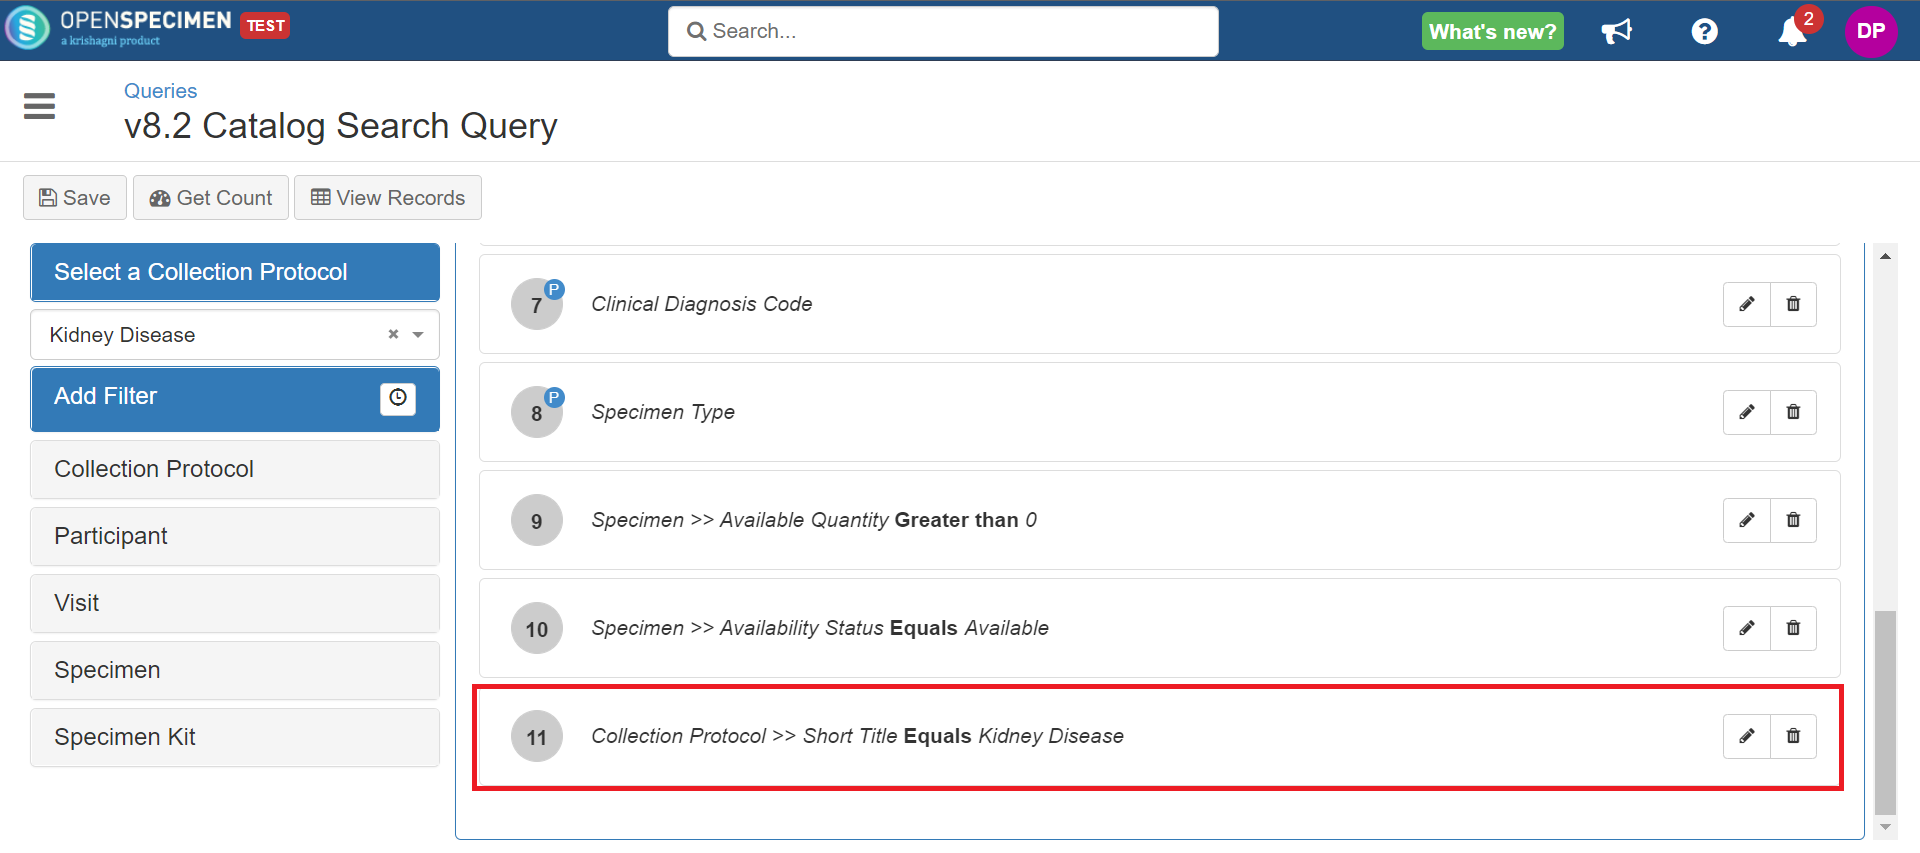
#2 Within your query, add a filter as below:
Collection Protocol >> Short Title Equals Kidney Disease
Set Default Catalog
Any public catalog can be set as 'Default catalog', which appears when the OpenSpecimen login page is accessed.
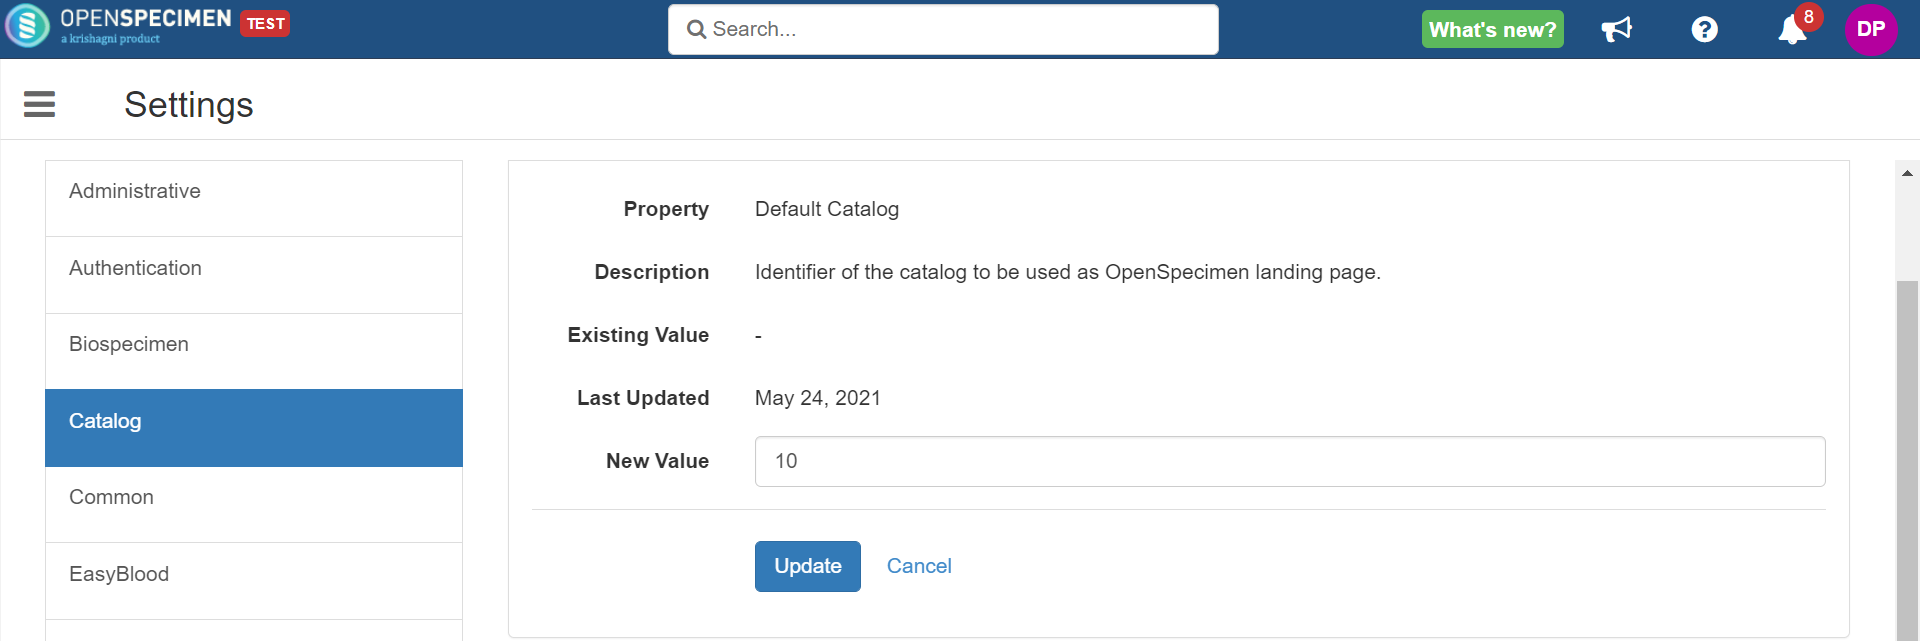
- Navigate to 'Settings'.
- Click on the 'Default Catalog' property from the 'Catalog' settings module.

- Add the catalog's identifier to be set as the default catalog under the 'New Value' field and click on the 'Update' button.
Leave a comment at the end of this page or email contact@krishagni.com