Steps to import the CSV
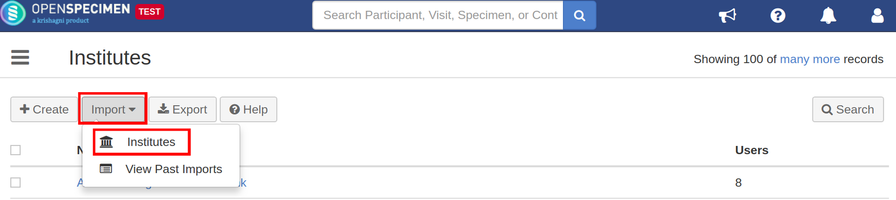
- Login as a Super Admin user and go to the Institute's list page.
- Click on the 'Import' button and select option 'Institutes'.
- Click on 'Download Template File' to download the template file from the 'Import Institutes' page.
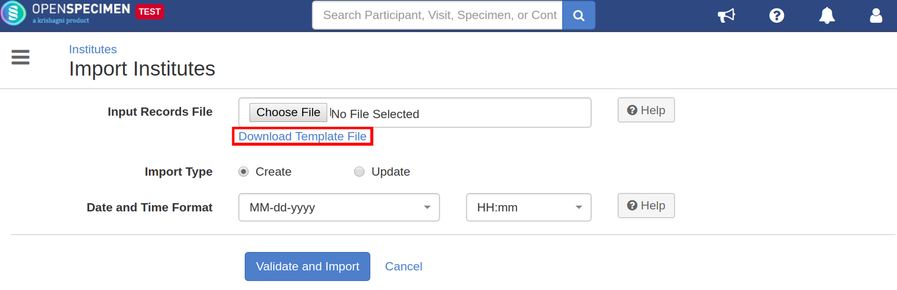
- Enter all valid data in the template file as mentioned in the below 'Data Dictionary' table.
- Upload the filled template file in the 'Input Records File' field, select 'Import Type' as 'Create' to create or 'Update' to update institutes.
- Click on the 'Validate and Import' button.
- Refer 'Import status' to check the status of the import job.
Sample CSV
Data Dictionary
Column Name | Datatype | Mandatory? (Create) | Mandatory? (Update) | Description | Permissible Values | Validations |
|---|---|---|---|---|---|---|
| Identifier | Number | No | Yes | System auto-generated unique number for every Institute. | It can be left blank during add. This is used only for updating the institute name. | |
| Name | String | Yes | Yes | Name of the Institute. | Should be unique within the instance. | |
| Activity Status(v7.0) | String | No | No | Activity status of the institution. | Active/Disabled | To delete the institutions, update the activity status to 'Disabled'. |