Introduction
Manifests are PDF files that can be downloaded or printed after specimen collection, distribution, or shipment.
Prerequisites
You need to add the html file type on the list of file types allowed in the OpenSpecimen server. You can follow the below steps for it.
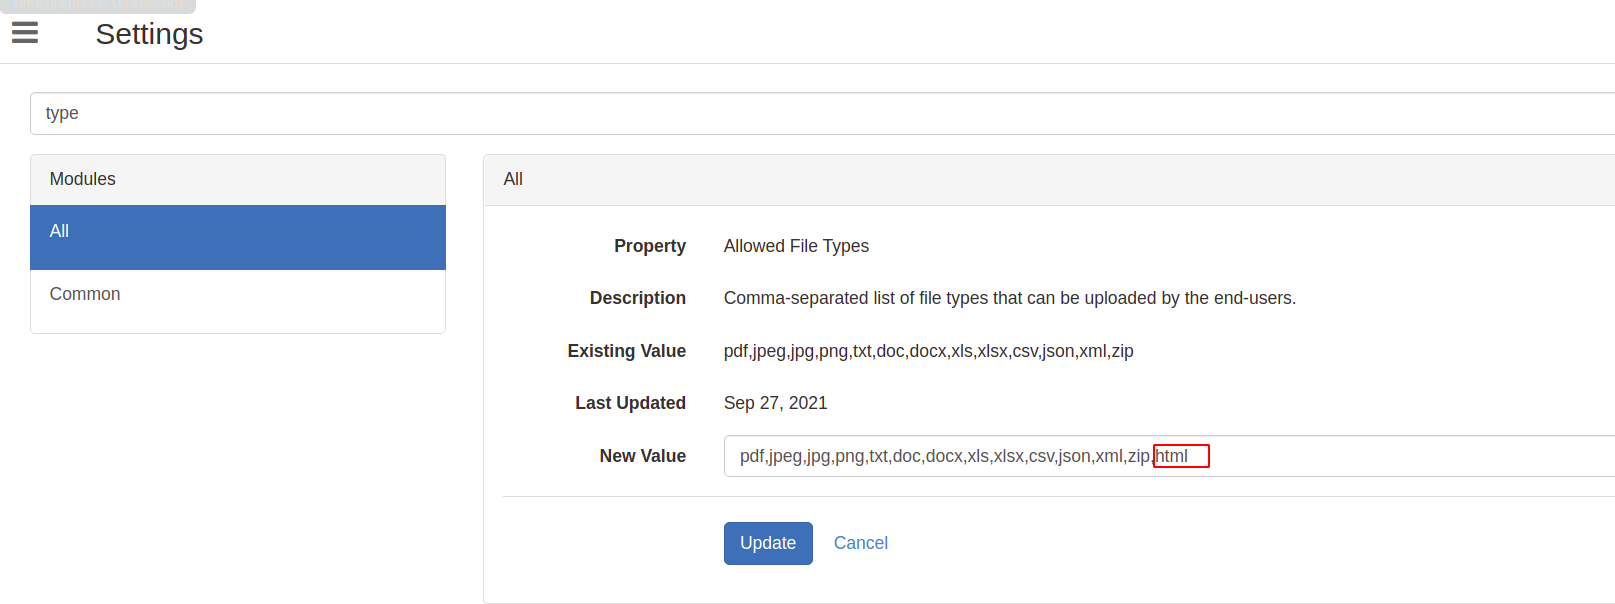
Go to ‘setting card’ from the homepage and search for ‘type.’
You will see a property named ‘Allowed File Type.’
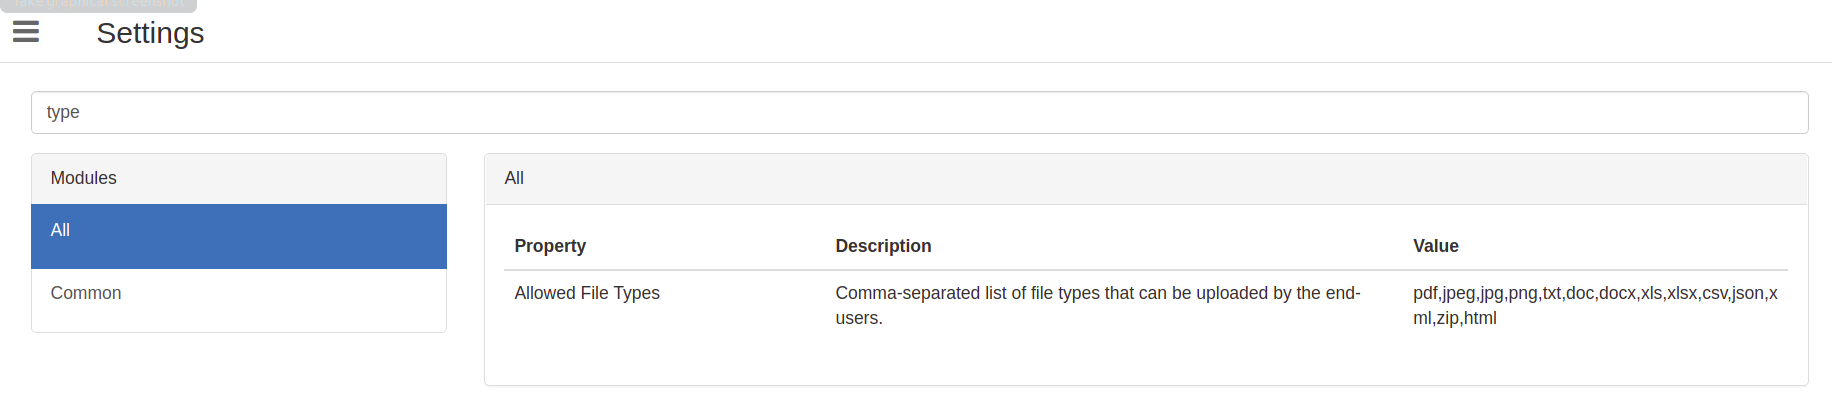
Click on it and add html in the list separated by a comma.
Click on an ‘Update.’
Specimen Collection Manifest
Since the processing techniques vary, generating protocol-specific manifests should be possible. The manifests can be configured based on protocol needs either at the system or CP level. It can contain any data related to specimen, visit, or participant - including custom fields.
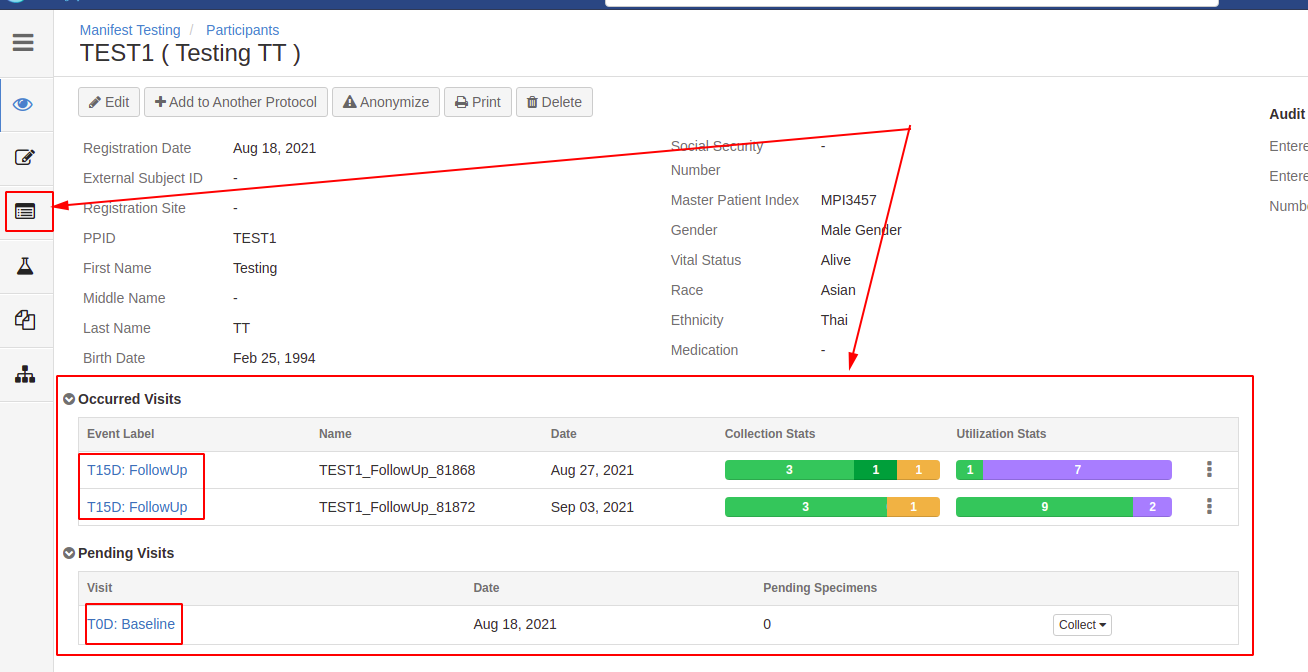
A clinic coordinator who has reading access to the visit can download a “Specimen Collection Manifest” from the participant’s visit page.
Specimen Distribution Manifest
Similarly, it is possible to configure the distribution manifests either at the DP or system level. The distribution manifest can be downloaded from the Order overview page.
Specimen Collection Manifest
Downloading Specimen Collection Manifest from Visit Page
Click on the “Collection Protocol“ card on the homepage.
Click on a CP of choice and select the participant for whom you want to generate the manifest.
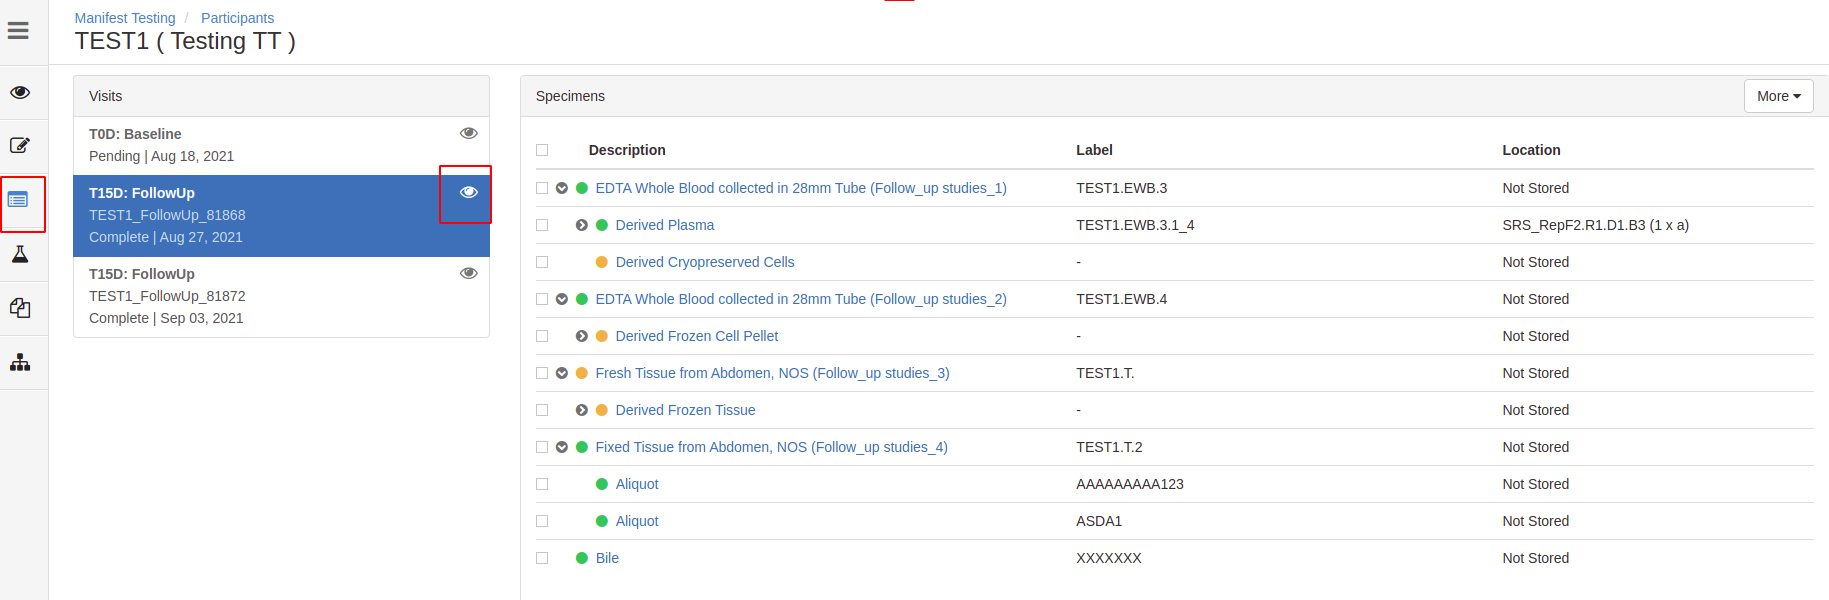
There are two ways to access the Visit Overview Page from Participant Overview Page. Choose the visit of your choice directly from the Participant Overview Page Or click on the visit tab on the left sidebar and select the desired visit from the list by clicking the eye icon.
Participant Overview Page
Visit list View
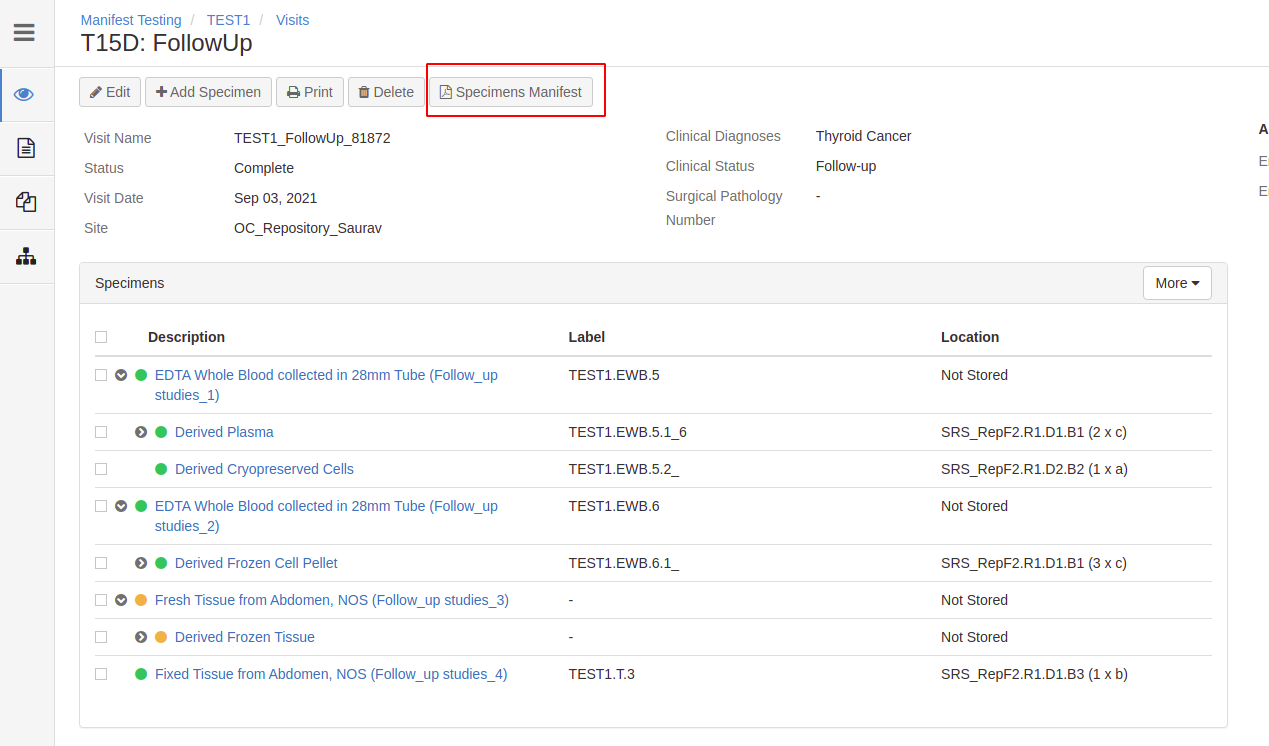
4. Finally, click on “Specimen Manifest“ to download the Specimen Collection Manifest.
Visit Overview Page
Default Specimen Manifest PDF

Downloading the default Specimen Manifest Template
You can also export manifest templates from both levels in the following ways:
System-Level Specimen Manifest Template
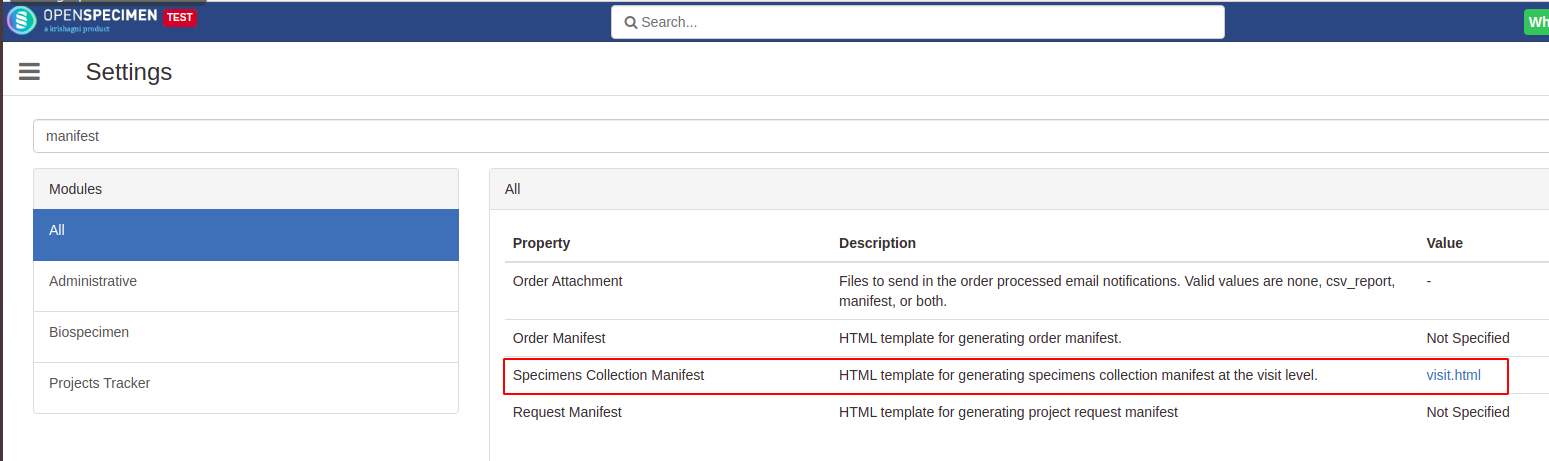
Click on the “Settings “card on the homepage.
Search “manifest” and click on visit.html

CP-Level Specimen Manifest Template:
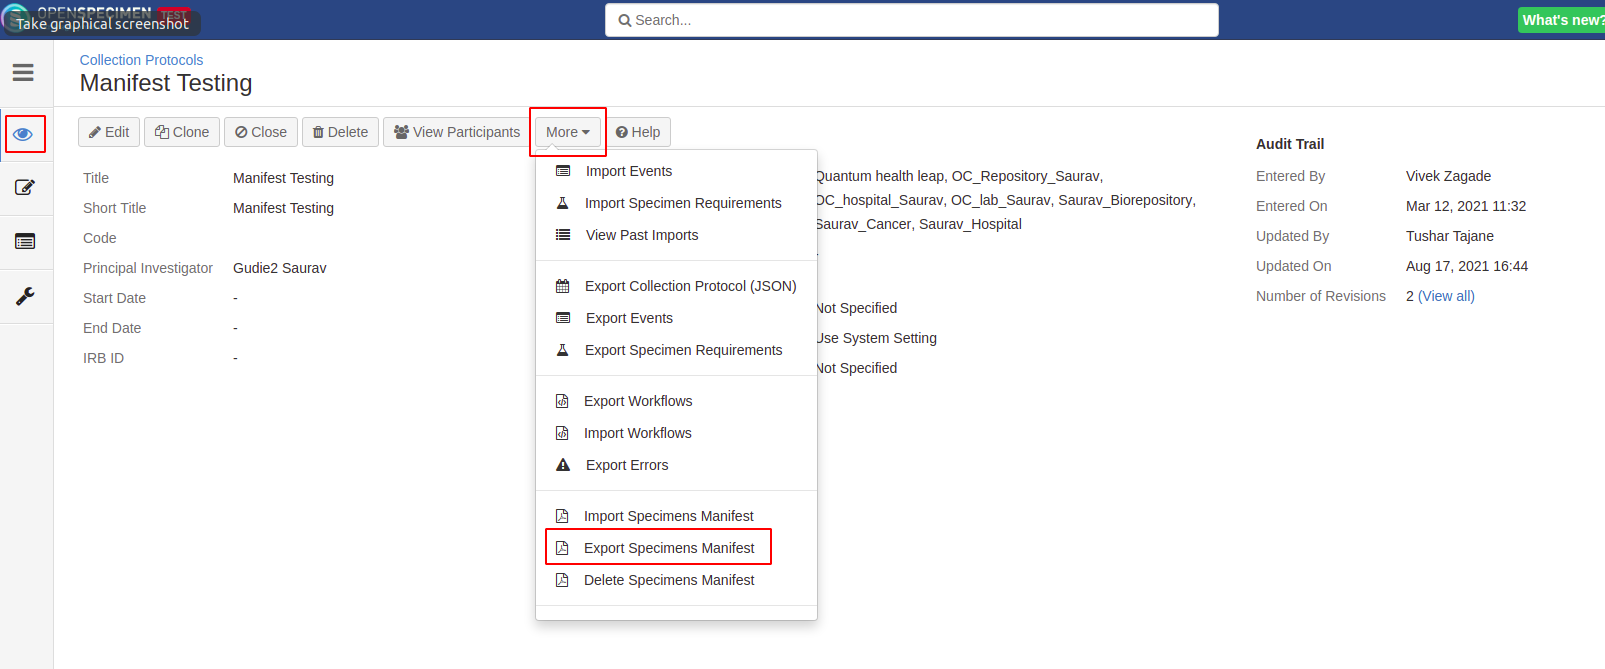
Click on the “Collection Protocol “card on the homepage.
Go to the Overview Page of the CP of your choice.
Click on the “More “option and select the “Export Specimens Manifest“ option. It will download CP-specific manifest template for that CP.
CP Overview Page
Configuring the manifest at System and CP-Level
Before configuring the manifest, it is good to have a backup file of the working manifest template.
The system-level template will be used when no template is configured at the CP level.
The manifest template can be configured in the following steps:
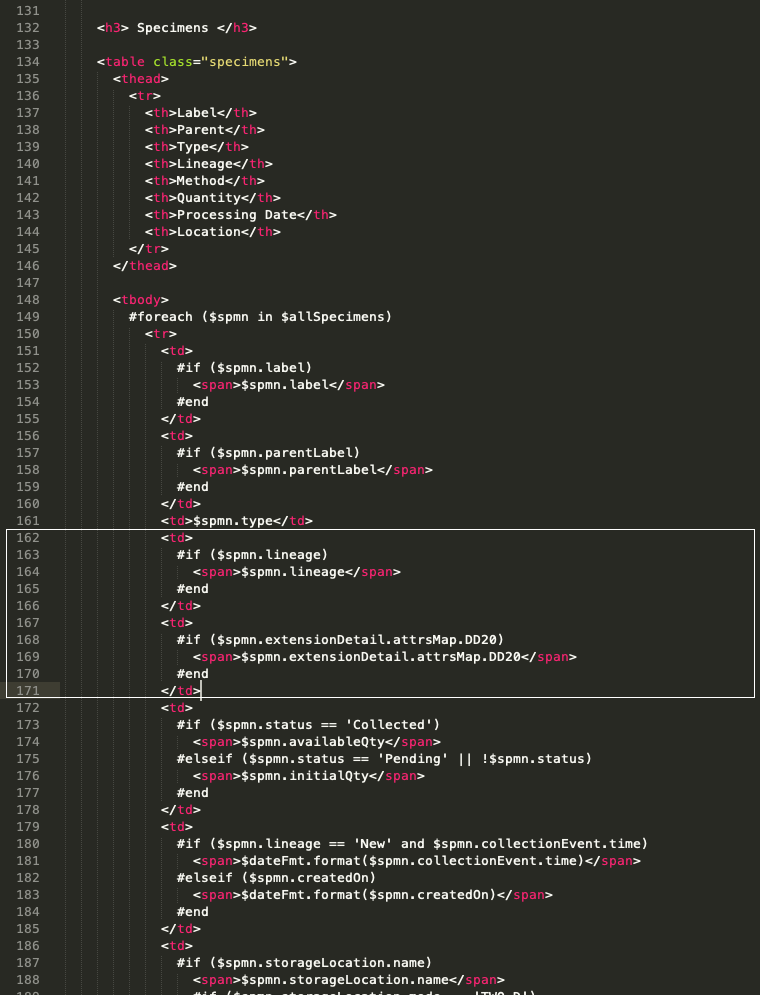
Download the HTML file of the manifest template by following the above steps.
Open the template in the editor of choice. Then, add additional fields of your choice, as shown inside the box below.
After saving the document, you can configure the manifest at the system or CP level.
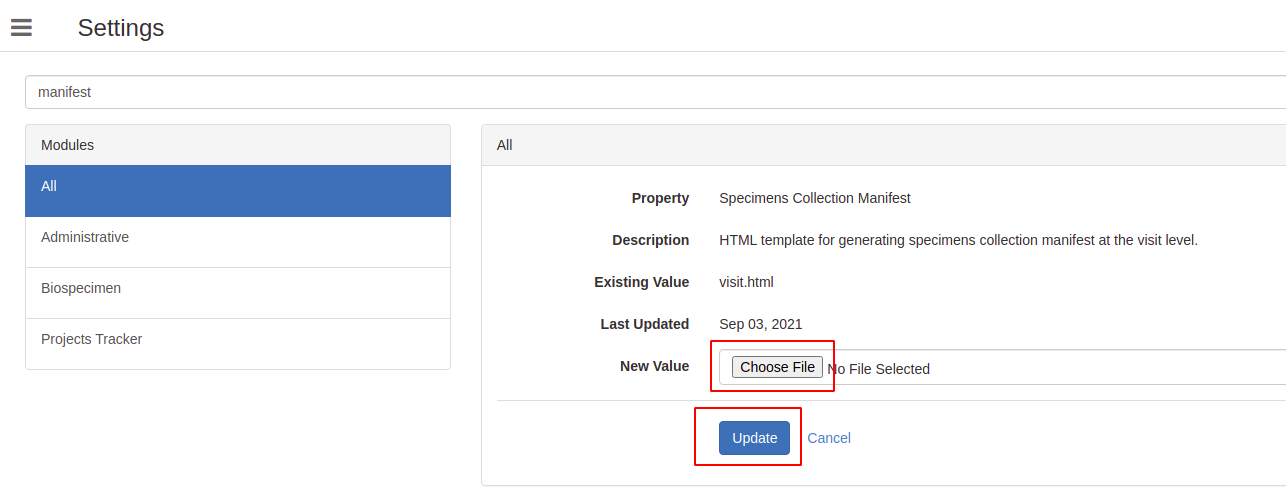
To configure the manifest at the system level, go to the “Setting” from the homepage, search for “manifest,” and select “Specimens Collection Manifest.” Browse the file, and click on the update button to upload the file.
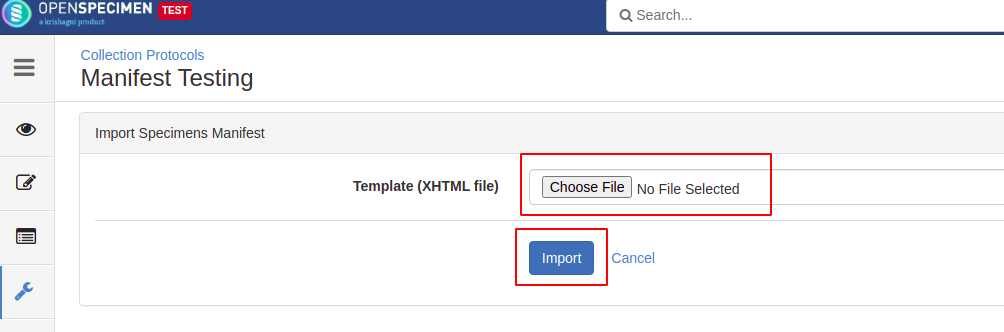
To configure the manifest at the CP-level, go to the CP Overview Page, click on the “More” option, and select “Import Specimen Manifest.” Browse the file and click on the import button to upload the file.

To review the changes, you can download the updated manifest pdf by following the above steps.
Supported Fields
Specimen manifest
https://docs.google.com/spreadsheets/d/1yzEDCO4uwpSHOO1lcPpouNQH-SmaL_hPsV0QZVuEaMs/edit?usp=sharing