Versions Compared

Key

  • This line was added.
  • This line was removed.
  • Formatting was changed.

...

Expand
titleClick here to expand..
  • The site admin receives a request for specimens from various resources.

  • If researchers are not given direct access to OpenSpecimen, the request might come via phone or email.

  • Admin can search for the specimens of interest through the system, create a ‘Cart’ of all the specimens, and distribute them using any distribution protocol.

Pre-requisites

  • Create a cart of specimens to be distributed. Refer ‘Add to cart’ page.

  • Create a user with a ‘Site Administrator’ or ‘Technician’ Role.

Workflow

  • Go to the carts list page and click on the newly created cart, which has the specimens to be distributed.

  • Select the specimens from the list, click on the ‘Actions’ button, and select the option ‘Distribute.’

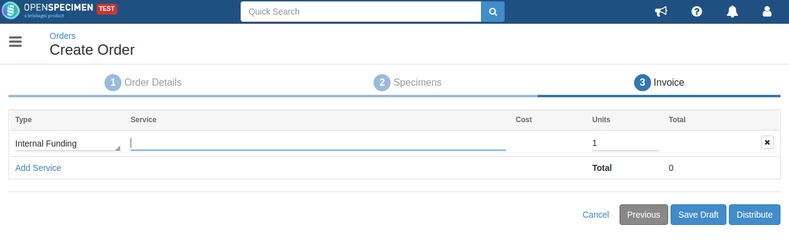
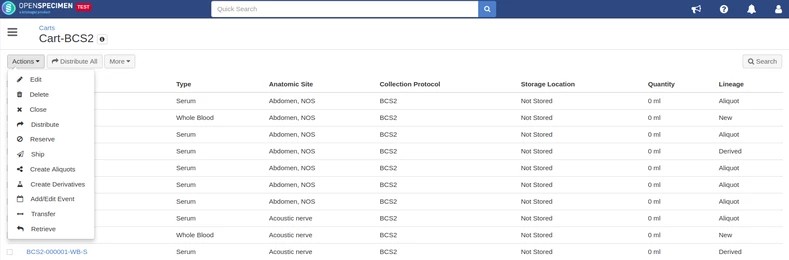
Note: By clicking the ‘Distribute All’ button, you can distribute all the specimens from the cart. Refer to the Distribute specimens using the 'Distribute All' feature wiki page for more details.

  • You can use the ‘Distribute Now’ feature from the dropdown shown in the below popup image that will distribute the specimens directly, or else you can click on the 'Add More Details' option and follow steps from #4 to add more details about the order.

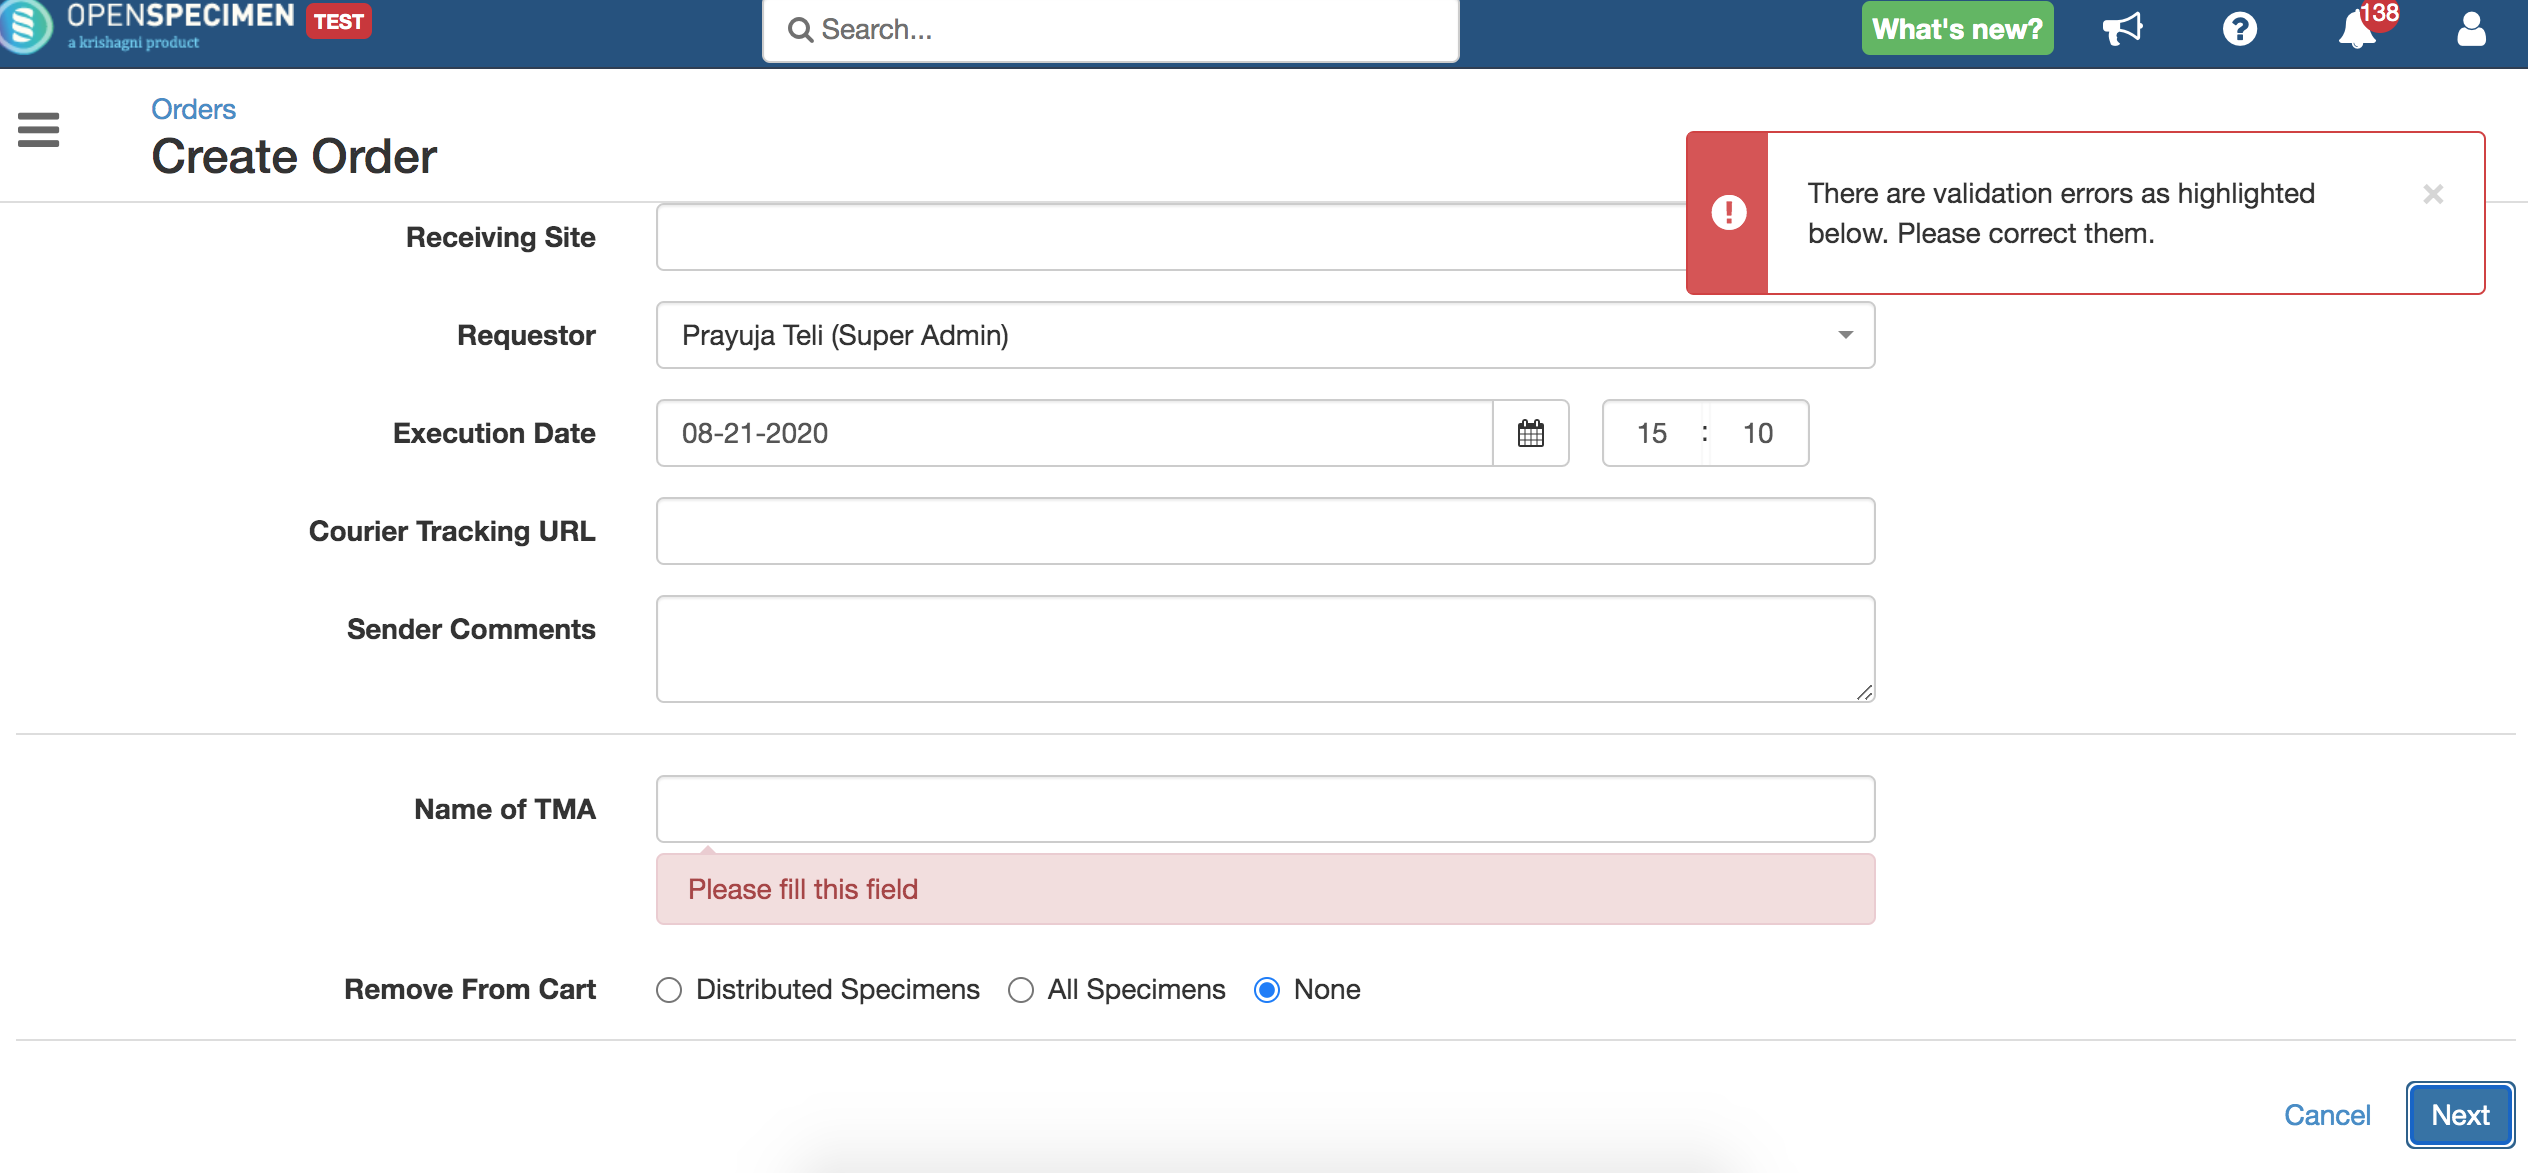
Note: If you get any error messages on clicking ‘Save Draft' or ‘Distribute,' the error messages stay until you click on the 'Dismiss’ option. The popup also allows you to copy the message to the clipboard by clicking on the 'Copy to Clipboard’ option.

  • Enter all valid details on the ‘Create Order’ page and click on the ‘Next’ button OR click on the 'Distribute' button for direct distribution.

  • If you add any mandatory custom field such as ‘Name of TMA,’ then the system will throw an error message of validation on the order page.

  • You can remove specimens from the cart using the 'Remove From Cart' option from the order add/edit page.

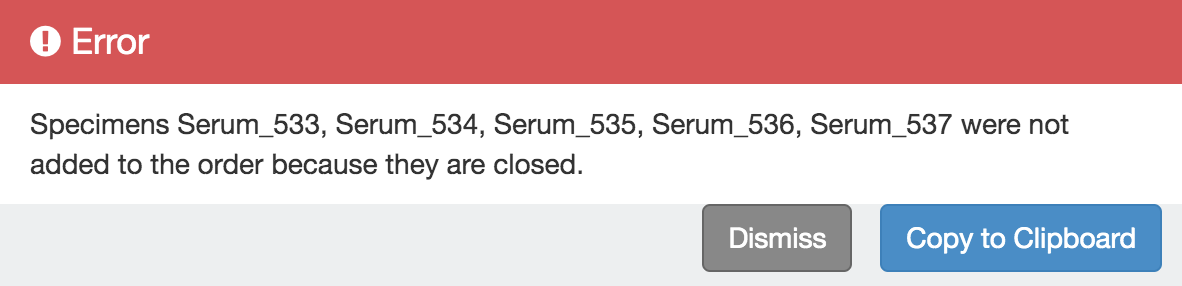
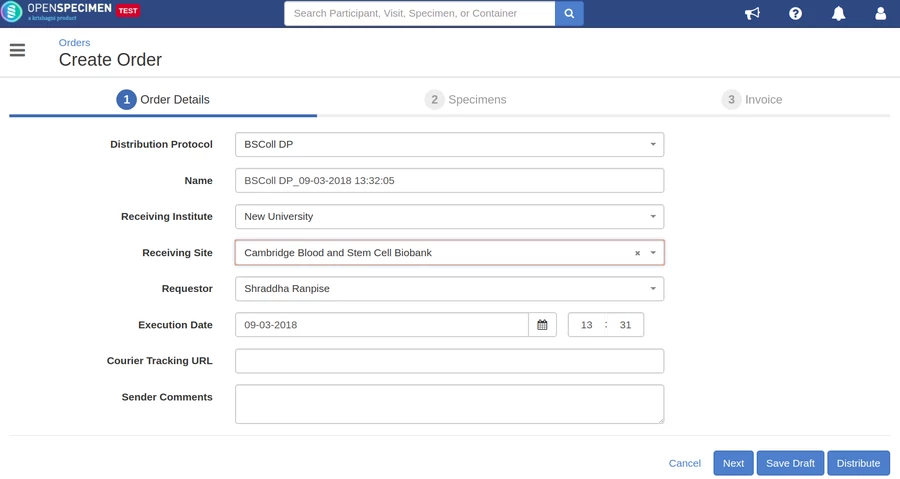
Note: While creating the order from specimen pages, the 'Distribute' button will appear on the first 'Order Details' page of the order wizard. Clicking on the 'Distribute' button, you can directly distribute specimens without forcing them to navigate through other steps of the order wizard.

  • Add any specimens if needed to the list and click on the ‘Next’ button.

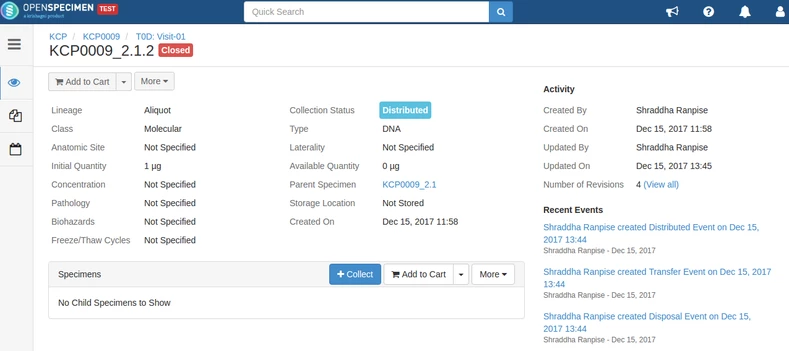
The system displays an error message when the closed specimens are automatically removed from the order, and only open specimens are displayed on the create orders specimen list view page.

Info

Info: 'Distribute All’ option can be used for large distributions > 500 specimens. If the ‘Distribute All’ option is selected, the specimens list will not be displayed during distribution. Refer to wiki Distribute specimens using the 'Distribute All' feature for more details.

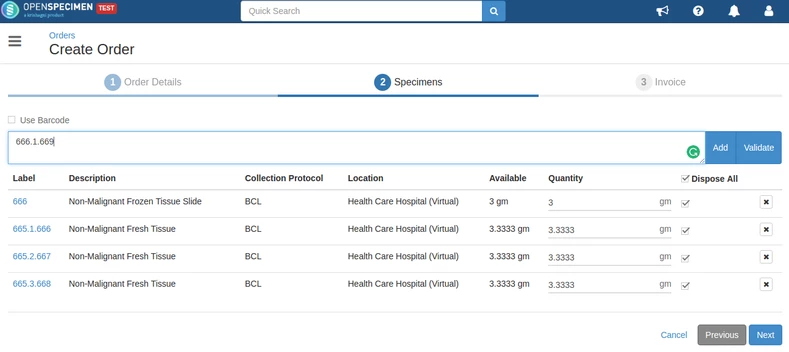
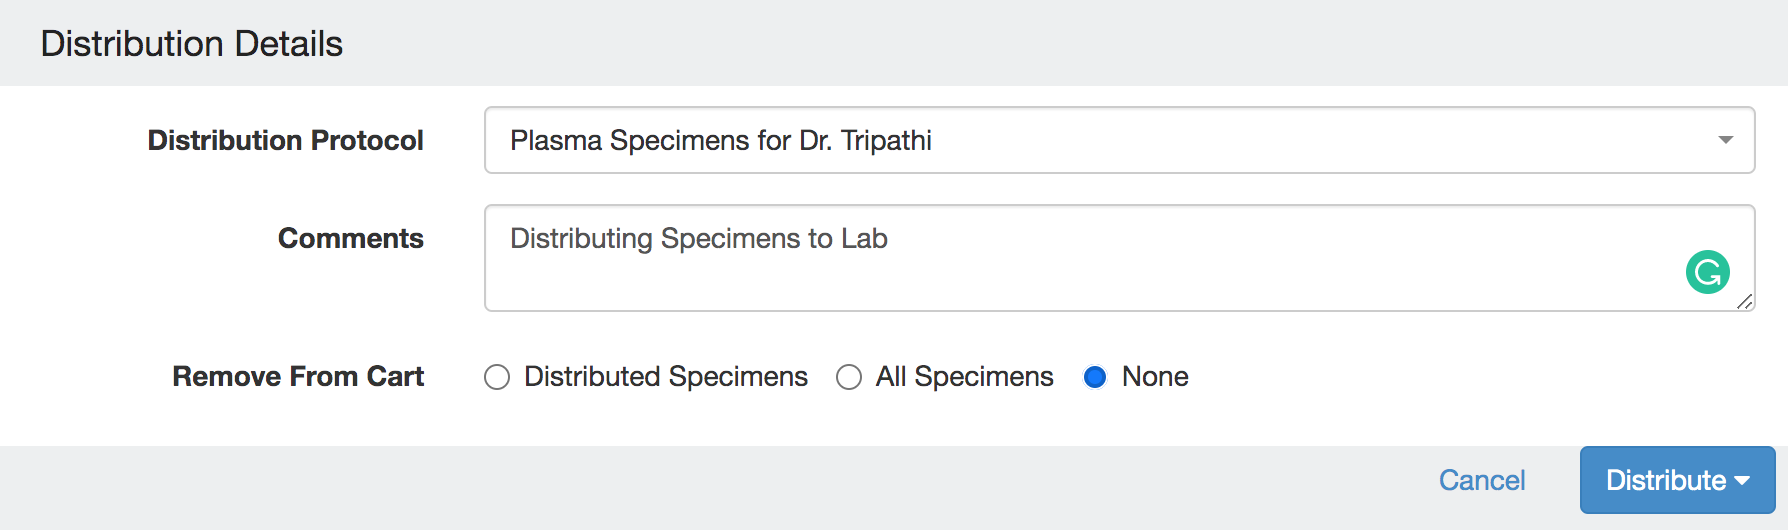
Note: After the distribution, the system will mark the specimens as ‘Closed’ if the ‘Dispose of All’ checkbox is checked. 

  • Add services, if added at the DP level, and/or click on the ‘Distribute’ button.

Note: The system allows you to distribute the specimens only if all the consent statements of DP match the CP consent statements (Number of CP consent statements can be greater than DP), and the responses for these statements should be ‘Yes.’ Refer 'Consent Validation before distribution' for more details.

  • The system adds ‘Distributed Event’ to the distributed specimen and mark them as ‘Distributed.’

Note: You can not distribute specimens from multiple sites through a single order.

Sender Comments

From V10.3 it's now possible for the users to notify the requestor with details such as when the specimens are being dispatched, picked up etc. using the comments' field which will be displayed in the order notification mail. For more details on order mail notification, refer to this wiki page.

The comment's field can be used as mentioned below:

Expand
titleClick for steps

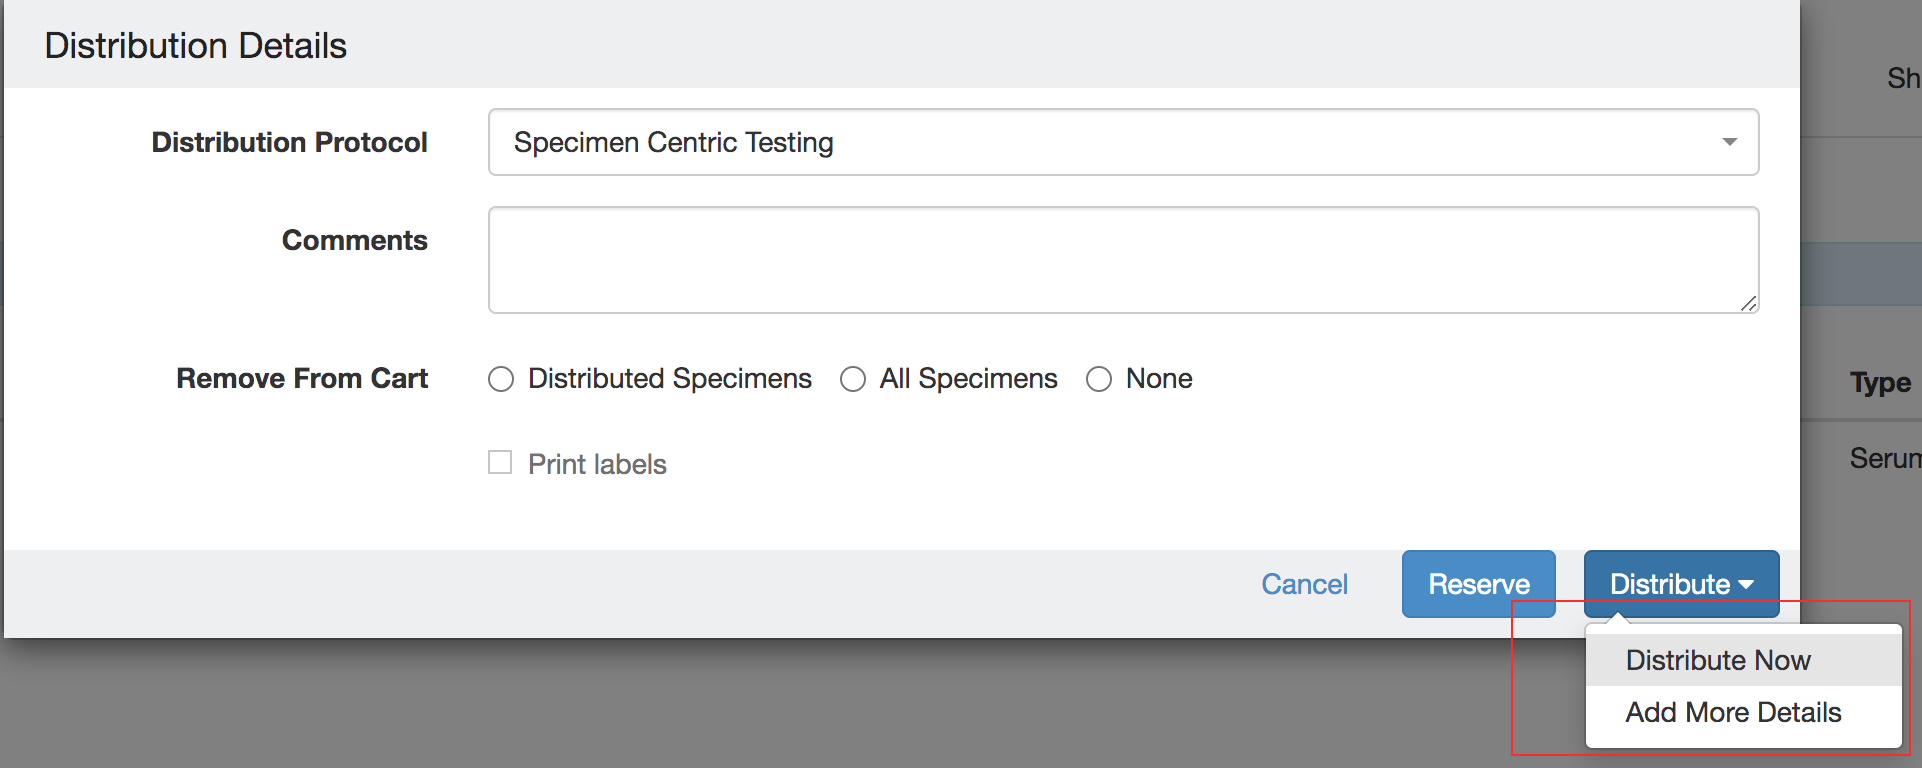
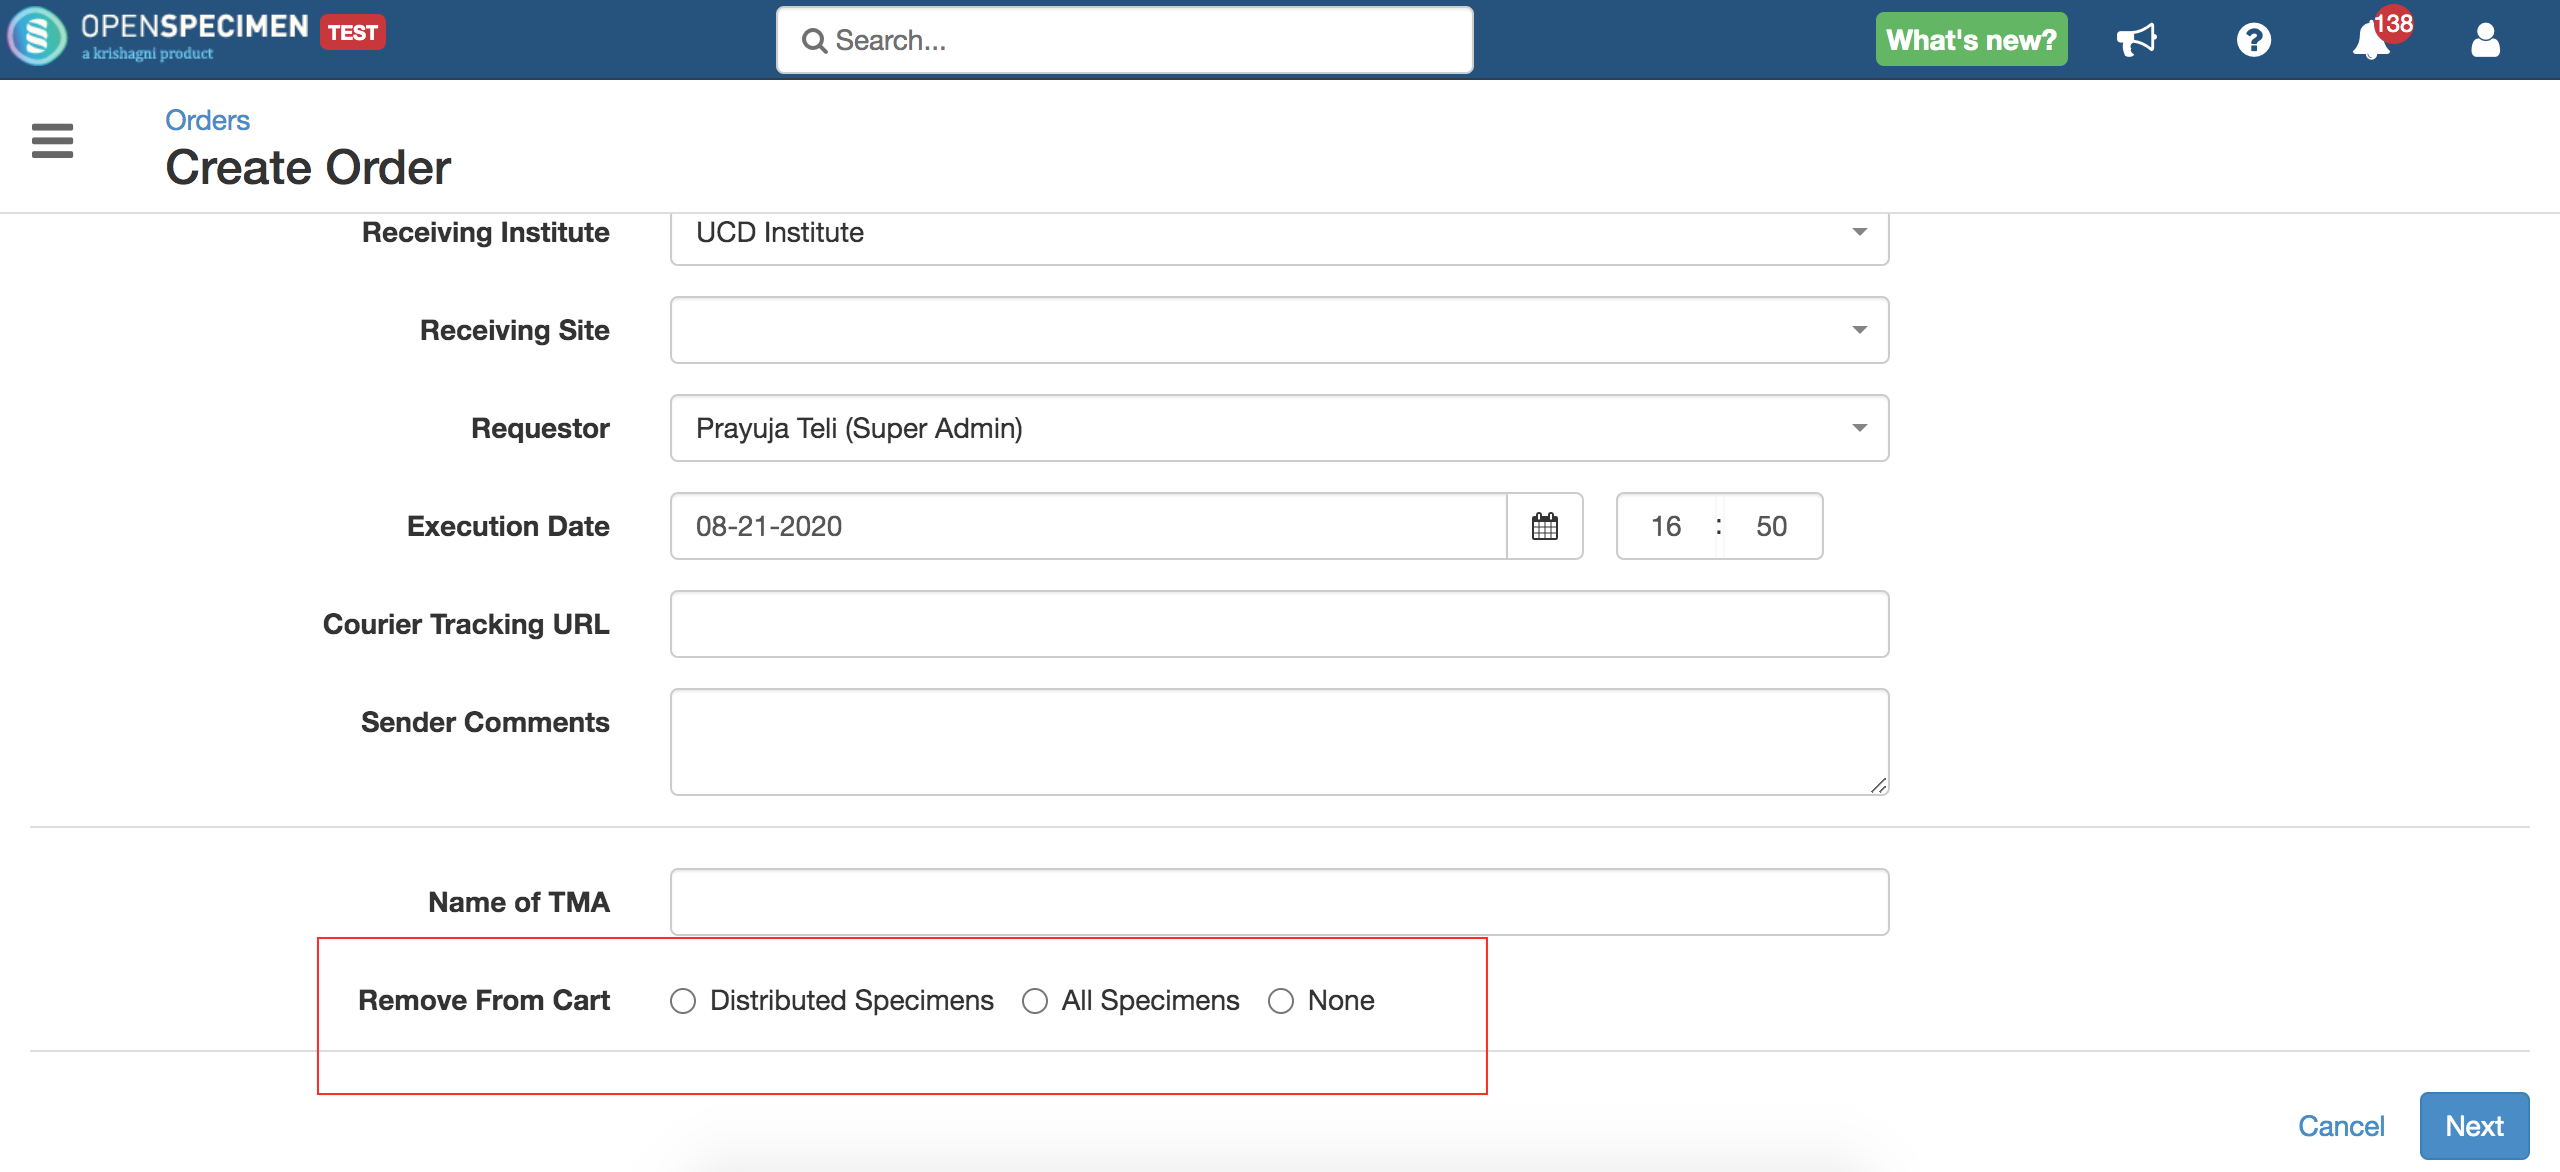
If using the ‘Distribute Now’ option to distribute the specimens, then enter the required details in the comment field as below and click on ‘Distribute’ → ‘Distribute Now’

Image Added

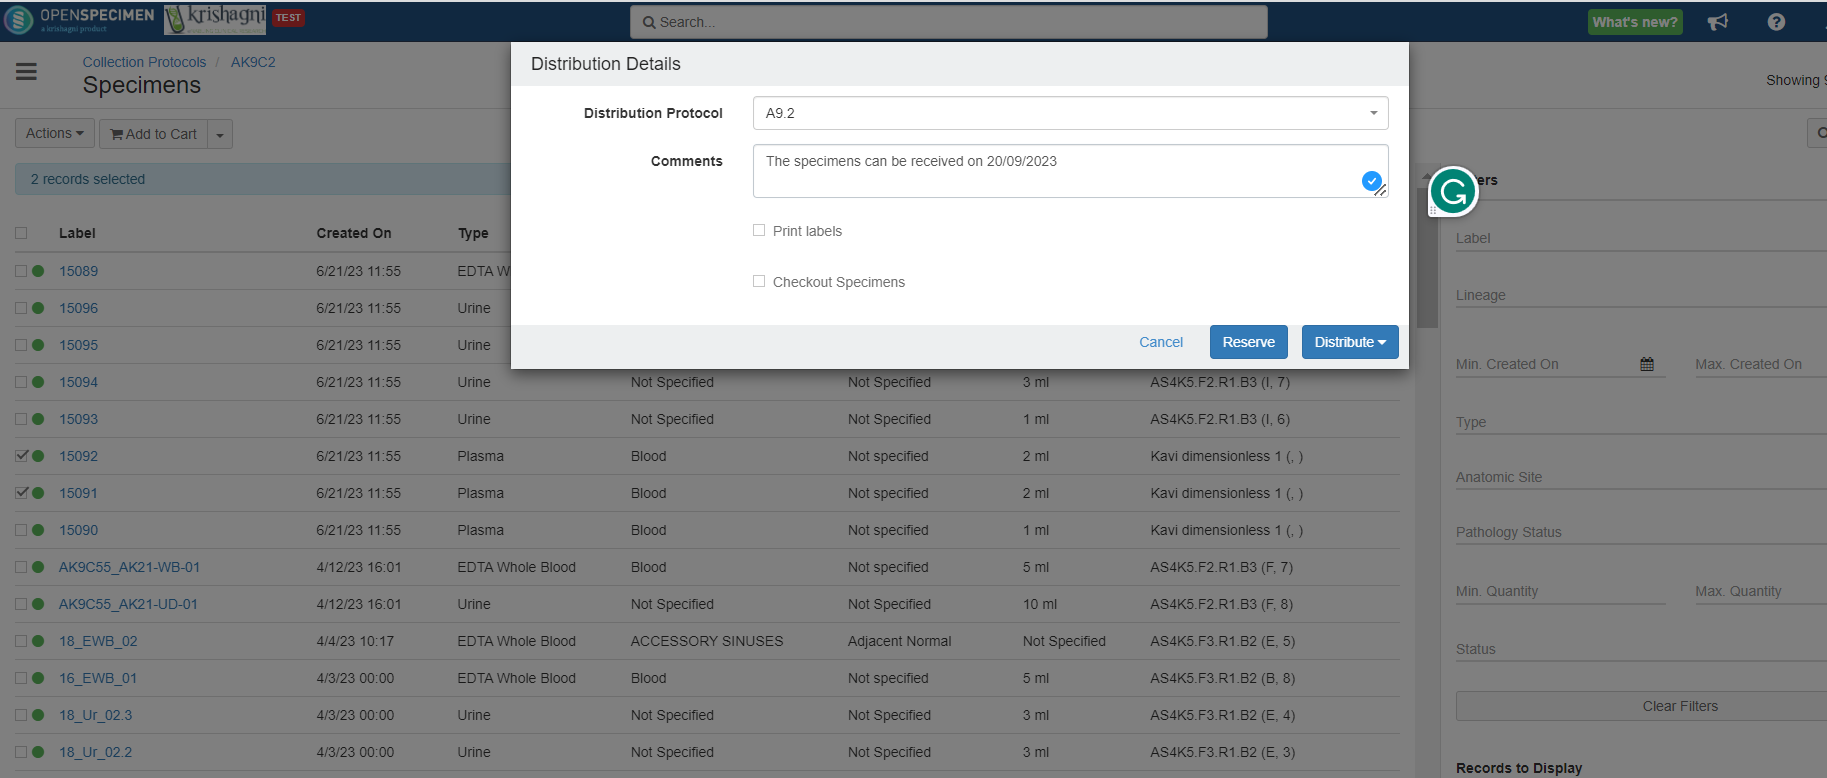
If distributing specimens by using ‘Add more details’ or directly creating an order, then enter the required details in the sender comment field as below

Image Added

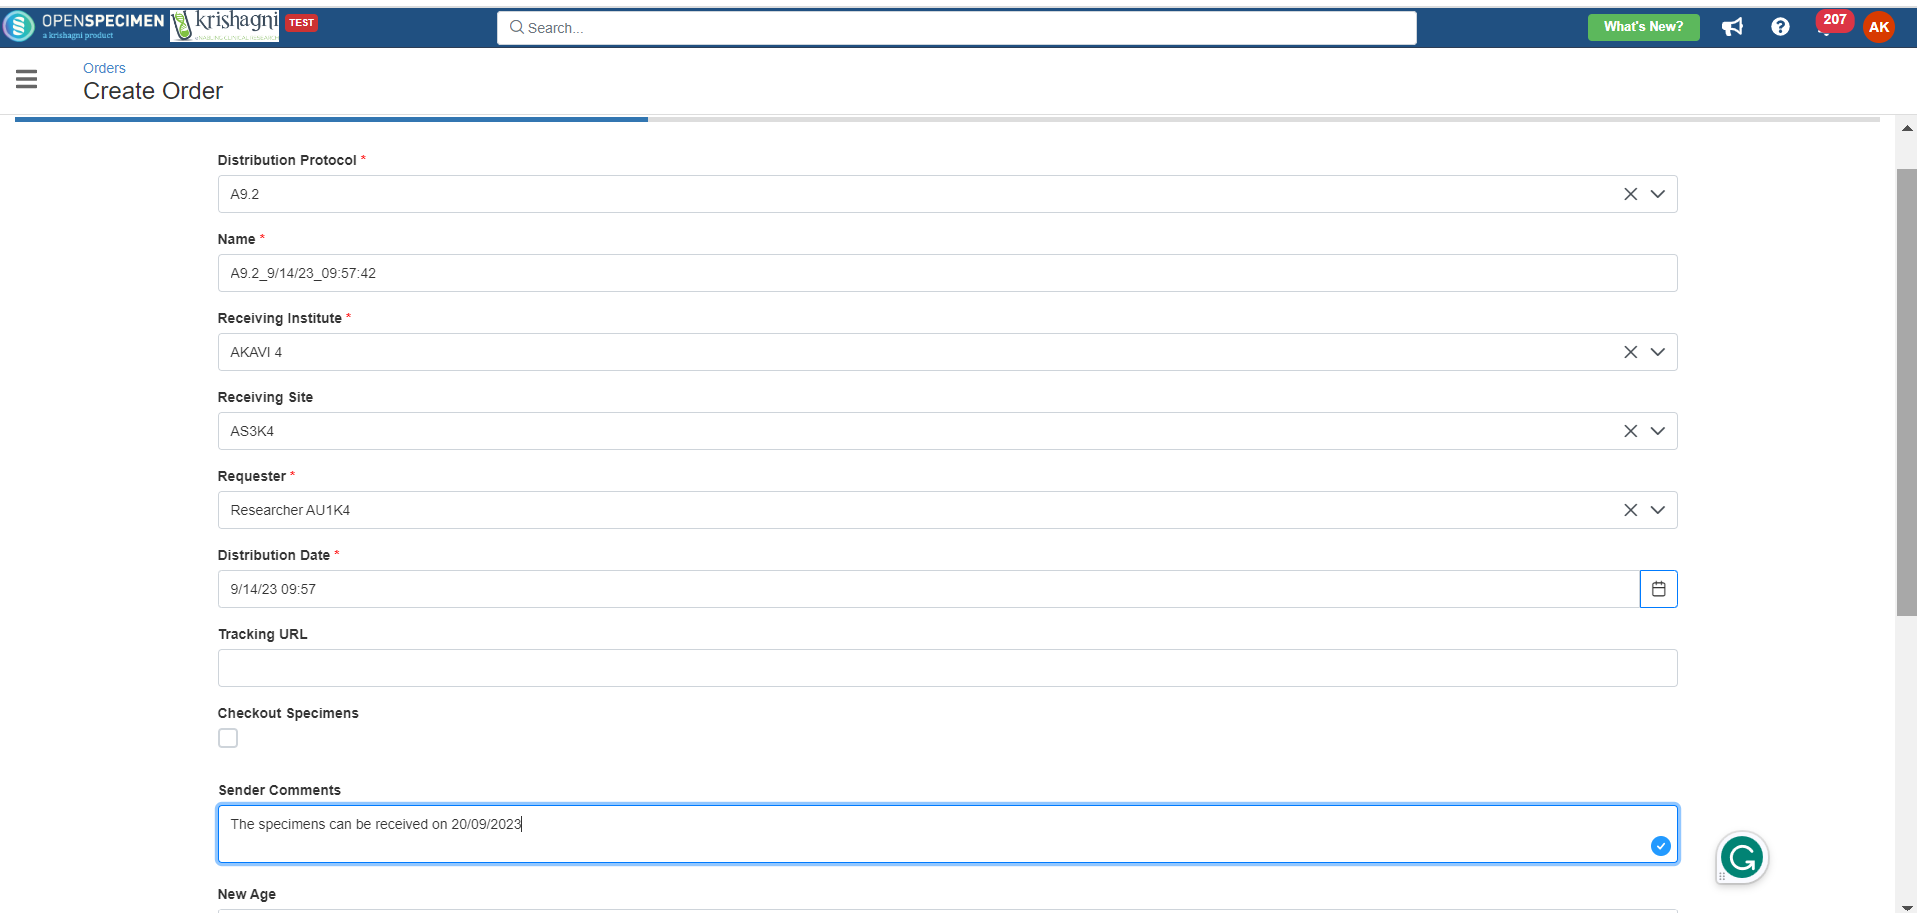
'Distribute All' Feature

Expand
titleClick here to expand..

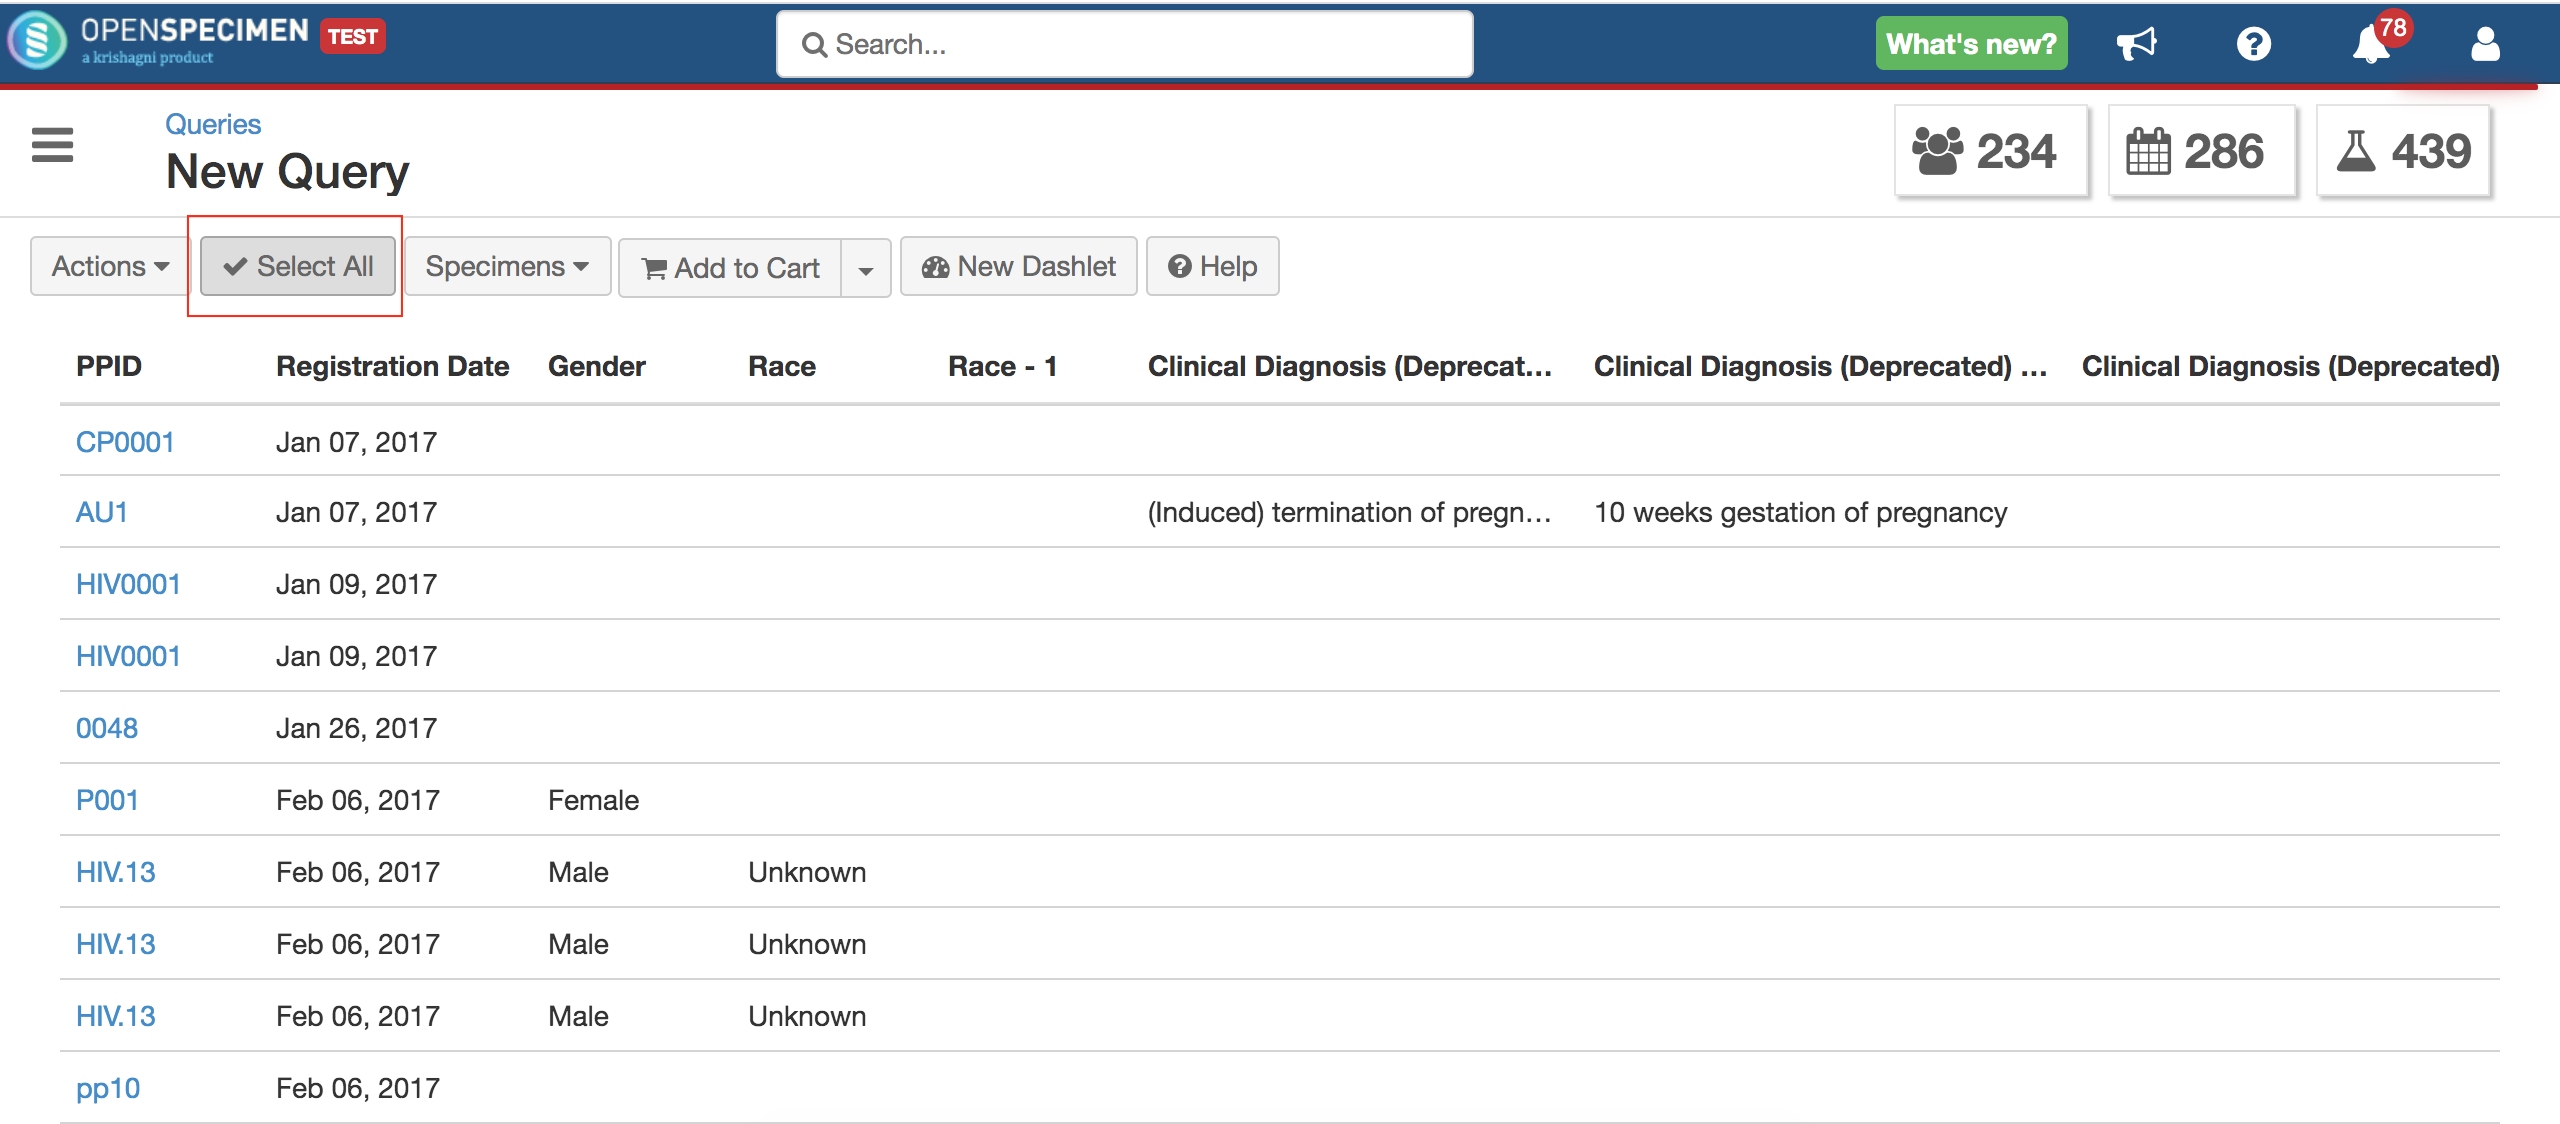
From the query interface, it is impossible to distribute a large number of specimens, i.e., more than 500 samples. To do that, you have to add all the specimens to the cart and use the ‘Distribute All’ option.

You can select 10000 specimens in one go via a query to distribute the colossal number of specimens. You can use the 'Distribute All' features from the cart.

Steps:
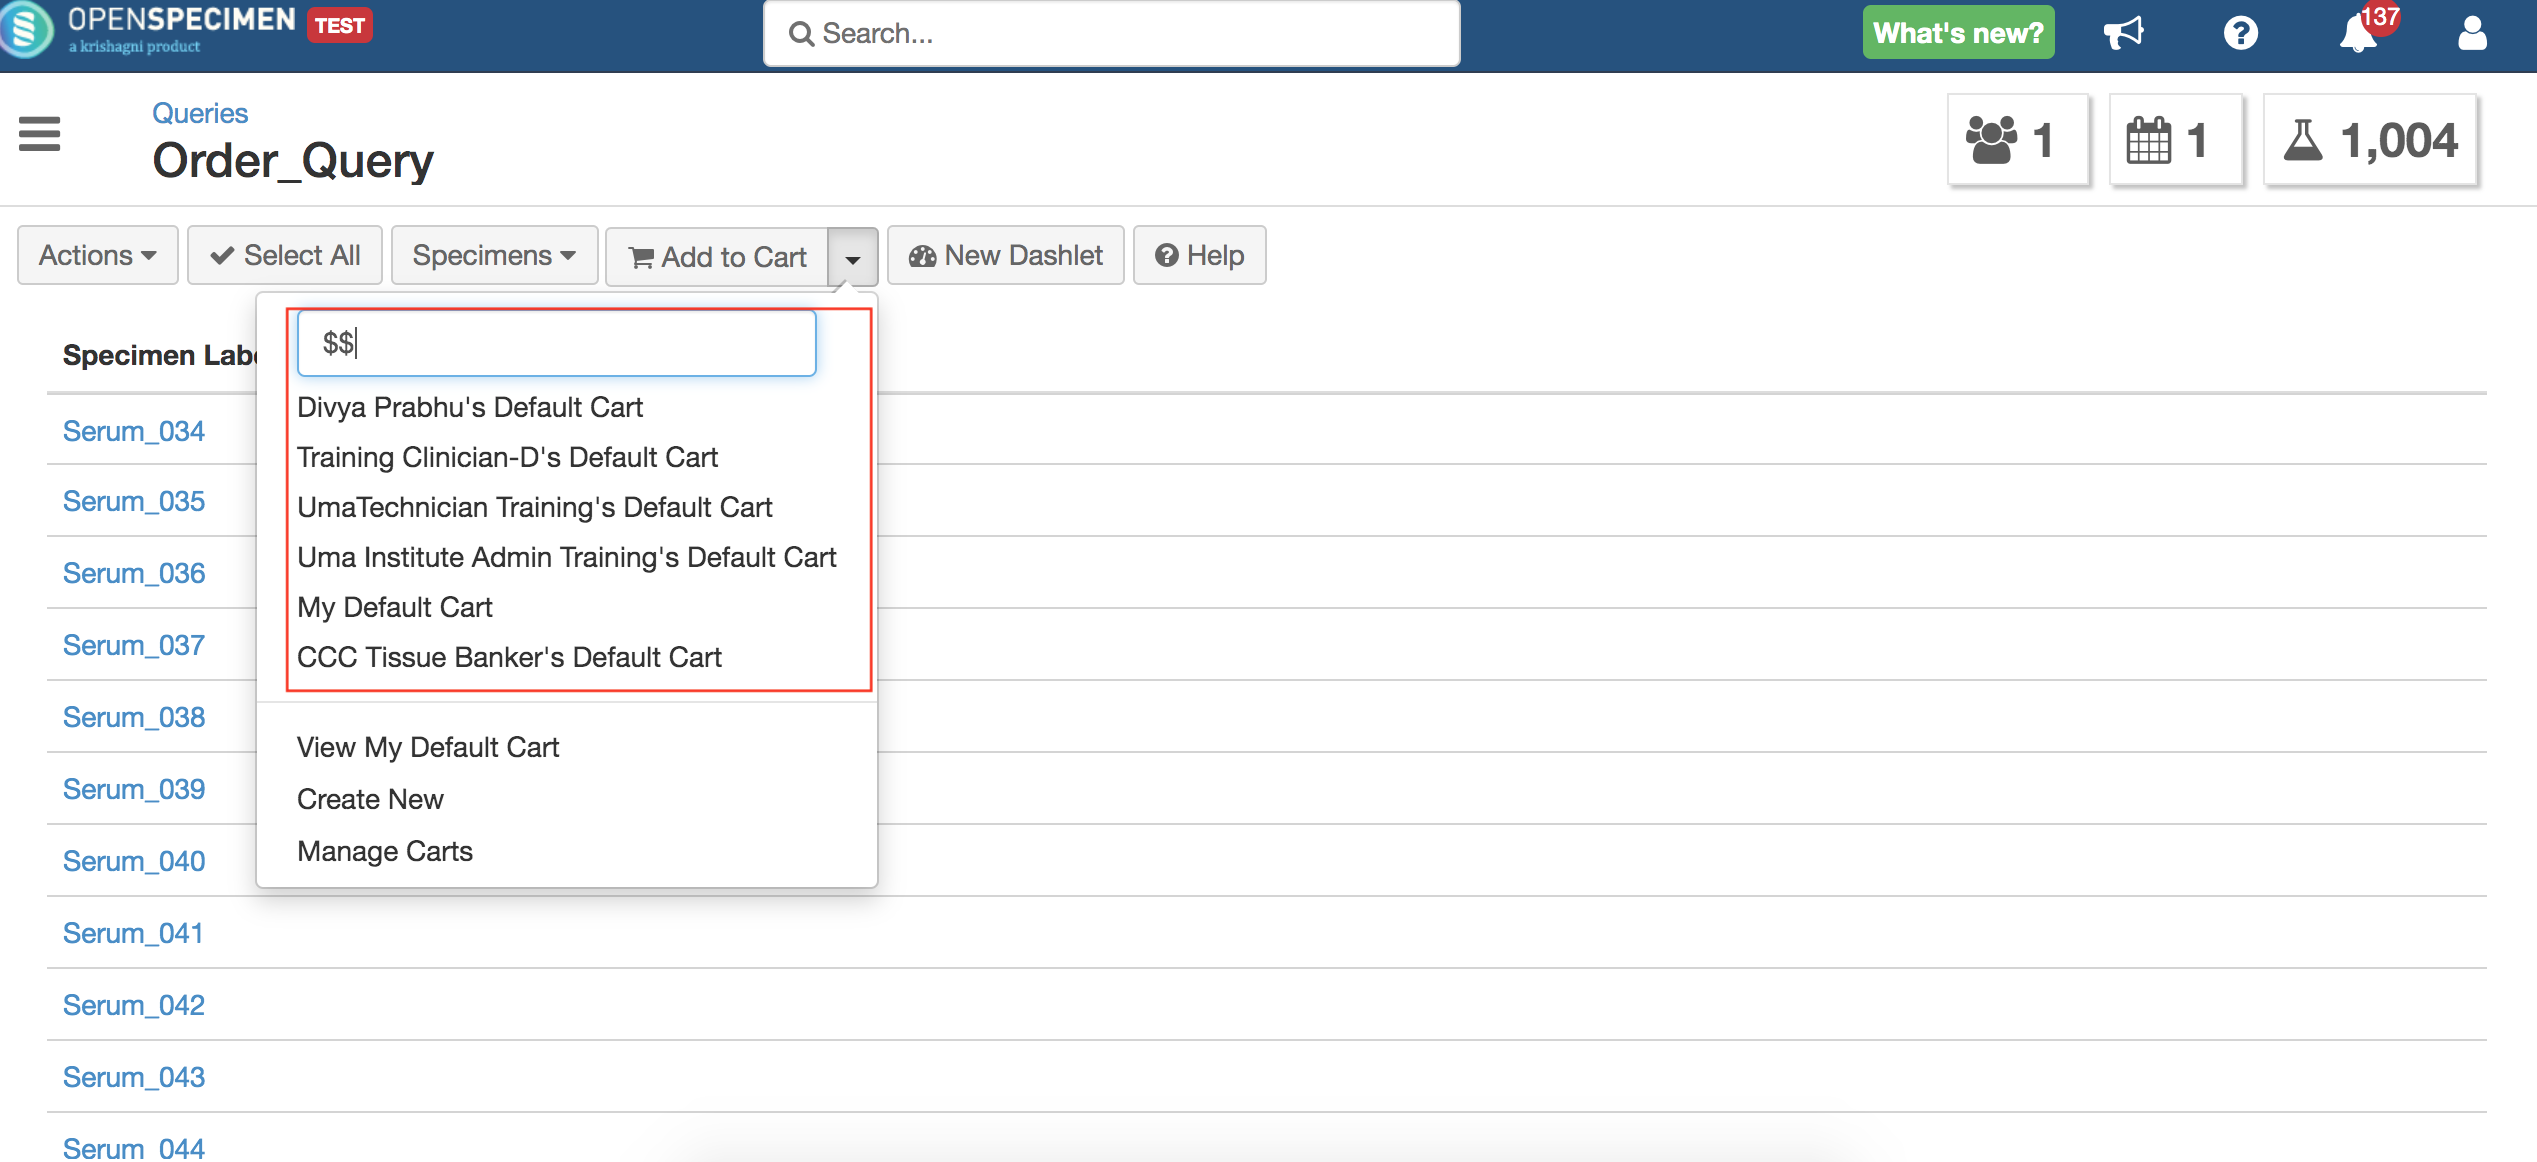
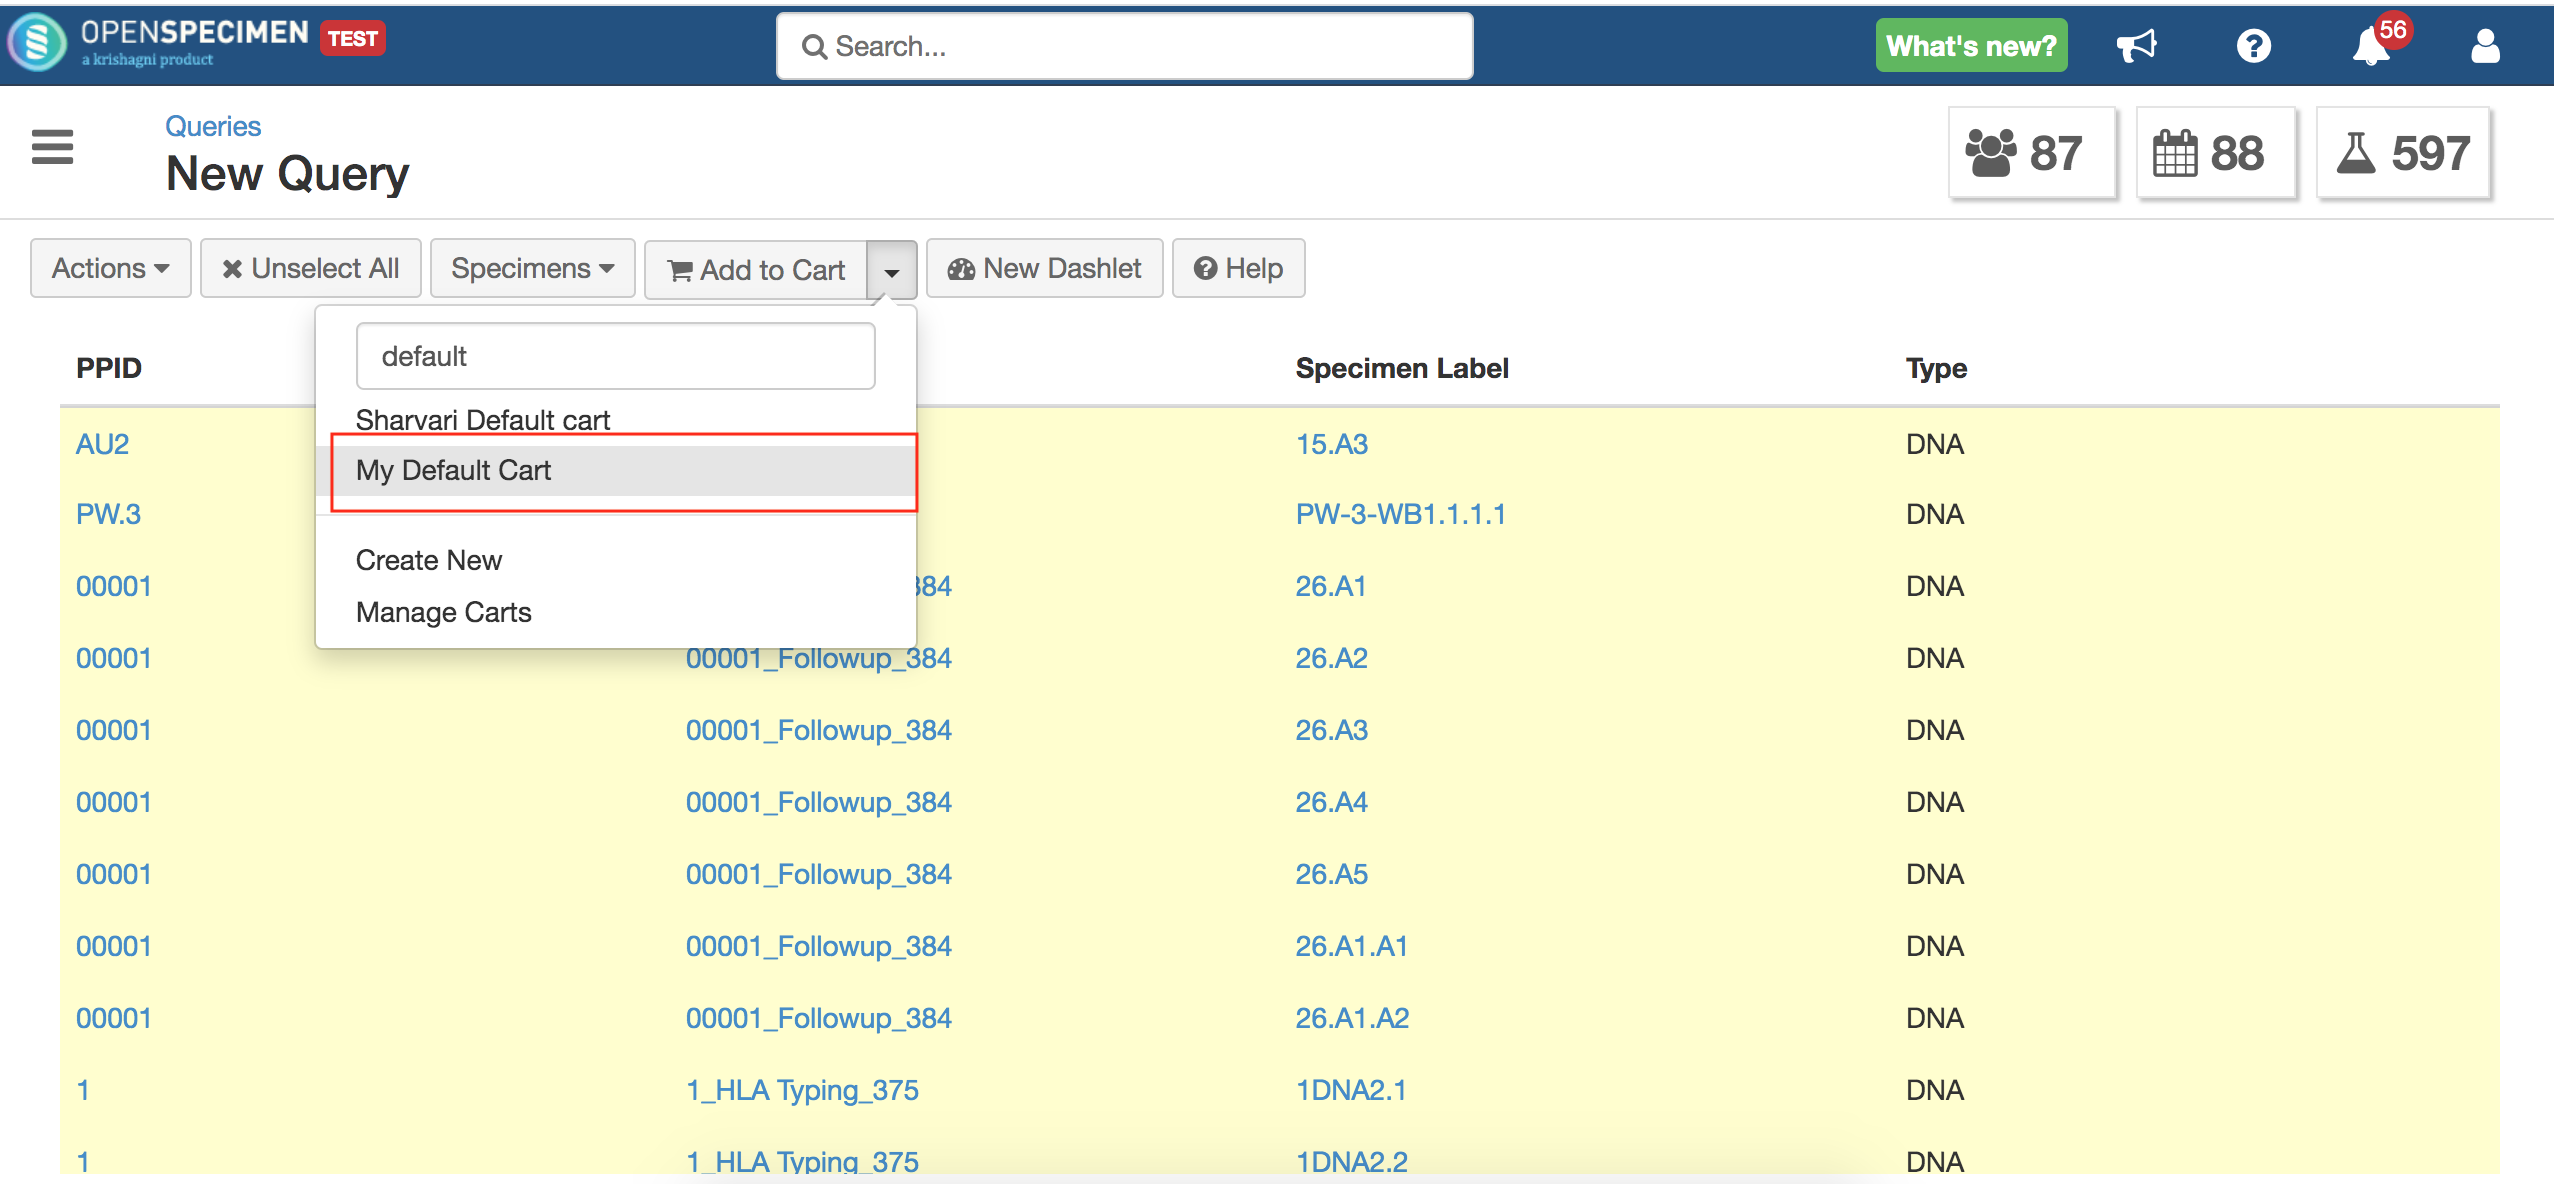
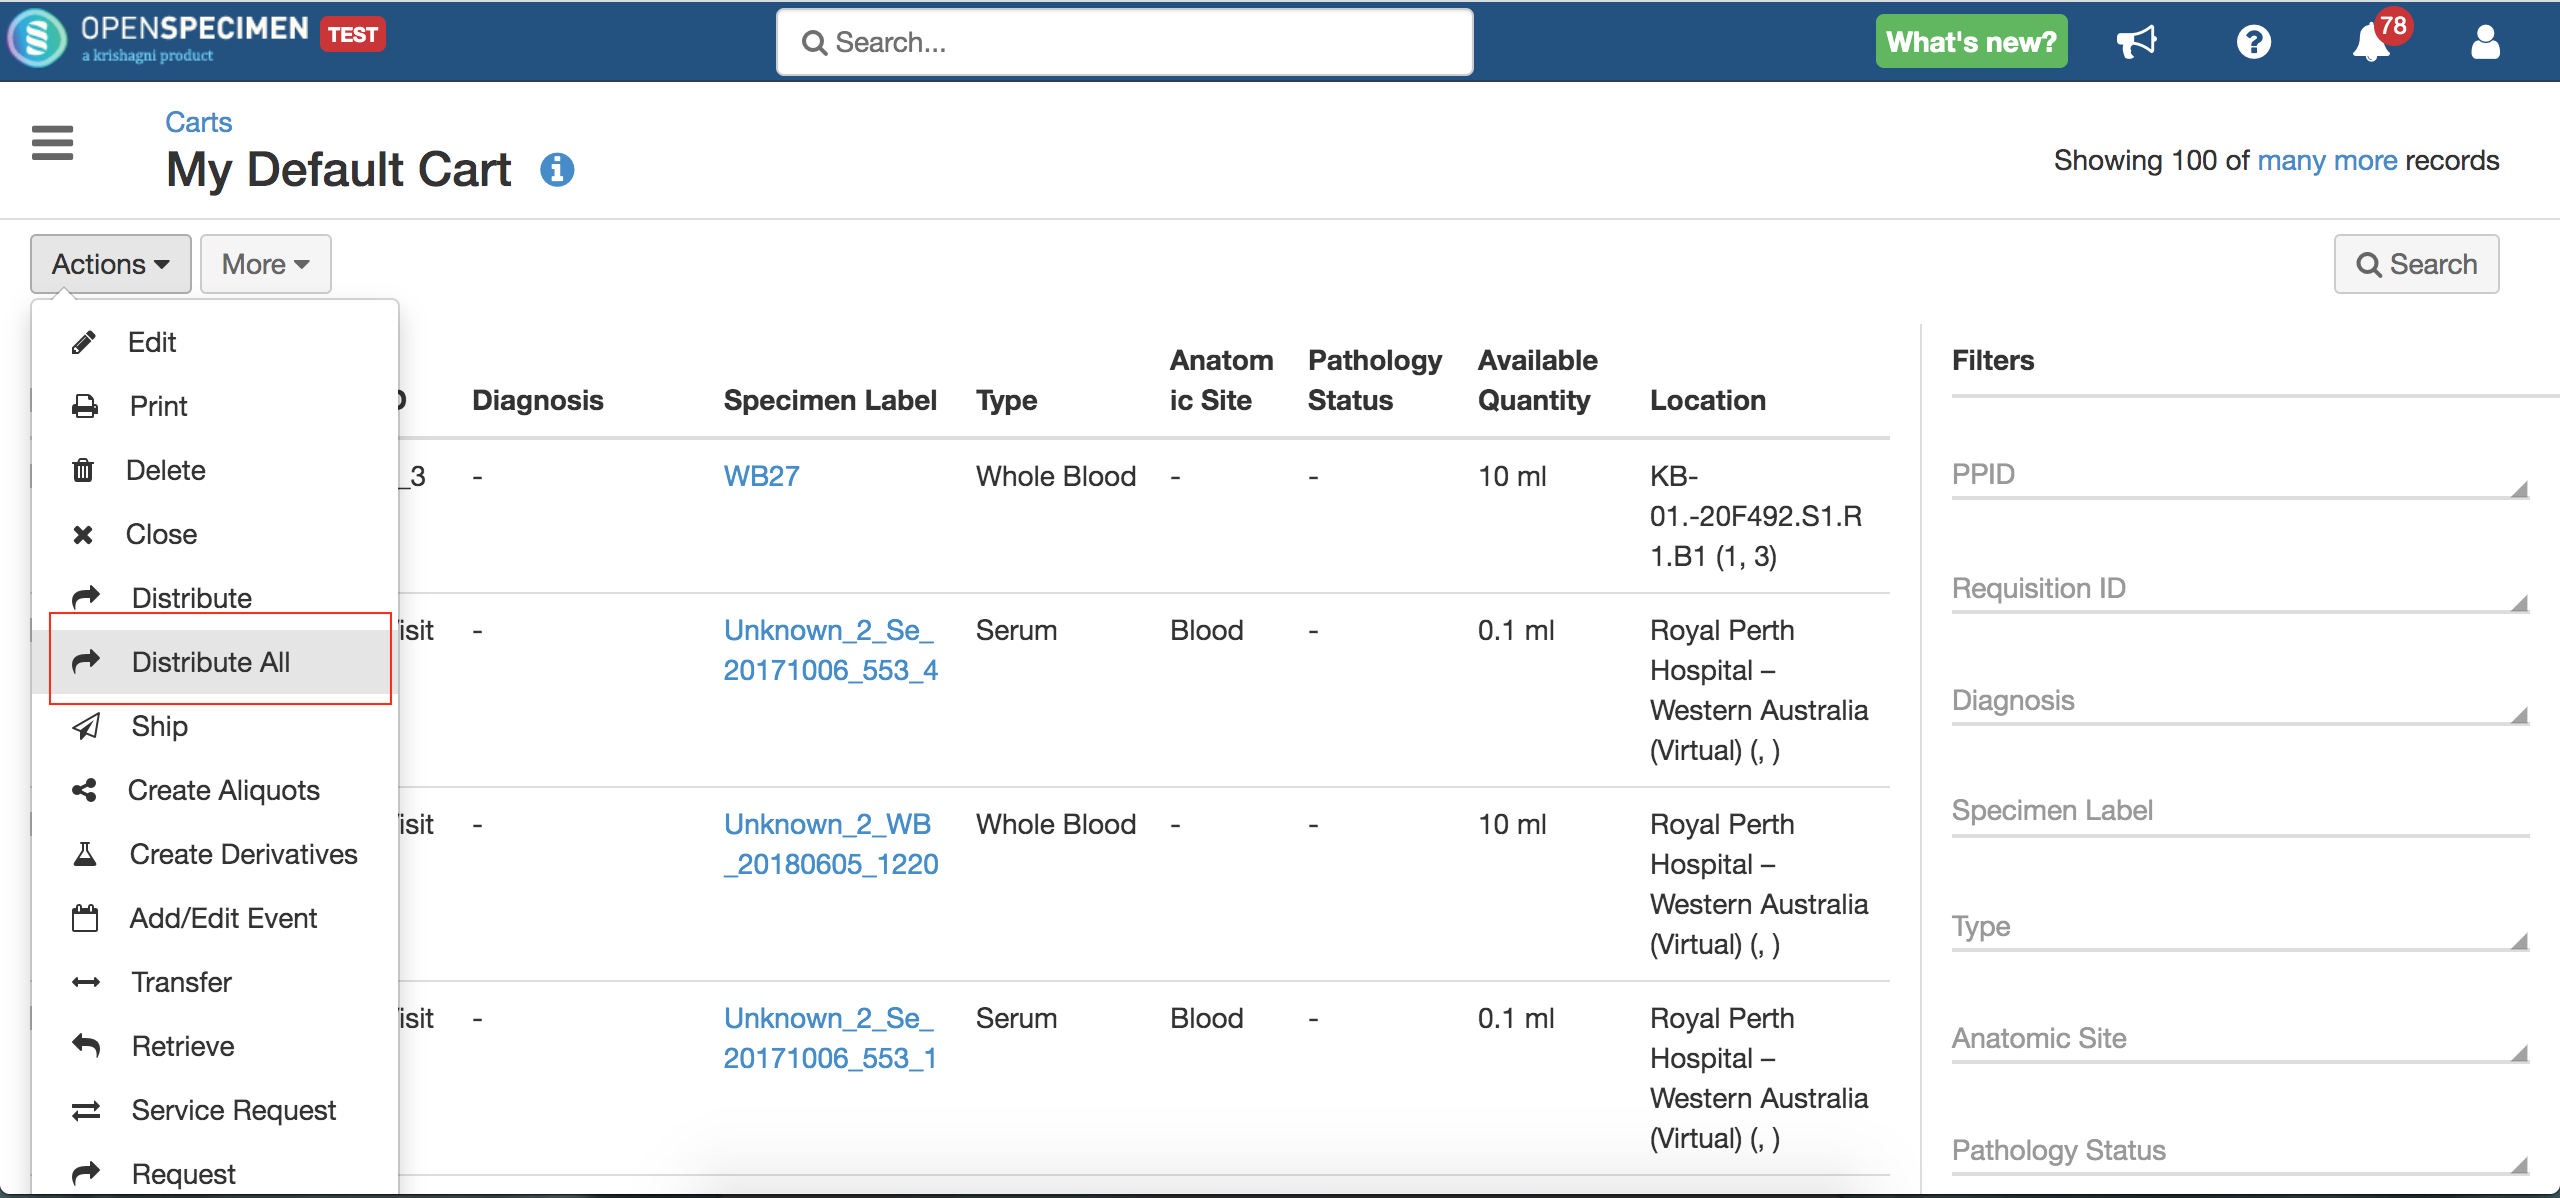
  • On the query result view page, click on the ‘Select All’ option to select the specimens.

  • Click on the arrow beside the ‘Add to Cart’ button. You can type '$$' in the search bar to search for default carts.

  • Select the ‘Cart' under which you want to add the specimens. Clicking on the 'My default Cart’ option navigates you to your default cart.

  • If the cart does not exist, you can create one using the 'Create New' option.

  • Go to ‘Carts,’ select the cart under which the specimens are distributed.

  • Click on the 'Distribute All' option. (Button visible under “Actions” menu from v7.0 onwards)

  • A pop-up window will appear. Add the details such as distribution protocol name, comments, and click on the 'Distribute' button.

  • Two options, ‘Distribute Now' or 'Add More Details,’ will be displayed.

  • On selecting 'Distribute Now,' the specimens will get distributed in “one-click.”

  • Clicking on the 'Add More Details' button navigates to a detailed create order page.

  • Complete the Order and Submit. For more details about Order, refer to https://openspecimen.atlassian.net/wiki/x/CwB2Dw

...