Freezers can be set up with different restrictions:
These restrictions are set while setting up containers like below:

For more details on creating containers, refer to Managing containers.
Using these restrictions, the system can accurately auto allocate storage locations for the specimens. This helps in high throughput banks where you can collect multiple specimens at once and let the system choose the storage locations.
To use auto allocation, the administrator has to choose between the below allocation strategies and set them at the protocol level:
To set this at the protocol level-


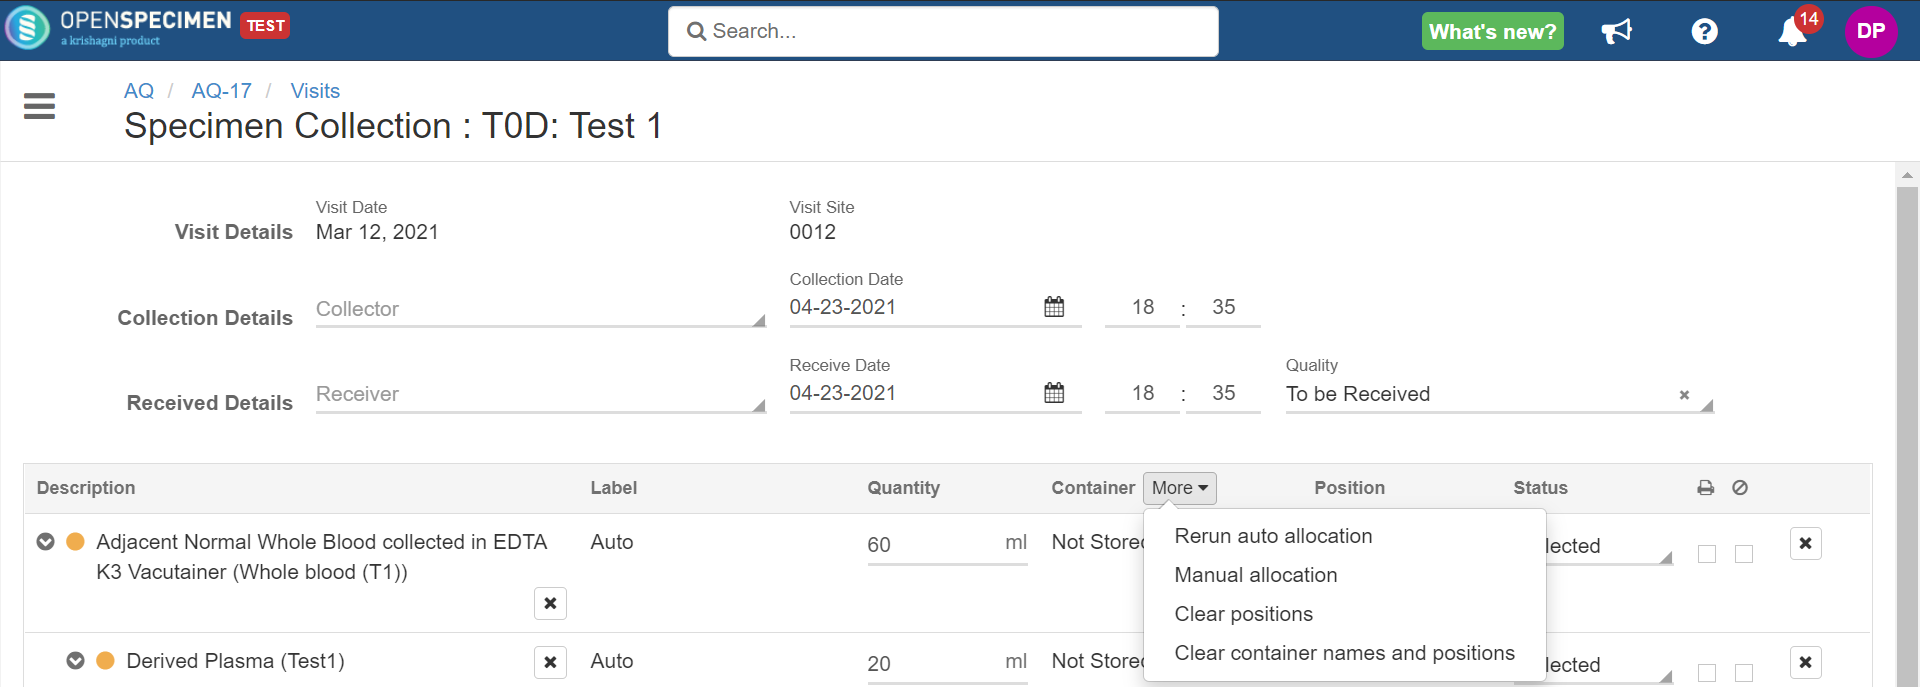
During specimen collection, containers are auto-allocated based on the settings done. You can reject automatically allocated container positions by clicking 'More' and selecting-
Pre-requisites: container auto allocation is enabled at the CP level. |
| Auto Allocation Strategy | Inputs |
|---|---|
| Recently Used Container | Increase aliquot count on below collection page |
| Recently Used Container | Decrease aliquot count on below collection page |
| Least Empty Container | Increase aliquot count on below collection page |
| Least Empty Container | Decrease aliquot count on below collection page |
Least Empty Container / Recently Used Container | Change Collection Status to Missed/Not Collected/Pending |
| Least Empty Container / Recently Used Container | Manually Run auto allocation Navigate to More—> Rerun Auto Allocation |

Furthermore, the system can auto allocate container positions by rules based on specimen properties like quantity, type, requirement code, lineage, etc. This is done via API. Refer to 'Advanced auto allocation' for more details.
After the user has set up the auto allocation, the positions are auto-suggested under the 'Container' column in the collection page. If we open the container overview page in another tab, it is visible that the positions are blocked. A horizontal line is shown across the positions that are suggested in auto-allocation, specifying them as locked.
These auto-allocated positions are blocked until the user clicks 'Cancel' or 'Submit' from the collection page. If the positions are not freed up, then wait for 5 minutes till an internal job runs to clean up these positions. From v6.3, onwards we have made sure that the internal job never stops running. If you still see the blue lines, please report to support@krishagni.com


Even if any specimen is canceled from the collection page, these auto-suggested locations continue to be blocked.
To free them and allow OpenSpecimen to suggest more appropriate locations, you need to re-run the auto-allocation from the collection page > Container > More > Rerun auto allocation

Reload the container page. It will show that only the one auto-suggested position is blocked.
In case you are not happy with this auto-allocated position, you can select 'Manual allocation' from the collection page and select any other storage location.