From v10.x, OpenSpecimen supports the below features.
Action | Description | Color Code |
|---|---|---|
Check-Out | Temporarily removes the container from the position and blocks the position. | Amber |
Check-In | Returns the container to the same position as before check-out. | Green |
Archive | Removes the container from the position and cannot be used to store specimens again. On archiving a parent container, all child containers are also automatically archived. You cannot archive a container if specimens are stored in a container | Red |
Transfer | Move the container from one position to another within/ across freezers. All child containers and stored specimens are also transferred automatically | - |
Unblock | The locations blocked by the checked out specimens can be unblocked in bulk from the containers list view by scanning the checked out specimen labels/barcodes. |
Check-out
From the containers page, click on Actions → Checkout

2. Scan/paste the container's unique name or barcode and Click on Add

3. Add a reason (mandatory) → Submit

4. Checked-out containers can be identified in 4 ways
Container is displayed at the bottom of the parent container
‘Blocked’ icon is seen in the ‘Map view’
‘Amber’ colored dot appears in front of the Container name
On the overview page of the container, the word 'Checked out' appears


Check-in
Steps to check in
From the containers page, click on Actions → Checkin

2. Scan/paste the container's unique name or barcode and click on “Add”. (Note: Only checked-out containers can be checked-in).

3. The original position of the container during ‘Checkout’ is displayed by default. Add a reason (mandatory) → Submit.
Note: If you want to change the position of the container, you can manually update the ‘Parent Container’. In such cases, the blocked position during the ‘Checkout’ is released.

4. Checked-in container can be seen as a regular container in the tree view

Archive
Steps to Archive
From the containers page, click on Actions → Archive

2. Scan/paste the container's unique name or barcode (check the checkbox) and Click on “Add”

3. Add a reason (mandatory) → Submit.

4. Archived containers can be identified in 3 ways
Container is moved to the bottom of the parent container in the hierarchy
‘Red’ colored dot appears in front of the container name
On the overview page of the container, the word 'Archived' appears


Unarchive
Steps to Unarchive:
From the containers page, click on Actions → Archive

‘Parent Container’ is defaulted to the original position. Users can choose to update the position to ‘Archive’. Once the position is finalized, users need to enter a reason (mandatory)

3. Unarchived container is displayed in the tree view
Transfer
Pre-requisites
The 'Parent Site' should be the same for source and destination containers.
The 'Collection Protocol' and 'Specimen Types' restrictions should match.
The new positions to which the containers are being moved should not be already occupied.
From the containers page, click on Actions → Transfer

2. Scan/paste the container's unique name or barcode and Click on Add
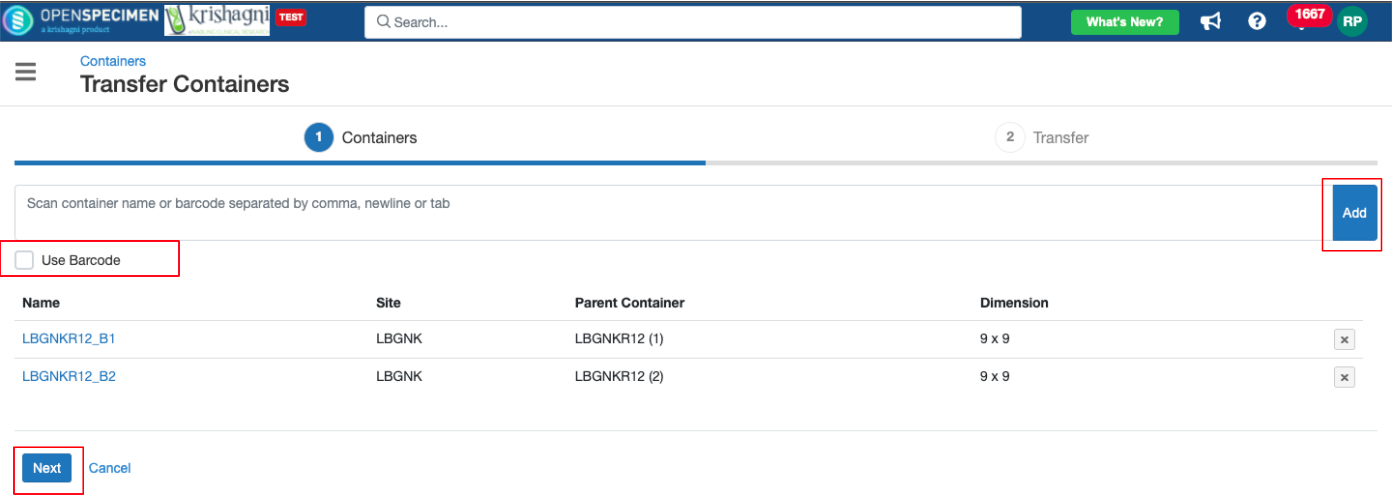
3. Select the Parent container and position, add a reason (mandatory) → Submit
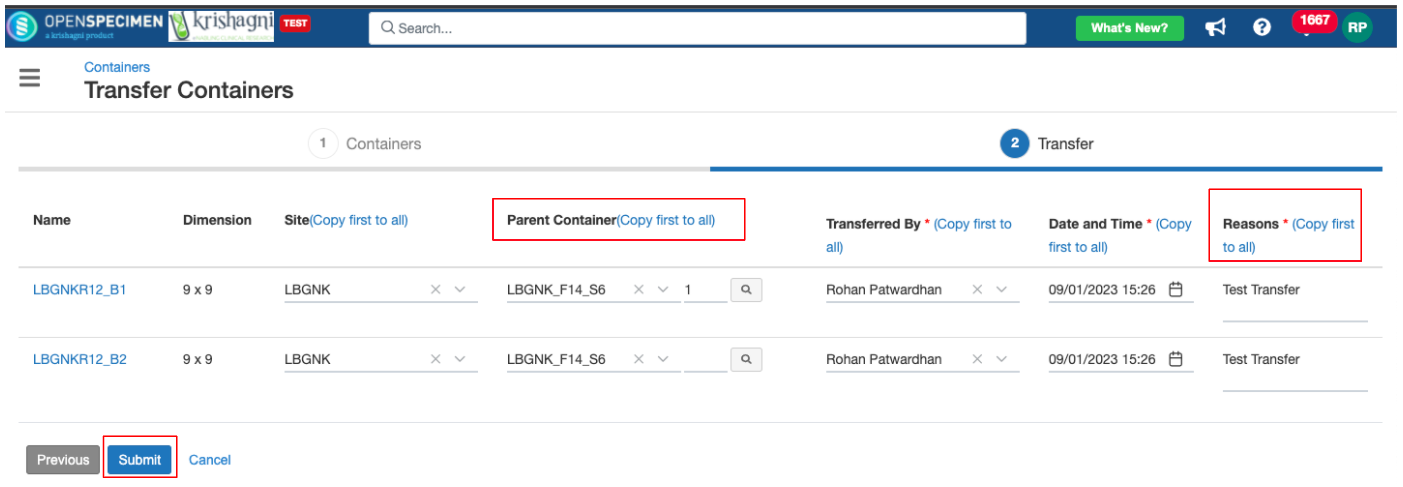
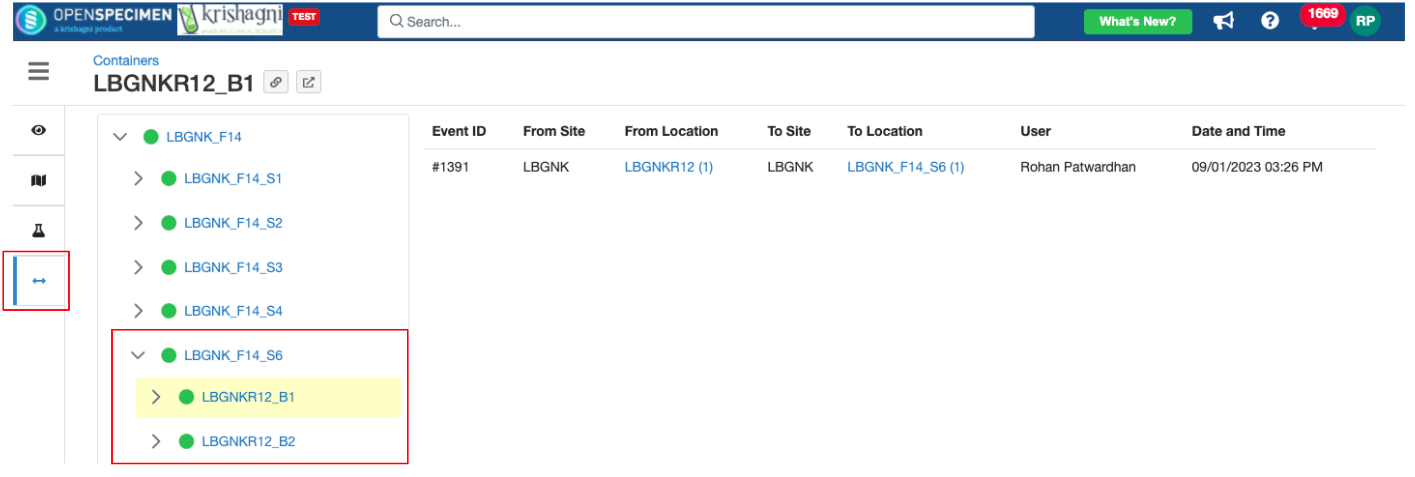
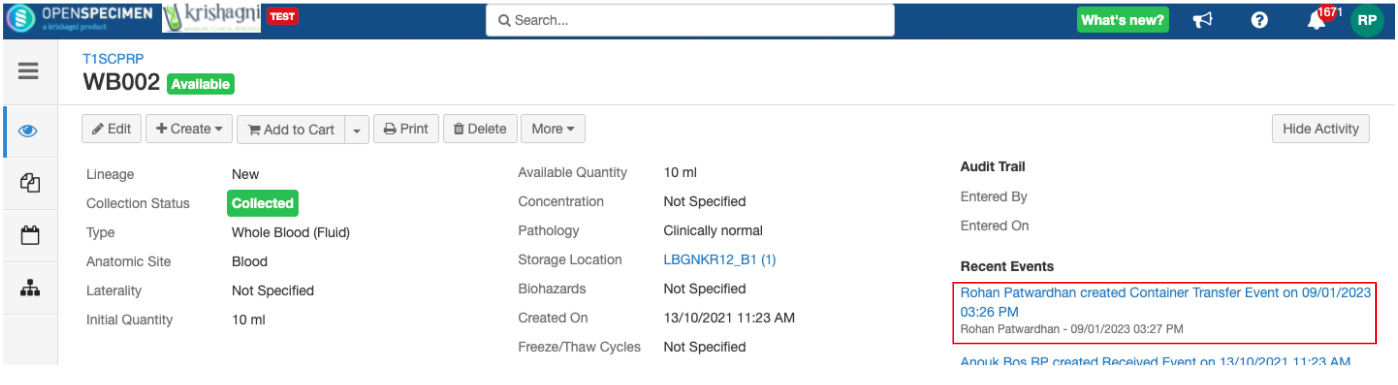
4. The transferred container can be seen under the selected Parent container.
Transfer event is added at 3 places
Transferred container
Descendants of the container
All specimens in container/ descendants

Unblock
From the containers page, click on Actions →Unblock

User can scan specimen labels or barcodes for which the container positions are blocked

After adding labels, click Add

The blocked positions will be auto-populated and the user can click on ‘Unblock’ to free up the container positions
Report
The above actions can be tracked using the Container Transfer Report. The field ‘Reason’ in the 'Transfer Report' specifies the action and the reason.
On Overview page
All the above actions can also be done per-container on the individual pages.
Go to the Container you wish to perform the action.
Click on “More”

Note: Option ‘Check-in’ appears for ‘Checked-out’ containers; 'Unarchive' appears for 'Archived' containers.