| Table of Contents |
|---|
...
| Expand | |||||||||||||||||||||||||||||||||||
|---|---|---|---|---|---|---|---|---|---|---|---|---|---|---|---|---|---|---|---|---|---|---|---|---|---|---|---|---|---|---|---|---|---|---|---|
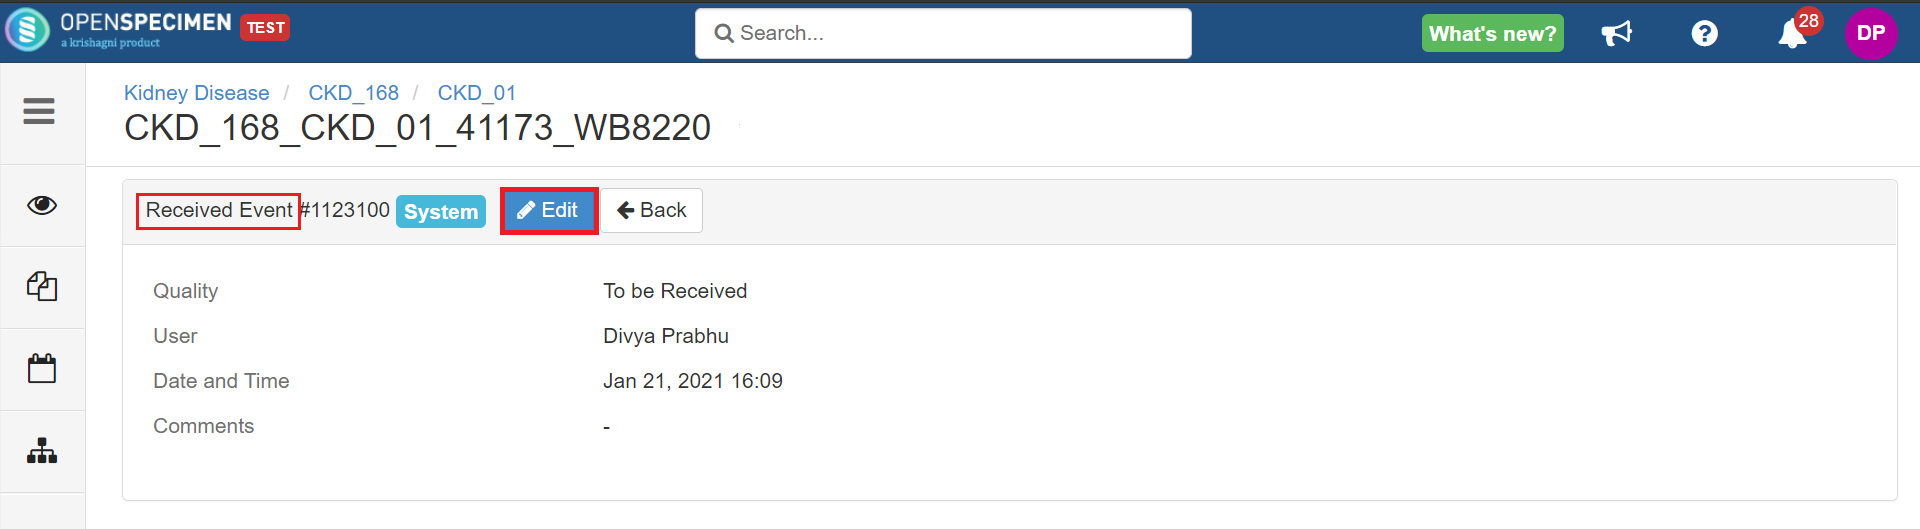
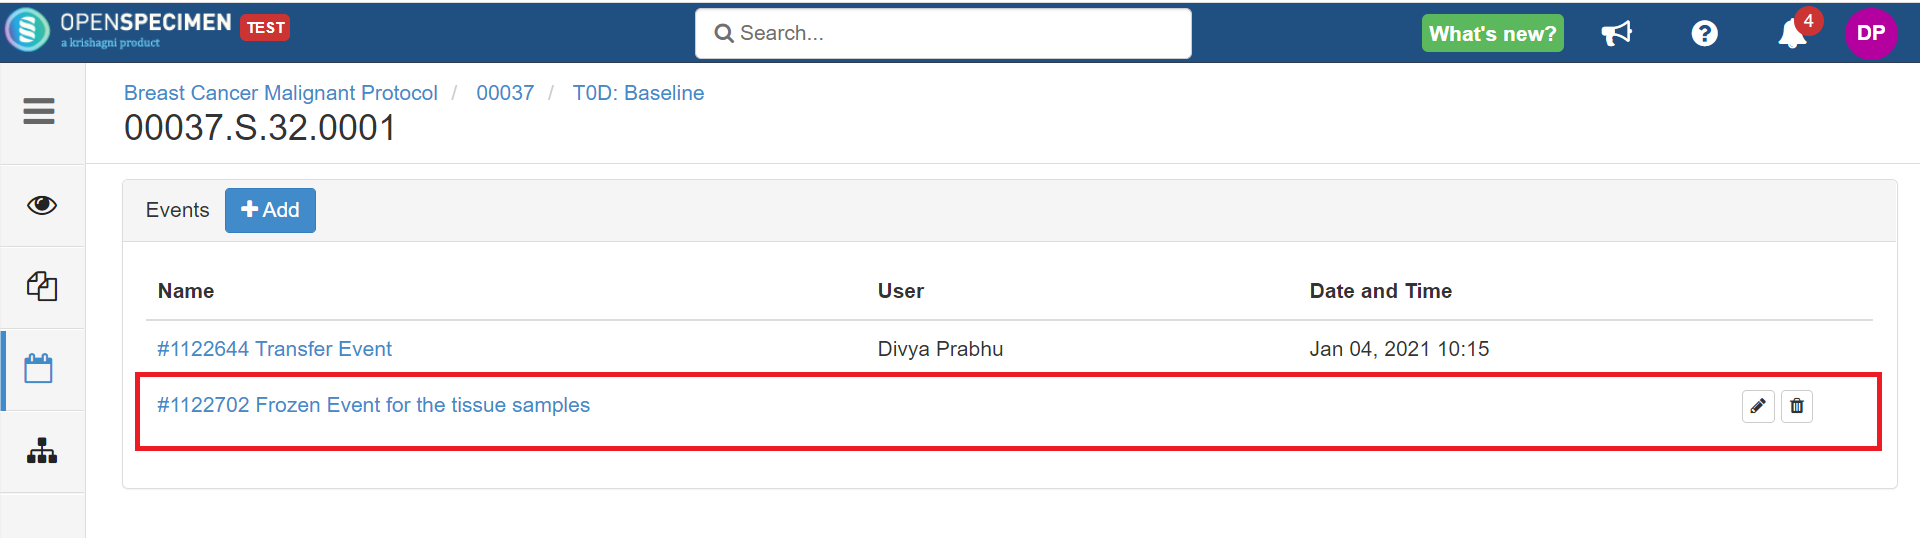
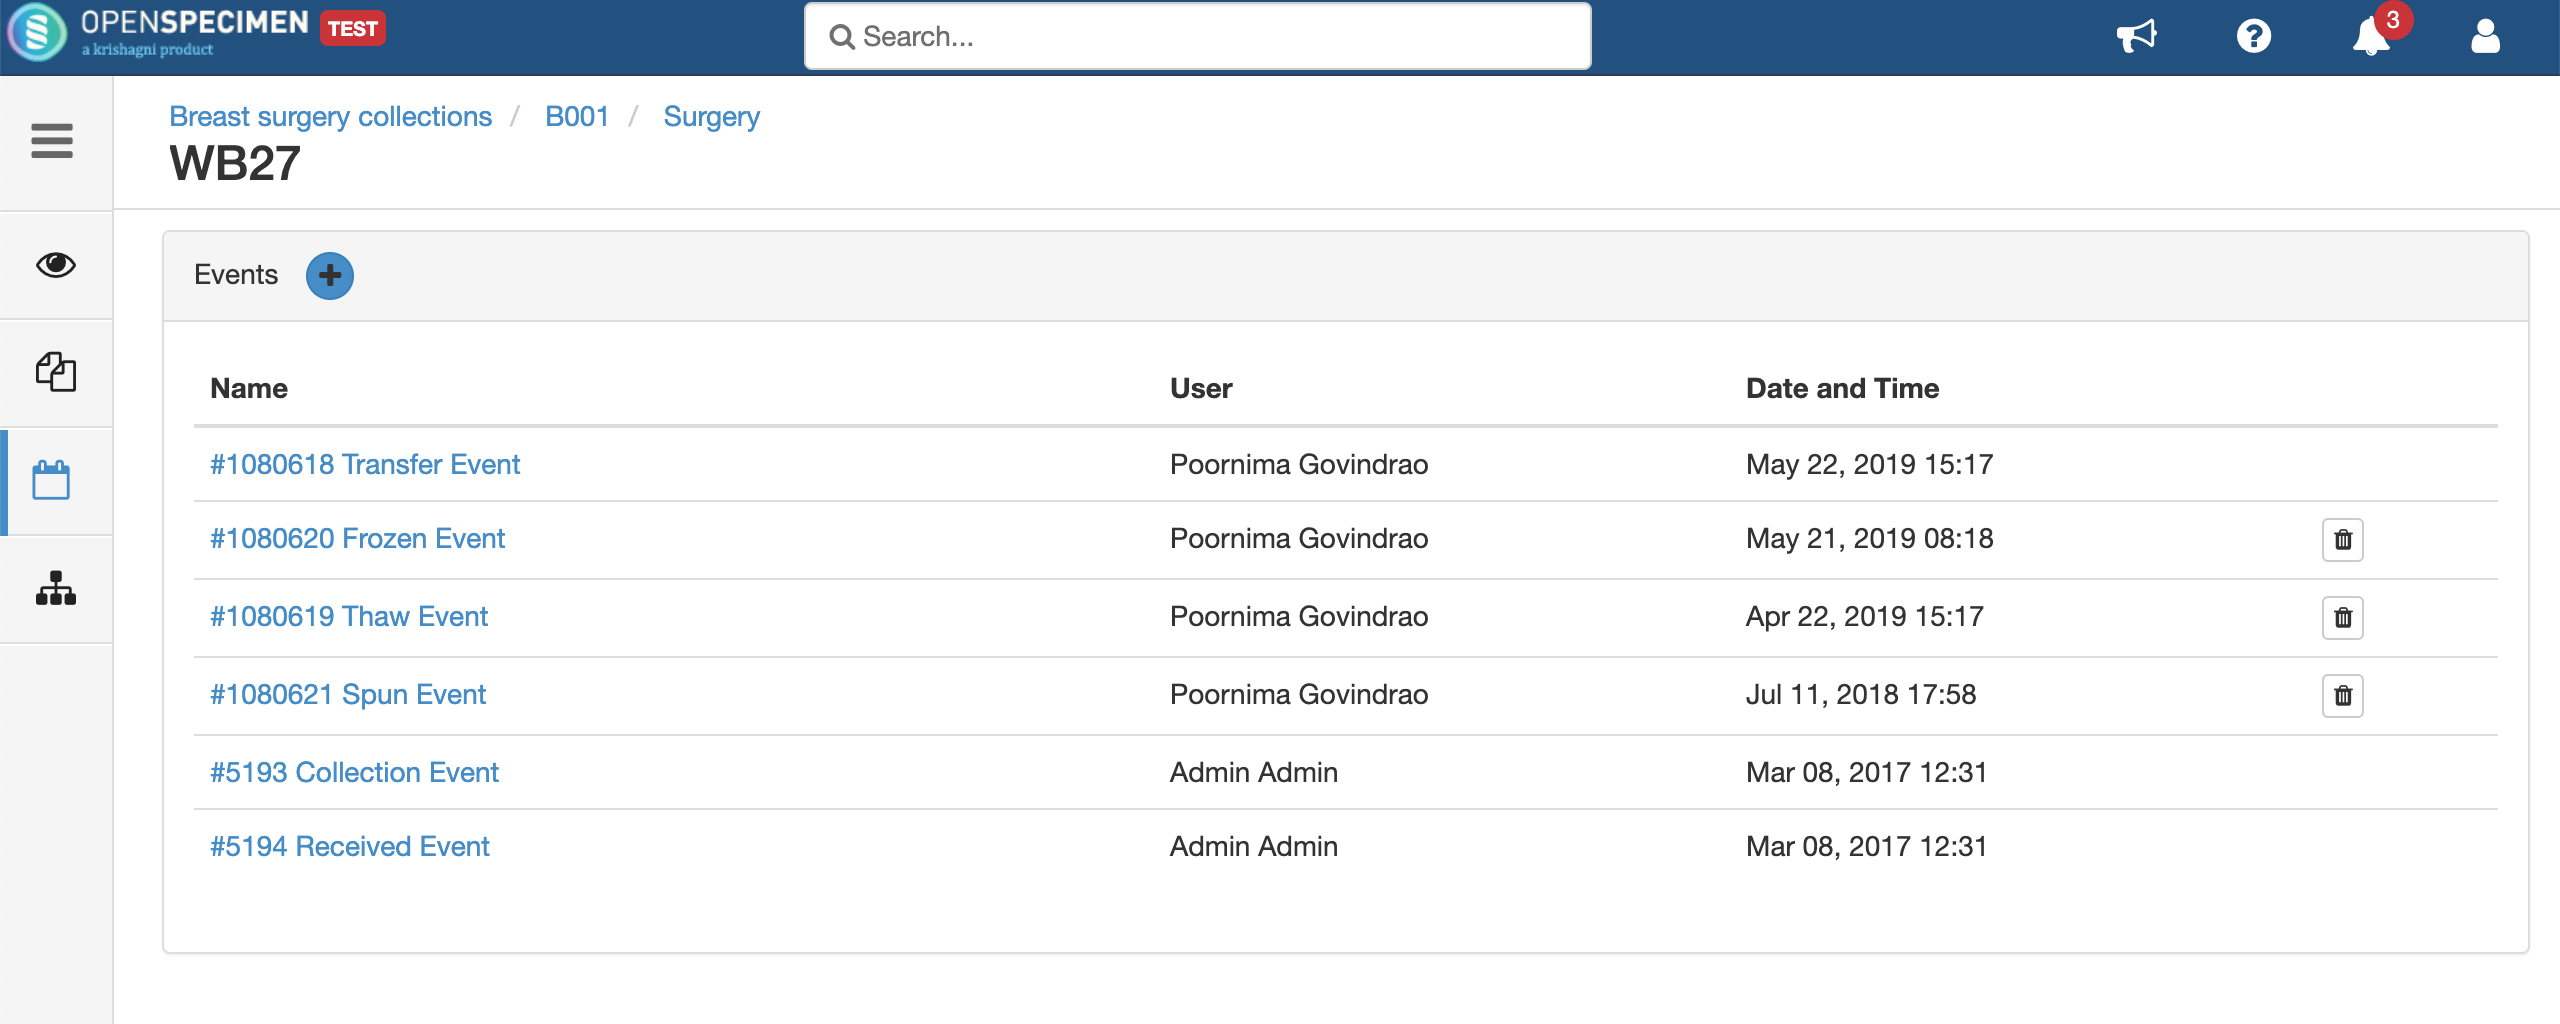
There are some system events that are automatically created by the system during specimen processing. These events are:
Steps to edit the system events (New in v8.0): Transfer Event: You can edit the below-listed details from the UI and bulk import:
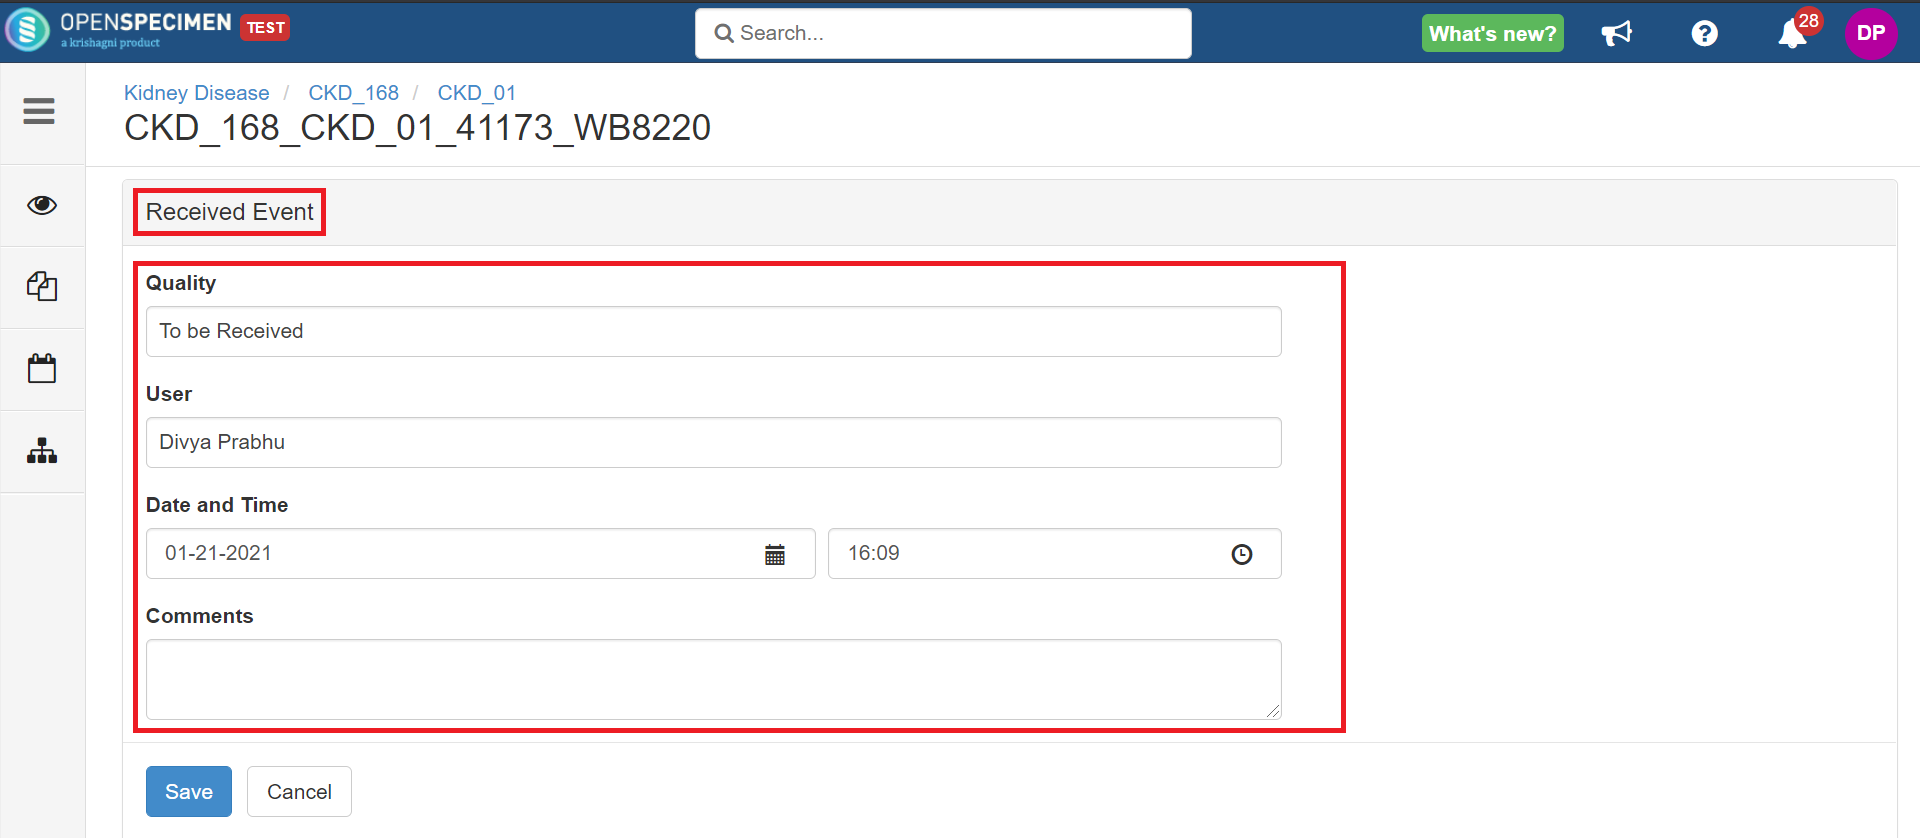
You can refer to the wiki page for information on bulk import. Received Event: You can edit the below-listed details from the UI:
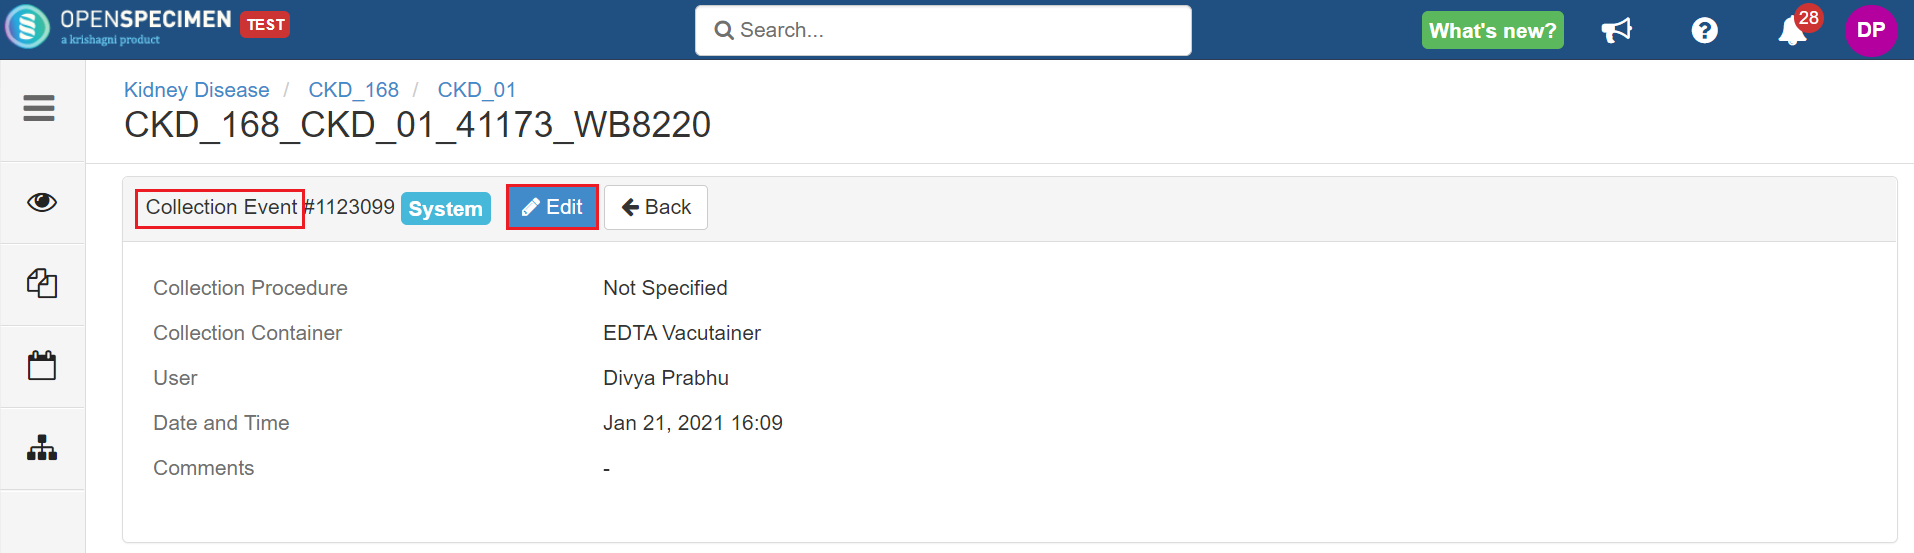
Collection Event: You can edit the below-listed details from the UI:
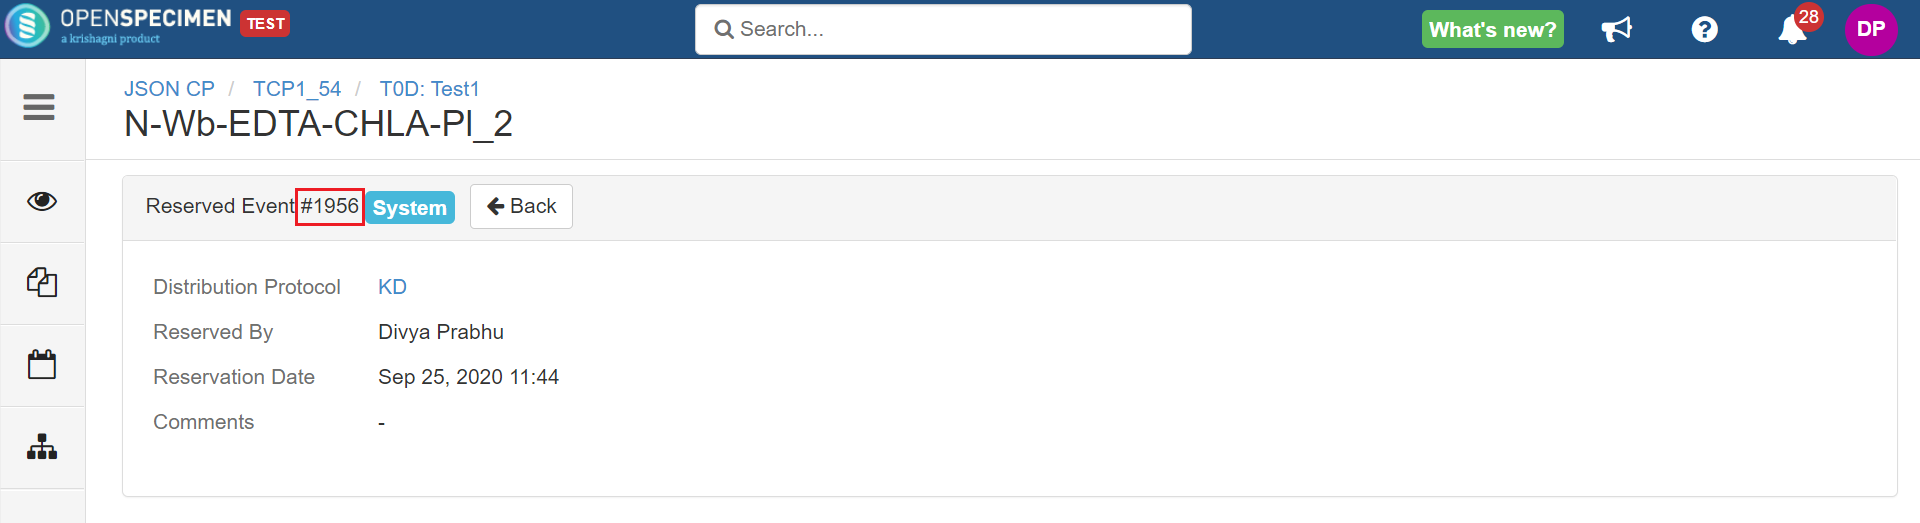
Reservation Event/Reservation Cancelled Event: You can edit the below-listed details:
Disposal Event: To update this event, you need to download the “Disposal Events“ template. You can download the template by following the steps:
You can edit the below-listed details:
You can refer to the wiki page for information on bulk import. Container Transfer Event: To update this event, you need to download the “Container Transfer Events“ template. You can download the template by following the steps:
You can edit the below-listed details:
You can refer to the wiki page for information on bulk import. Return Event: To update this event, you need to download the “Return Events“ template. You can download the template by following the steps:
You can edit the below-listed details:
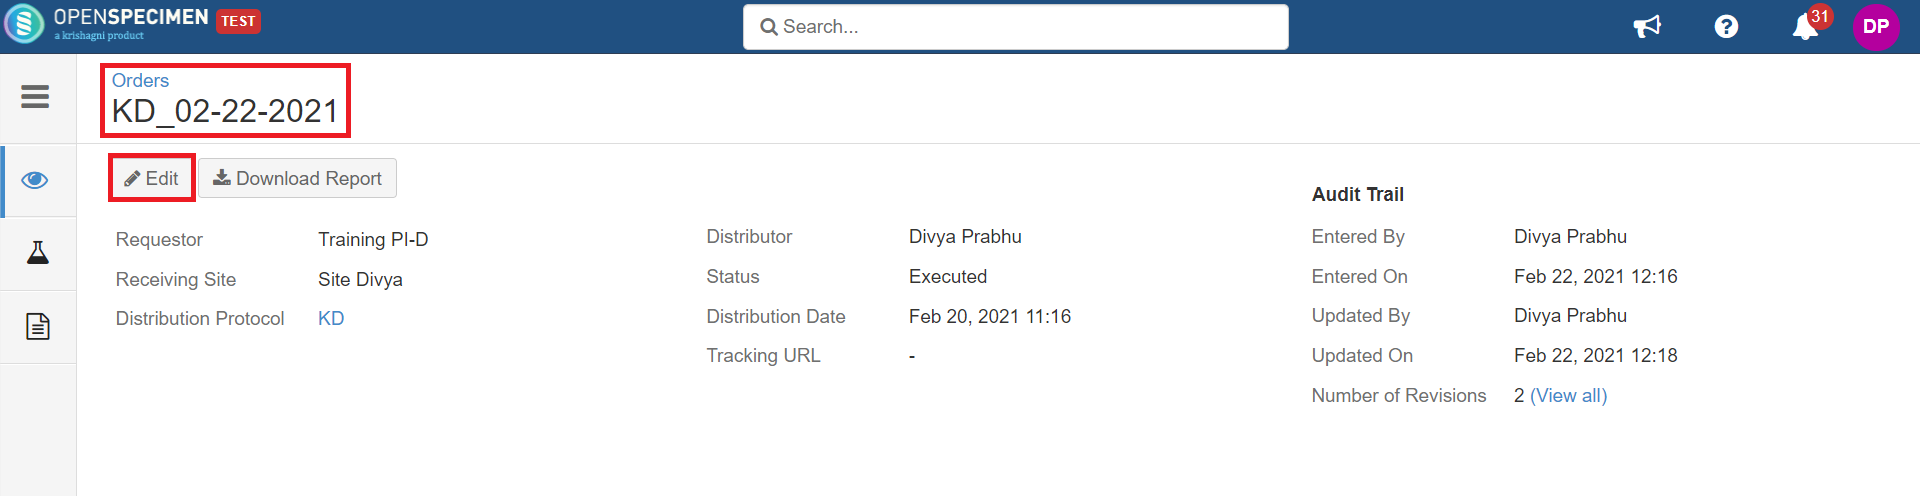
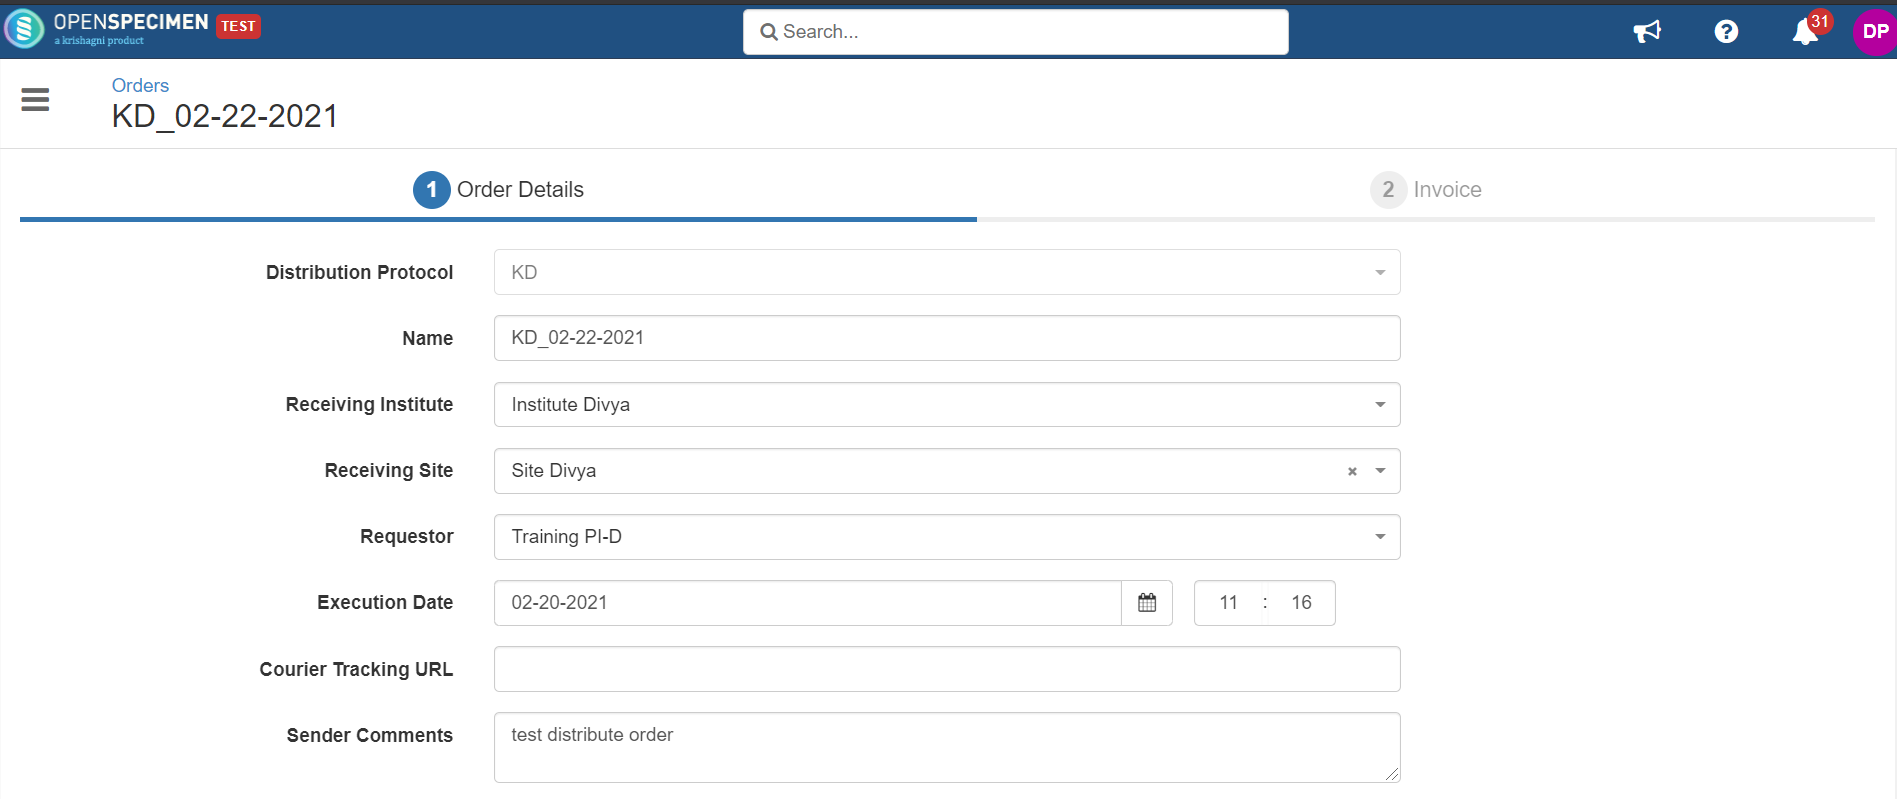
You can refer to the wiki page for information on bulk import. Distributed Event: To edit this event, go to the order, click on “Edit. “ The changes you make in the order will be reflected on the specimen’s distributed event.
You can edit the below-listed details:
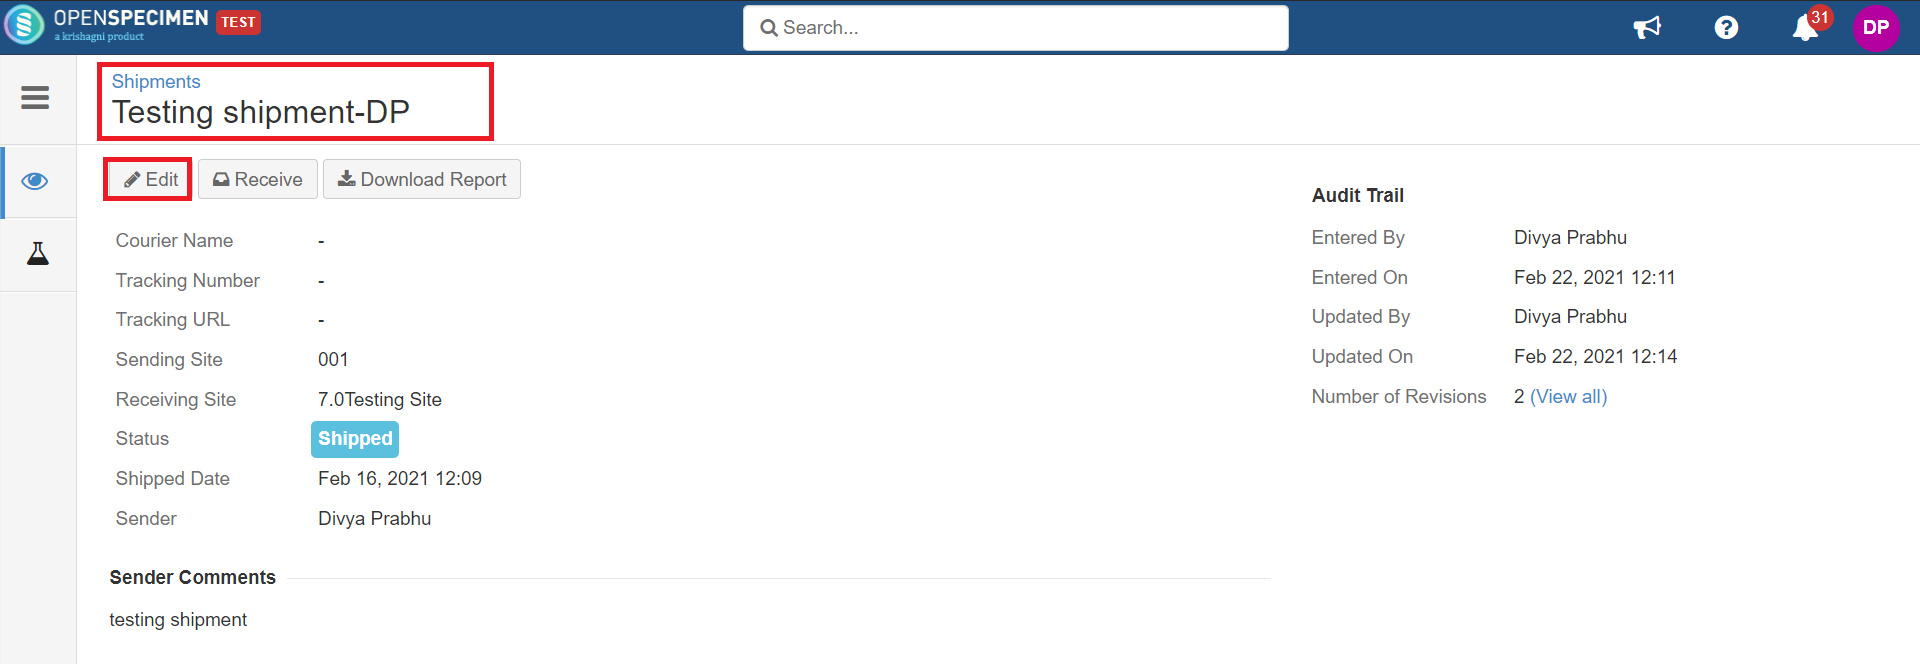
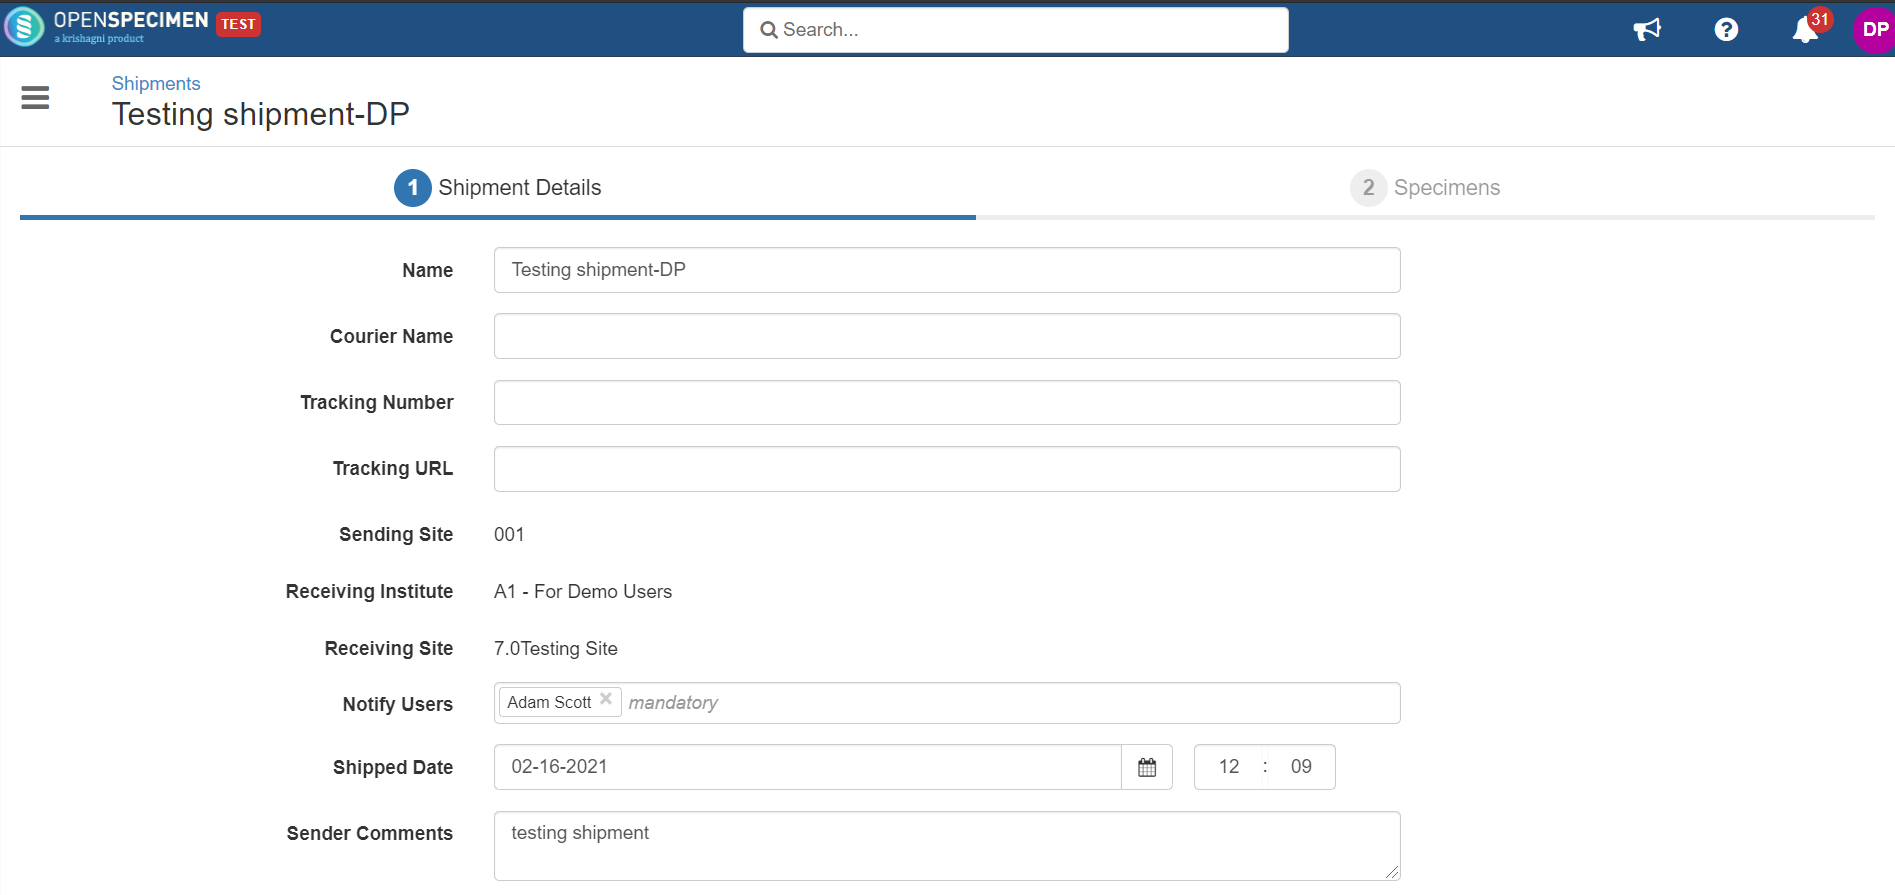
Shipment Shipped Event/Shipment Received Events: To edit this event, you need to go to that particular shipment overview page → Click on “Edit“ and update.
You can edit the below-listed details:
|
...
| Expand | |||||
|---|---|---|---|---|---|
| |||||
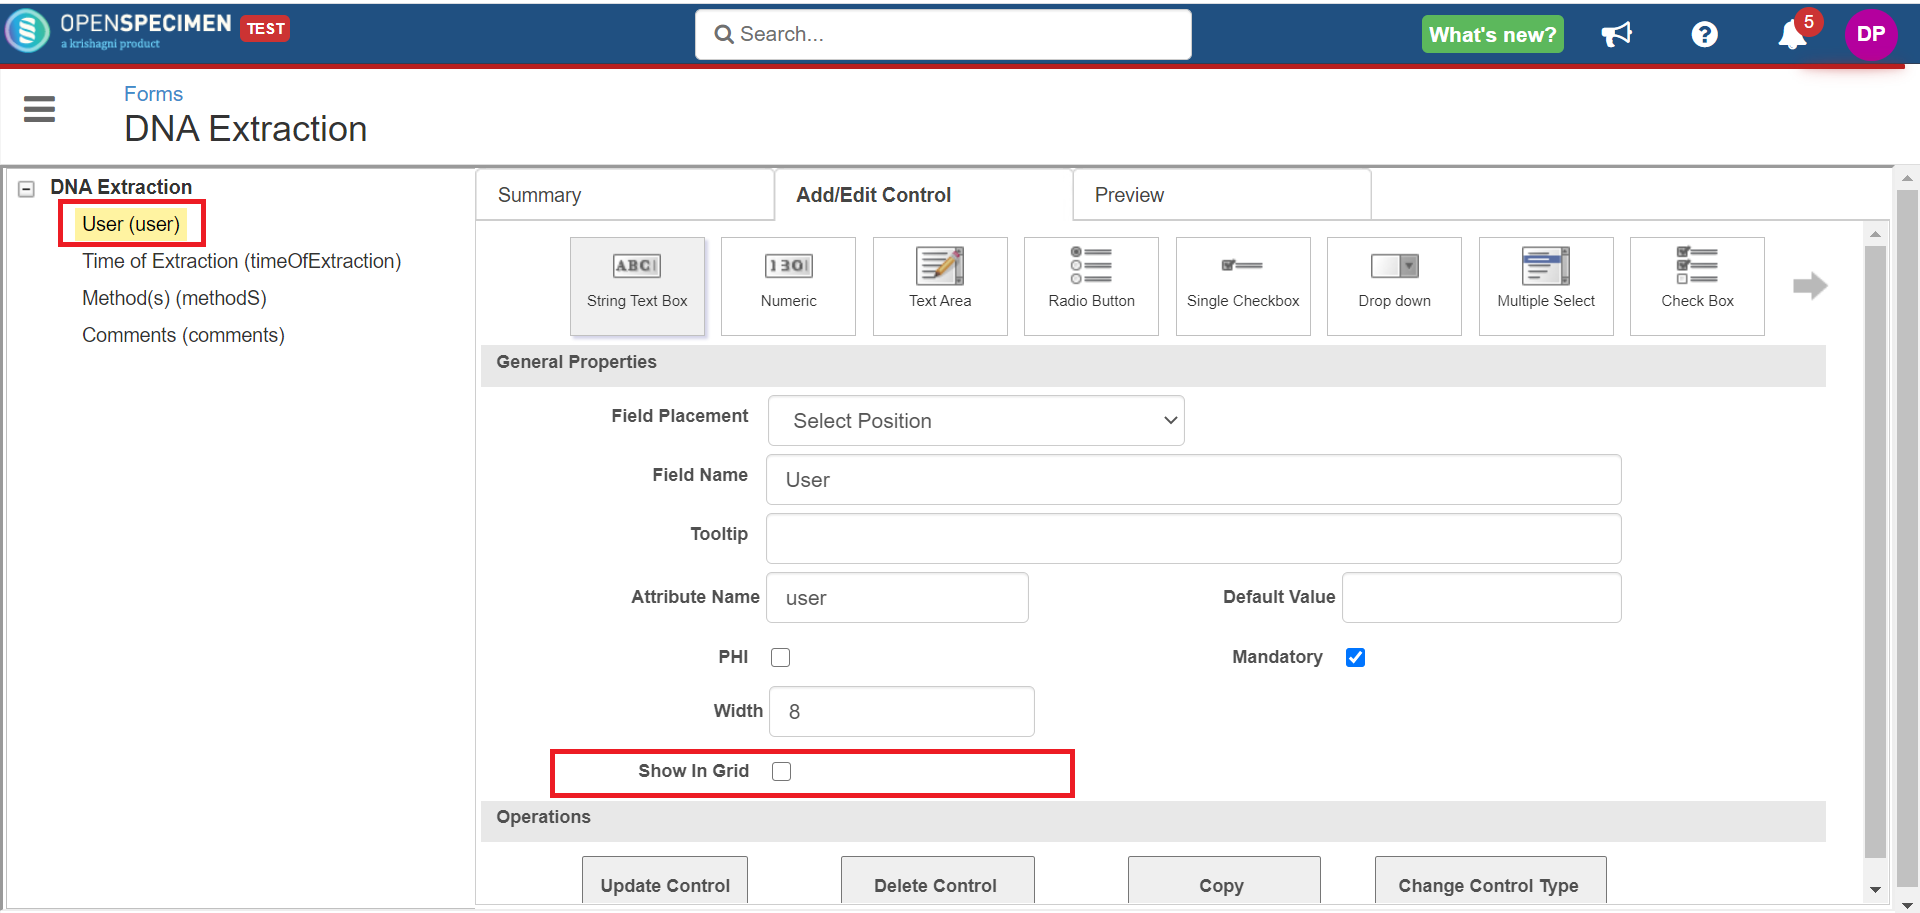
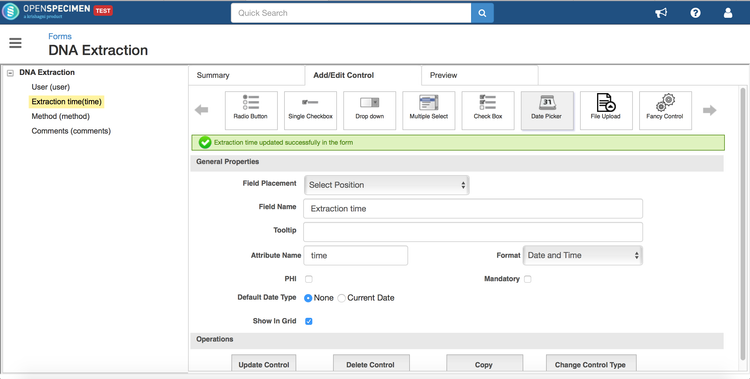
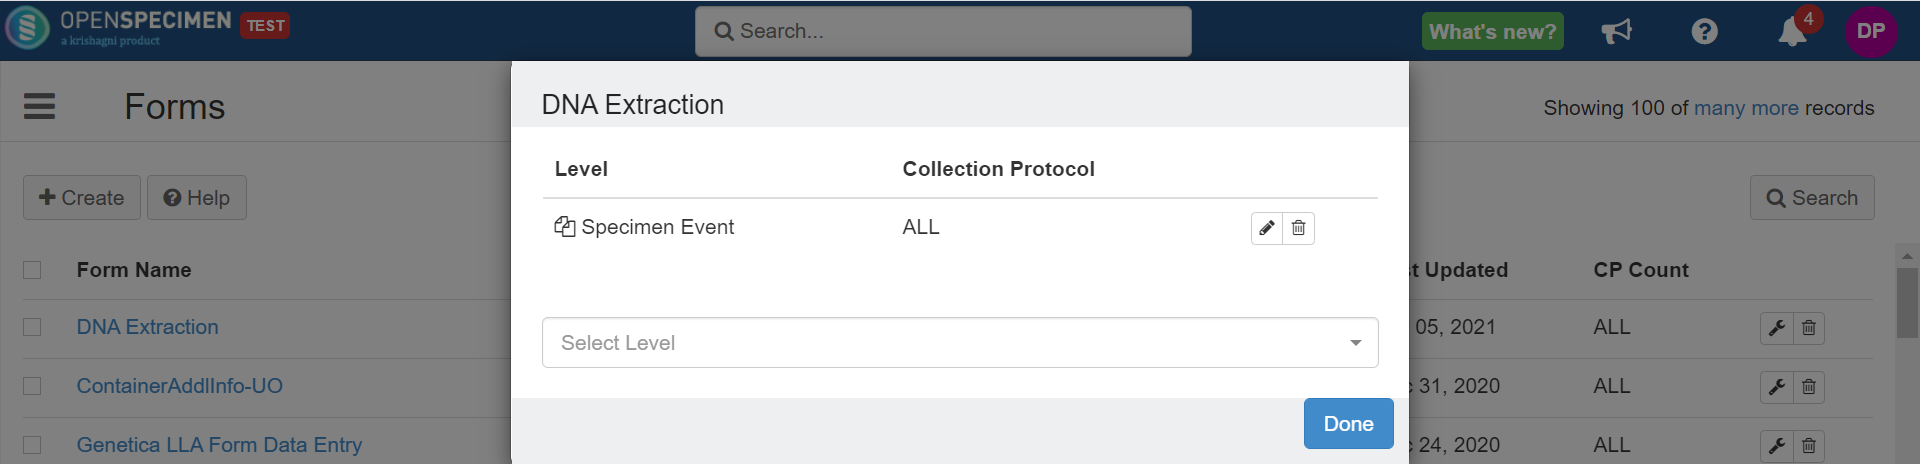
4. After the form is saved, click the 'Attach' icon beside the form in the forms list 5. Attach the form to the 'Event' level
6. This form will appear in the specimen events tab, and users can add, edit, query data under this.
|

...
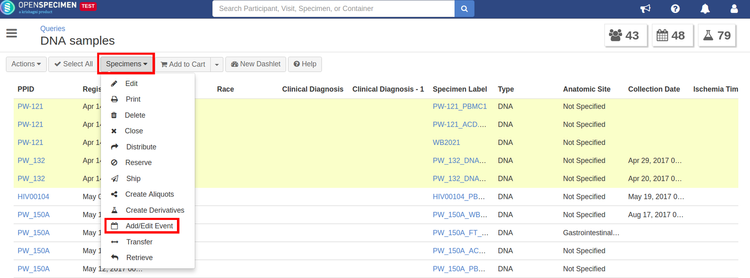
Add/Edit event data from a query
You can query specimens using the query interface and can add/edit events data from the results page.
| Expand | ||
|---|---|---|
| ||
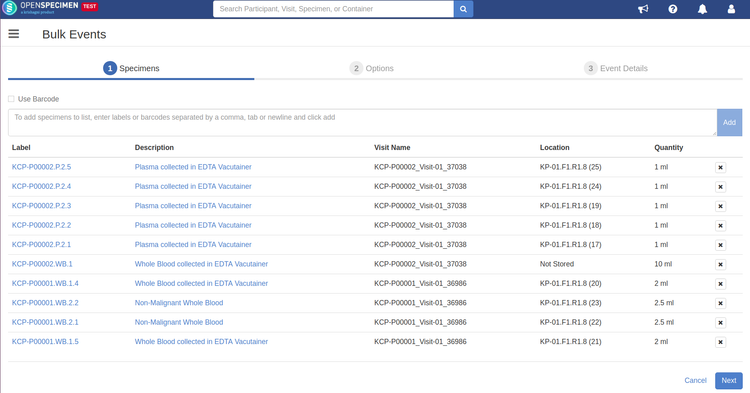
4. On the 'Bulk event' screen, users can review the list of specimens that were selected in the previous step. And also, add new specimens to the list by entering specimen labels in the box provided. Click on 'Next' once done with the specimen list.
5. Select the desired action, event, mode, and click the 'Next' button.
6. Add or update the values for the fields. Click "Save" to save the event.
7. An event will be created for all the specimens selected in step 3, having details such as date, time, user, method, and comments.
|


...