| Info |
|---|
Introduced in v7.0. |
Introduction
Forms (like surveys, questionnaires, medical history, clinical history, etc.) can be collected directly from participants via email. Data gets recorded in OpenSpecimen once the patient clicks on the link and enters the data.
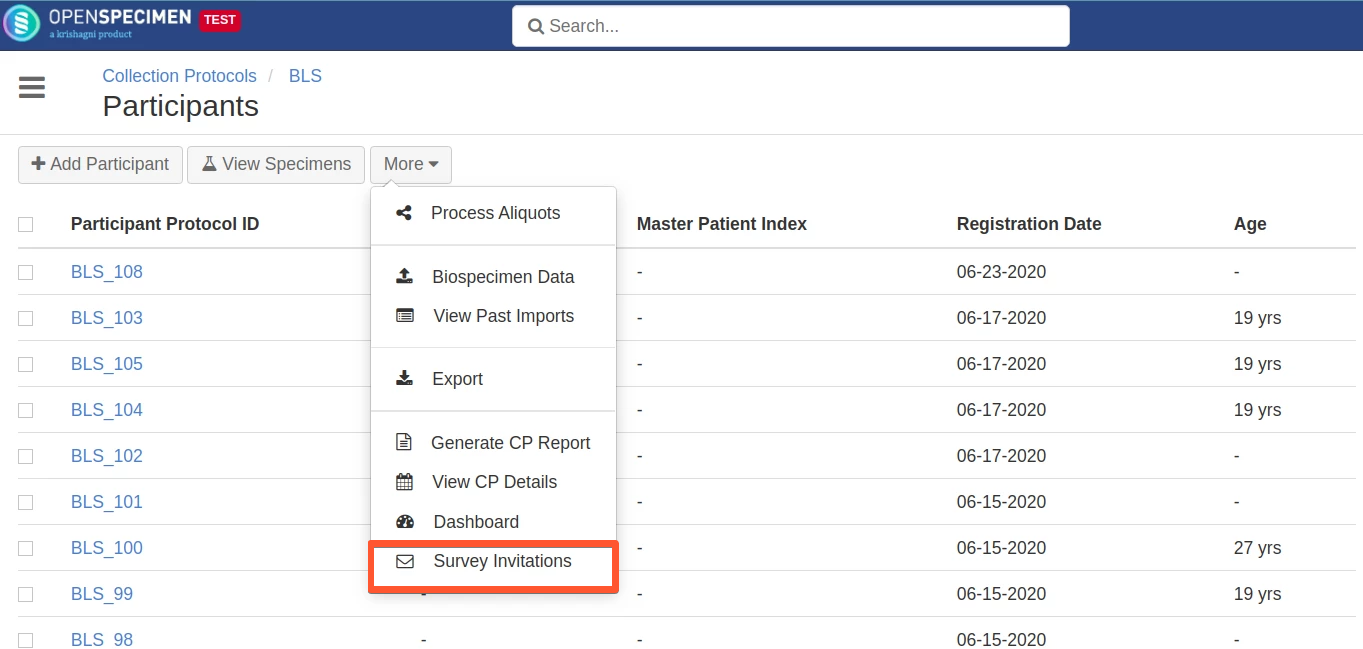
This option is named “Survey Invitations” is present under the “More” option of the Participant List page.
Features
More than one form can be emailed to participants
Reminder emails are sent if forms not filled
Email template per survey can be defined
The number of days for which the link remains active can be configured
Only participant level forms are supported
Prerequisites
Email notifications should be enabled at the system level.
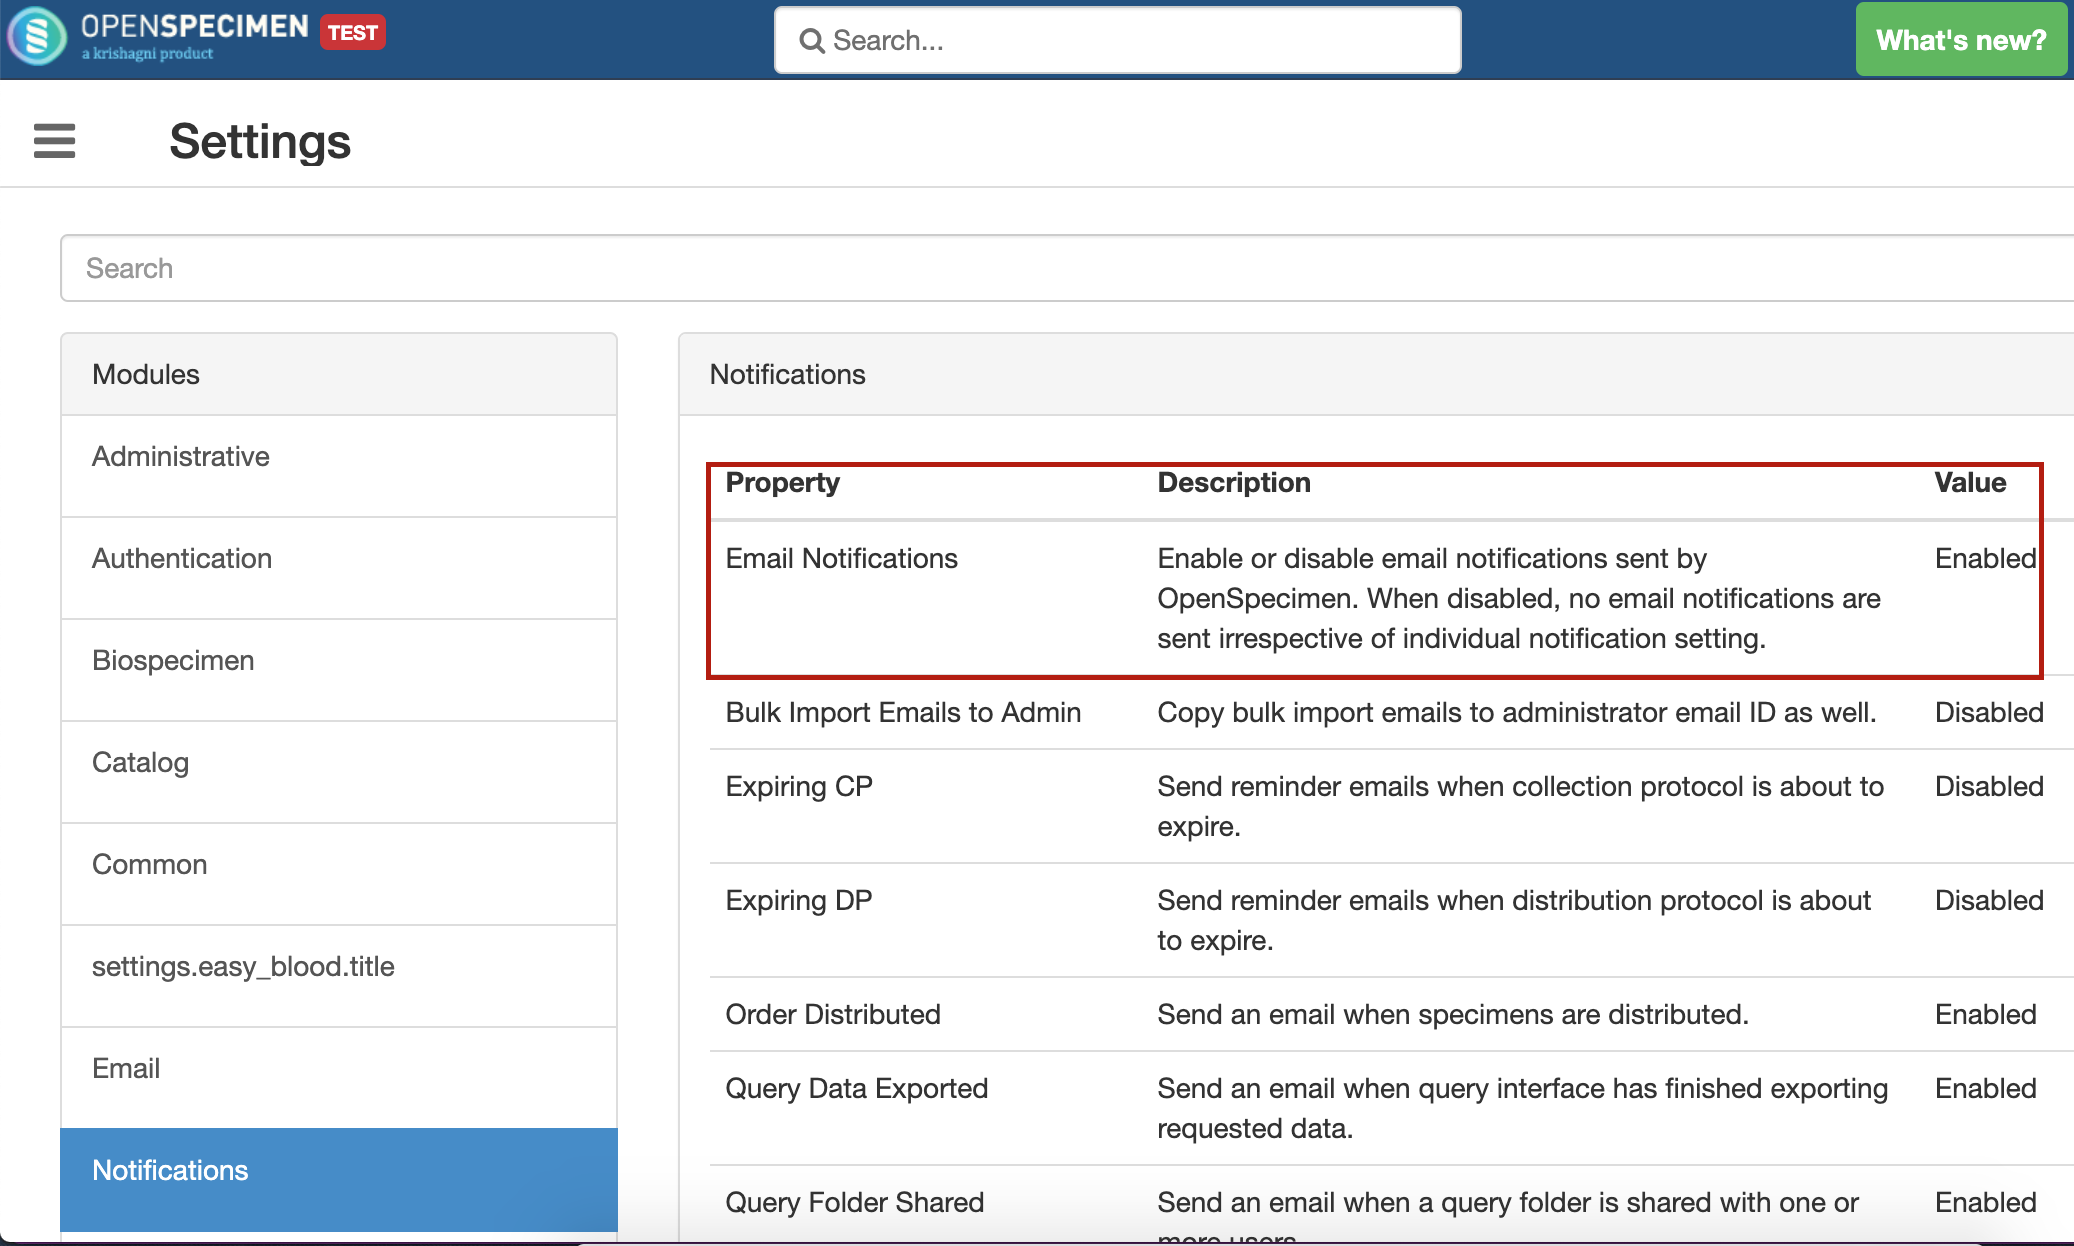
Email address for the participants should be present.
| Info |
|---|
Starting v7.0, email address is a standard field in the participant page. |
...
| Code Block | ||
|---|---|---|
| ||
{
      "name" : "cpr.participant.emailAddress",
      "caption" : "Email Address",
      "type" : "text",
      "optional" : true,
      "metainfo" : {
        "phi" : "true"
      }
}, |
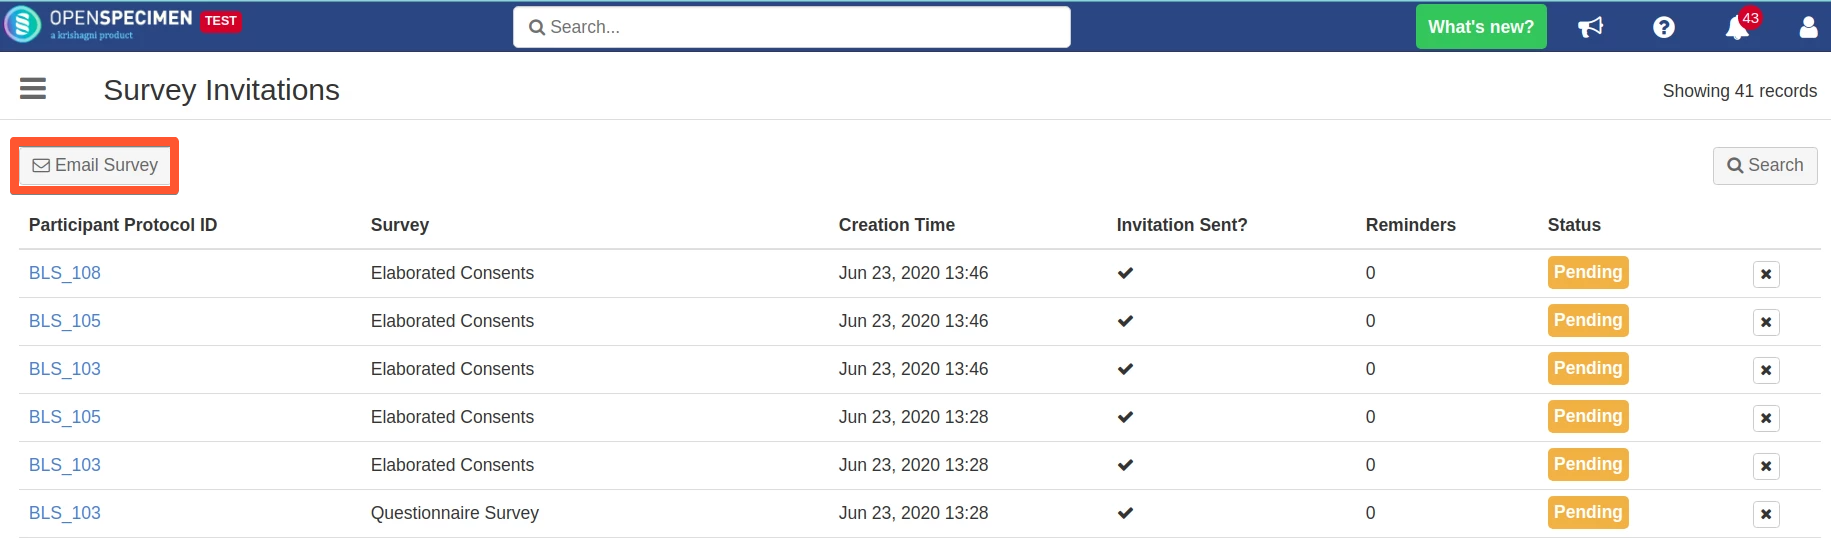
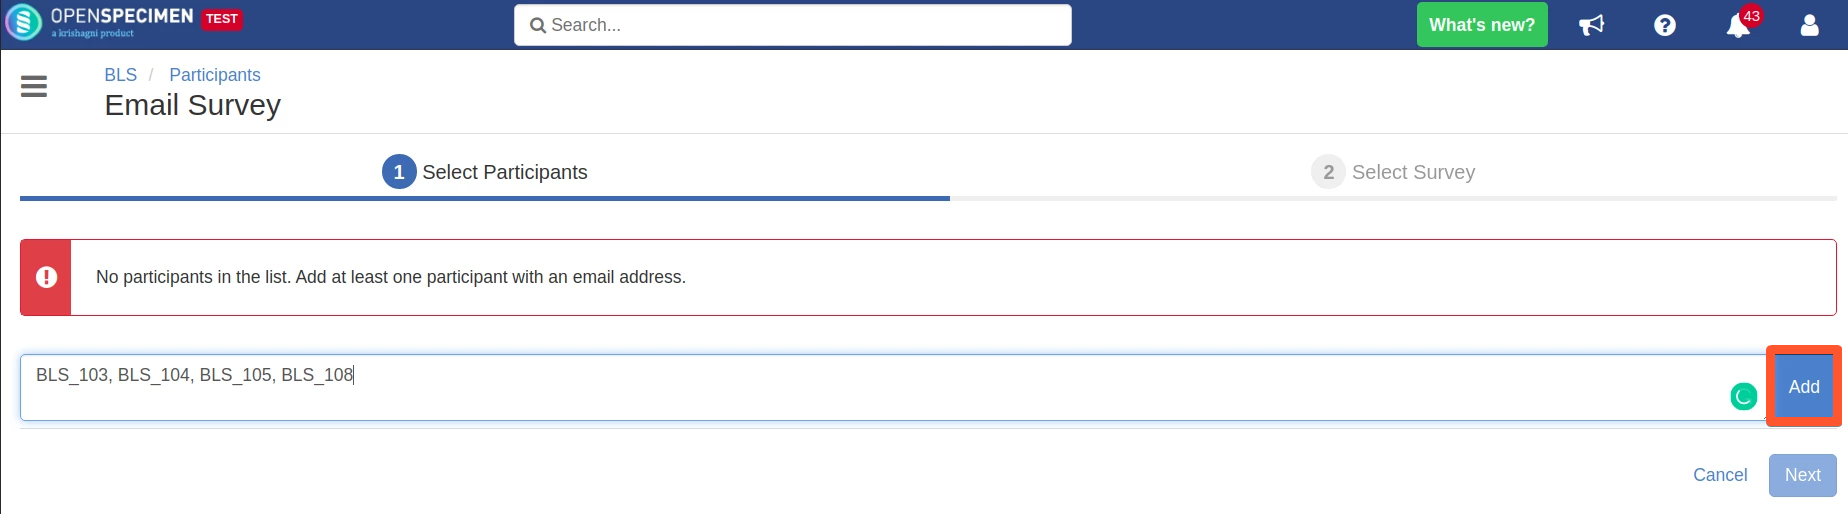
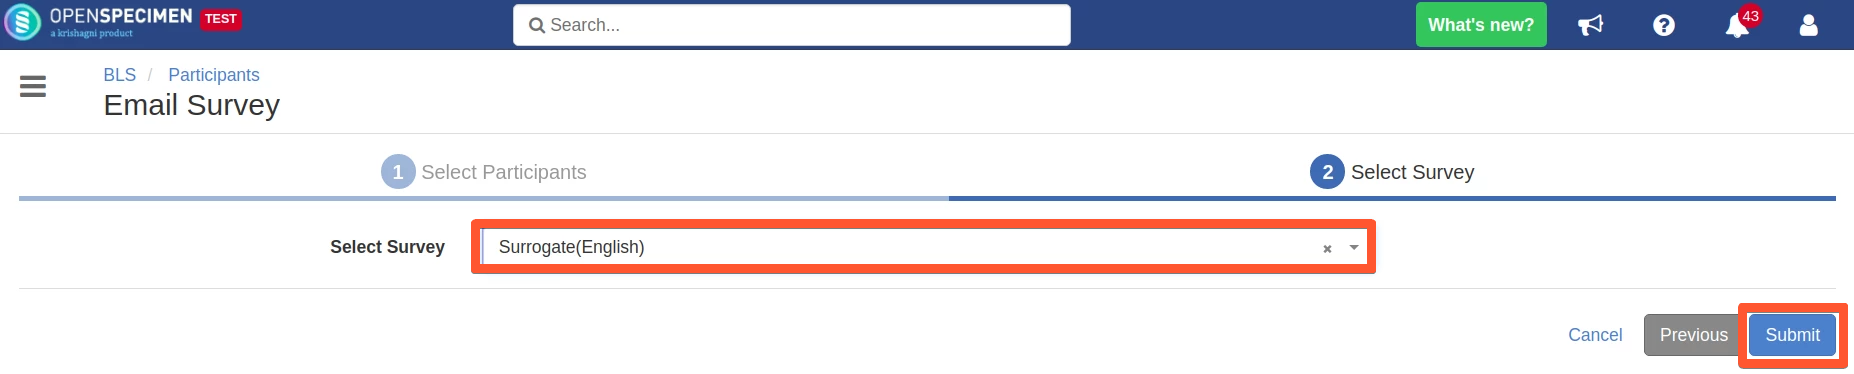
Emailing the Forms to Participant
Privileges:
In order to email the participant forms and/or consent forms, the user should have at least the following privilege:
a. Participant (PHI): Read, Update privileges
b. Consents: Read, Update privilegesThe surveys should already be designed at the CP level. For details on how to design the surveys, refer Surveys wiki page.
Follow the below steps to email consents/ forms:
| Expand |
|---|
|

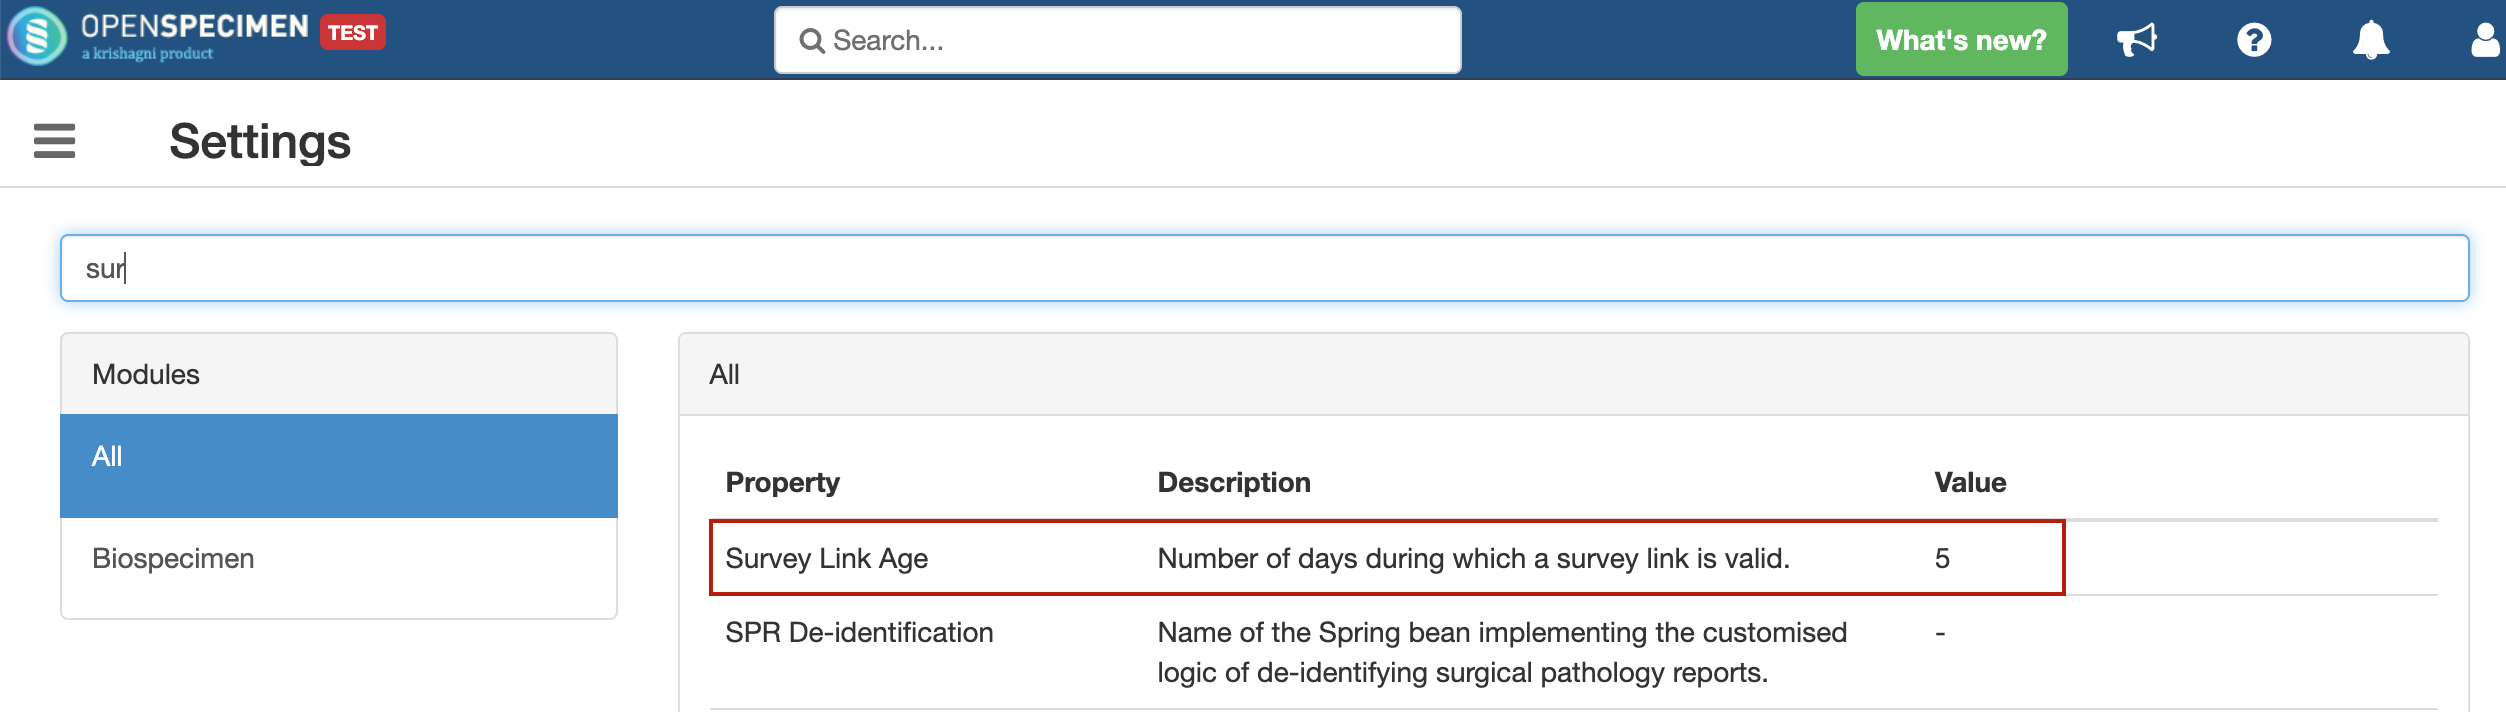
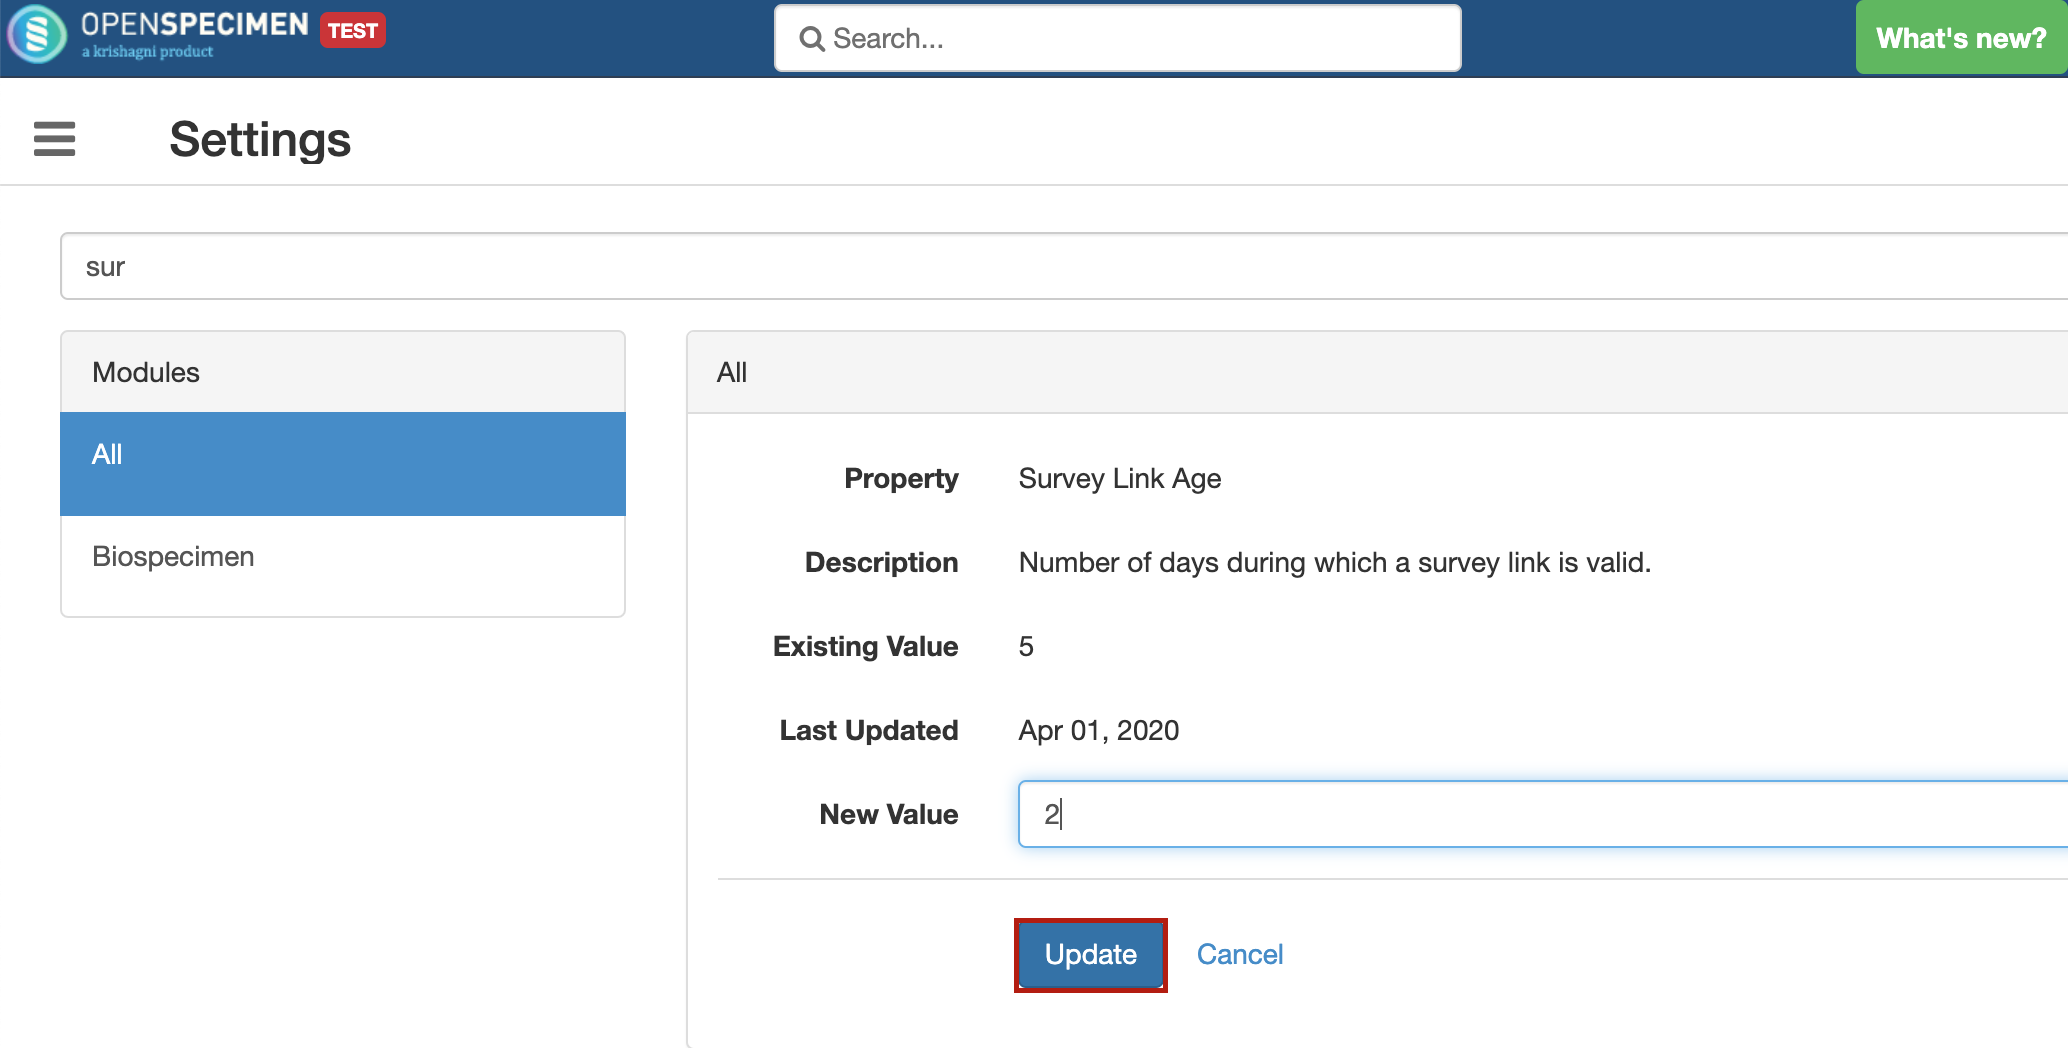
Configuring Expiry of a Survey Link
The links emailed will expire if not filled in within a certain number of days. The expiry can be set per survey using the ‘Invitation Age’ field.
...
| Expand | ||
|---|---|---|
| ||
|
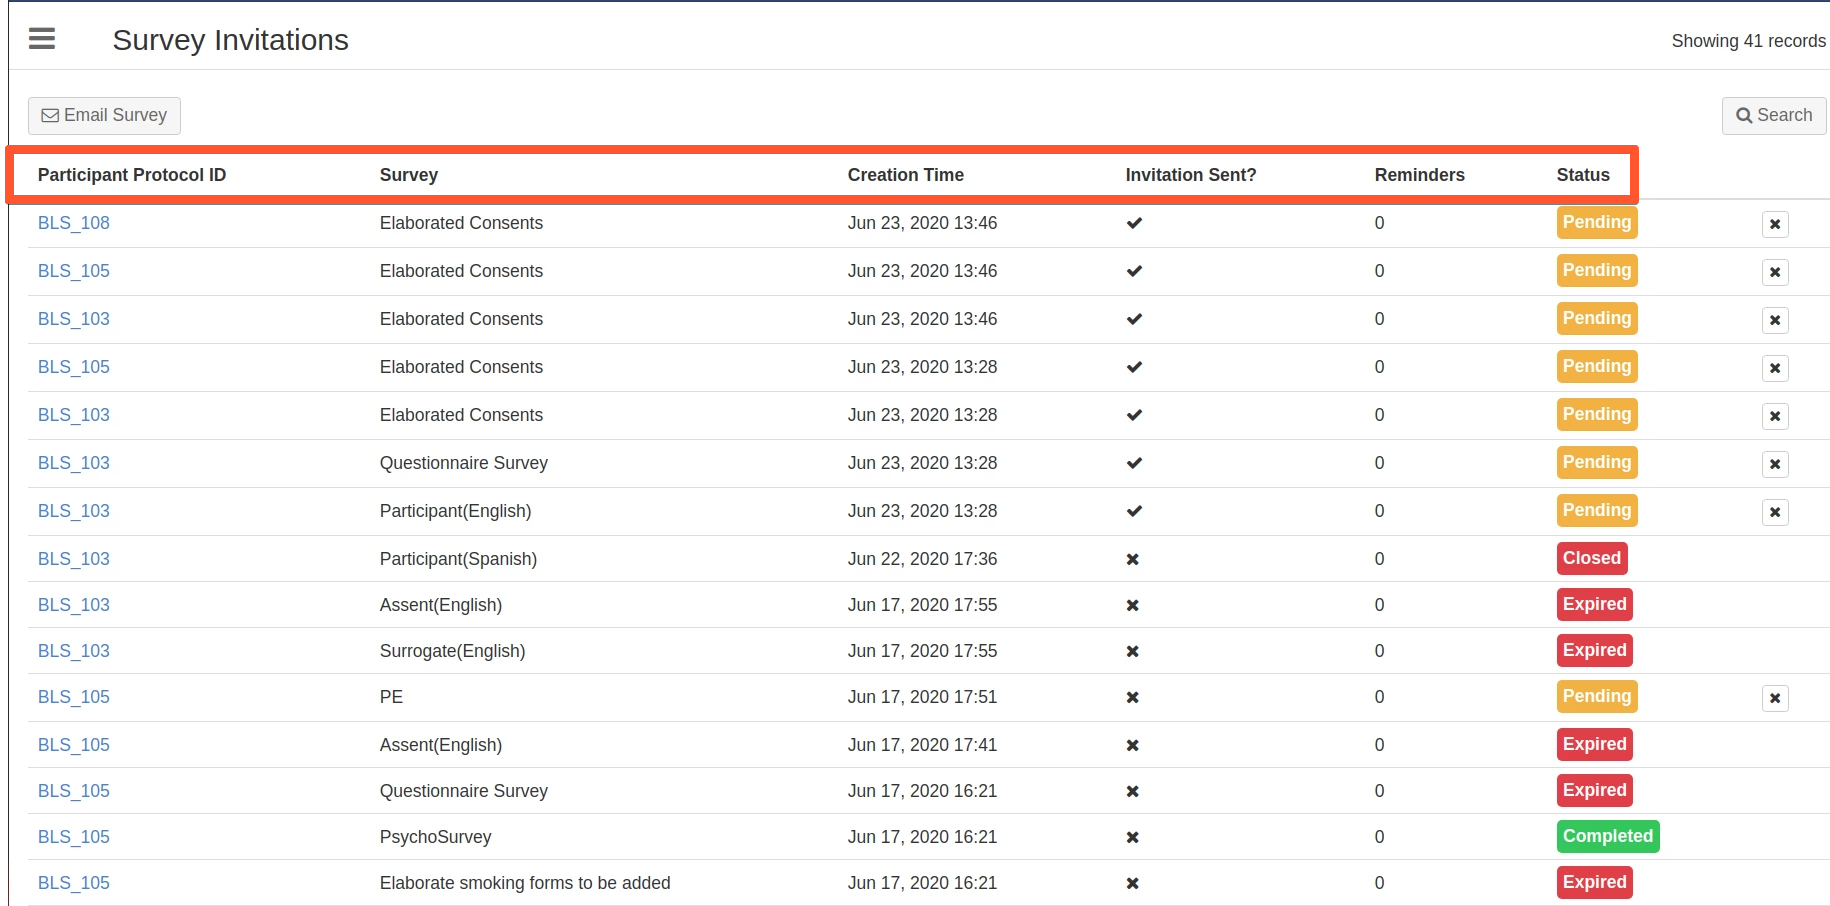
Viewing survey invitations
The survey invitations that have been mailed to participants can be viewed by going to the Participant List Page > More > Survey Invitations
...