Versions Compared

Key

  • This line was added.
  • This line was removed.
  • Formatting was changed.
Table of Contents

Containers can be moved transferred from one position to another across freezers (v10.x) or within the same freezer (earlier versions). It adds a "Transfer Event" on the container as well as stored specimens to and stored specimens to keep an audit of these movements and include includes them in reports.

title
Info

Pre-requisites

  • The 'Parent Site' should be the same for source and destination containers.

  • The 'Collection Protocol' and 'Specimen Types' restrictions should match.

  • The new positions

    where

    to which the containers are being moved

    to,

    should not be already occupied.

Steps to transfer a container:

...

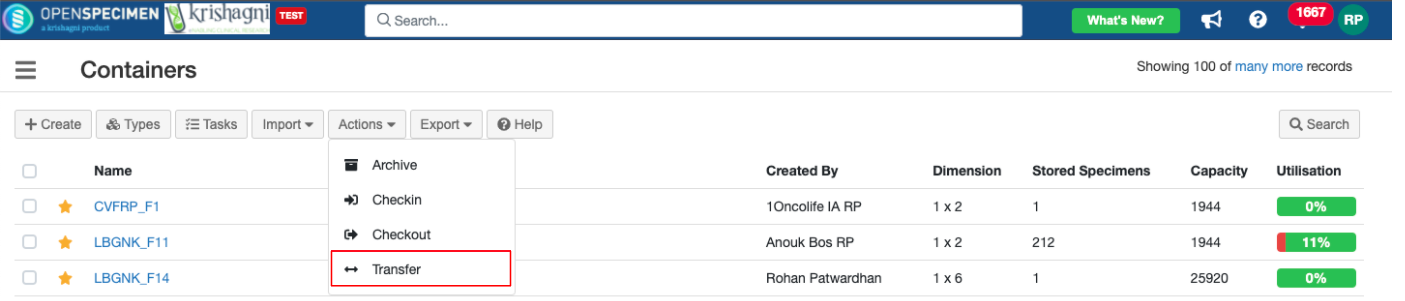
Transfer containers within/across freezers via UI

Expand
titleClick here to expand
  1. From the containers page click on Actions → Transfer

    Image Added

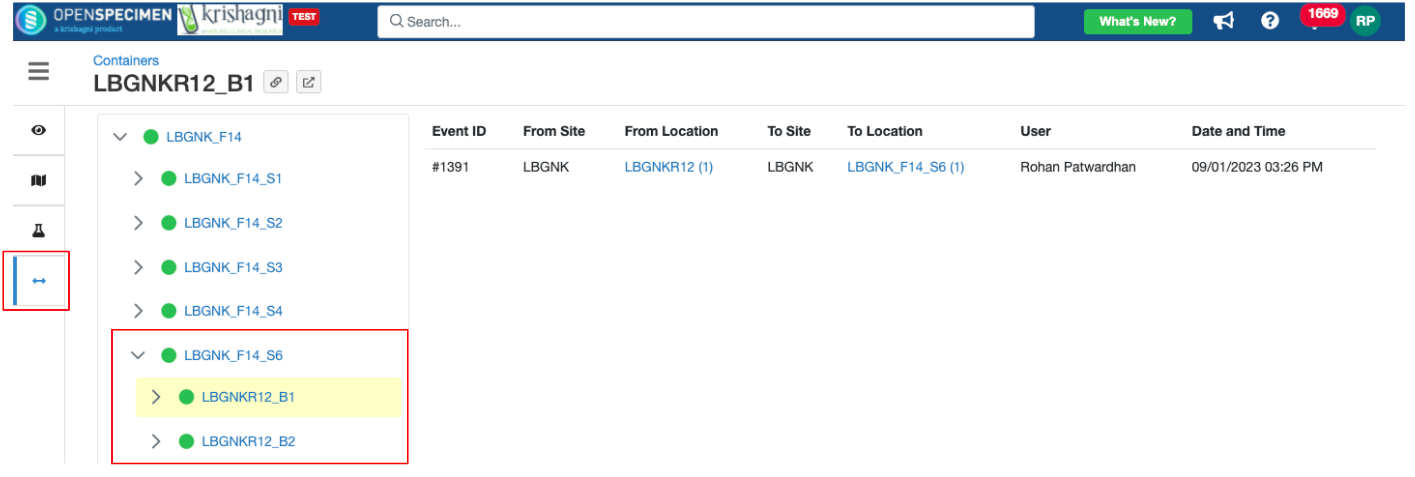
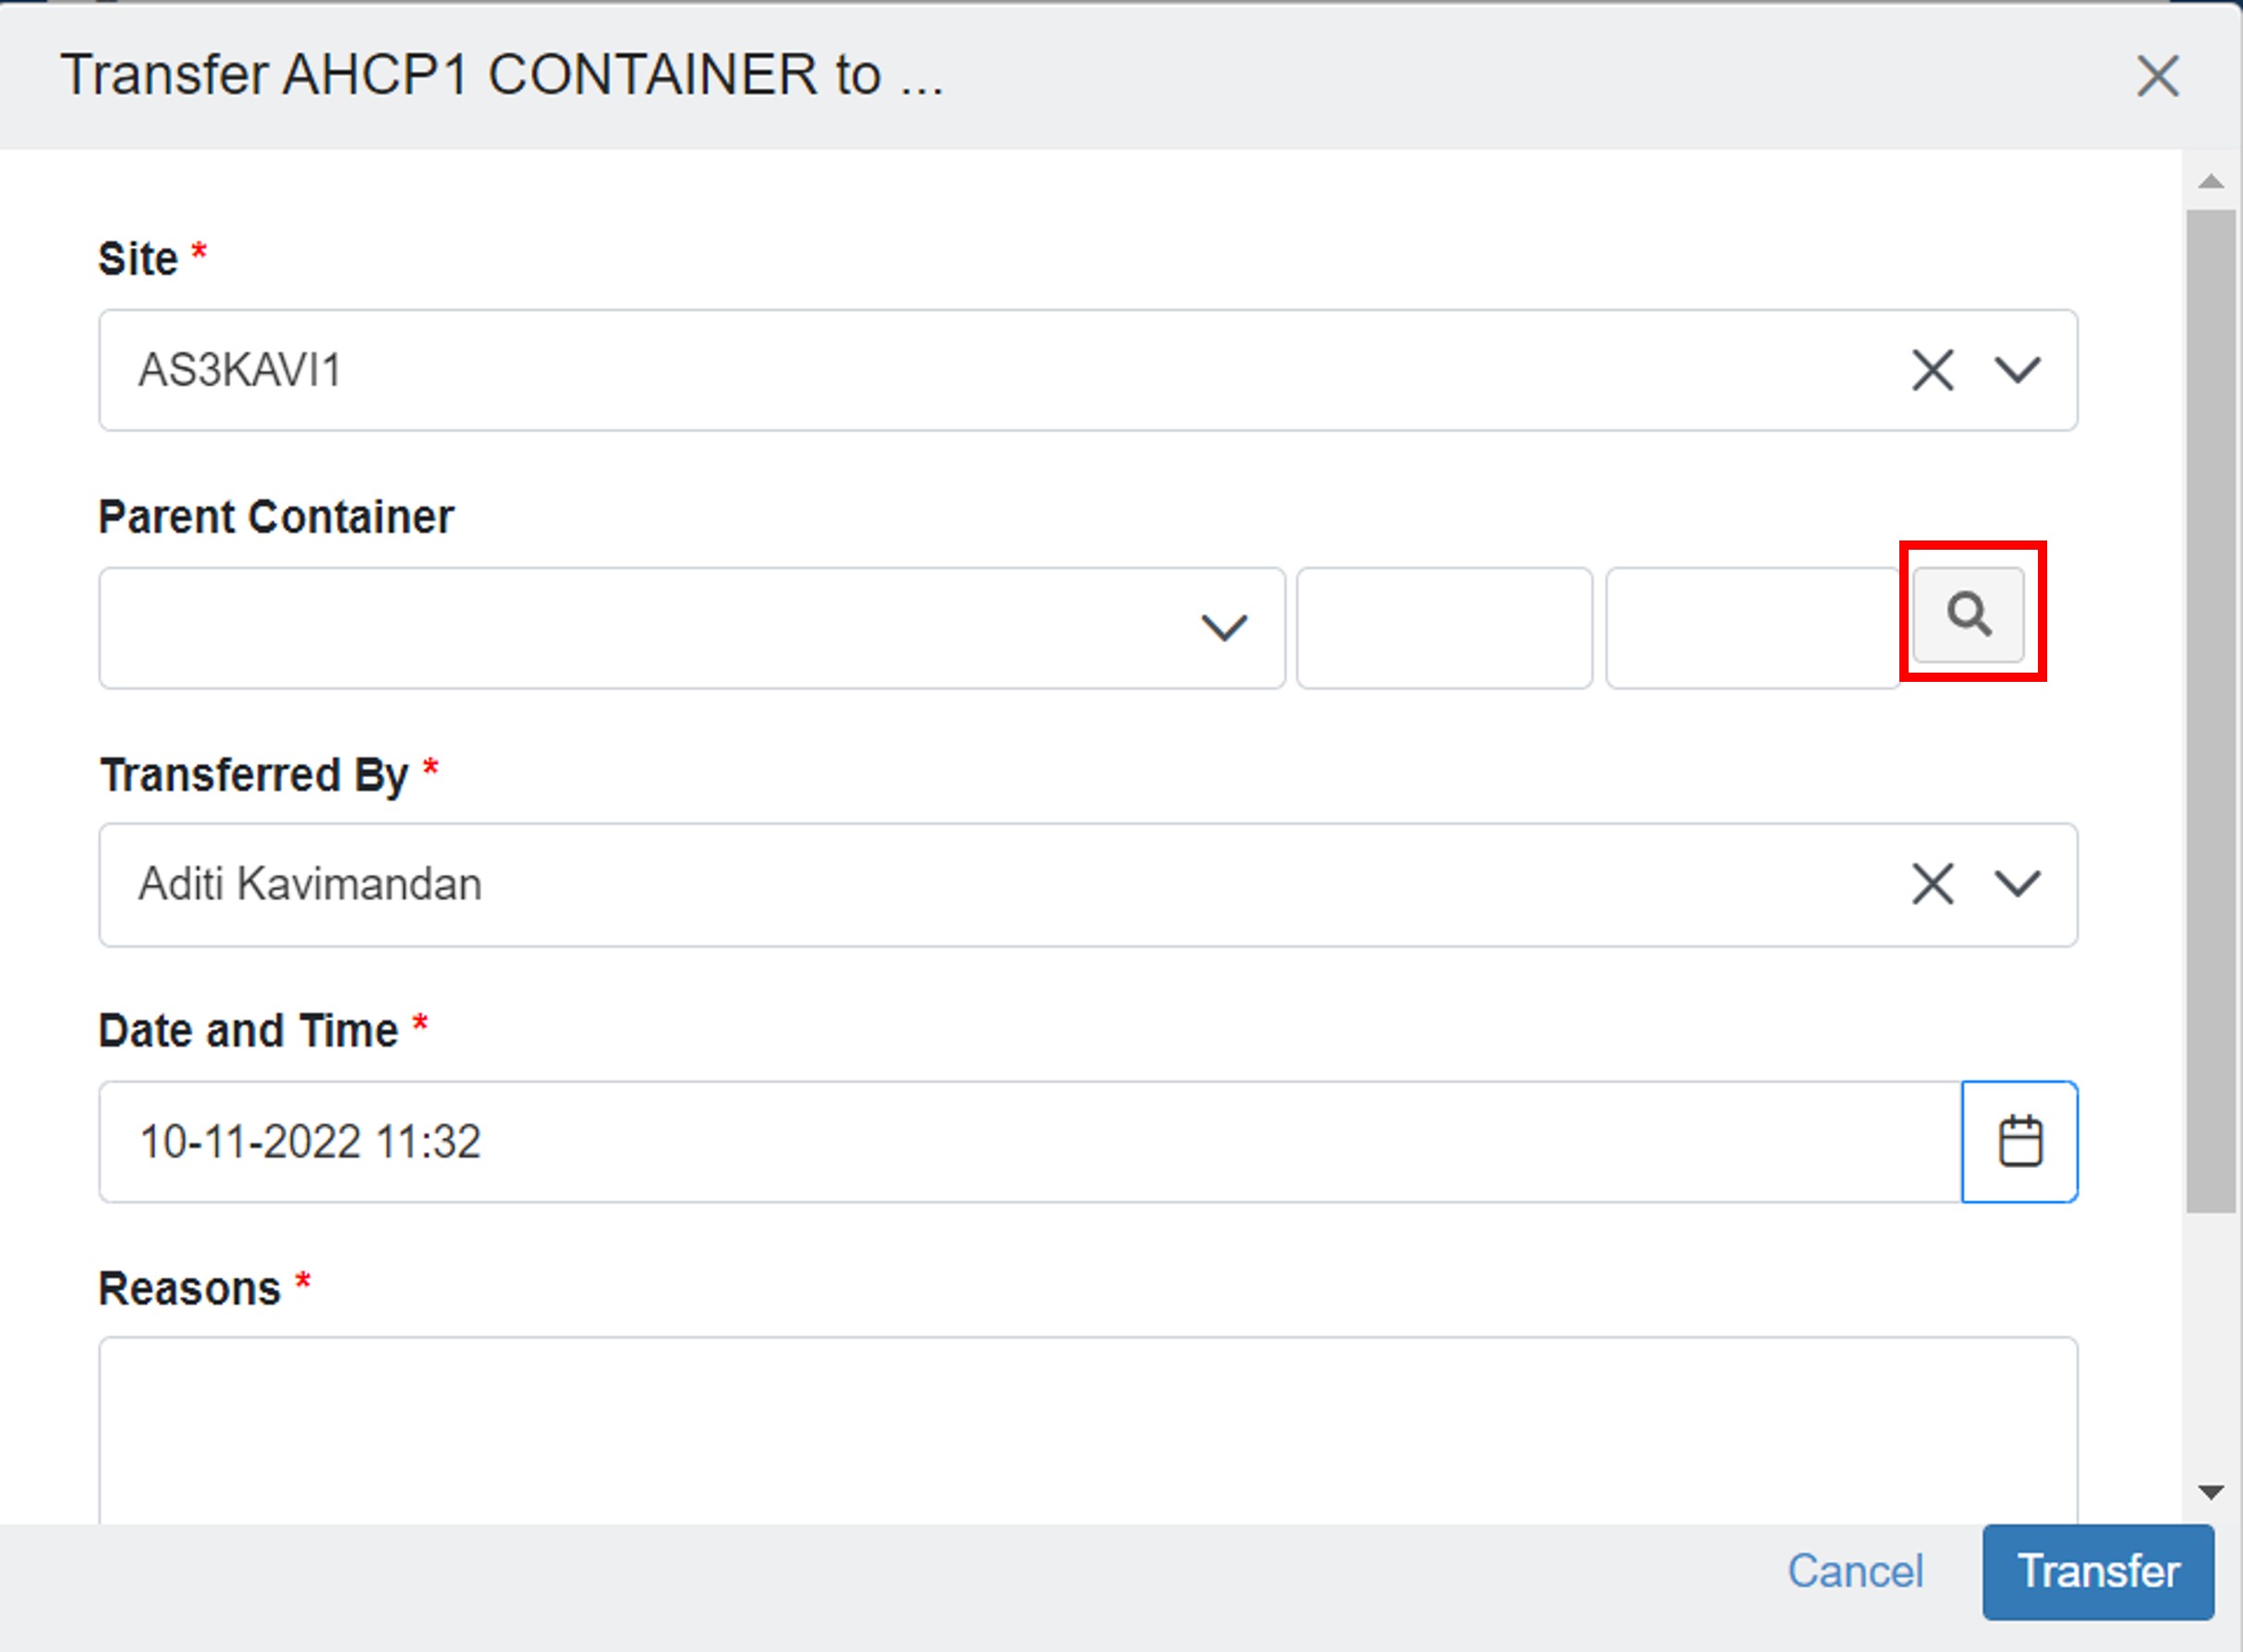
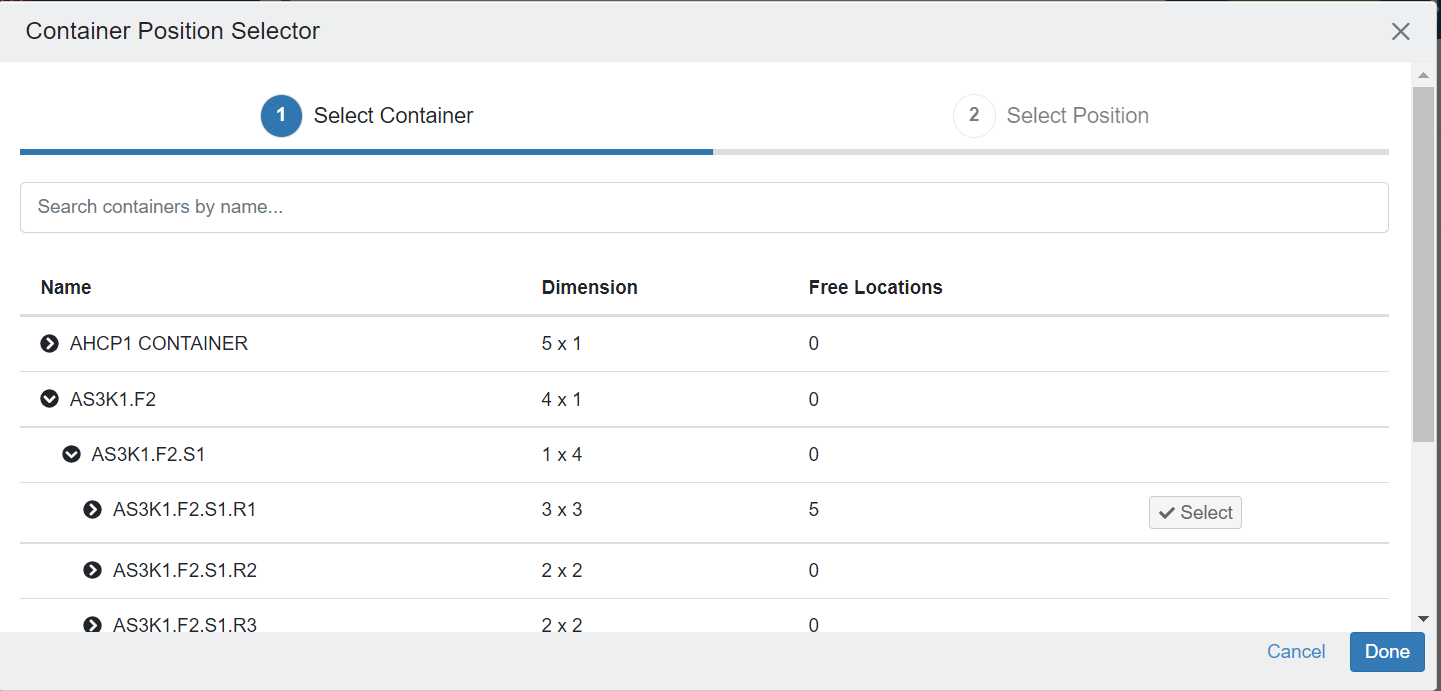
2. Scan/paste the container's unique name or barcode and Click on Add

Image Added

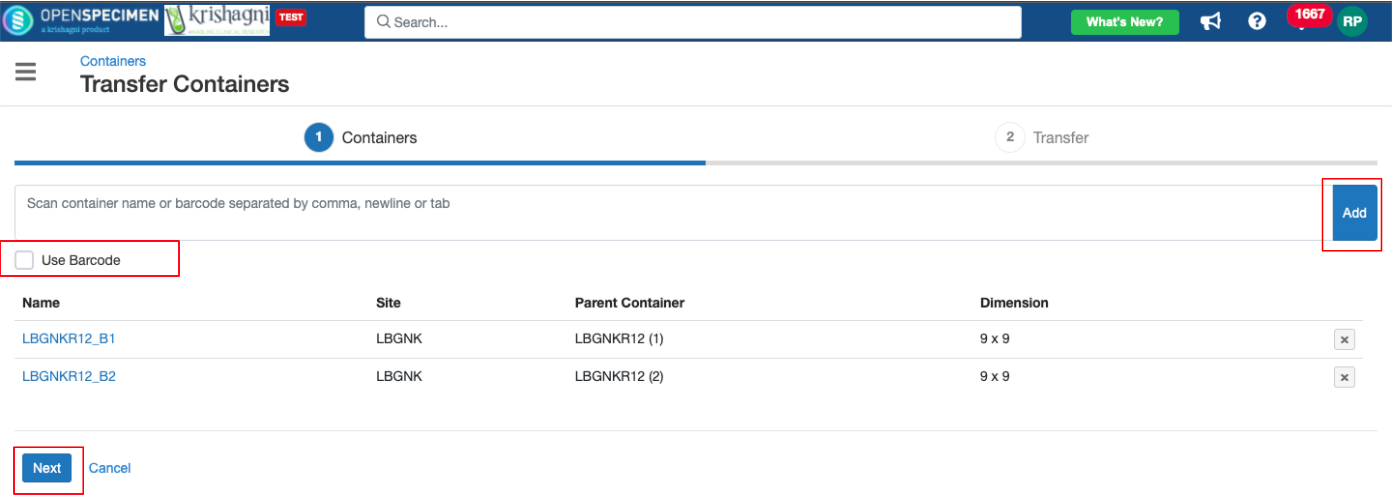
3. Select the Parent container and position, add a reason (mandatory) → Submit

Image Added

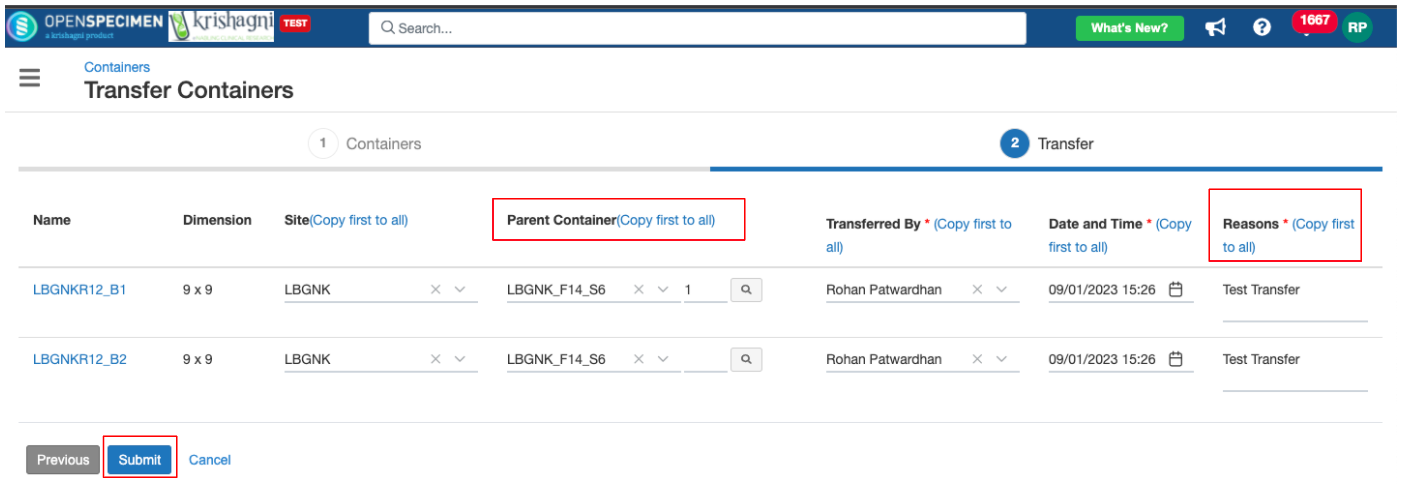
4. Transferred container can be seen under the selected Parent container.

Transfer event is added at 3 places

  1. Transferred container

  2. Descendents of the container

  3. All specimens in container/ descendants

Image AddedImage AddedImage Added

5. You can also ‘Transfer’ individual containers from the container overview page → More → Transfer
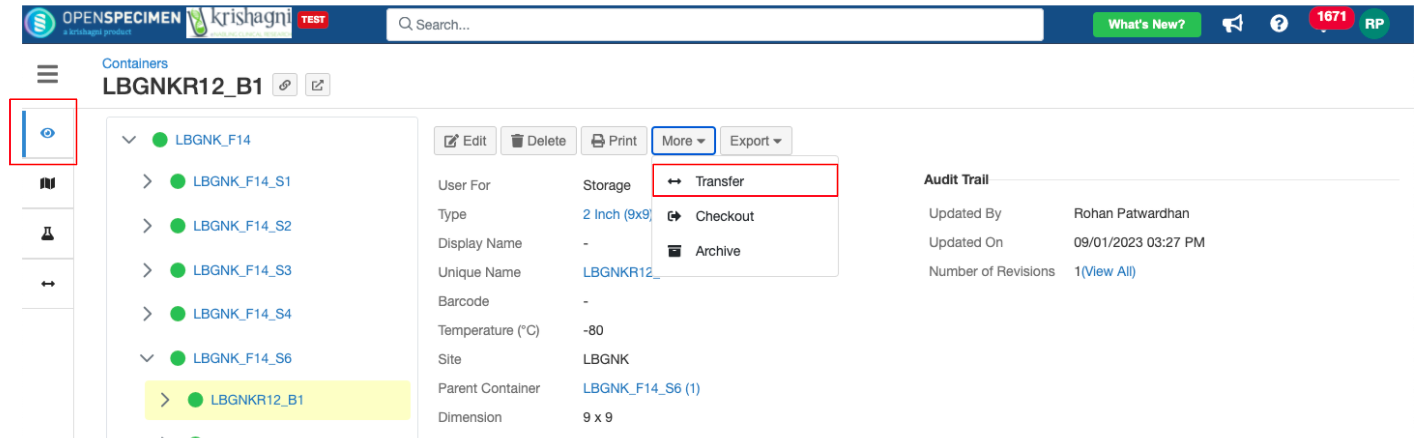
Image Added
Note

Note - Selecting Parent Container:

  • The dropdown shows the first 100 values that are available.

  • You can click on the "Search" icon (magnifying glass) from the pop-up

...

  • to see the containers

...

  • eligible as a parent location for the

...

  • transfer container.

  • Alternatively, you can start typing the initials of the container name, and it will appear.

Image Added

  • Select any container by clicking on "Select". 

Image Added

  • Choose the location you want to move the container in and click on "Done"

...

Transfer Events

Transfer event created on the container can be viewed from the 'Transfer Events' tab on the left-hand side.

Image Removed

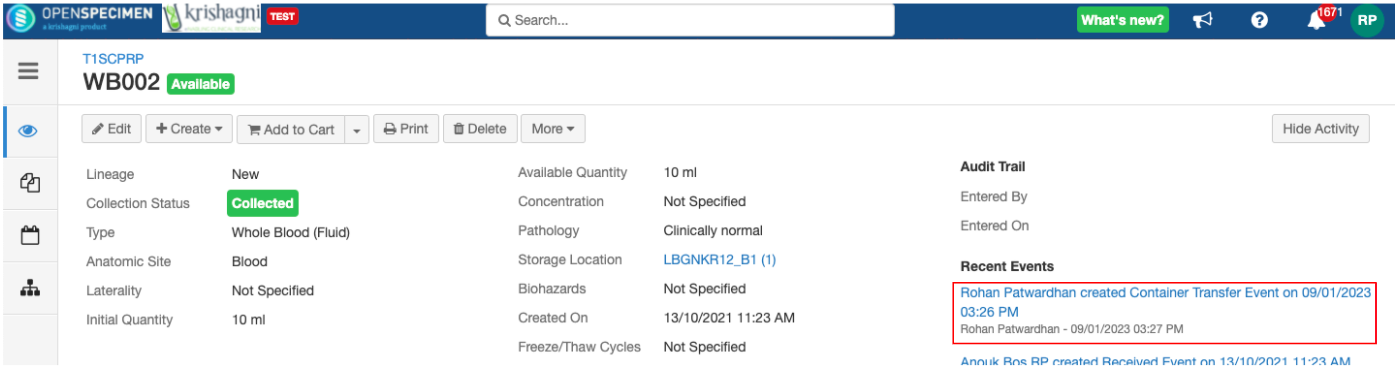
If there are specimens stored inside such box, transfer event is created for each specimen as well along with the container transfer event.

Image Removed

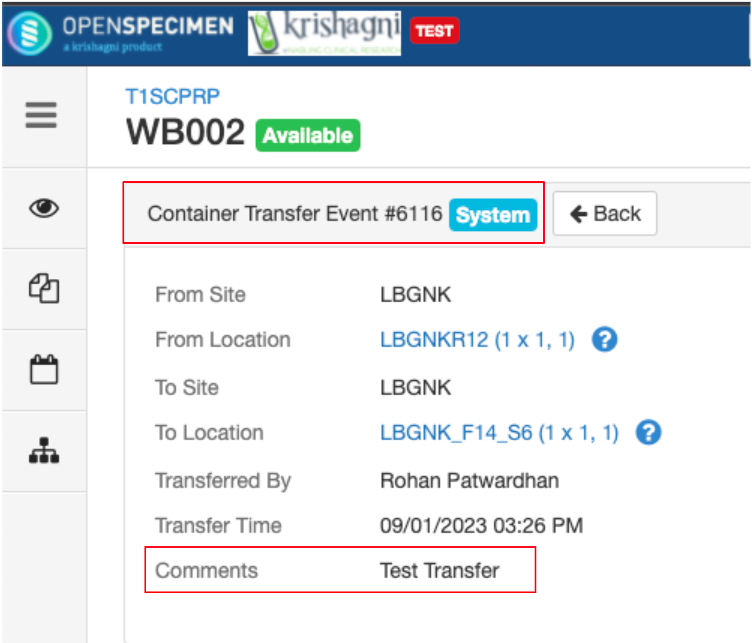
Clicking on the 'Container Transfer Event' from the 'Specimen Overview' page displays the details about the transferred container.

...

  • .

Image Added

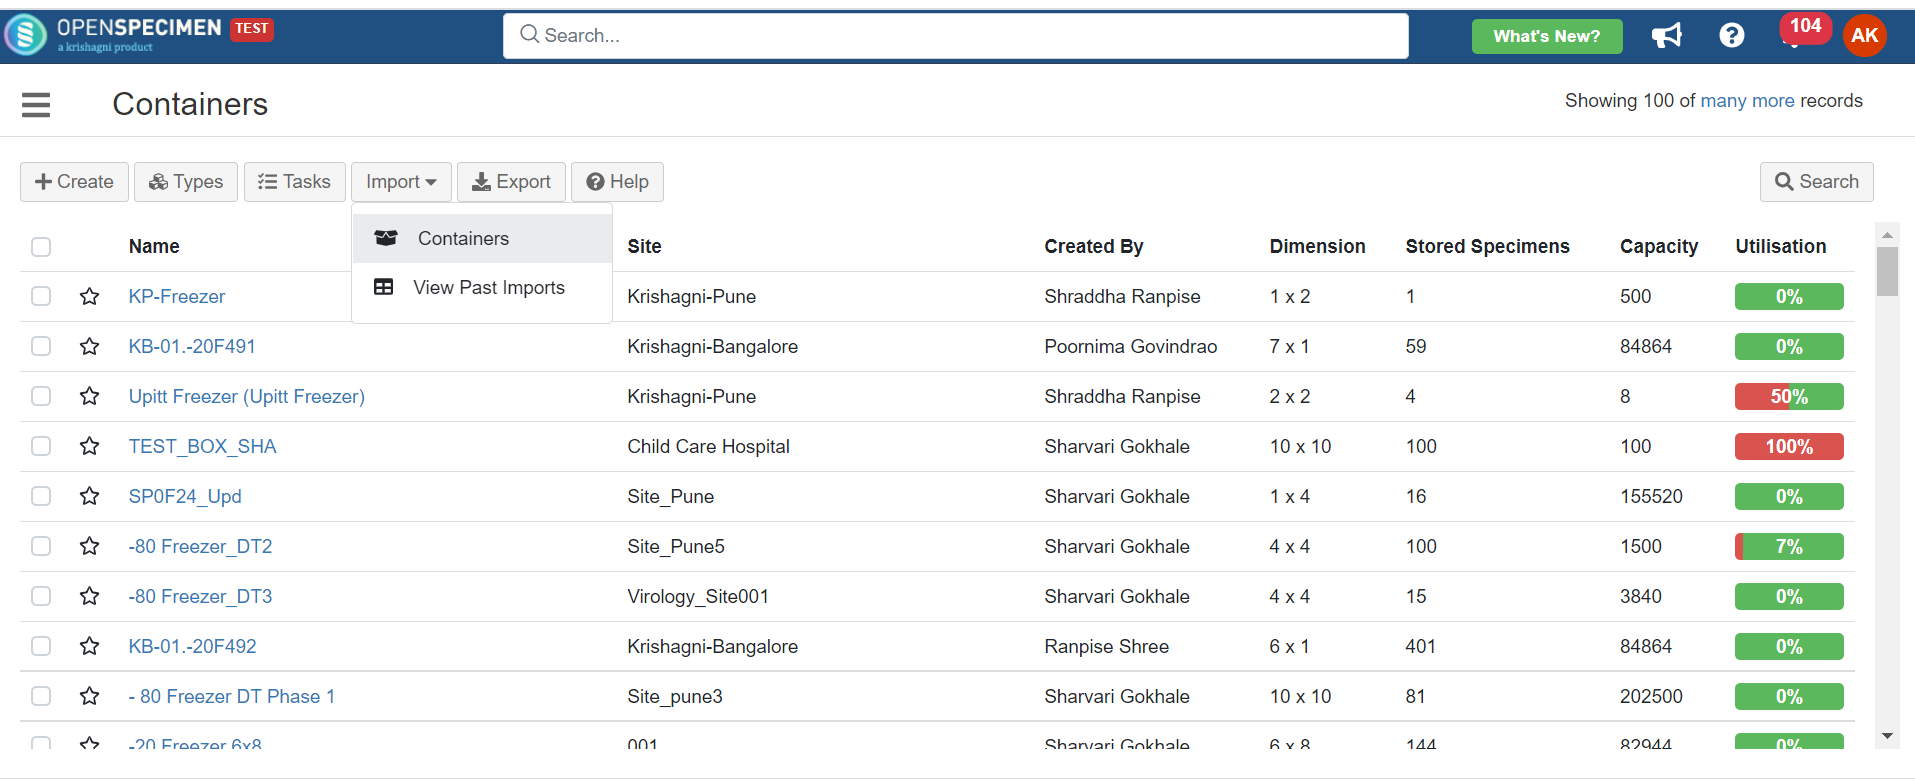
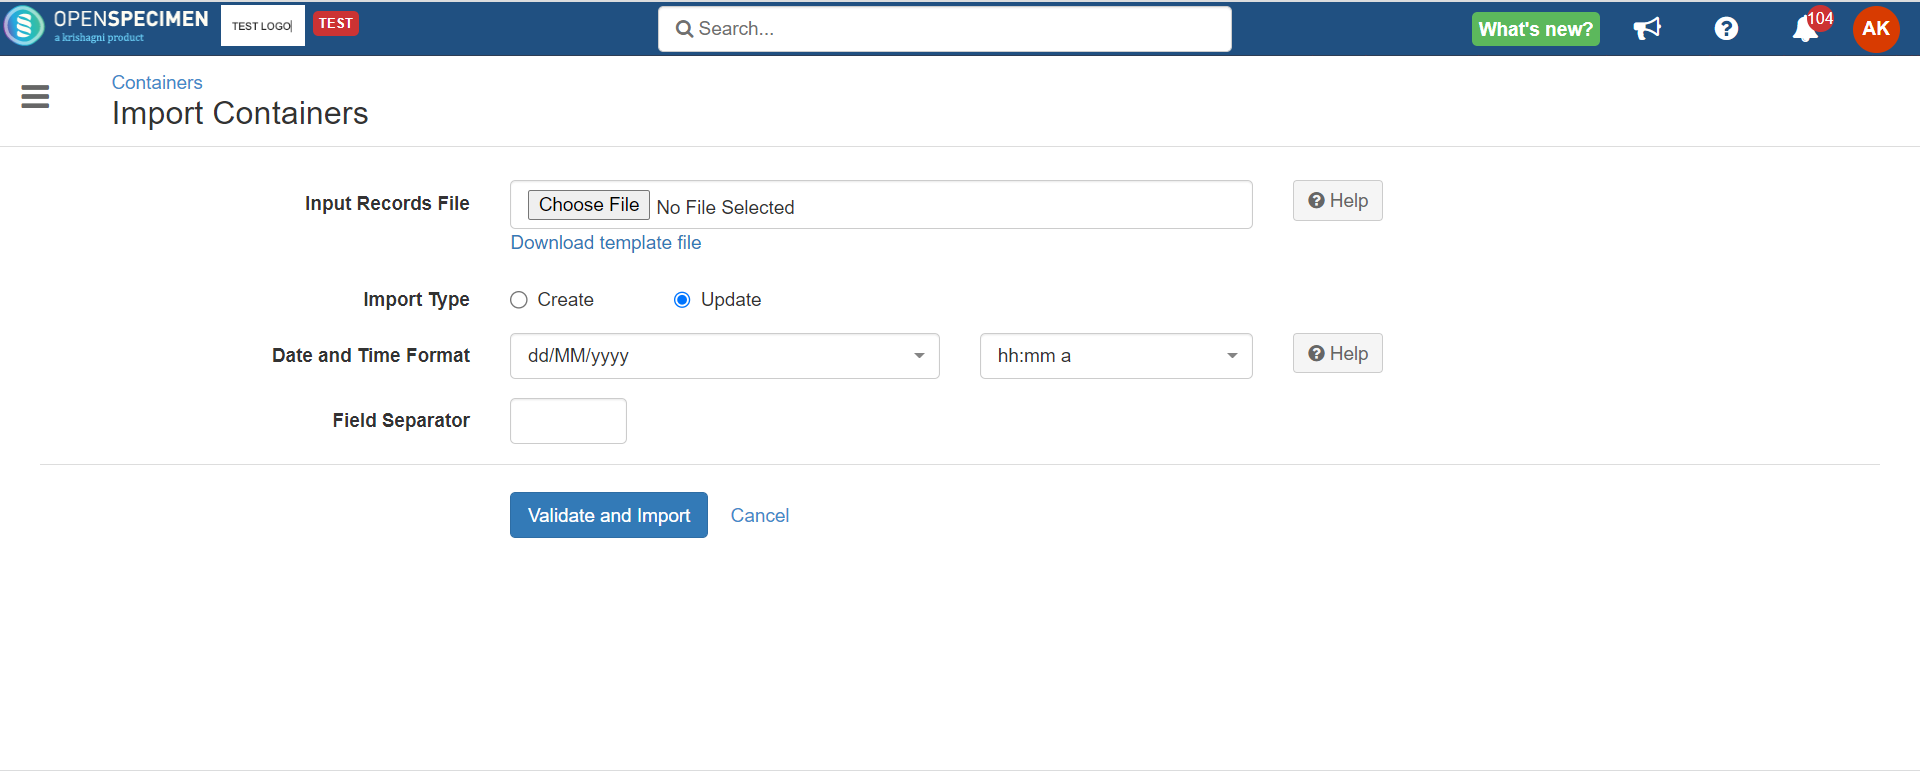
Move Containers in Bulk

Expand
  • Go to the containers page, and select 'Import' under more.

Image Added
  • On the import page, download the template file and fill in the fields mentioned in the table. 

Column  Name

Datatype

Mandatory?

(Update)

Description

Validations

Name  

String

Yes

Name of the containers that need to be moved

It should  be an existing and unique  name within the  system storage

Storage Location#Parent Container Name

String

Yes

The name of the parent container, i.e., New Location


Storage Location#Column

Integer


The new position in its container


Storage Location#Row

Integer


The new position in its container


  • Once all data is filled, save it as CSV and import the file. Make sure the 'Update' operation is selected.

Image Added
  • Optionally, positions can be kept blank, and the system will allocate the next available position in the specified container.