| Table of Contentschildren |
|---|
Researchers request specimens from biobanks based on their interest in study and analysis. Distributing specimens based on the study's written procedures describing what number of specimens and quantity of specimens will be utilized for research is known as distribution.
Consent validation
Consents can be validated before distribution by setting required consents at DP and CP levels.
System will allow distributing the specimens only if:
- The consents statements added to DP should match with the CP statements whose specimens are to be distributed (Number of CP consent statements can be greater than DP)
- Consent responses are ‘Yes’ for all these statements under the participants of specimens being distributed.
...
| title | Click here to view the steps... |
|---|
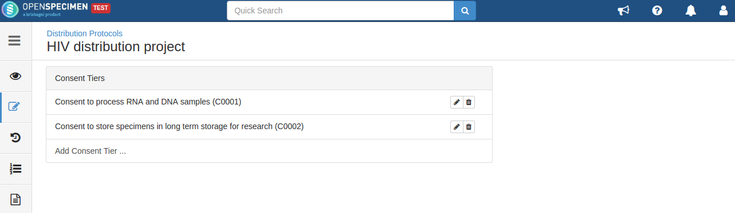
For example, consider below consents set at DP level:
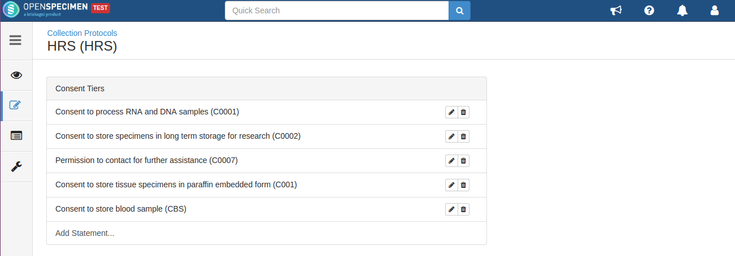
Consents set at CP level:
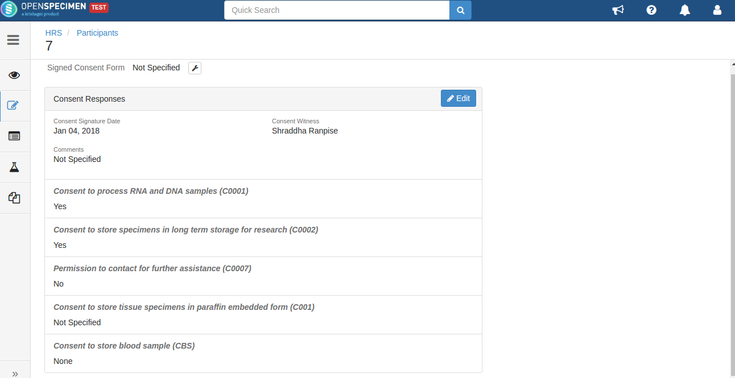
Consent responses for the DP level statements should be ‘Yes’ for the participants whose specimens are being distributed. See below, the statements which are set at DP level have responses as ‘Yes’
If all the above requirements are met, the system allows distributing specimens.
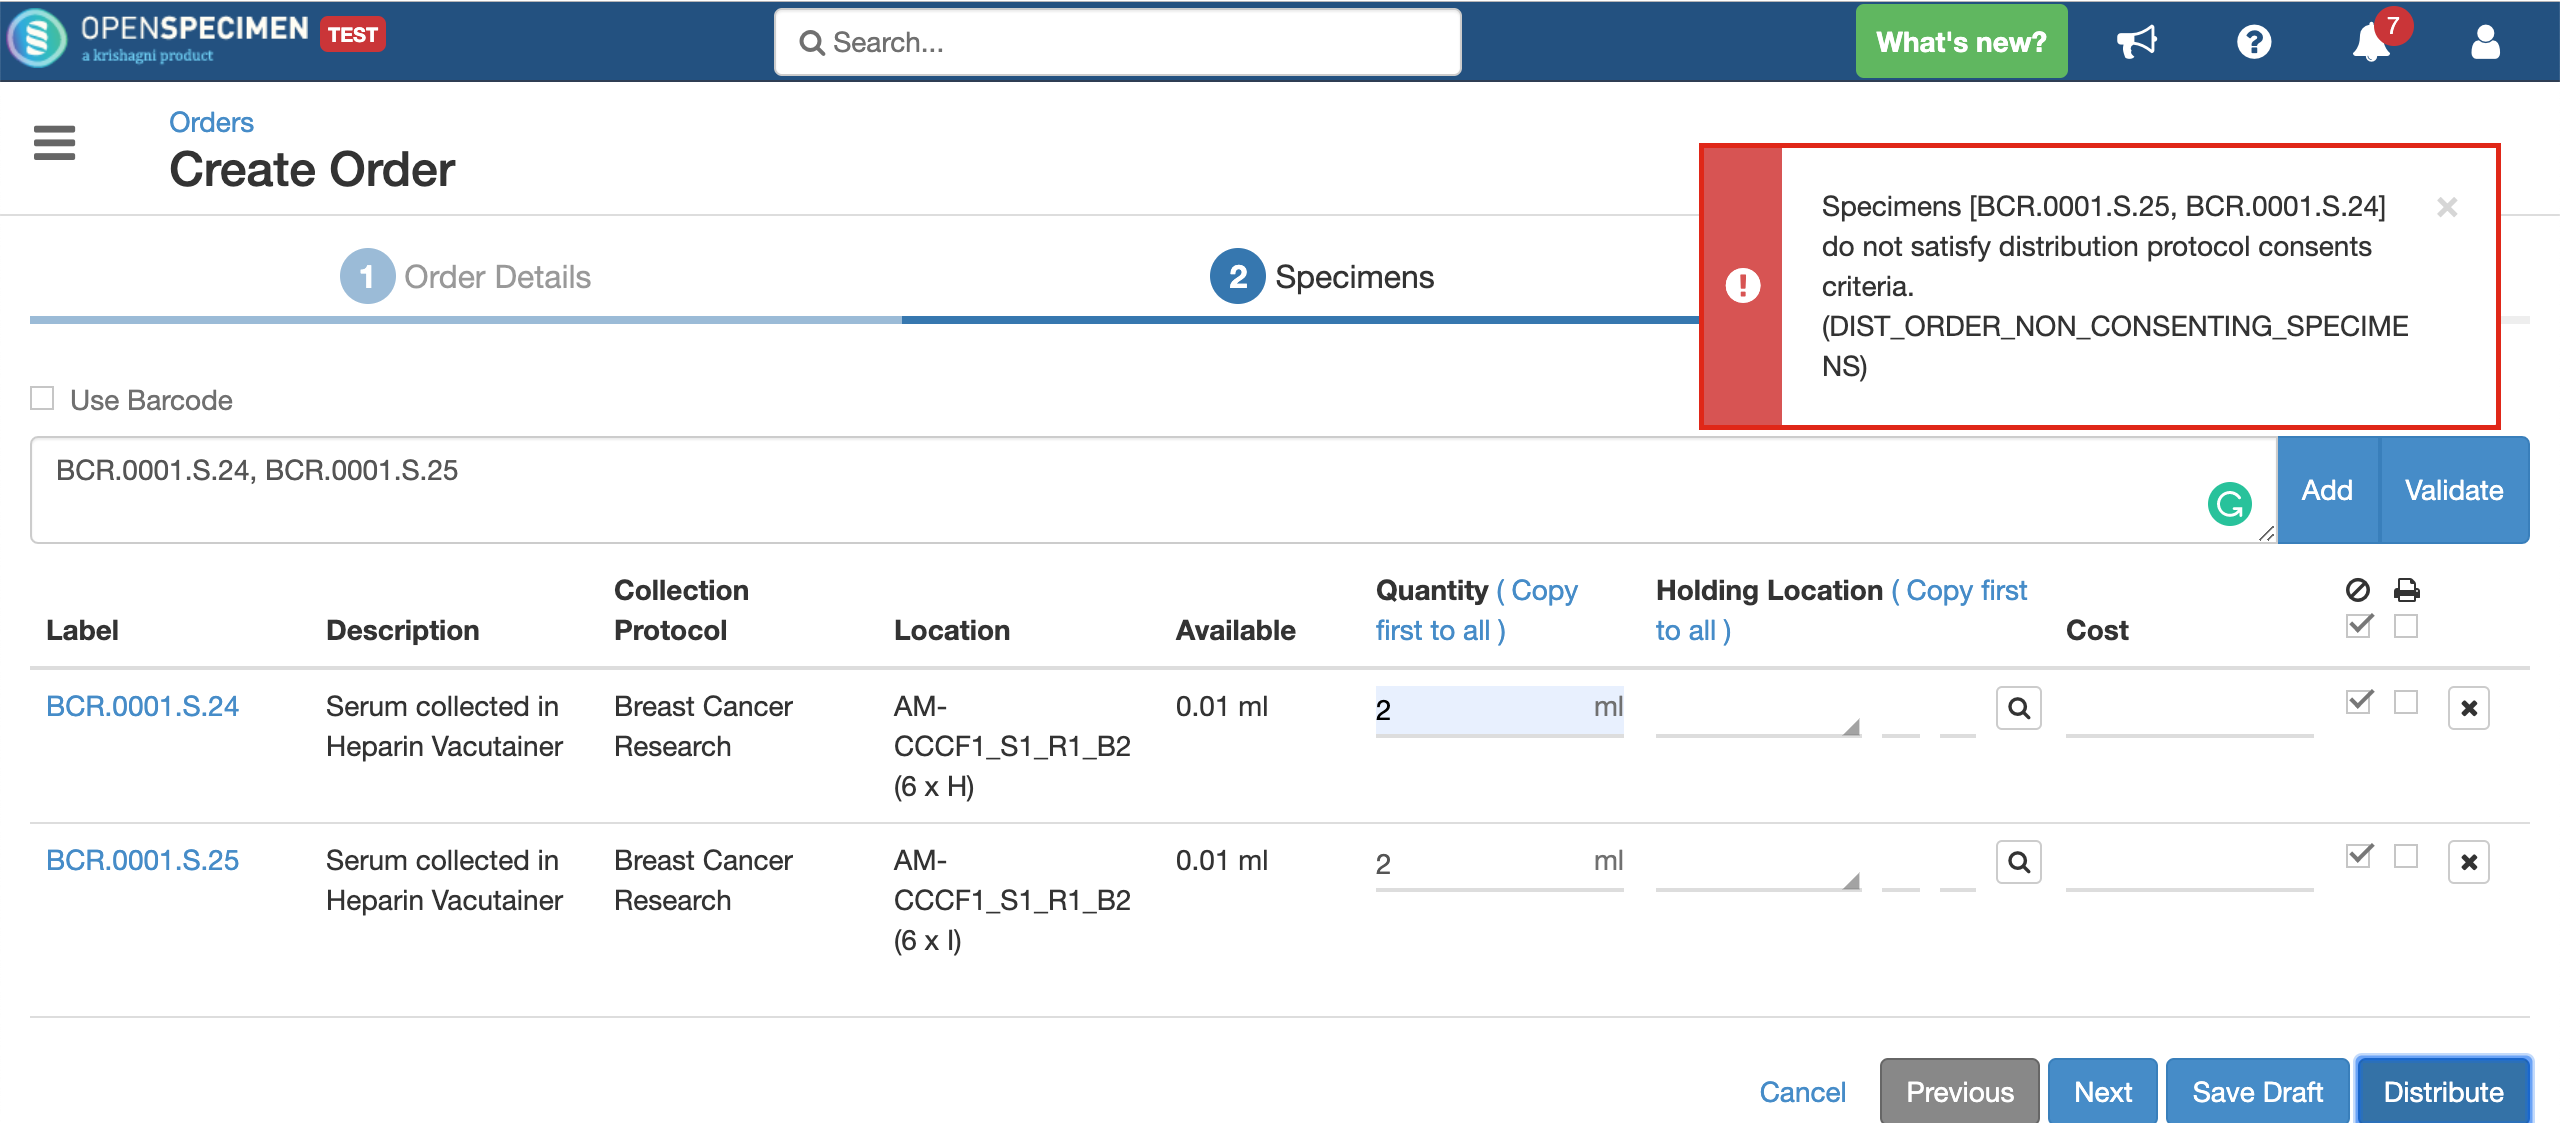
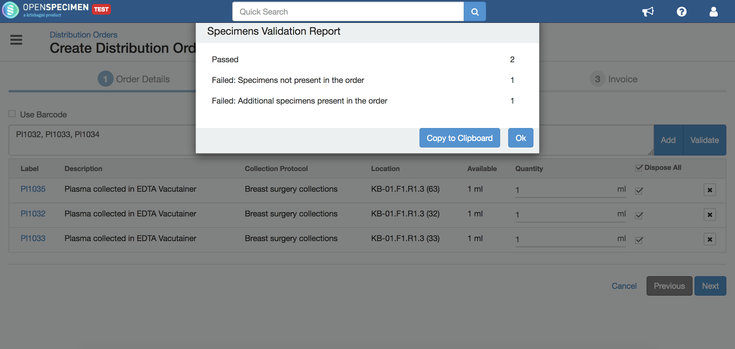
If the consent statements from the DP and CP are not matching, or the responses are not ‘Yes,’ the below error is displayed:
| Note | ||||
|---|---|---|---|---|
| ||||
For versions above 7.0 having EDC plugin deployed, the consent validation rules can be added referring to this page- Consent Validation during Distribution |
Validate specimens
| Expand |
|---|
You can validate the specimens before adding them to the order by clicking on the "Validate" button. This will check for errors like specimen does not exist, privileges, etc., and provide a popup with statistics. In case of errors, you can click on "Copy to Clipboard" button and paste the error report to a file (like notepad or text).
|
Quantity
...
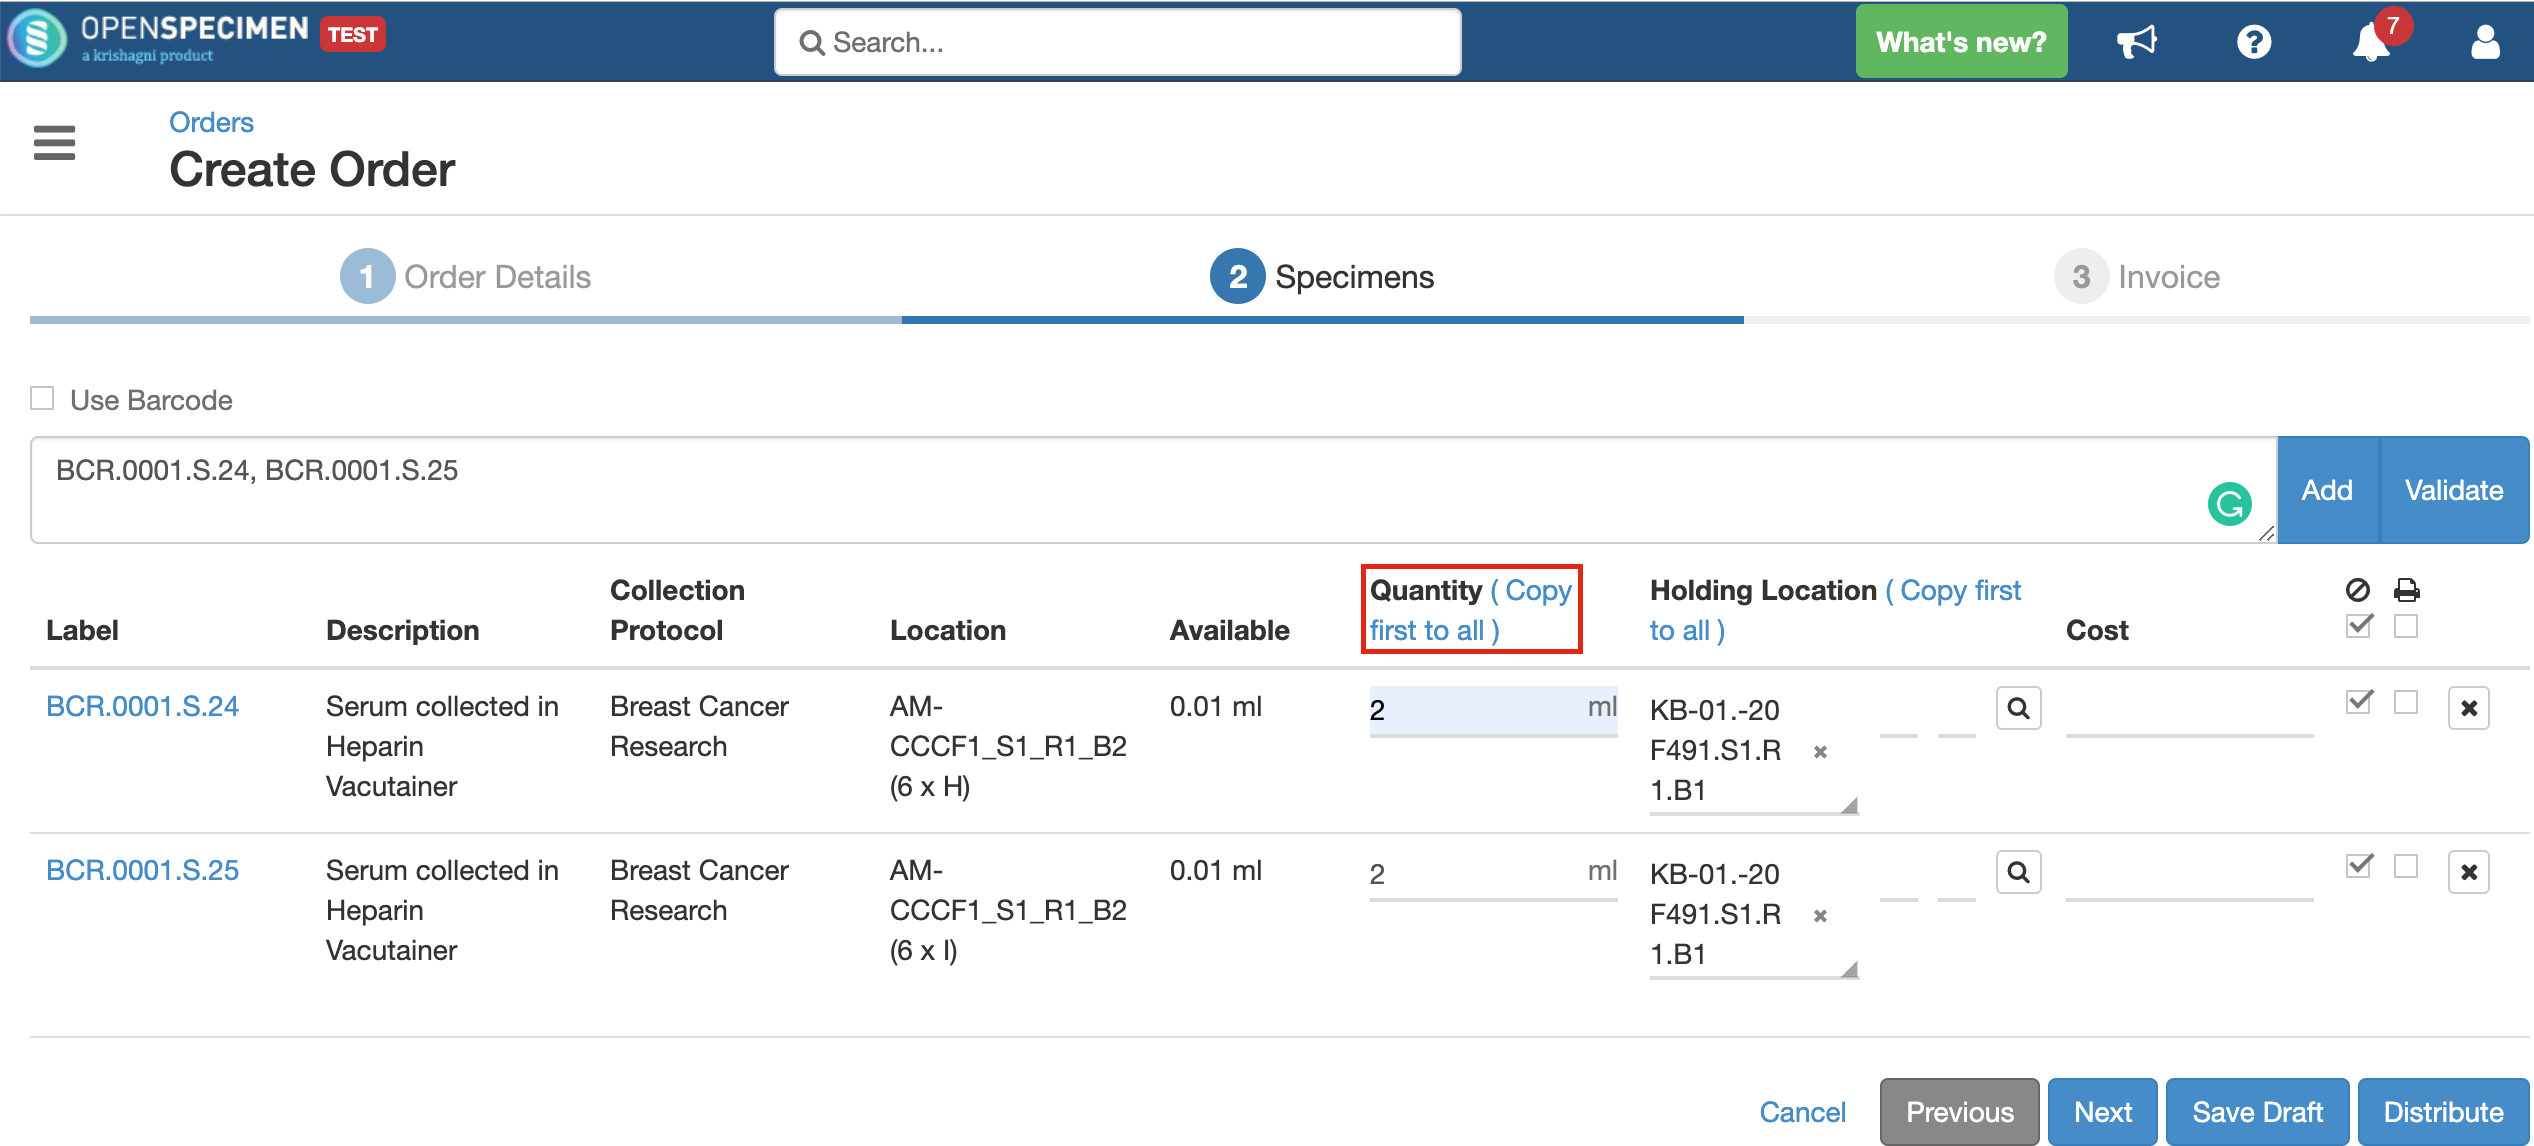
Indicates the quantity of specimen to be distributed. It can be less, equal to, or even more than the available quantity.
Using the 'Copy first to all' option copies the field's first value to all below rows, thus saving the users' efforts to enter values for each row manually.
| Note | ||
|---|---|---|
| ||
|
Holding Location
A temporary location where the specimen will be transferred to and stored until the researcher picks it up (retrieves) for his use.
Close Specimens
| Expand |
|---|
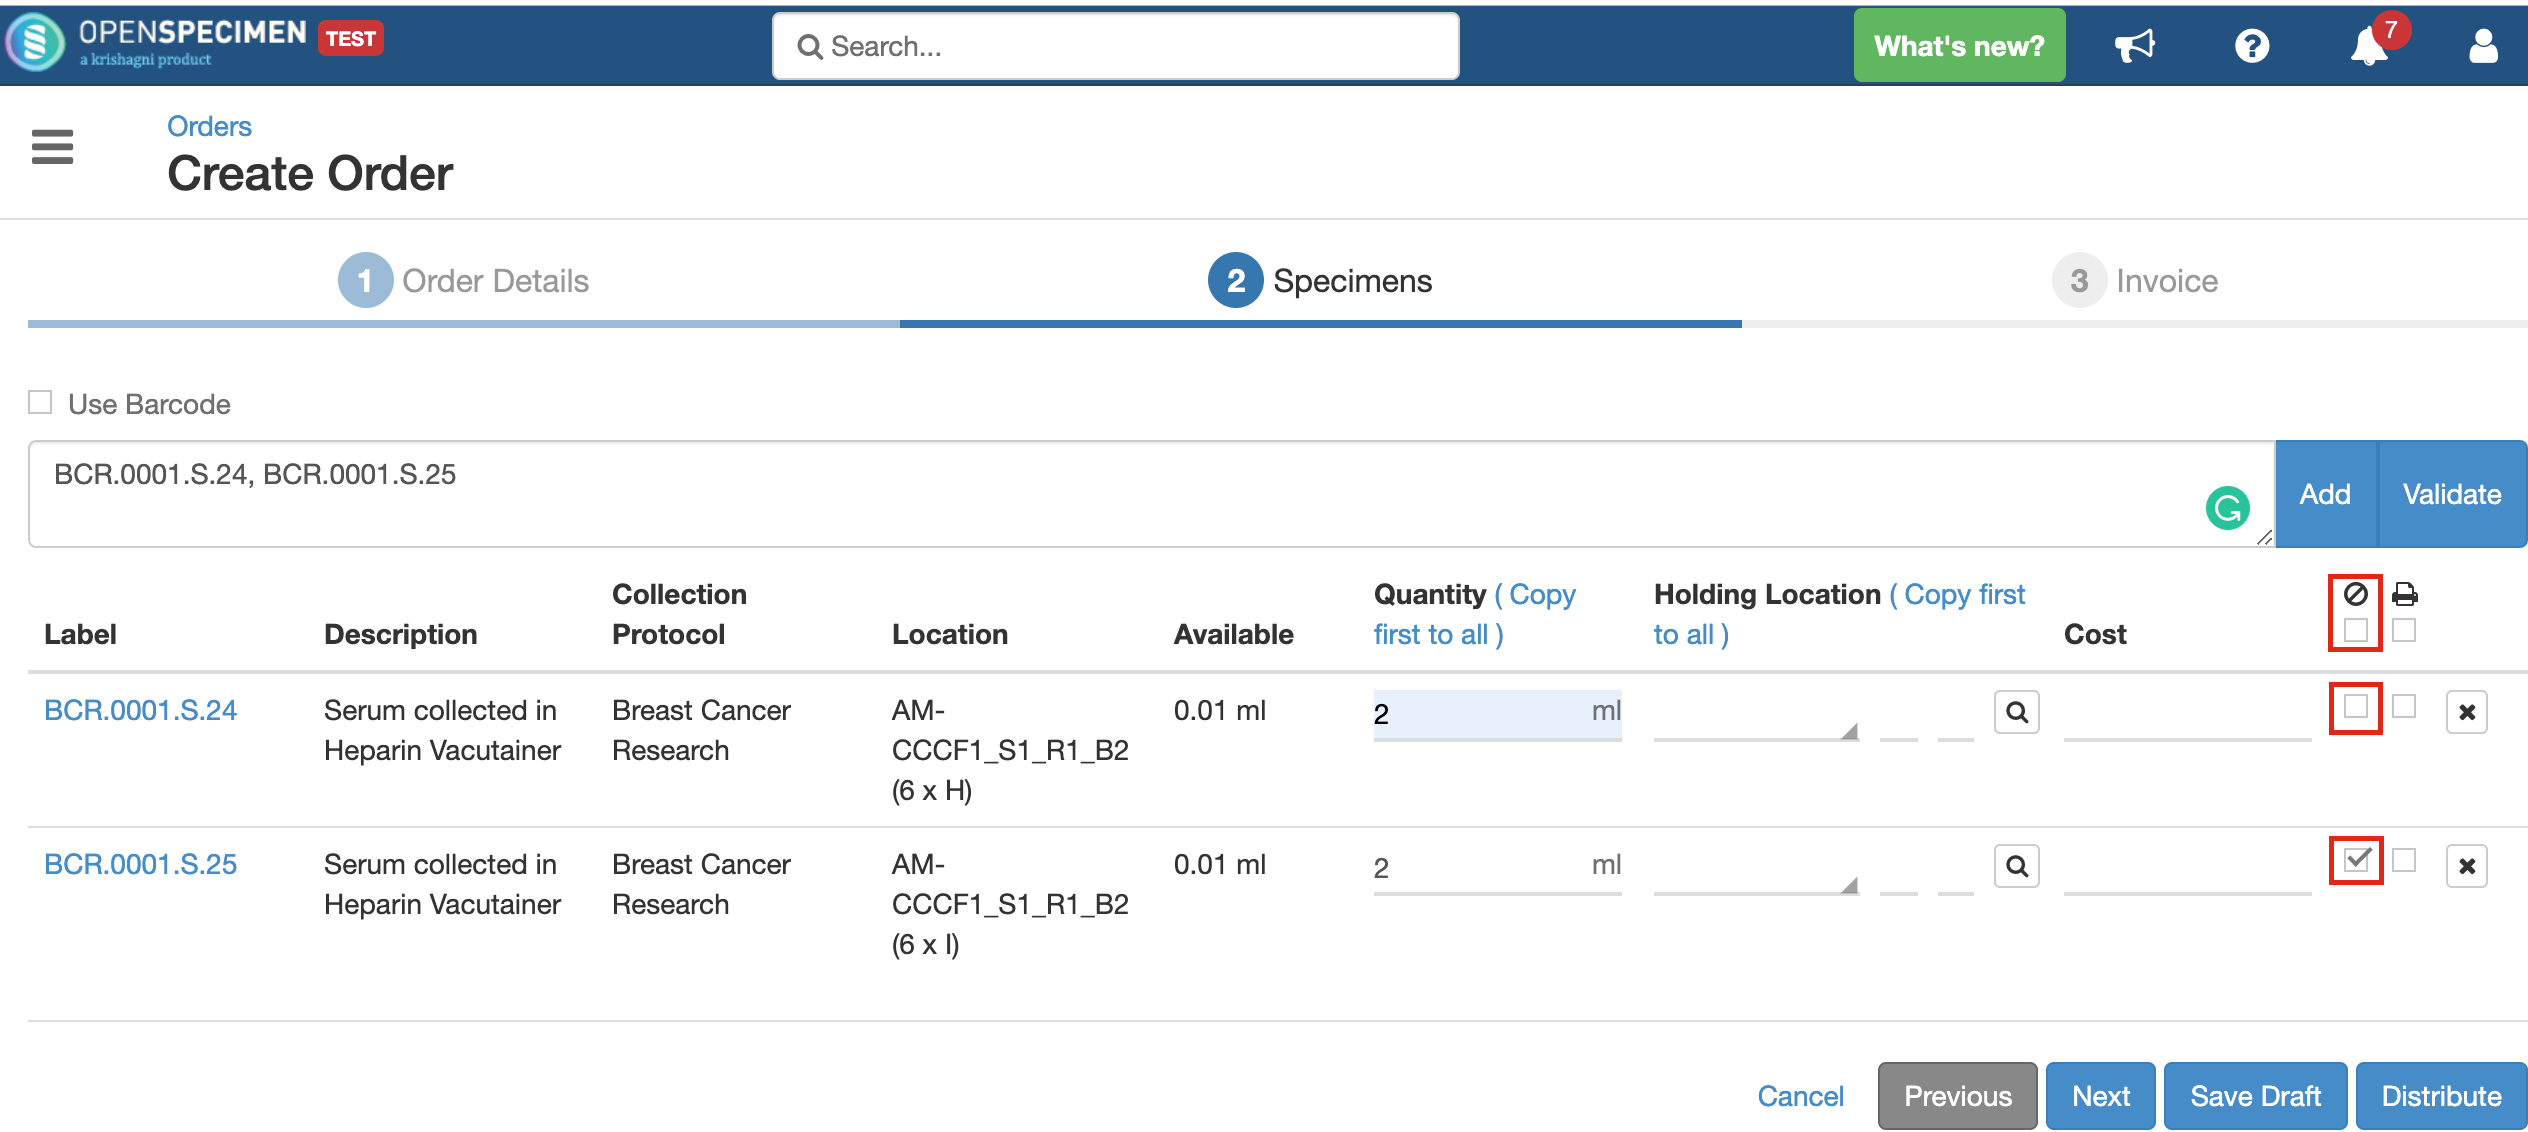
You can choose whether the specimen being distributed should be closed or kept open after distribution by checking/unchecking the 'Close Specimen' checkbox. This allows you to edit the specimen, add more details. As per the below screenshot, the first specimen will remain open, and the second one will be closed after distribution.
However, if there is a value for 'Holding Location' present, the specimen will always get closed. It will be transferred to the holding location completely and cannot be stored at two locations simultaneously. In case the specimen is to be distributed partly and held in a temporary location, it should be aliquoted into two parts and distributed accordingly. |
...
| Expand |
|---|
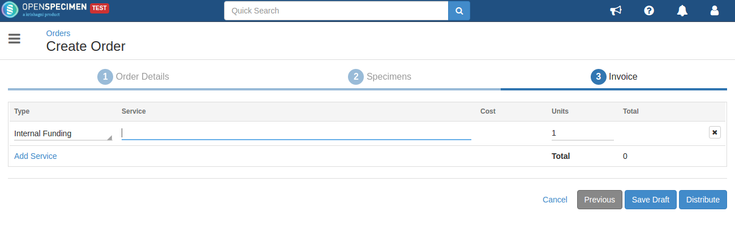
An order can be saved as a draft order if you are not yet ready with all the details. Click on the 'Save Draft' button on the 'Invoice' page of the order
|
...
| title | Click here to expand.. |
|---|
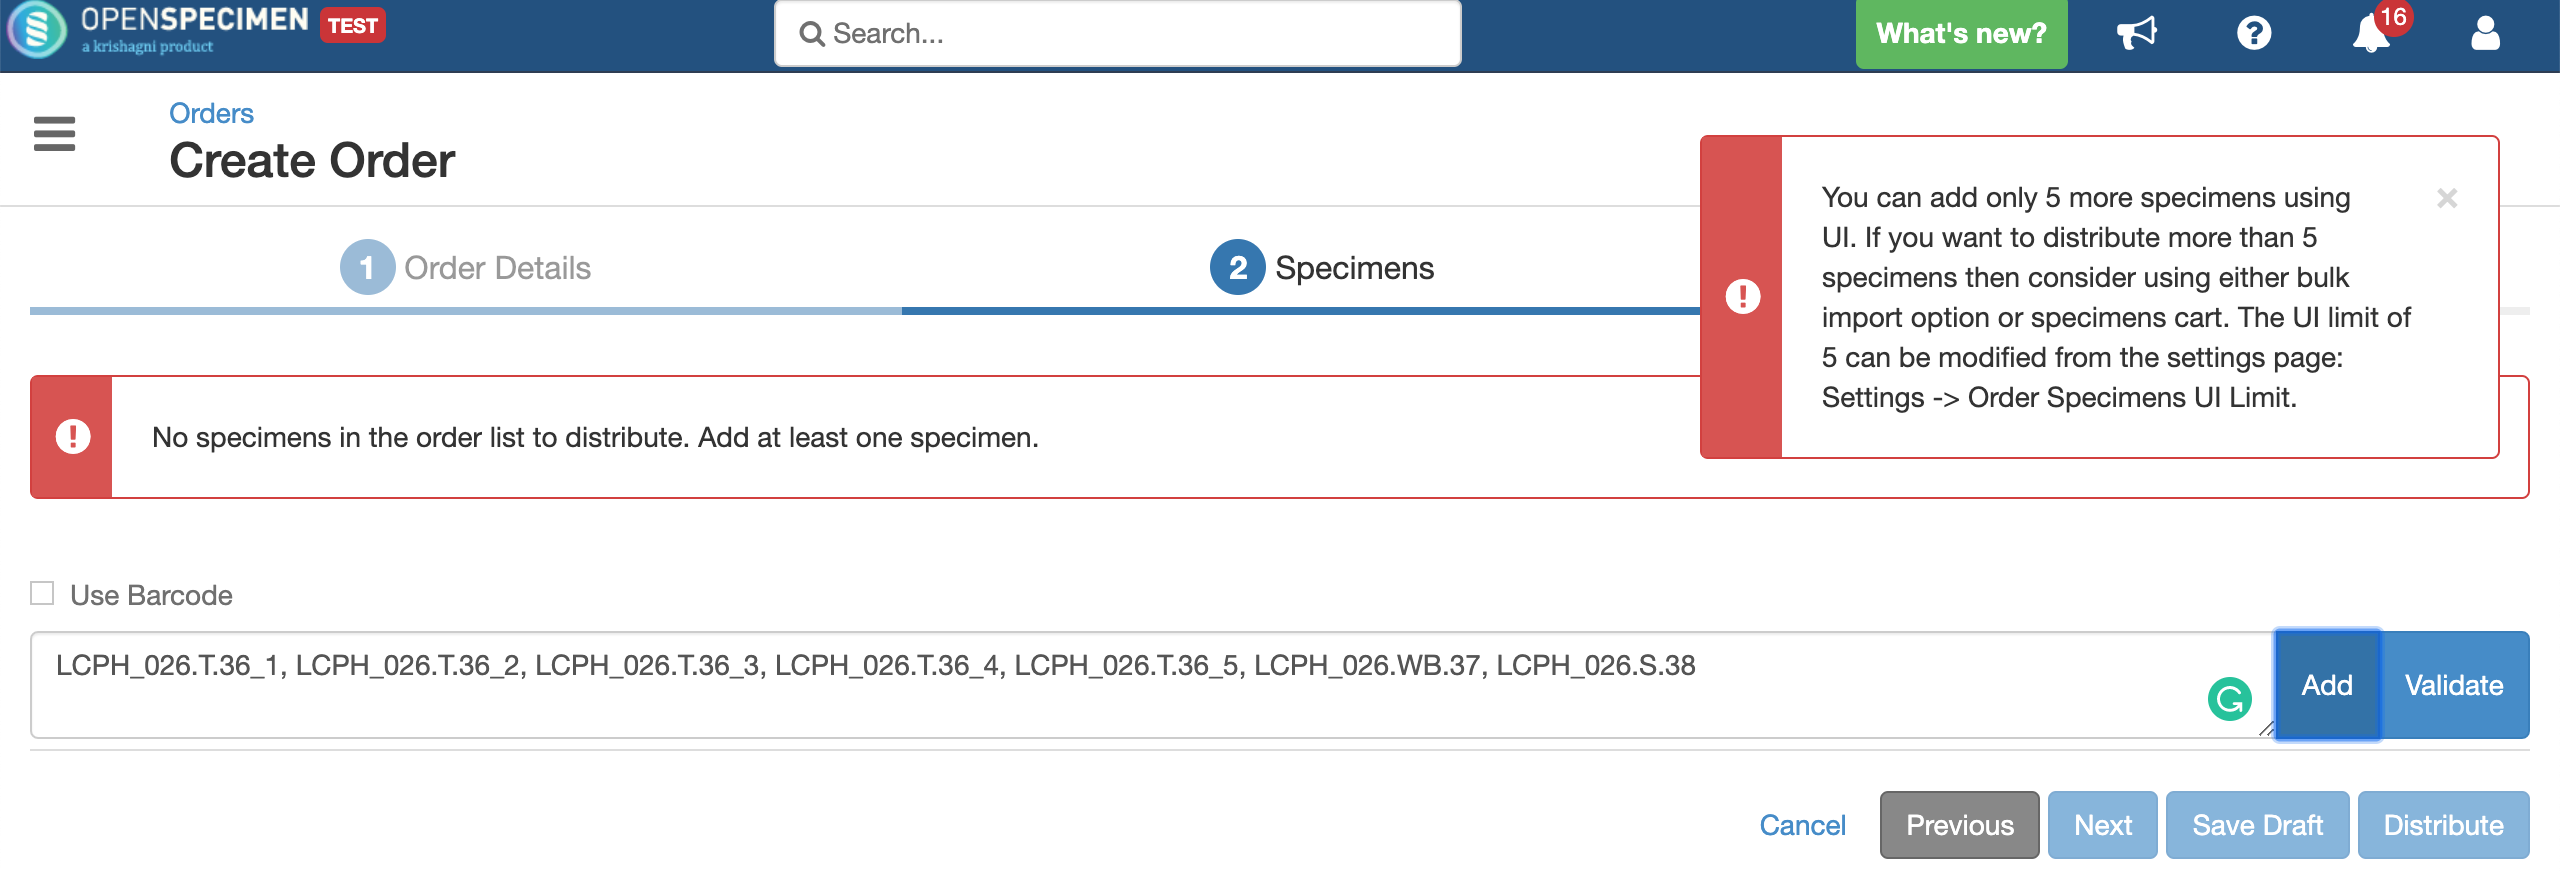
You can configure the maximum number of specimens added using UI, whose details can be edited at the time of distribution. Once configured, if the number of specimens to be distributed is less than the limit set, the 'Specimens' list will display all the specimens.
From this page, you can edit the specimen details like quantity, cost, etc. 'Copy first to all' option for 'Distribution Quantity' and 'Holding Location' can be used to copy the first value to all rows so that user need not input it for each row manually.

In case the number of specimens scanned is more than the UI limit, the system will display an informative message like this:
Steps
...
as
...
Retrieve Specimens
...
distribution
...
.
...

This option retrieves the specimen from the holding location, and a final transfer event is added to the specimen.
Before retrieve:
After retrieve:
Specimen Events
...
| title | Events added when a specimen is distributed |
|---|
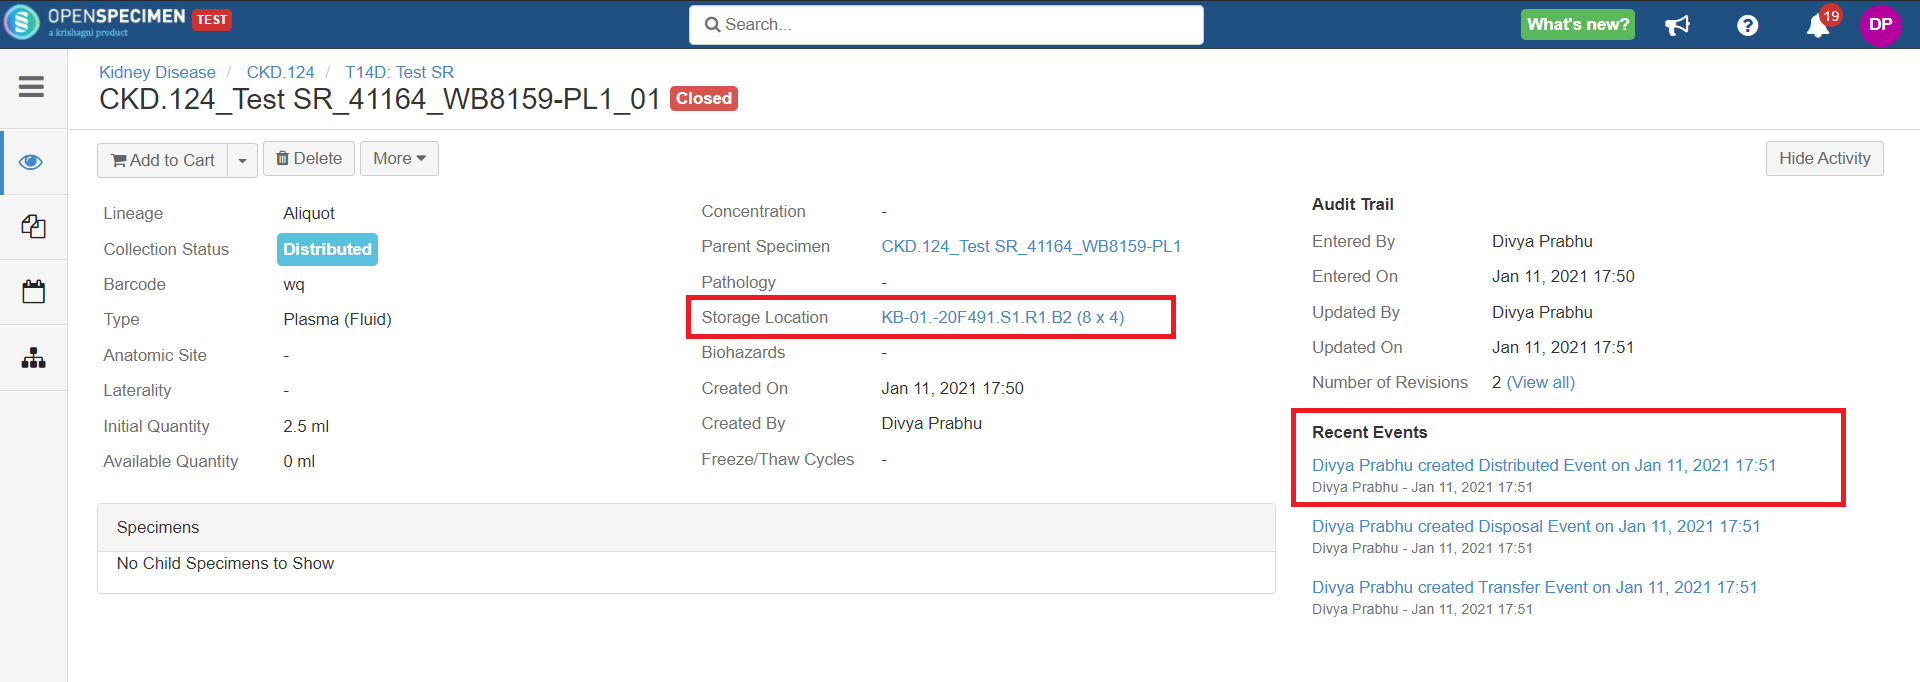
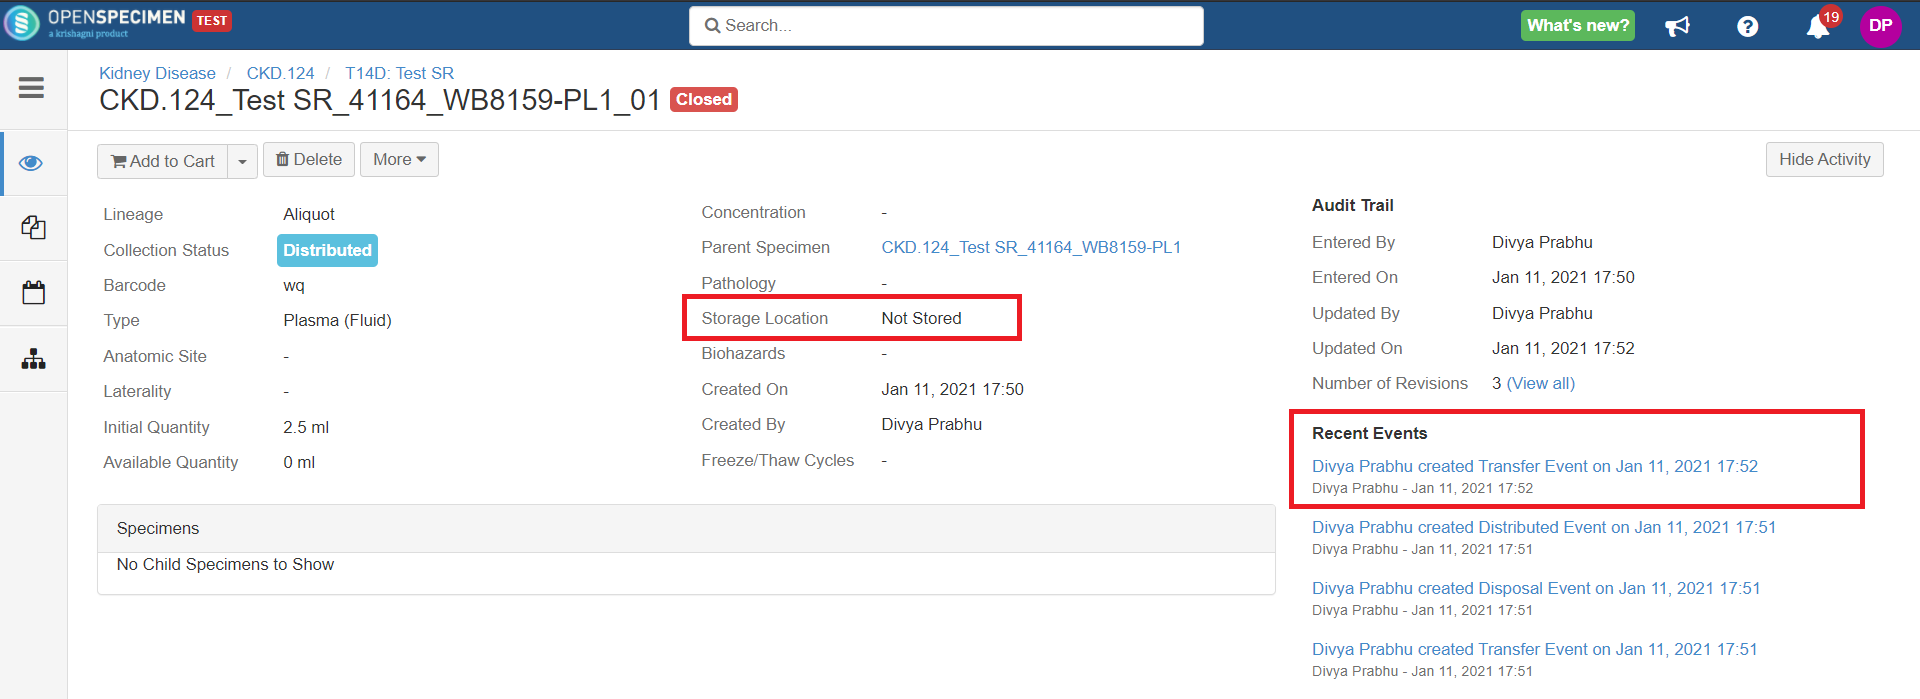
After you click on the 'Distribute' option from the above 'Create Order' screen, the following events are added for each distributed specimen:
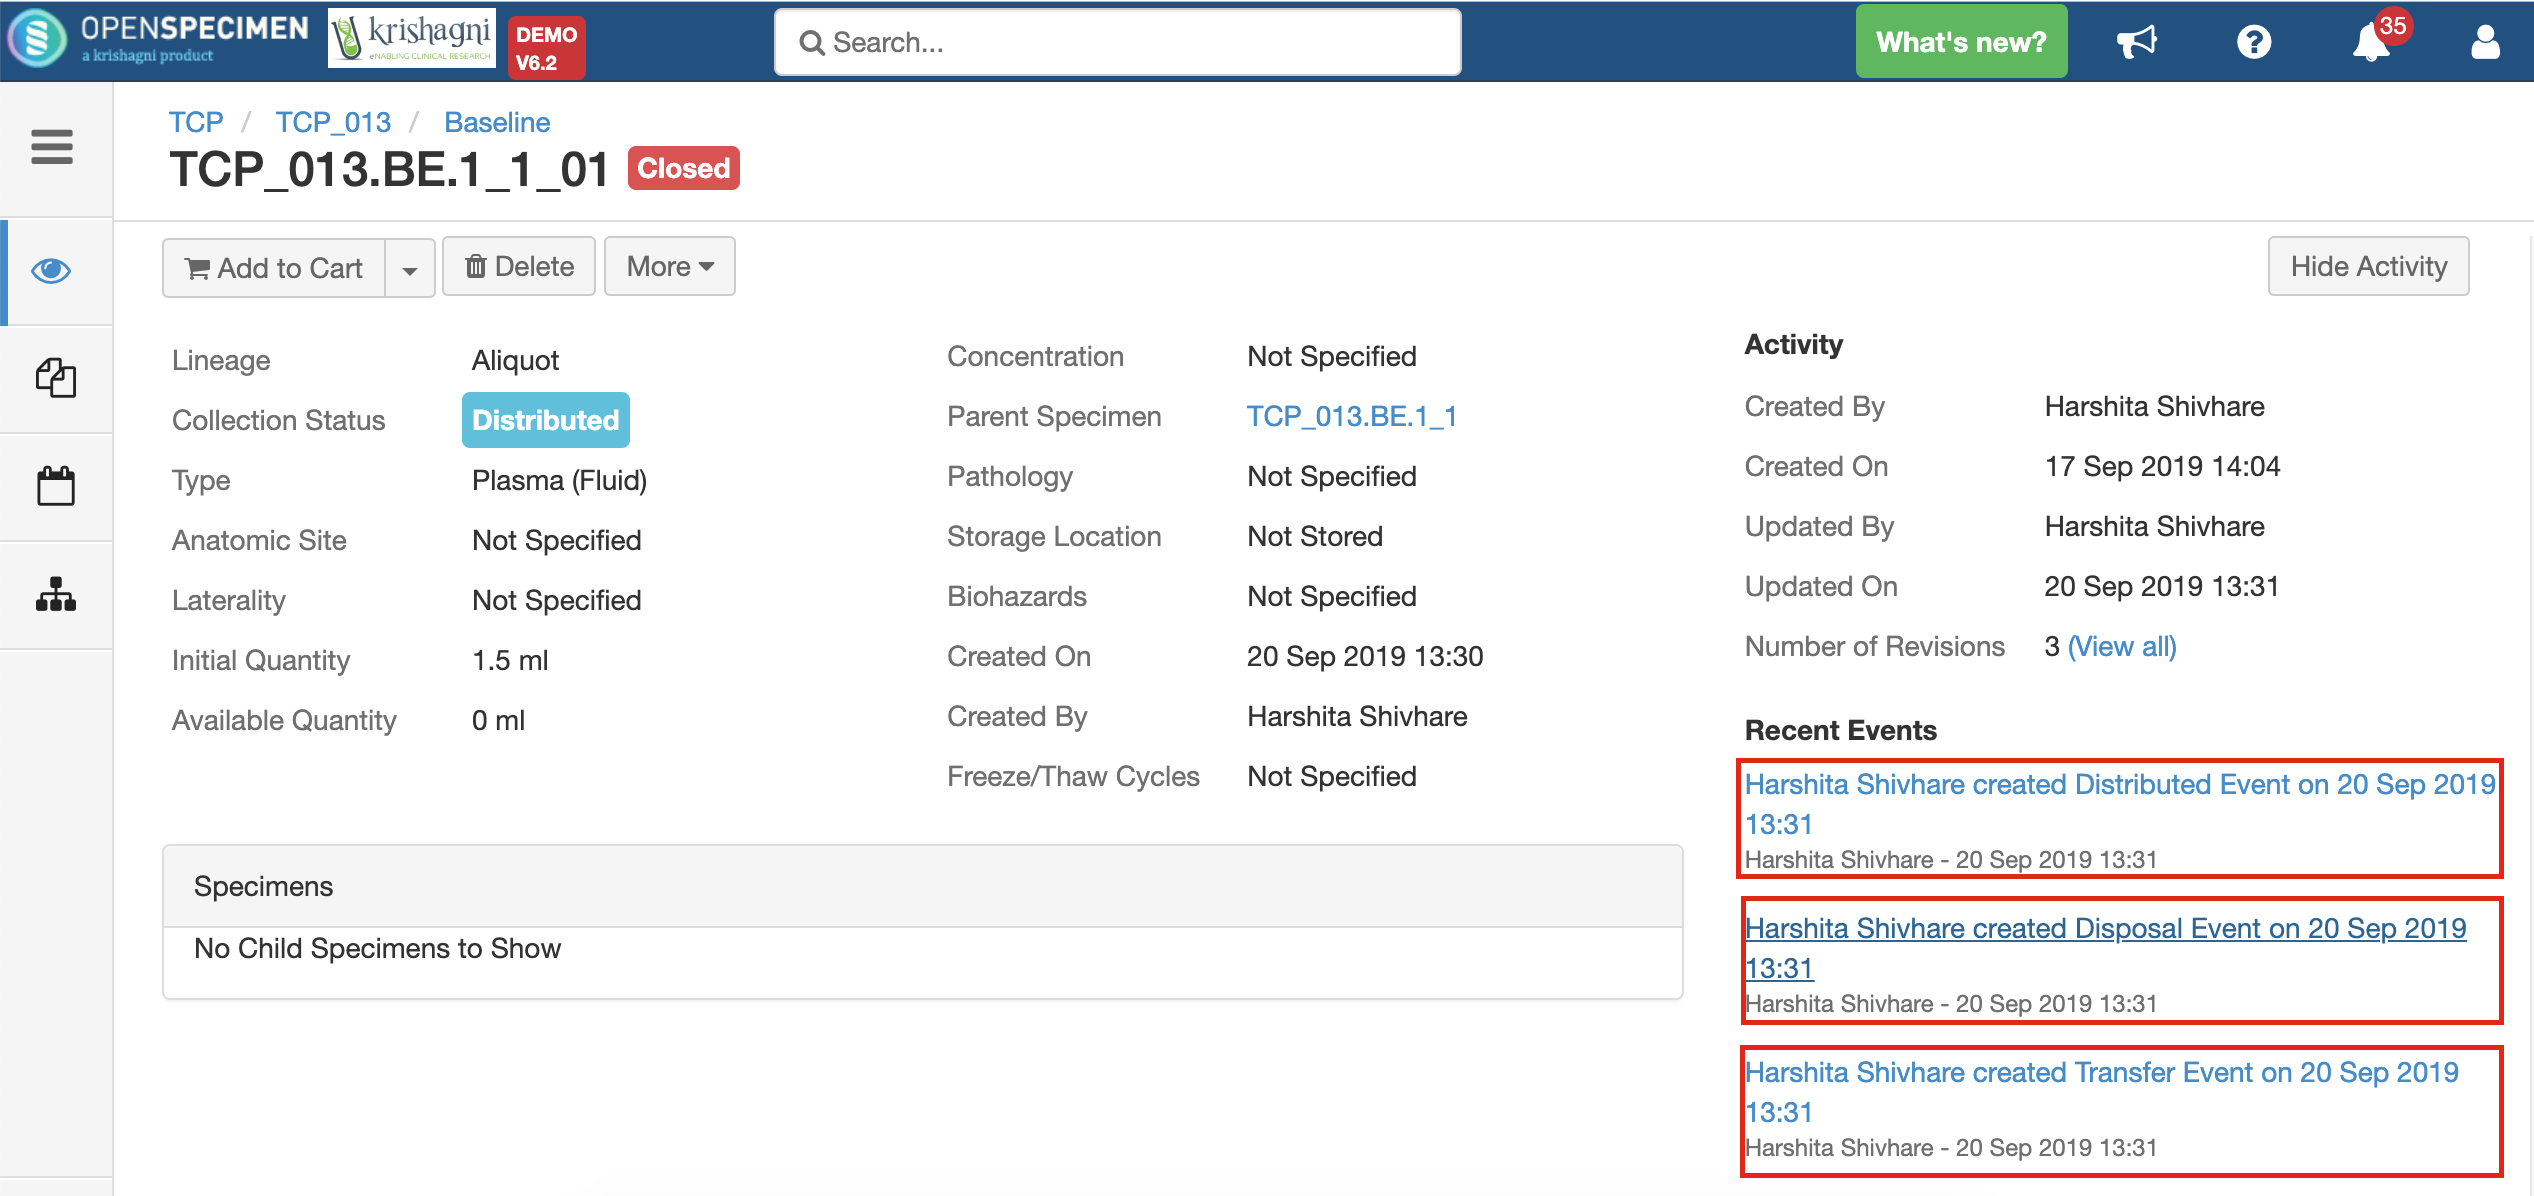
These events are useful for creating reports or audit purposes.
- Distribution event: To give details of when the specimen was distributed, which DP, etc.
...
- Transfer event: To indicate the specimen was moved out of the storage location.
...
- Disposal event: To indicate that the specimens are disposed of from the system. This event will be created in case the 'Close Specimen' checkbox is checked.
...
Bulk upload
| Expand |
|---|
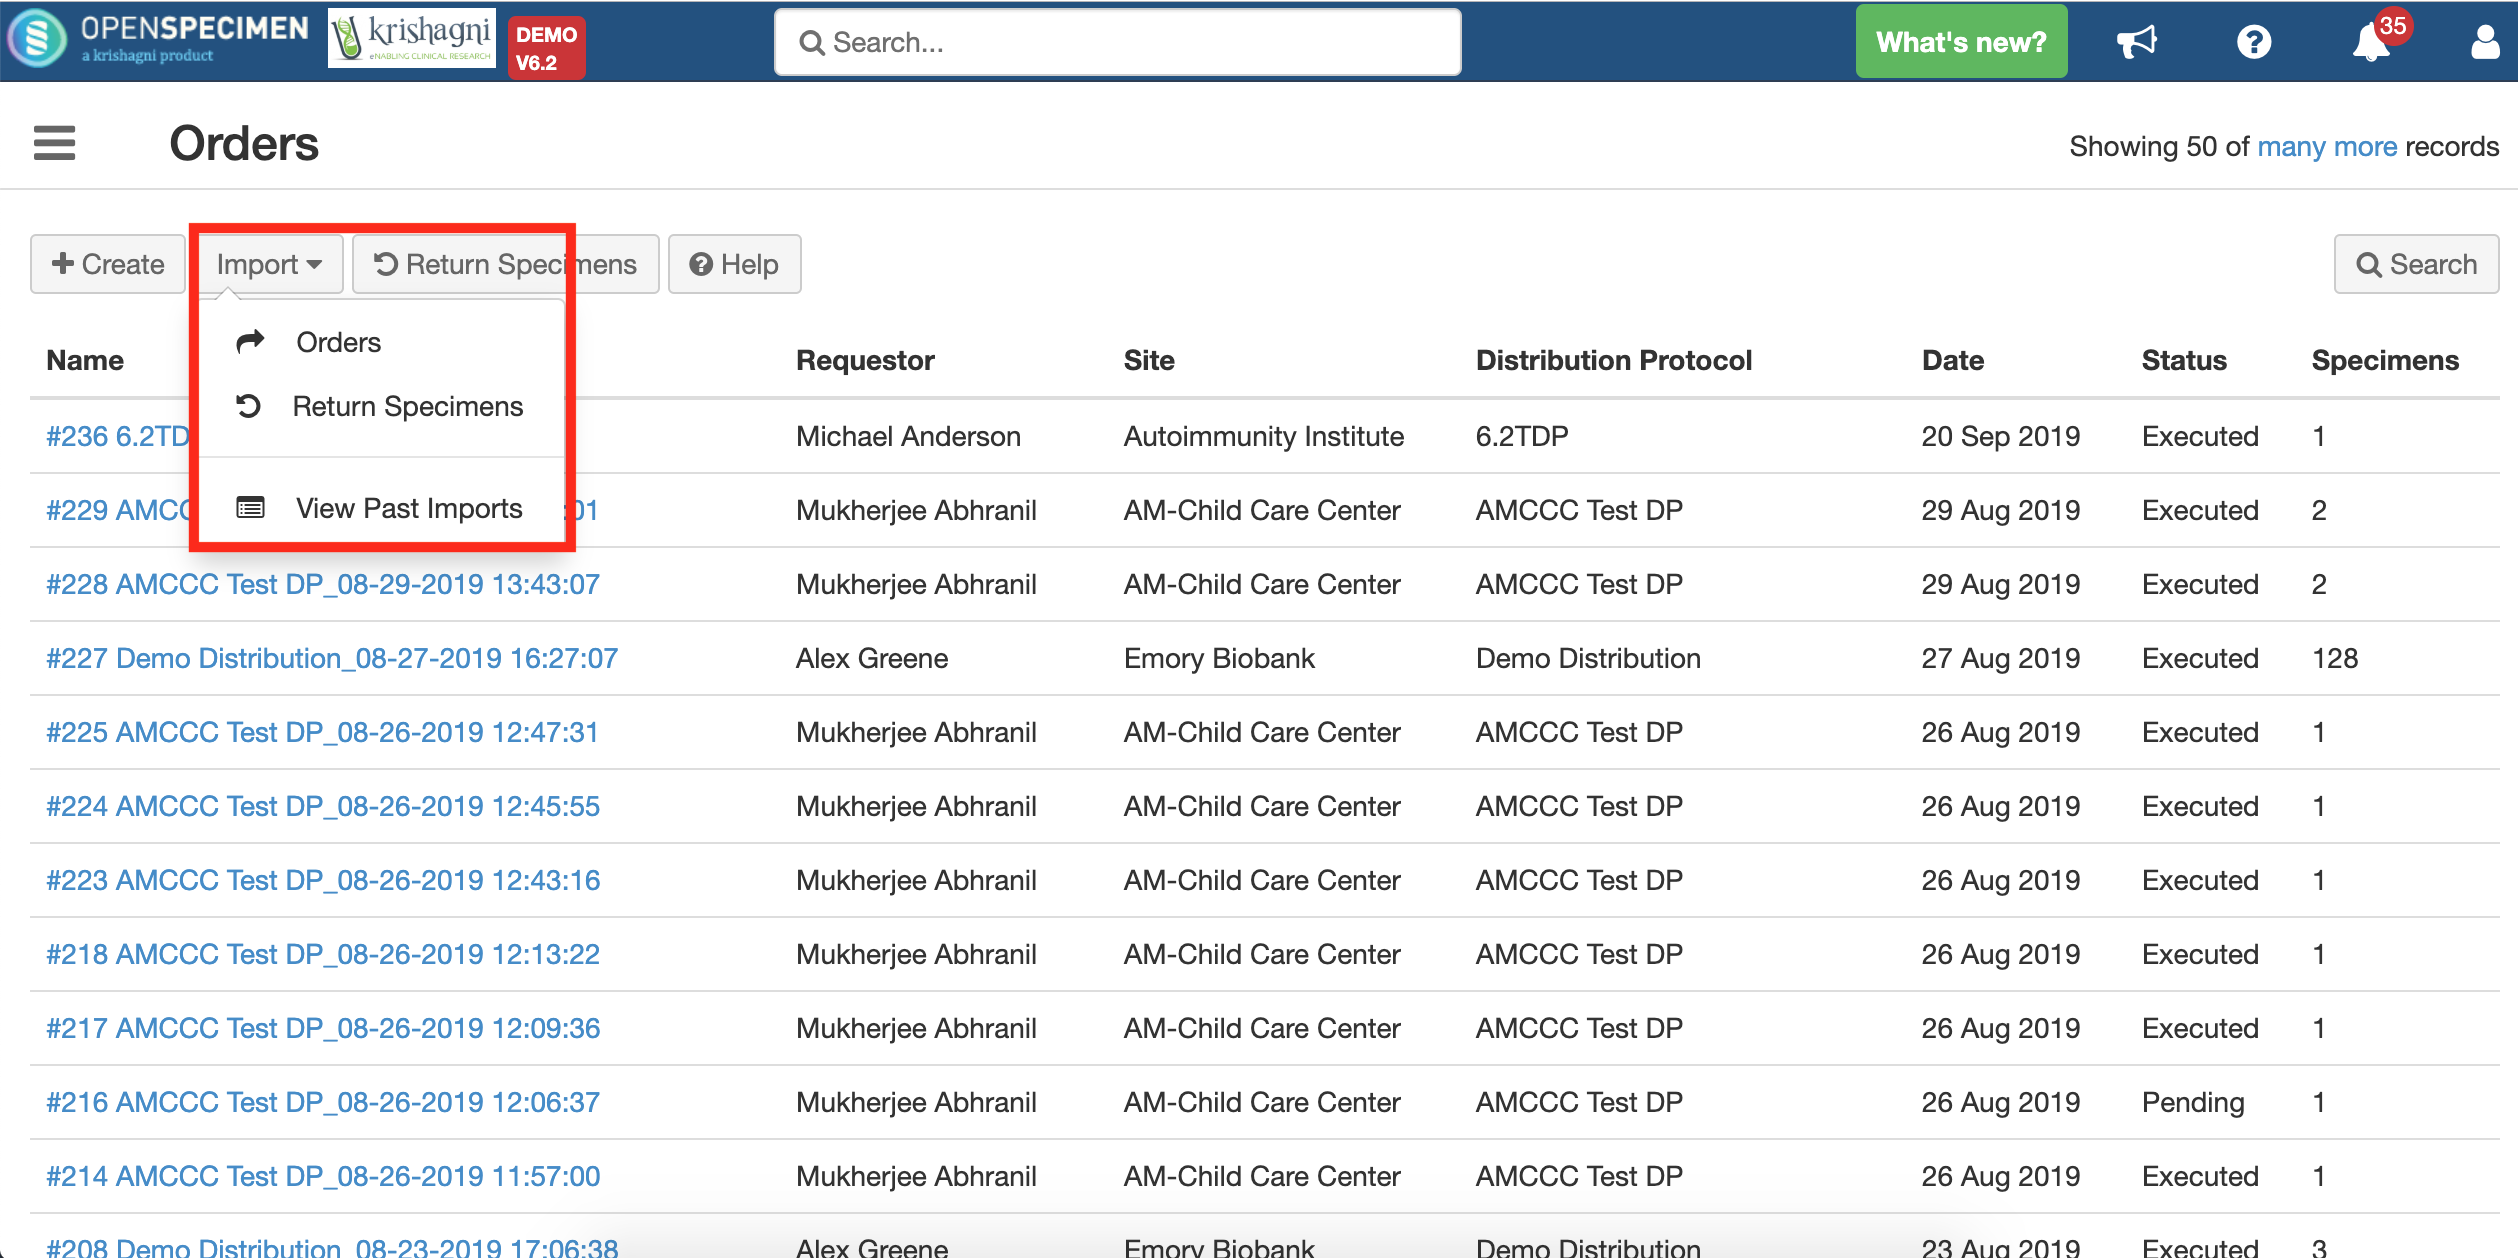
Distribution data can also be bulk uploaded for many orders at a time using CSV files. E.g., for legacy data migration.
|
Edit Orders (new in v7.1)
...
| title | Click here to view steps... |
|---|
...
...
.png?version=1&modificationDate=1600084749191&cacheVersion=1&api=v2&width=735)
The following order details can be edited for any order:
- Name
- Receiving Institute
- Receiving Site
- Requestor
- Execution Date
- Courier tracking URL
- Sender comments
- Additional custom form data
- Add/ remove services.
Following are NOT editable:
...