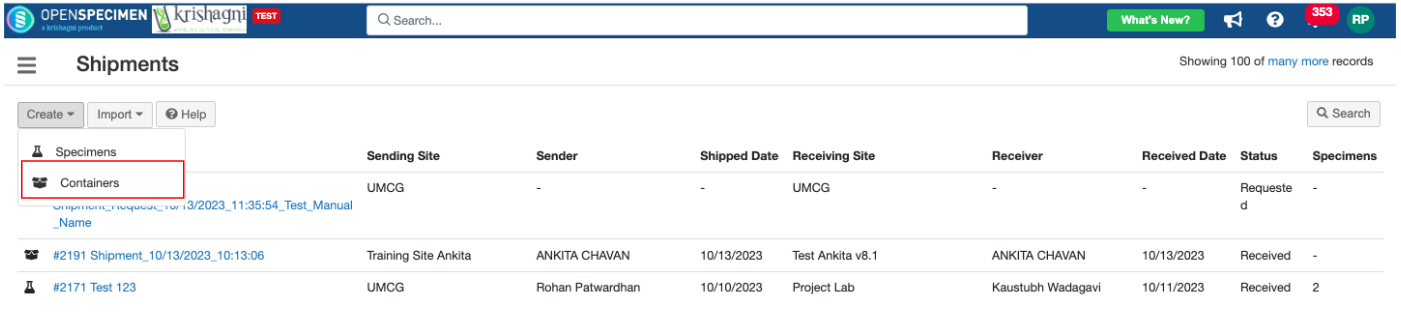
Click on the 'Create' button and select the option 'Containers'
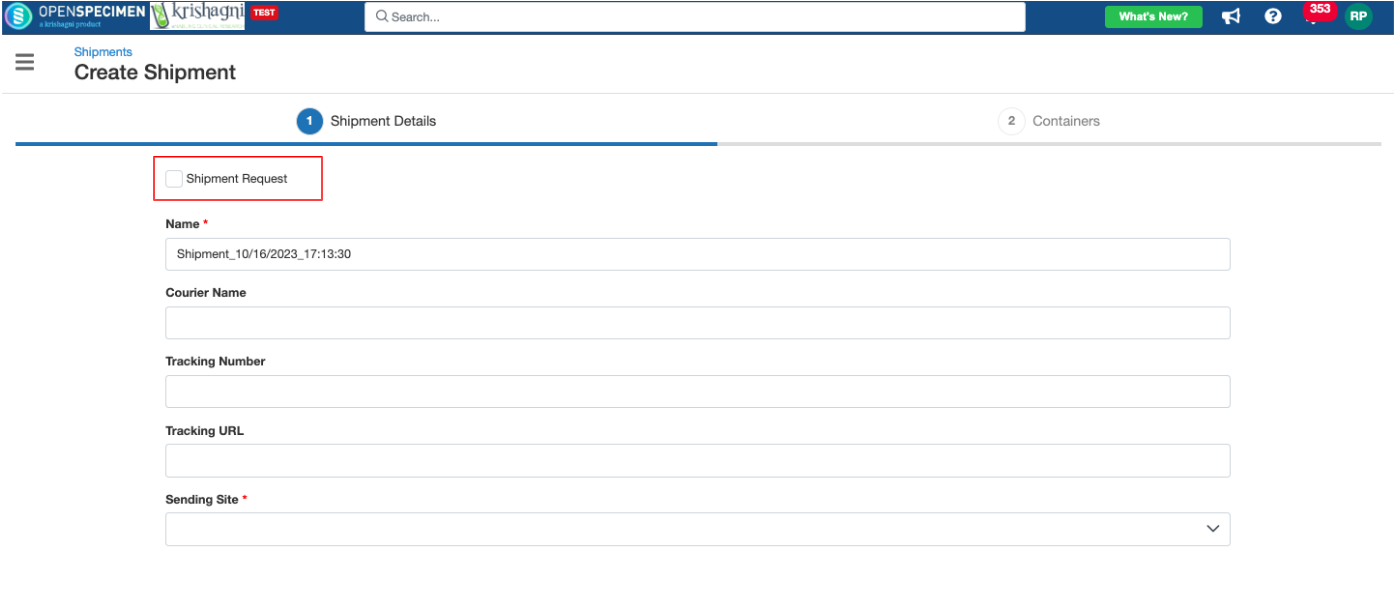
Enter all valid details, select sending site and receiving site, and click on the ‘Next’ button. Select the checkbox ‘Shipment Request’ if you want to generate request (available from v10.3).
Info
Note
From v10.3 Unique shipment names will be auto-generated with the format
Regular Shipments: Shipment_<date>_<time>
Request Shipments: Shipment_Request_<date>_<time>
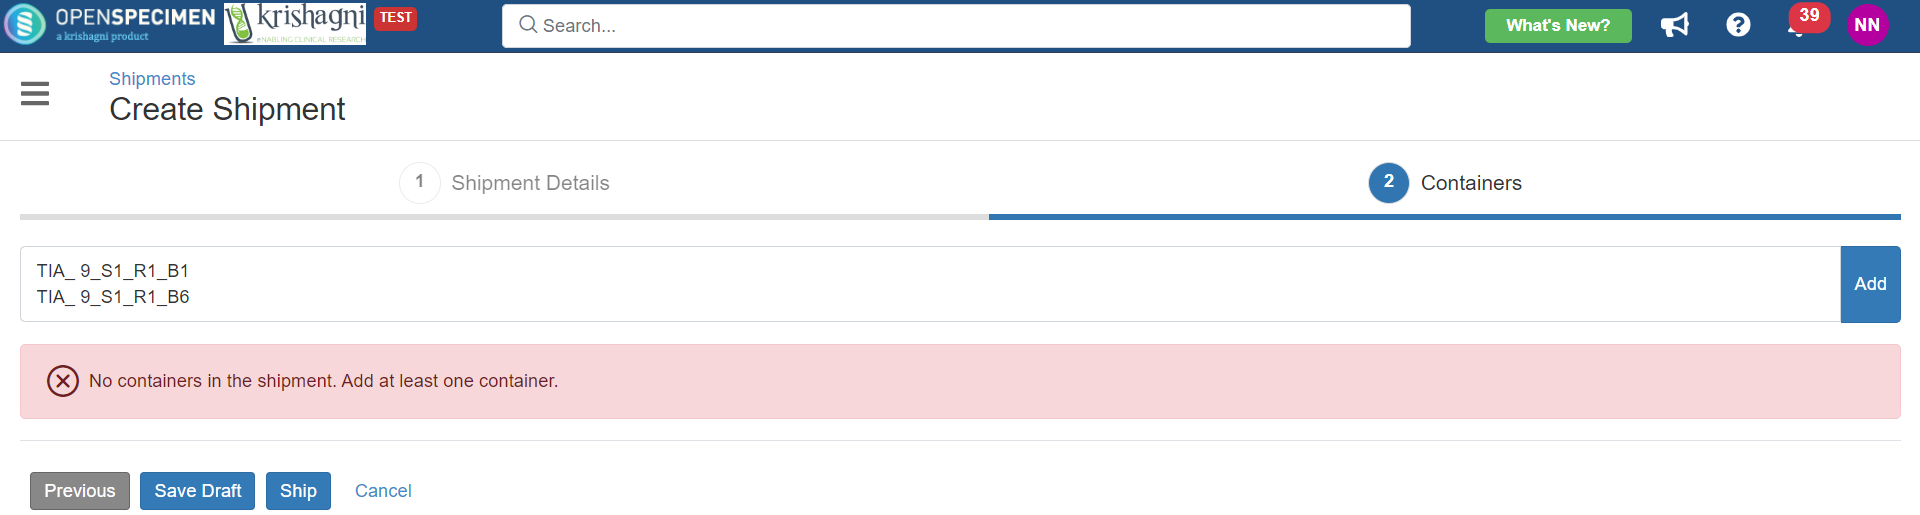
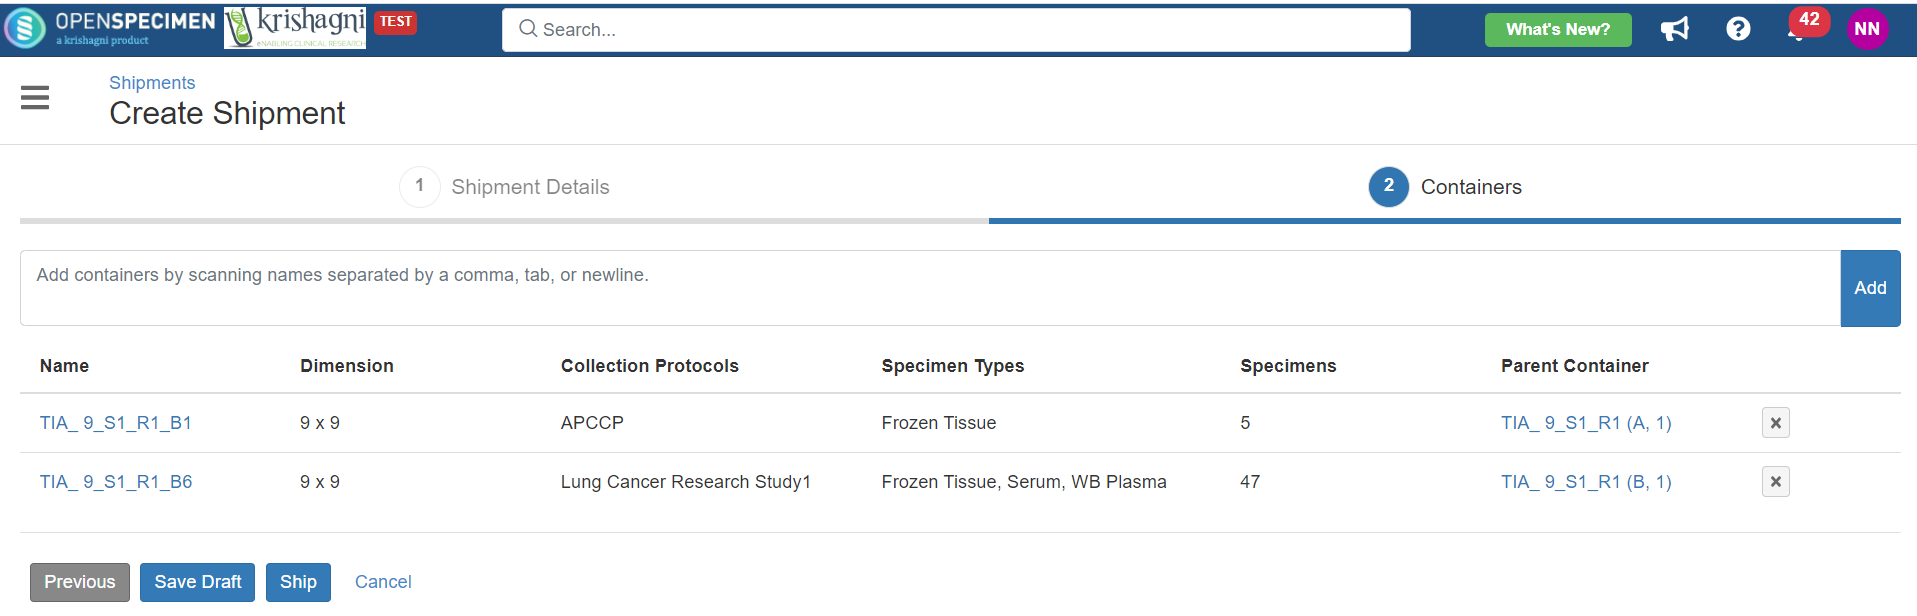
In the next screen, enter the container names separated by a comma, tab, or new line and click on the ‘Add’ button.
Check the list of containers to be requested/ shipped, make changes, if any, and click on the ‘Submit Request’/ ‘Ship’ button. From v10.2 onwards, users will be able to see container CP and specimen types restrictions for the container being shipped.
Info
The users selected under the field ‘Notify Users’ while creating a shipment will be notified when the container is shipped.
You save the shipment as a draft by clicking the ‘Save Draft’ button.
Once the shipment is “Shipped“, you cannot edit the “Notify Users“ field.
You can see the “Notify Users“ field on the overview page for the Shipped shipments but cannot see it on the edit screen.