...
Once you create a form, you can link it to different levels. The forms attached at levels such as participant, visit, or specimen level will appear as a separate form under the forms tab. Whereas the forms attached at custom field level, e.g., specimen custom fields or container custom fields, would appear on the main data entry screen. The custom fields within the main screen can be also be marked as "mandatory" fields.
You will only be able to see those custom form levels for which you can create associations.
Attach form
...
The CP-specific forms such as registration, specimen, and visit level forms can be attached to one or multiple collection protocols.
| Info |
|---|
The 'Associations' column displays a count of form associations. |
| minLevel | 1 |
|---|
| maxLevel | 6 |
|---|
| include | |
|---|
| outline | false |
|---|
| indent | |
|---|
| style | default |
|---|
| exclude | |
|---|
| type | list |
|---|
| class | |
|---|
| printable | true |
|---|
|
Attach Form
A user can attach forms at three levels depending on the role assigned to the user. For example: Super admin users have access to attach forms at the system level, whereas admin users can attach forms at the collection protocol level to which they have access.
At system level
At collection protocol level
At collection protocol group level
At System Level
Forms attached at the system level apply to every collection protocol, container, and user across all institutes within the system.
Only the Super Admin can attach forms at this level.
There are two types of associations where the form can be attached at the system level
Direct Attachment at the System Level:
Certain associations allow forms to be attached directly at the system level, such as collection protocol custom fields. This approach ensures that the form is accessible across all collection protocols within the system.
| Expand |
|---|
| title | Click here to view the steps with example |
|---|
|
expandSelect 'Forms' from the navigation menu or the home screen. Navigate to the form overview page and click on 'Associations'
 Image Added Image AddedClick on 'Add'
 Image Added Image AddedSelect the ‘Collection protocol Custom Field’ level from the dropdown and click on '
Attach' button (spanner icon) next to the form.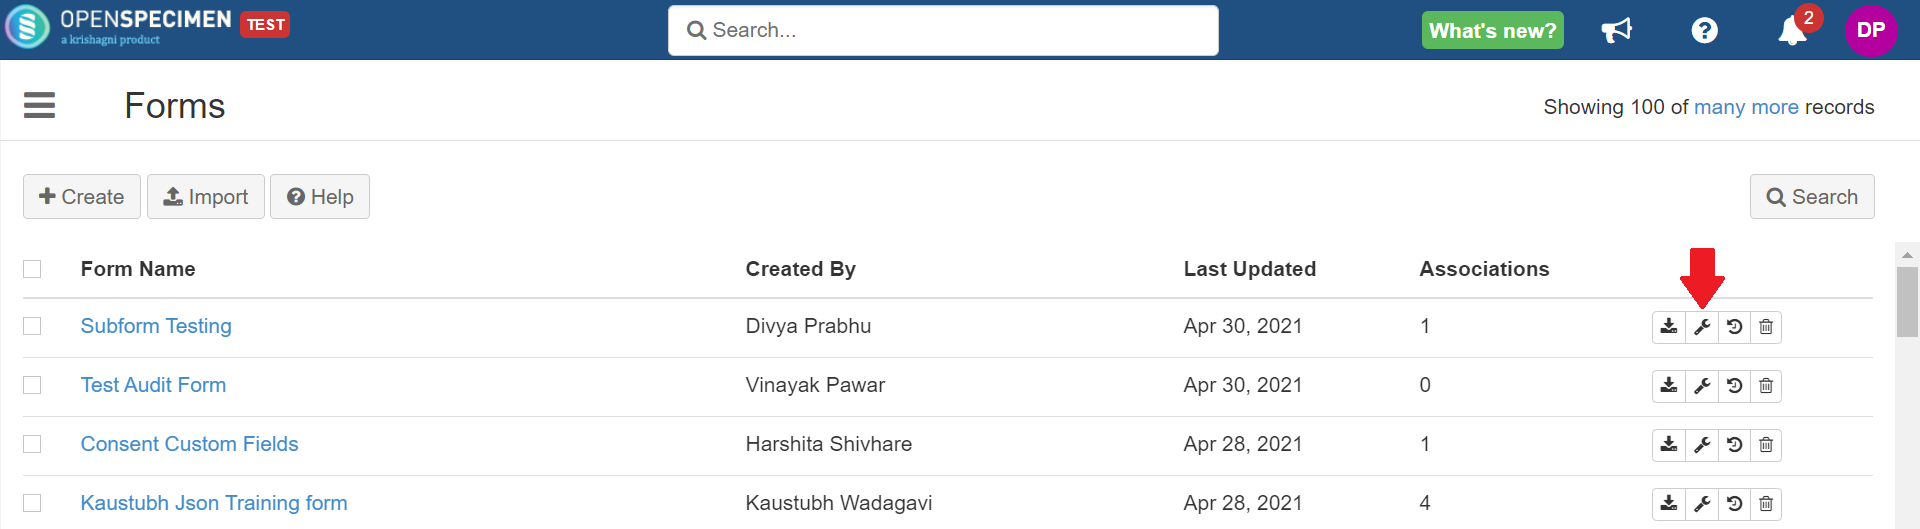 Image Removed Image RemovedSelect the CP-specific level, e.g., registration, specimen, or visit form (when levels not specific to CP such as container custom fields are selected, the options to select CP will not be displayed).
 Image Removed Image RemovedCheck the 'All Current and Future Collection Protocols' checkbox to link the form with all protocols in the system. If you want to link it to more than one Collection Protocol, click in the collection protocol box and select one or more collection protocols to which the form has to be linked.
In the case of custom fields (for example, forms attached at Distribution Protocol Custom Fields, Container Custom Fields, etc.), it will get attached to all distribution protocols or containers across the system. 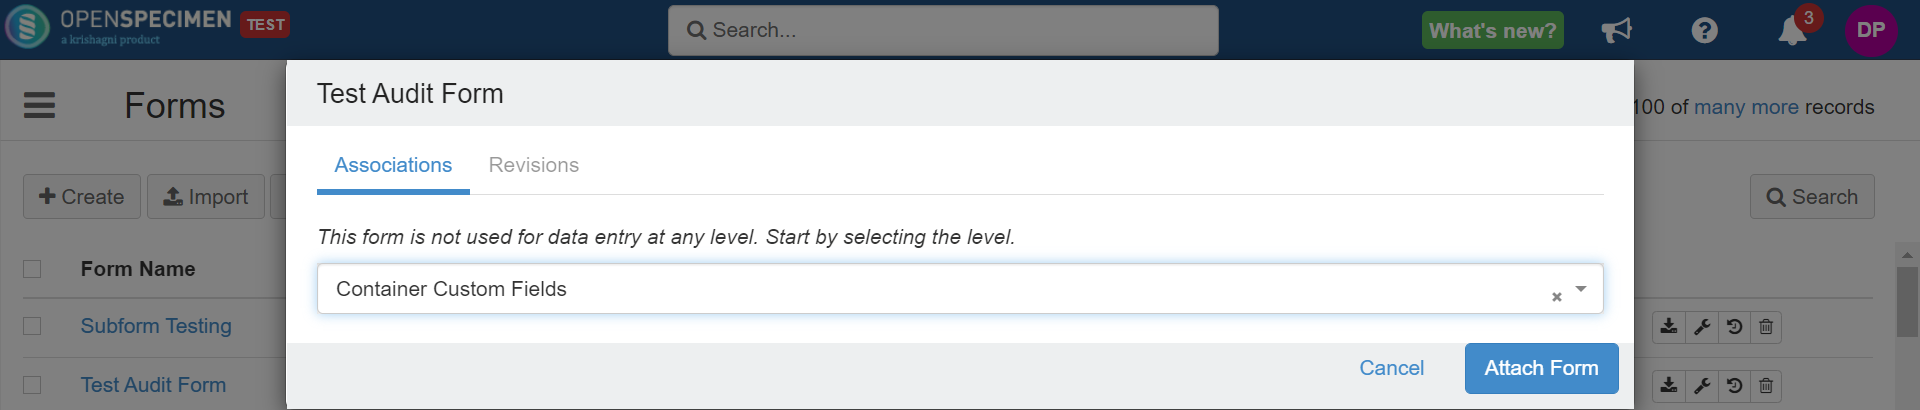 Image Removed Image Removed |
As Custom Form
Add'
 Image Added Image Added
|
At All Present and Future Collection Protocols:
There is other type of association where users can choose the option ‘All Present and Future Collection Protocols’ when linking the form. This setting ensures the form is automatically applied to both existing and future collection protocols in the system.
| Expand |
|---|
| title | Click here to see the steps |
|---|
|
Navigate to the form overview page and click on 'Associations'
 Image Added Image AddedClick on 'Add'
 Image Added Image AddedSelect the ‘Registration Form’ level from the dropdown, select 'All Present and Future Collection Protocols' then click on 'Add'.
 Image Added Image Added
|
At Collection Protocol Level
Forms attached to individual collection protocols take precedence over system-level or Collection Protocol Group (CPG) associations. Regular users with form access, in addition to administrators, can attach forms at this specific level.
| Expand |
|---|
| title | Click here to view details... |
|---|
|
Navigate to the form overview page and click on 'Associations'
Image AddedClick on 'Add'
Image AddedSelect the ‘Registration Form' and name of the ‘Collection Protocol’, click on 'Add’
 Image Added Image Added
|
At Collection Protocol Group Level
Users can attach a form at the CPG level to enter data across all collection protocols in the group, thereby overriding system-level associations.
| Expand |
|---|
| title | Click to view the steps |
|---|
|
Navigate to the CPG and click on the 'Forms' tab
 Image Added Image AddedSelect the level for attaching the form participant/visit/specimen.
 Image Added Image AddedTo attach a form at the 'Custom Field' level, click the 'Add' button next to 'Custom Fields'.
 Image Added Image Added
 Image Added Image AddedIf you wish to attach the form at the ‘CustomForm' level, click on the ‘Add’ button present beside 'Forms’.
 Image Added Image Added
 Image Added Image Added
|
Attachment level and Description
The customs forms can be attached at various levels based on the data entry needs.
| Expand |
|---|
| title | Click to view the levels and description |
|---|
|
Level | Description |
|---|
Participant Forms | |
will be available under all CPs 'Participant' level will be available under all CPs the participant is registered to.E, If P1 is registered under CP1 and CP2 entered for P1 under CP1 also under CP2 available on the participant overview pageFor CP. E history', which might only be required under Lung Cancer Protocol.Forms added at this level will be available participant overview To add custom fields to the "add event page" While to select the formTo add "custom events" specimen , . Refer to the wiki page for more details to be available of of CPTo add custom fields on the add event Multiple . (New in v8.0)To add forms at the “User“ level. The forms can be added to capture training records, and so on. Refer | User forms can be added at the ‘User’ level for capturing training records and other information For more details, refer to the wiki page
|
for more details to available of occurred of CP. |
As Custom Fields (embedded within the main screen)
| Expand |
|---|
Level | Description |
|---|
| Collection Protocol Custom fields | |
"create collection protocol" page. E.g., 'IRB document', "CTRI number.' "create page" | DP Requirements Custom Fields | |
"create page" | Distribution Protocol Custom Fields | | Order Custom Fields |
The forms can not attach icon at order custom fields level. It either Refer to Adding custom fields to Order level for more details. "create page" | Registration Custom Fields | |
"participant page" | Service Request Custom Fields | |
"create page" "create page".Specimen Array Event | To add custom fields to the "add event page" of the array. Multiple forms can be attached at this level. While adding an event, click the dropdown button in the event field to select the form "". |
Multiple records
Some forms like test results, surveys, etc., might have to be collected multiple times. To do this, check the "Multiple records allowed" checkbox while attaching a form at a particular level.
...
Editing the attachment level
...
Edit Attachment
Forms can be edited at the Participant Forms, Visit Forms, Specimen Forms, and Registration Forms levels. For example, you can edit whether modify a form can have a single record or to include multiple records, as demonstrated below.
| Expand |
|---|
This can be done by clicking the attachment level (spanner icon) and then 'Edit'.  Image Removed Image Removed |
For forms attached at any other levels, if you want to change the attachment level, you can follow one of the below approaches:
No data present in the form
| Expand |
|---|
You can delete the attachment and attach it to another required level and collection protocol/s. To do this, follow the below steps:
Image Removed Image Removed
 |
|---|
| title | Click to view the steps |
|---|
|
|
Delete Attachment
When no Data Exists
You can directly delete the attachment from different levels when there is no data present related to that form
| Expand |
|---|
| title | Click to view the steps |
|---|
|
Follow these steps ONLY when there is no data present in the forms or in a case where the data need not be preserved. Otherwise, deleting the attachment level leads to the deletion of related data. |
When Data
...
Exists
When deleting an attachment level leads to the deletion of the data related to those forms. In this case, the data needs to be preserved, and then the form reattached it to another level. You can follow the below steps:
Case 1: Changing the attachment level from ALL to single/multiple CP
| Expand |
|---|
Go to the Collection Protocol list page → More → Export.
 Image Removed Image Removed2. Select the name of the form in 'Record Type' and click on 'Export'. A CSV file containing the form records will be exported.  Image Removed Image Removed3. Go to the forms list page, search for the form for which the attachment was to be changed, click on the spanner icon and delete the previous attachment level.  Image Removed Image Removed4. Add the new attachment level and click on 'Done.' 5. Go to the exported form records CSV (exported in step 2) in any text editor. 6. Remove the first column (Identifier) and save the file. If the new attachment level added was CP specific, go to that CP’s patient list view page → More → Biospecimen Data. If the new attachment level added was not CP specific, go to the Collection Protocols list page and click on More → Biospecimen Data.
 Image Removed Image Removed7. Select the form name from the 'Record Type' dropdown and click on 'Validate and Import.'  Image Removed Image Removed |
Case 2: Changing the attachment level from single/multiple CP to ALL
| Expand |
|---|
Go to each CP's participant list page, to which the form is attached, click on 'Export.'
 Image Removed Image Removed2. Select the form name from the 'Record Type' dropdown and click on 'Export.'  Image Removed Image Removed3. Repeat steps 3 to 6 from Case 1. |
If you wish to attach the same form at the same level to multiple collection protocols, this can be done using Collection Groups. You can refer to Collection Protocol Groups for more information.
Case 3: Changing the attachment level from single/multiple CPs to CPG
Make sure you do not delete the attachment of the form. This will result in the deletion of the data.
...
In this case, go to the CPG → Click on the 'Forms' tab.
...
2. Select participant/visit/specimen where you want to attach the form.
3. If you wish to attach the form at the ‘Custom Fields' level, click on the 'Add’ button beside it.
...
4. If you wish to attach the form at the ‘Visit Forms' level, click on the ‘Add’ button present beside 'Forms’ title.
...
, the associated data is also removed. To ensure data preservation, first, save the data before deleting the attachment level. Afterward, you can reattach the form to a different level. For more detailed instructions, please refer to the wiki page.
Enable Multiple Records
To collect data from forms such as test results or surveys multiple times, ensure you select the ‘Multiple records allowed’ checkbox when attaching the form to a specific level. This setting enables the form to be used repeatedly for data collection.
| Expand |
|---|
| title | Click to view the screenshot |
|---|
|
|
Enable Notifications
Users can receive notifications about adding or editing form associations. Additionally, you can choose to include the form data in these notifications by selecting the corresponding checkbox.
| Expand |
|---|
| title | Click to view the steps |
|---|
|
While adding an association, select ‘Send Notification’
 Image Added Image AddedSelect the user group from the ‘Notification Recipient' dropdown and click on 'Add’
 Image Added Image Added
Note: The notifications are only sent to the User Groups and not to the individual users. |


