| Table of Contents |
|---|
Self Sign Up
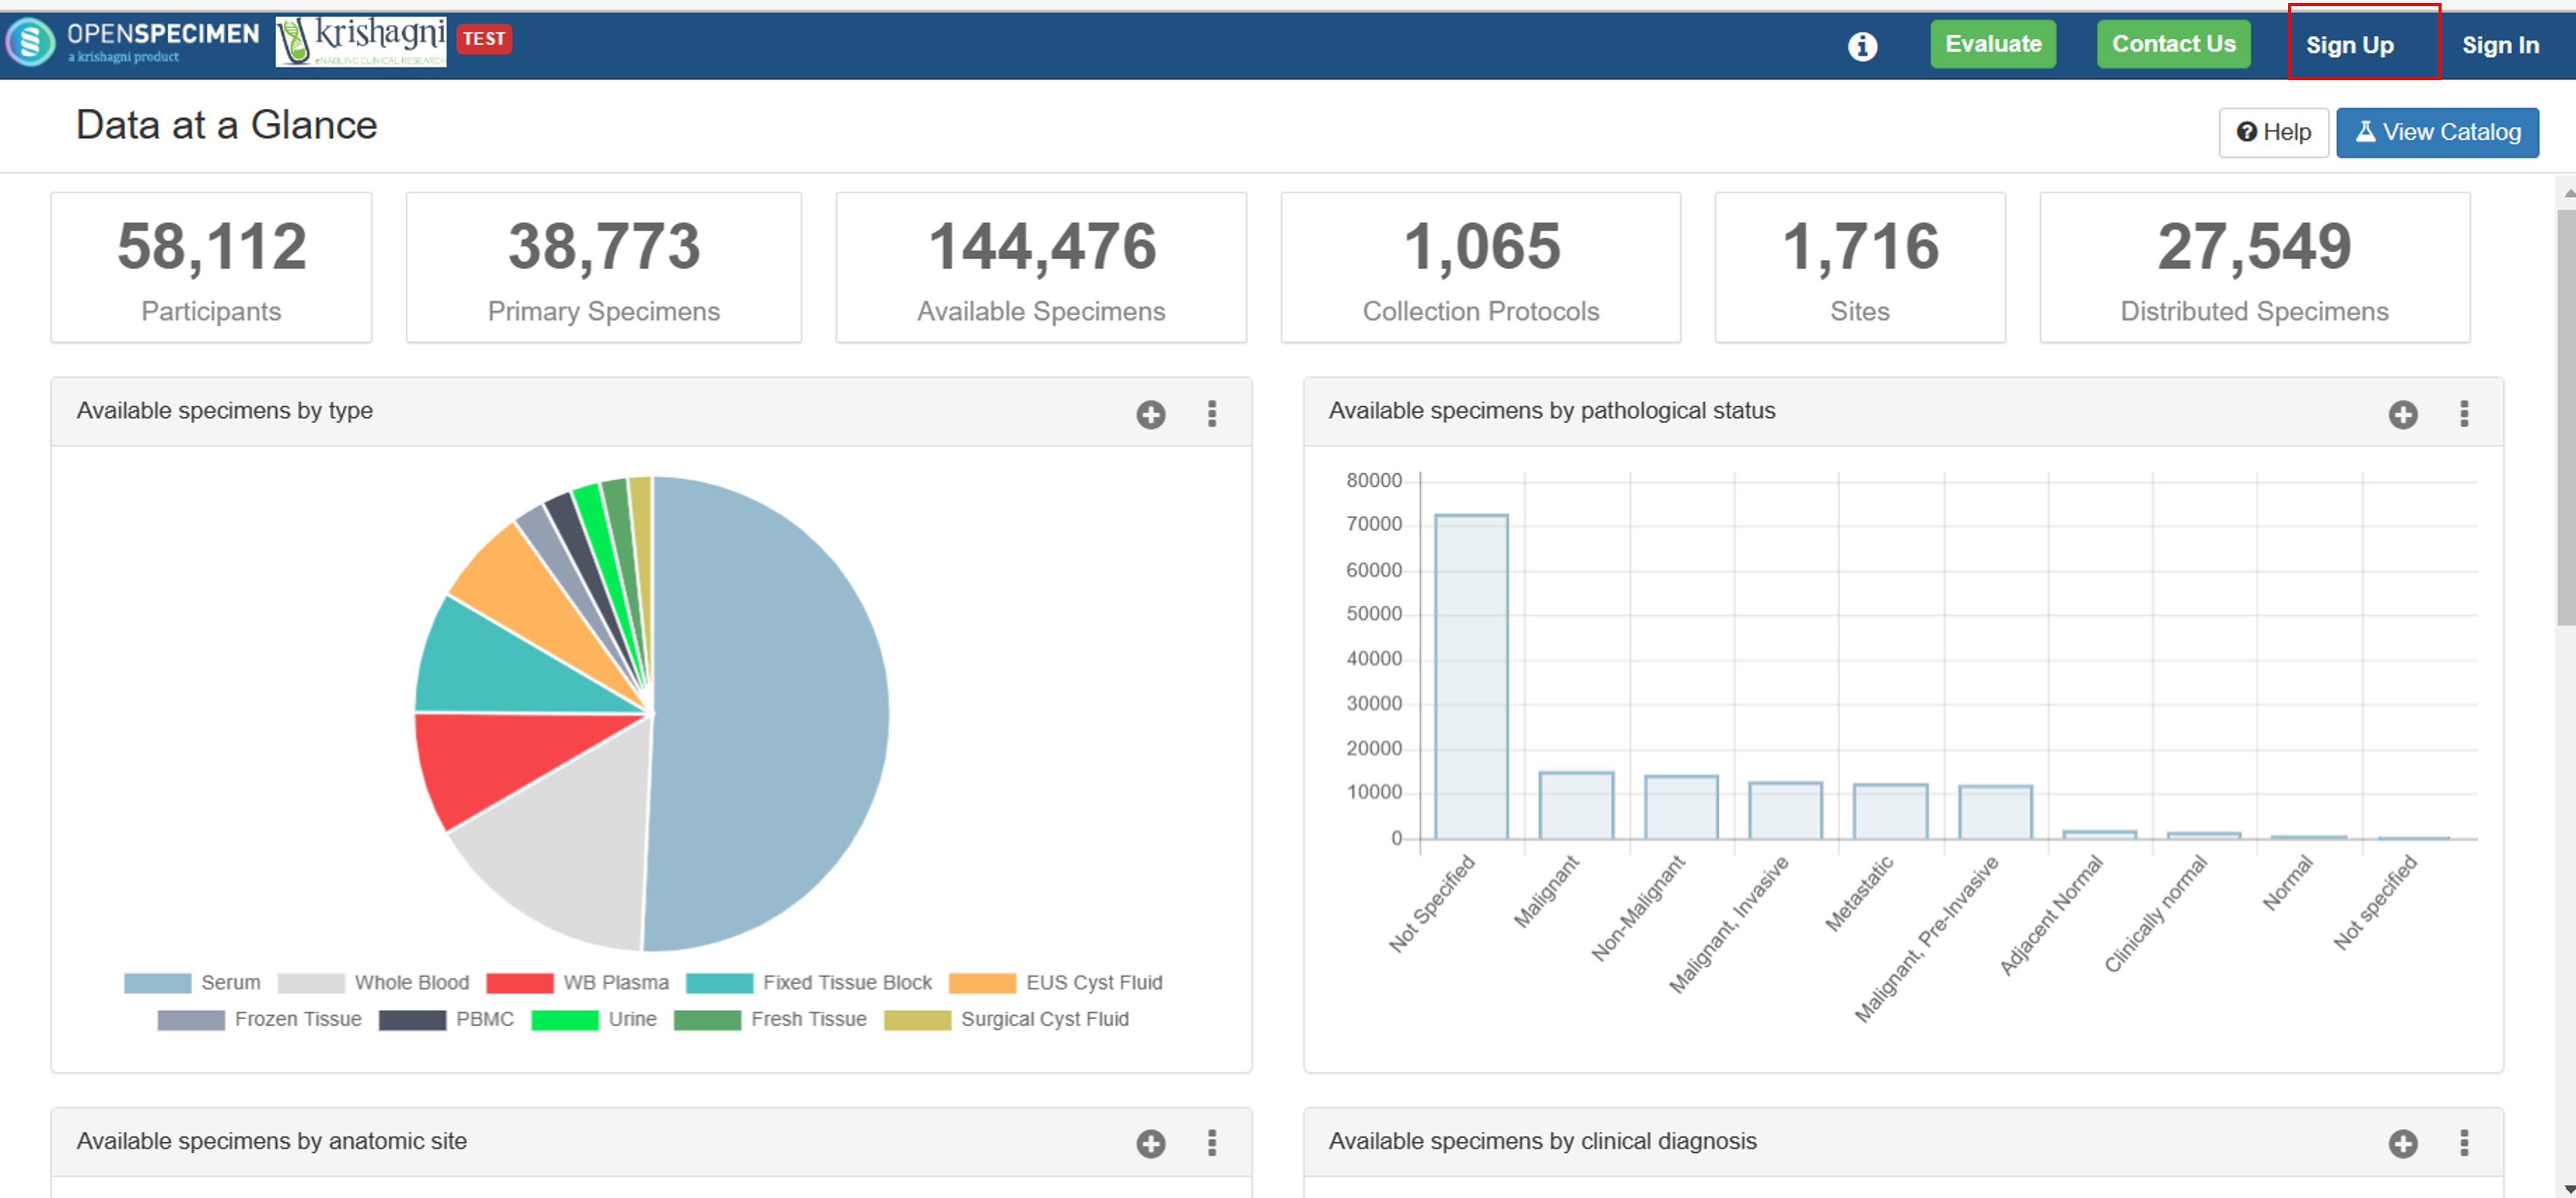
If you are a new user and want to sign up to access OpenSpecimen, go to the dashboard page and click on the 'Sign Up' button.
| Expand | ||
|---|---|---|
| ||
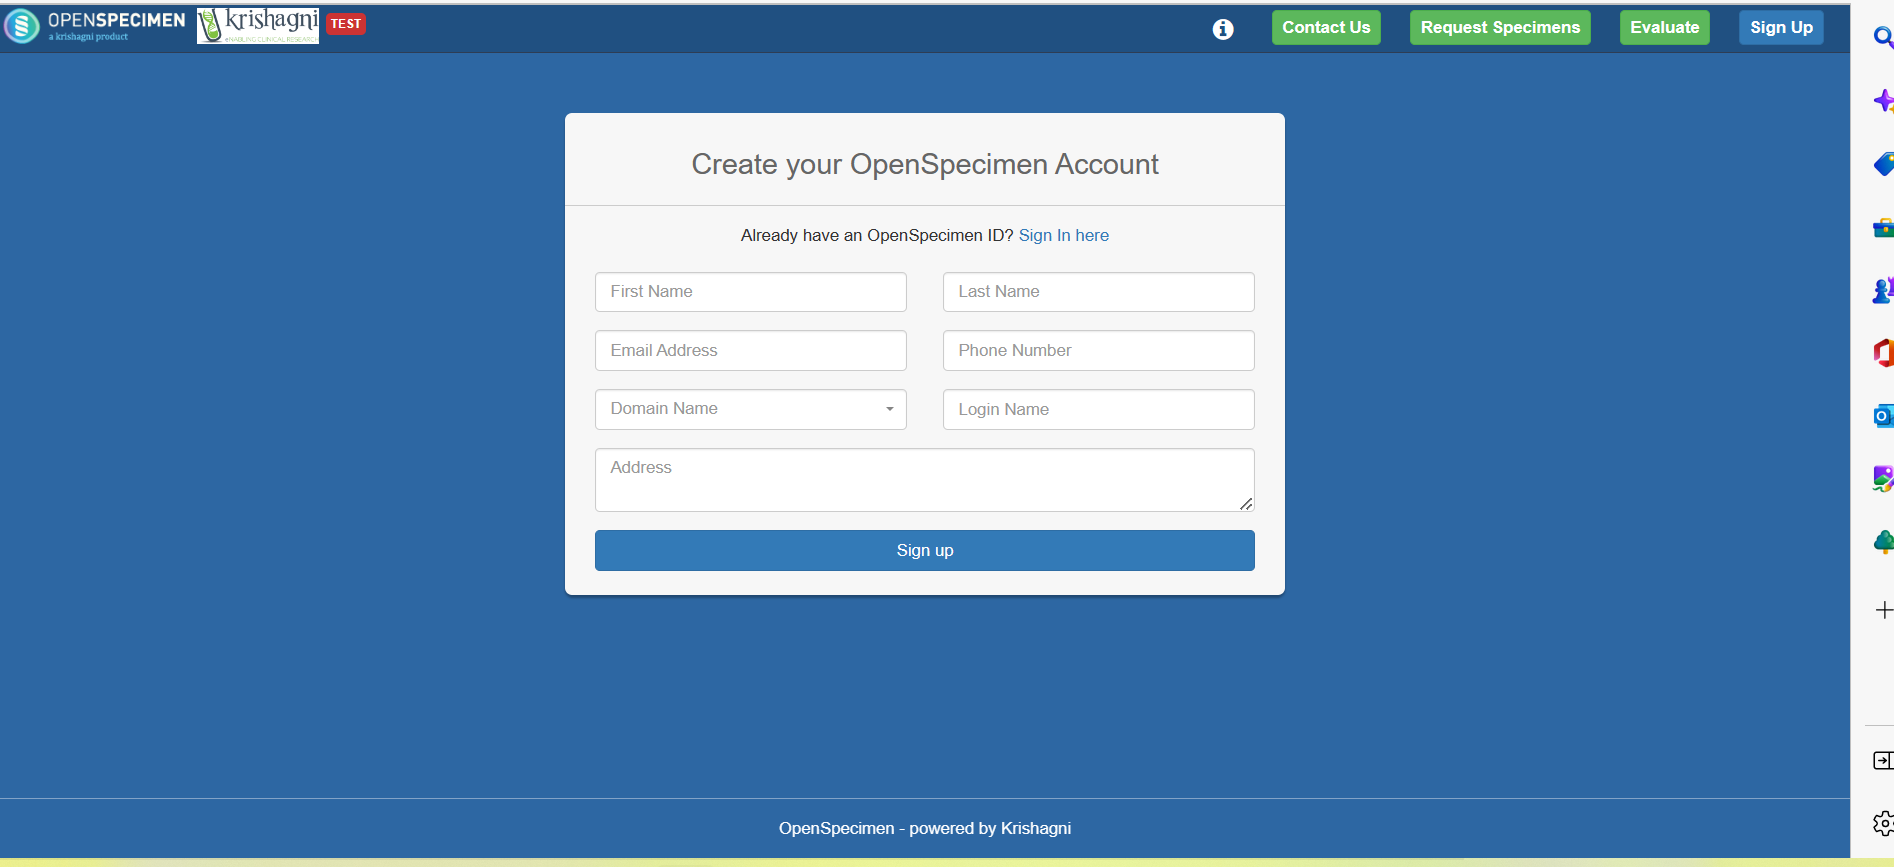
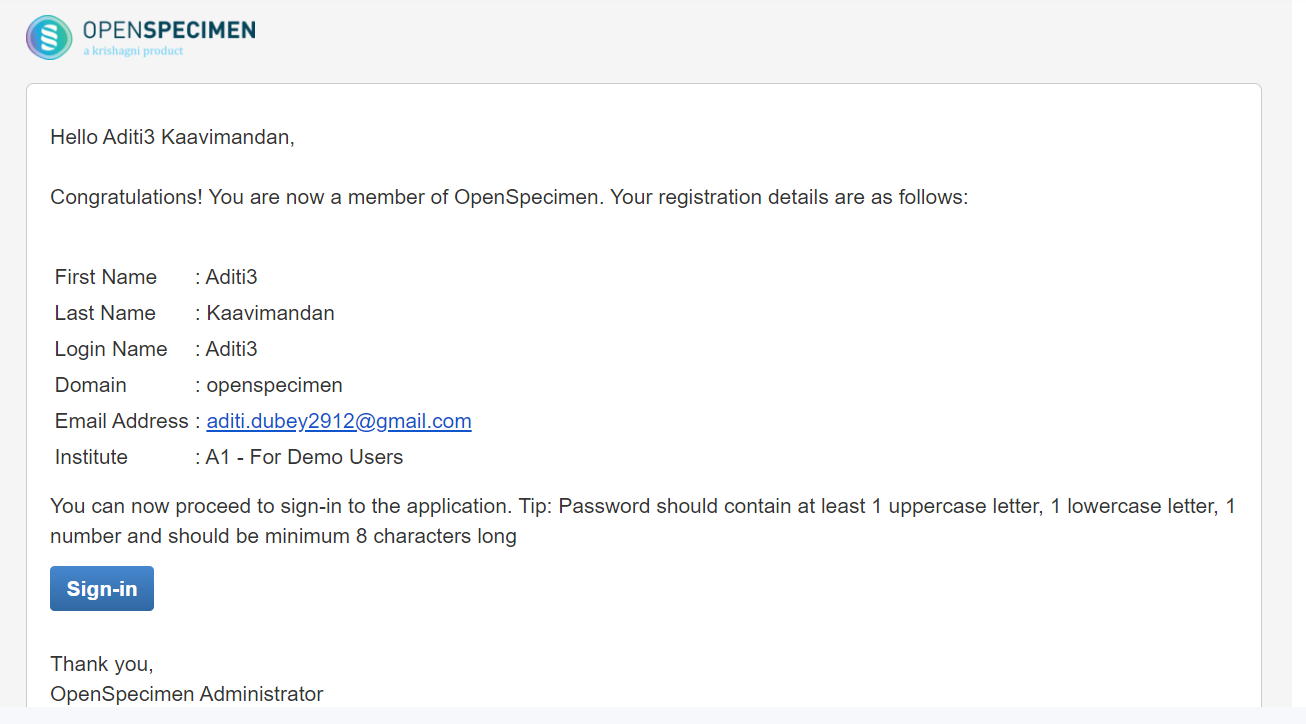
Fill up details and click on 'Sign up.'  Once you sign up, the admin will receive an email. 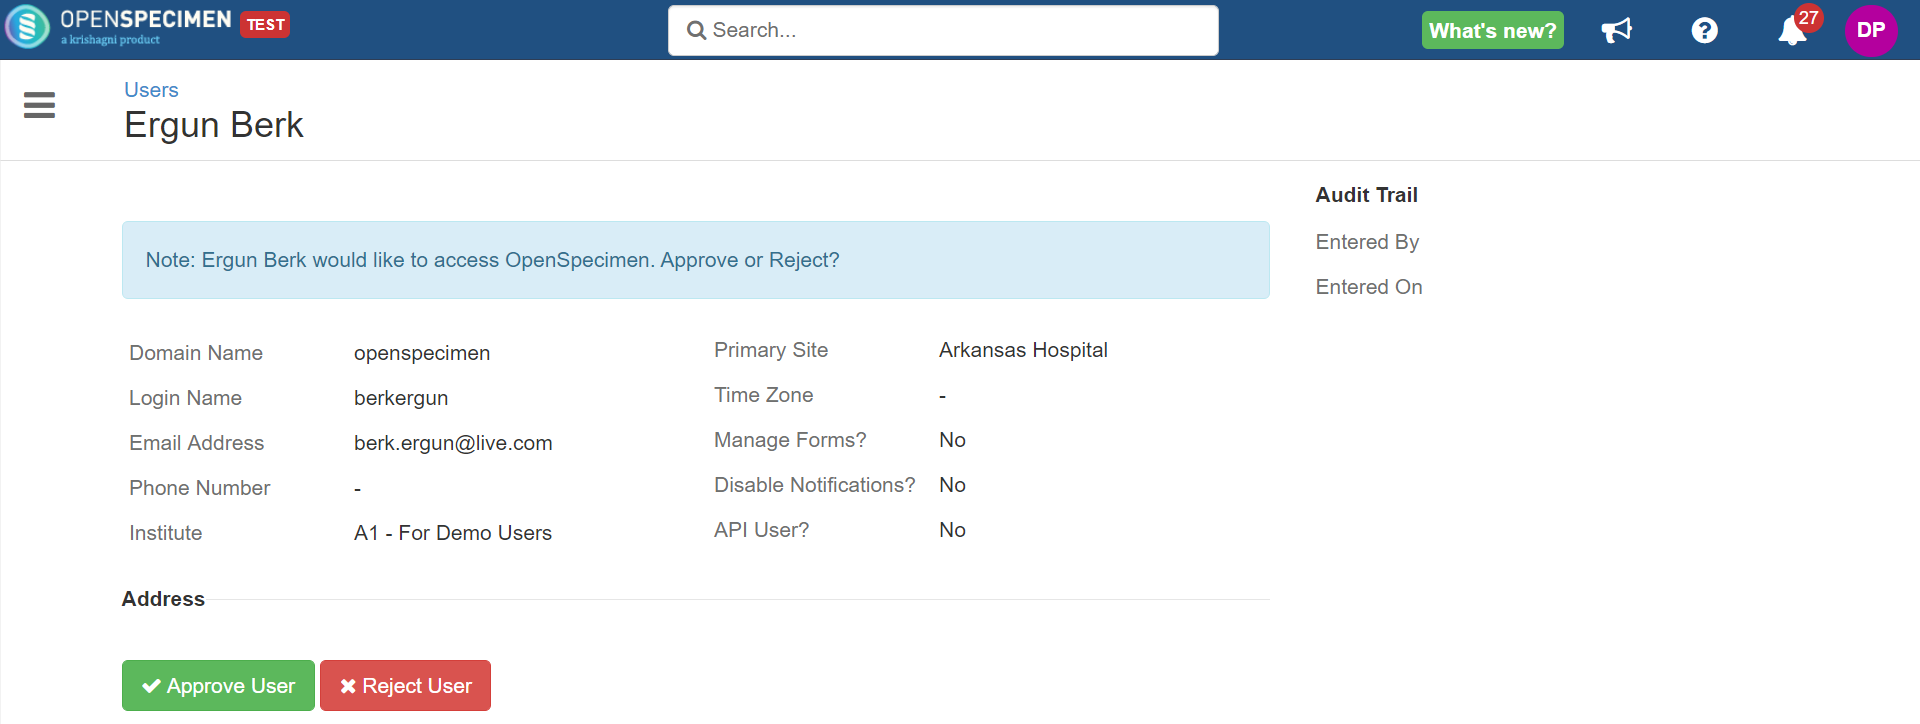
|
Auto approval of new users
From V9.1 onwards, an auto-approve user feature has been introduced. With this feature, the users who have signed up will either get automatically approved or the super admins will approve the account.
System-level settings : Below are the list of the settings which the Super admin should enable so that the users are auto-approved:
...
| title | Click here to view details... |
|---|
Login as Super admin → Settings
...
Fields
...
Description
...
Permissible Values
...
Validation
...
Auto Approve Users
...
Enable automatic approval of new user signup requests.
...
Enabled
Disabled
...
If Disabled accounts have to be approved by Super Admins
...
Default Signup Institute
...
Default institute to use for the newly signed-up users.
...
It should be an existing Institute.
If not specified, the sign in user will get an error for 'Institute name is required'
...
Default Signup User Role
...
Default role to assign users on auto approval of their signup requests.
...
It should be one of the default roles
...
Local Account Signups
...
Enable signup requests for the 'OpenSpecimen' domain.
...
Enabled
Disabled
...
When disabled, the domain dropdown should not contain the option 'OpenSpecimen'
For the users to receive the notification below, fields should be enabled
...
Fields
...
Description
...
Permissible Values
...
Validation
...
User Created
...
Send an email when a new user is created.
...
Enabled
Disabled
...
When disabled, the new user will not receive any notification
...
User Signup Request
...
Email administrator when a new user signs up.
...
Enabled
Disabled
...
User Signup Approved
...
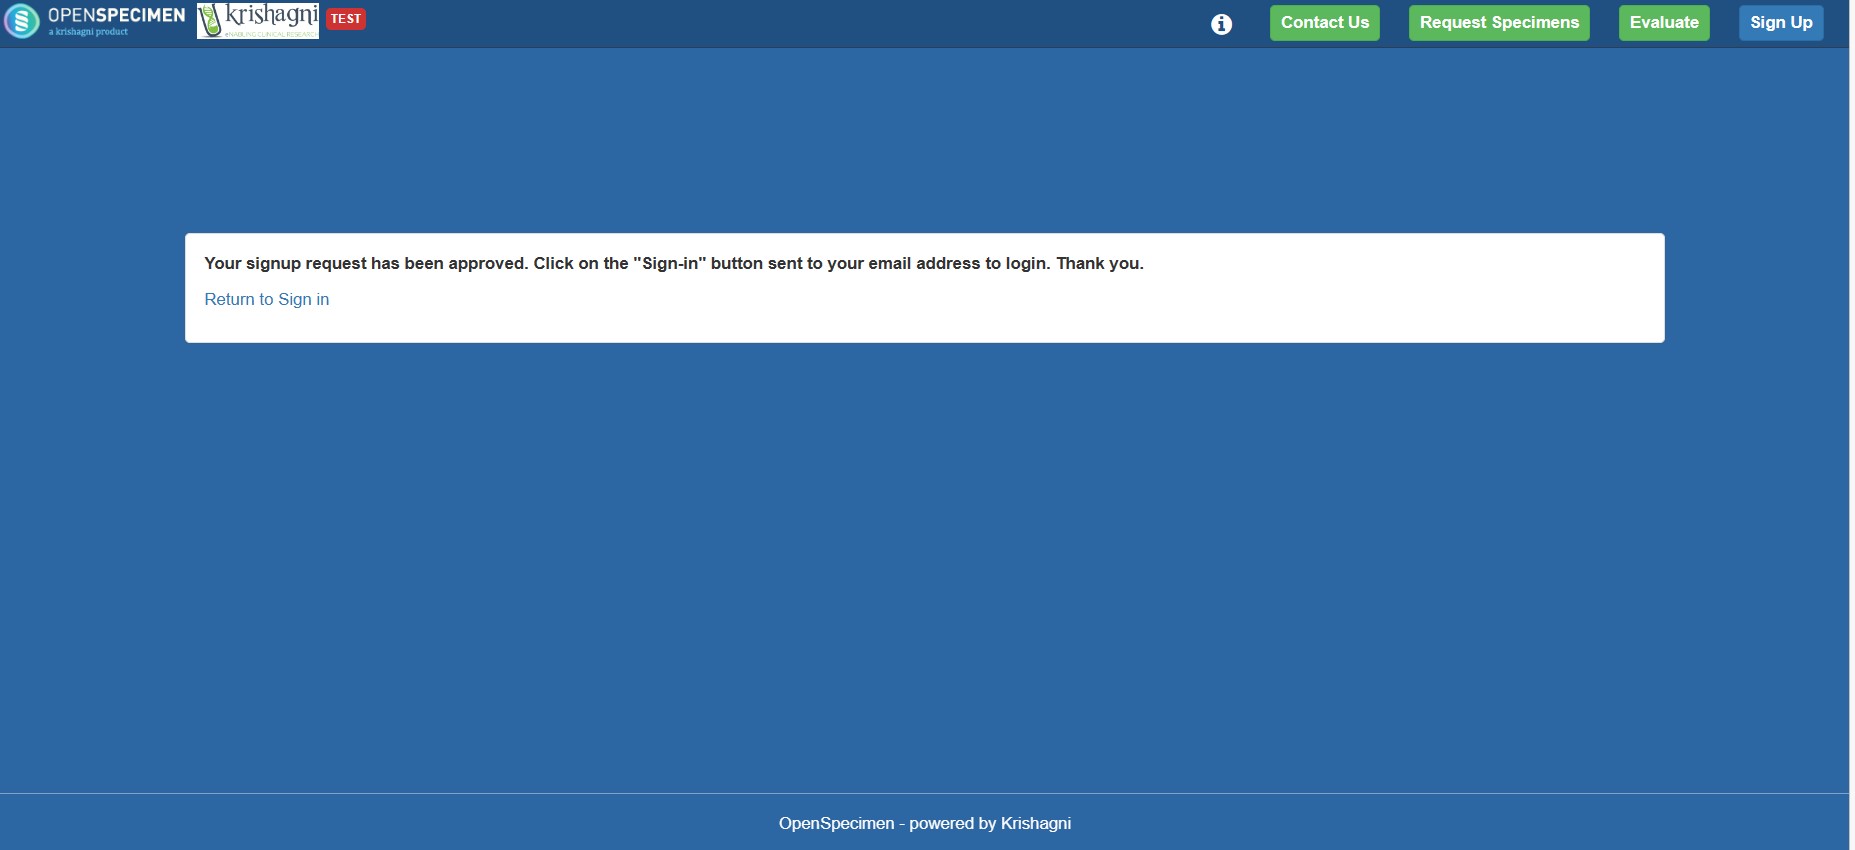
Send an email when a signup request is approved by administrator.
...
Enabled
Disabled
Steps for self sign up:
| Expand | ||
|---|---|---|
| ||
|
...
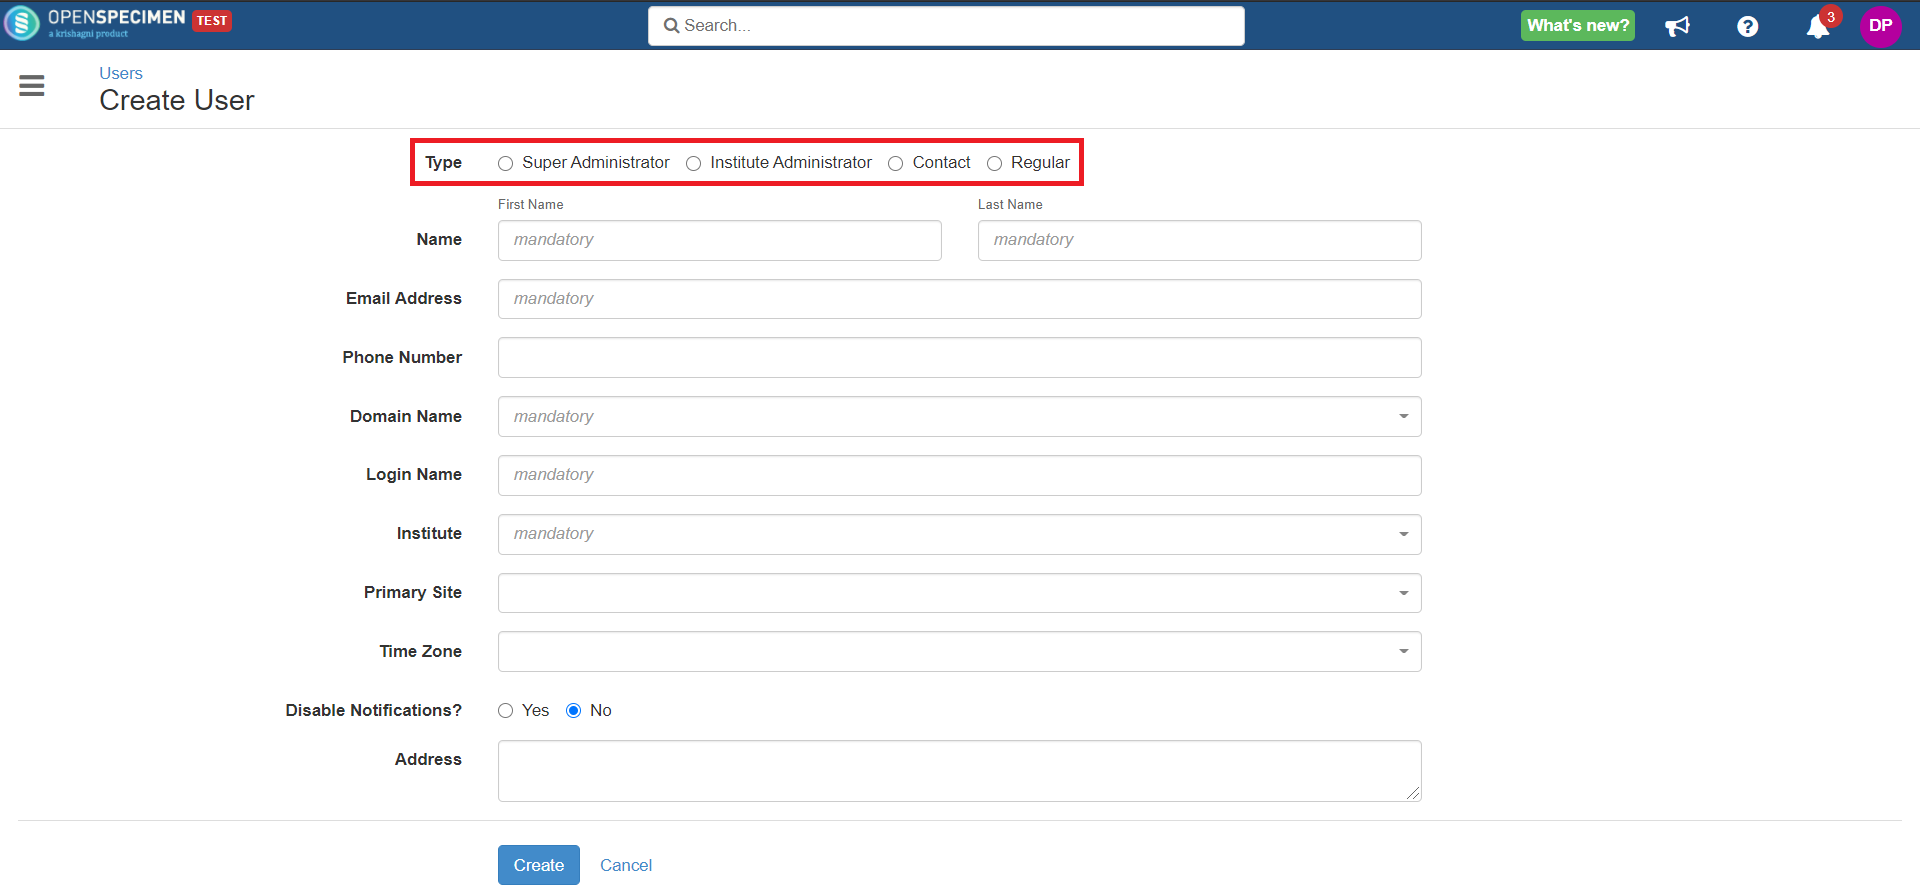
Types of Users
...
Type
...
Description
...
Super Administrator
...
Has access to all the data and operations across all the sites and institutes in the application.
...
Regular User
...
Has limited access based on their roles within the associated site.
...
Institute Administrator
...
Has access to all the data and operations within all the sites of the institute to which the user is associated.
...
Contact User
...
Users that do not log in to the system. For example, nurses, external lab members, etc.
List of fields available on the create users page and their description:
...
Fields
...
Description
...
Type
...
Type of the user:
Super Administrator
Institute Administrator
Contact
Regular
...
First Name
...
First Name of the user
...
Last Name
...
Last Name of the user
...
Email Address
...
Email ID of the user
...
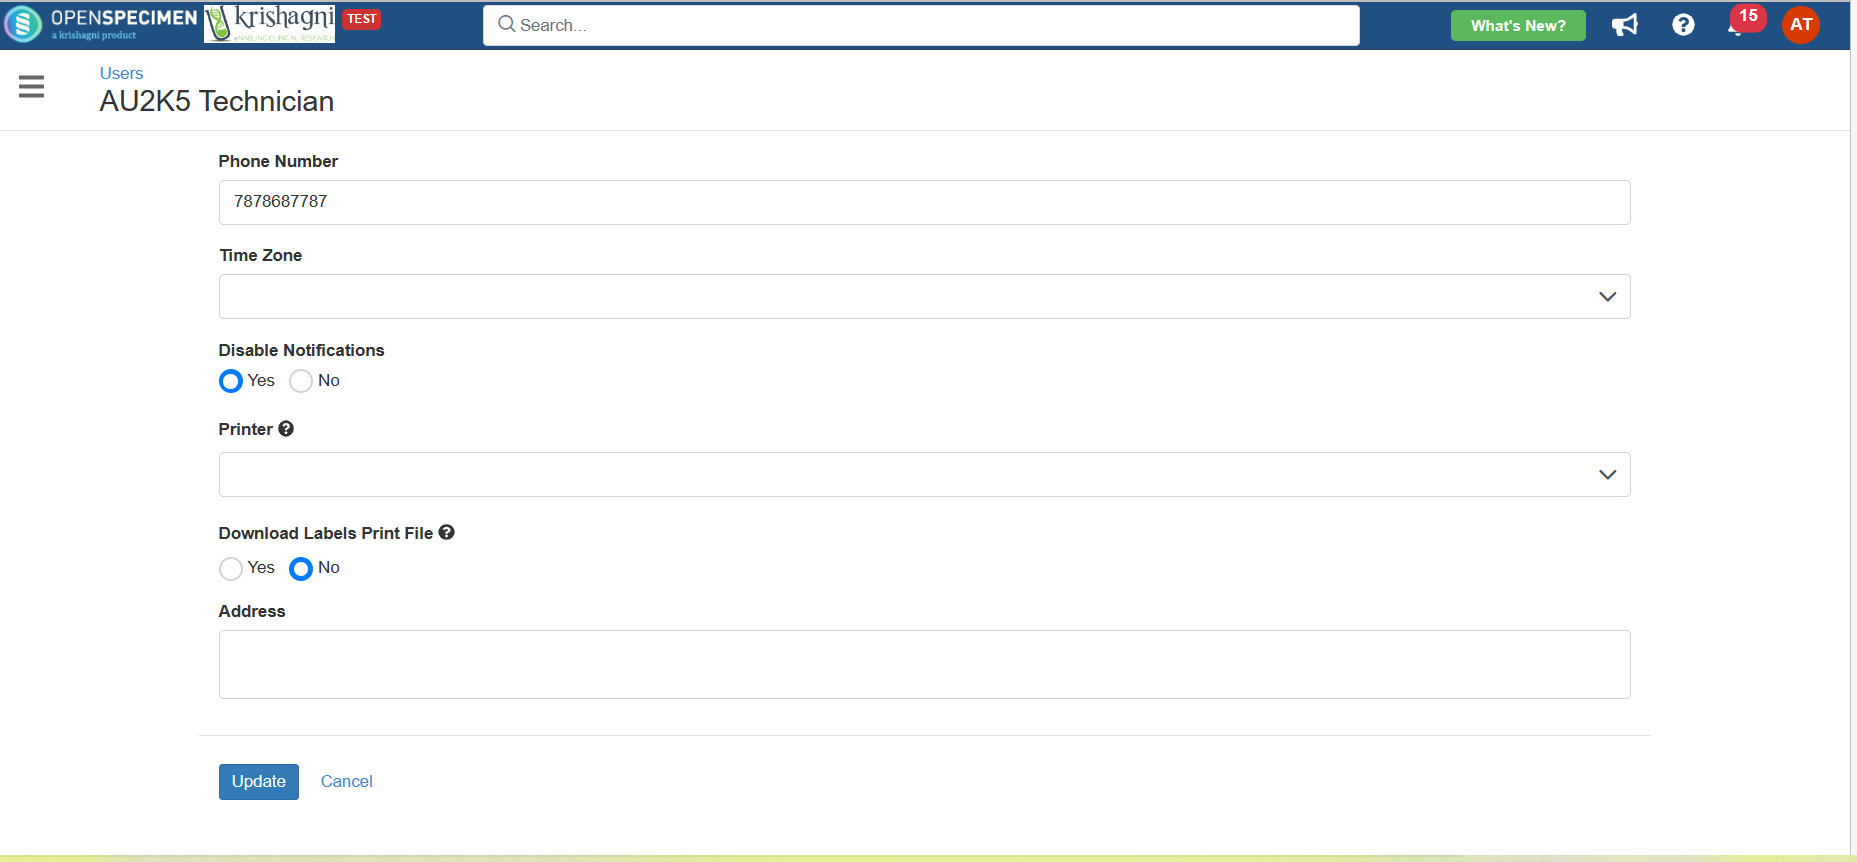
Phone Number
...
Phone number of the user
...
Domain Name
...
It is "OpenSpecimen" by default. If you have LDAP/SAML configured, you can add that as the domain name
...
Login Name
...
The username that will be used to log in
...
Institute
...
Institute under which the user needs to be created
...
Time Zone
...
Time zone of the user
...
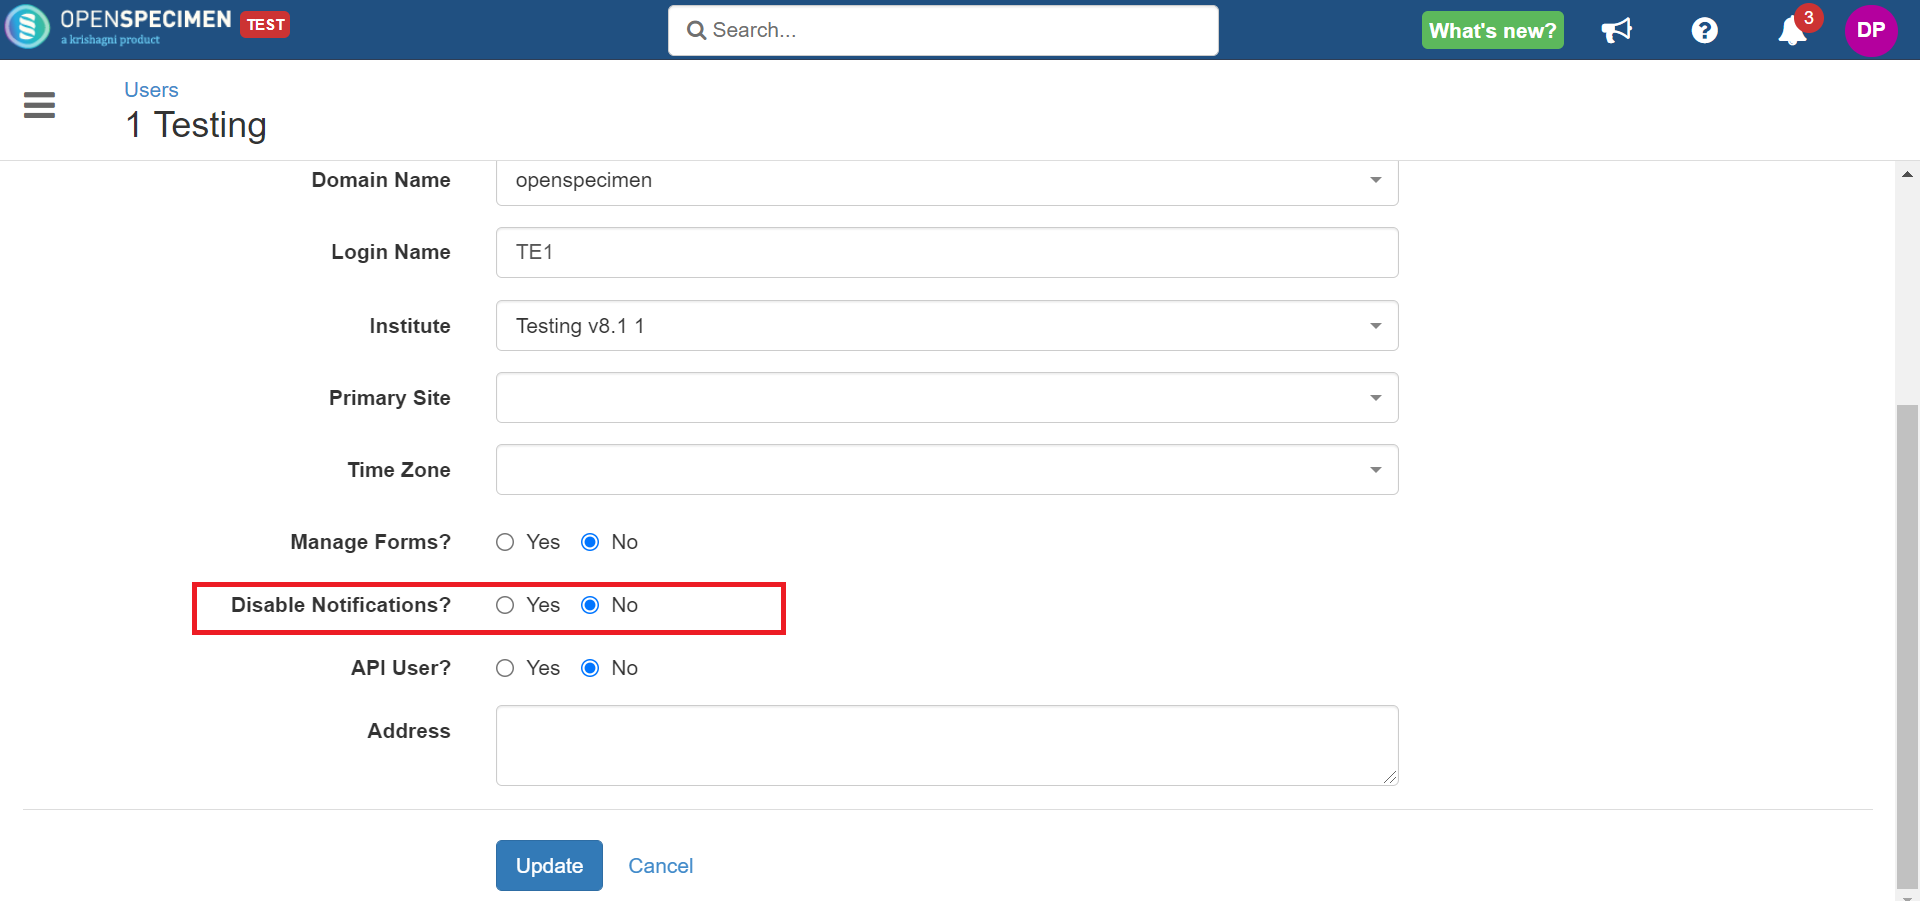
Manage Forms
...
If enabled, the user will be able to add/edit forms. Refer to the wiki page for more details on forms.
...
Manage Workflows
...
If enabled, the user will be able to add/edit workflows. Refer to the wiki page for more details on workflows.
...
Disable Notifications
...
If enabled, the user will not receive any emails from OpenSpecimen.
...
API User
...
Enable if the user works with APIs. Refer to the wiki page for more details.
...
Download Labels Print File
...
Allows the users to download CSV files for printing labels. Refer to the wiki page for more details.
...
Address
...
Address of the user
Data Entry Users
Administrators (Super/Institute/Site) can create authorized users and provide them with specific access privileges in OpenSpecimen. These users can be Site Managers, Biobank Managers, Laboratory Managers, Clinicians, Technicians, etc.
| Expand | ||
|---|---|---|
| ||
 |
Contact Users
Some users (e.g., PI of the study, external lab members, nurses, etc.) do not log into OpenSpecimen. For such types of users, you can create a 'Contact' user type.
| Expand | ||
|---|---|---|
The contact users can be used in the below fields:
|
Assign Roles
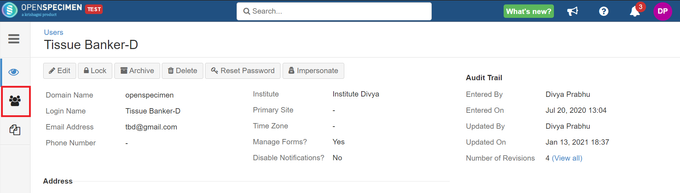
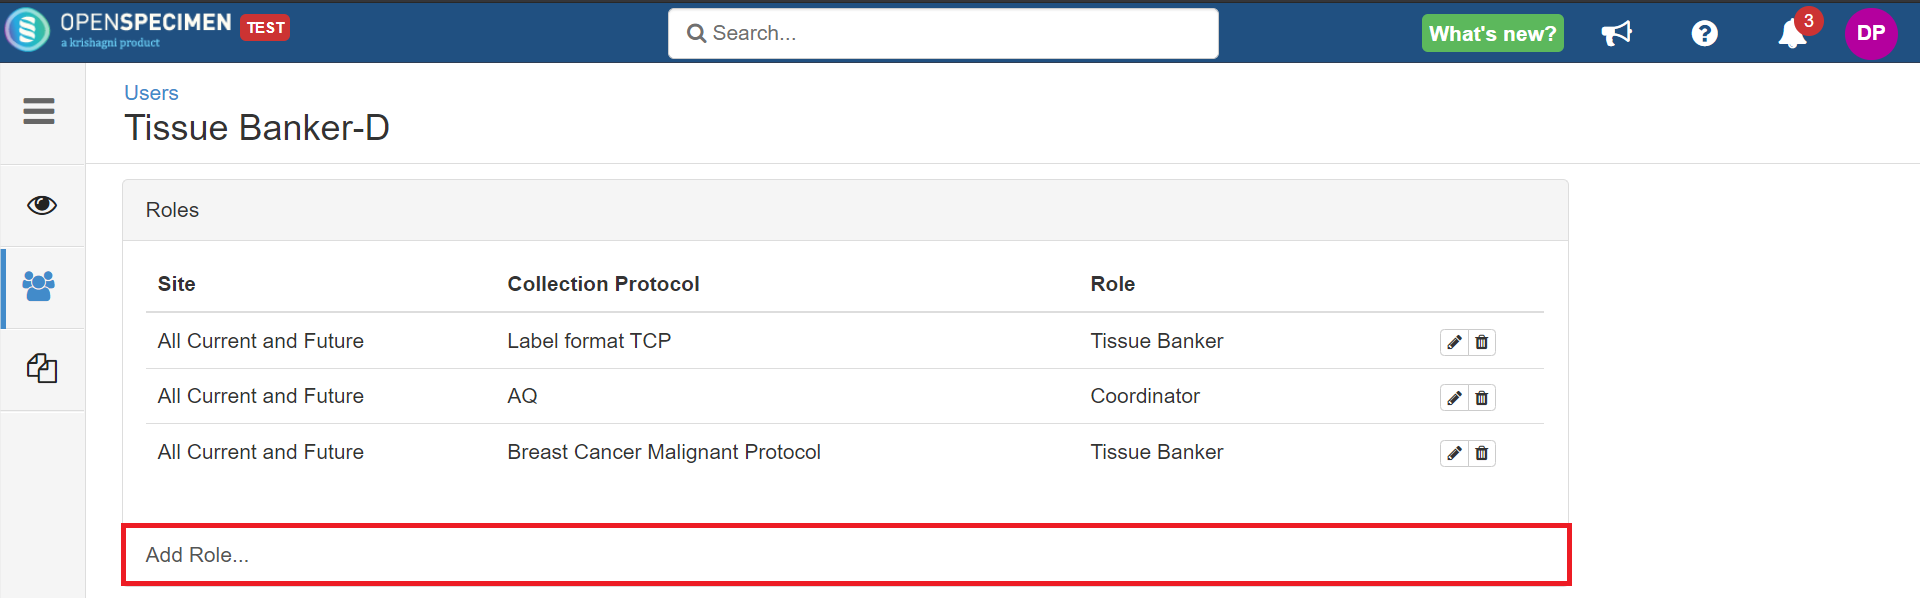
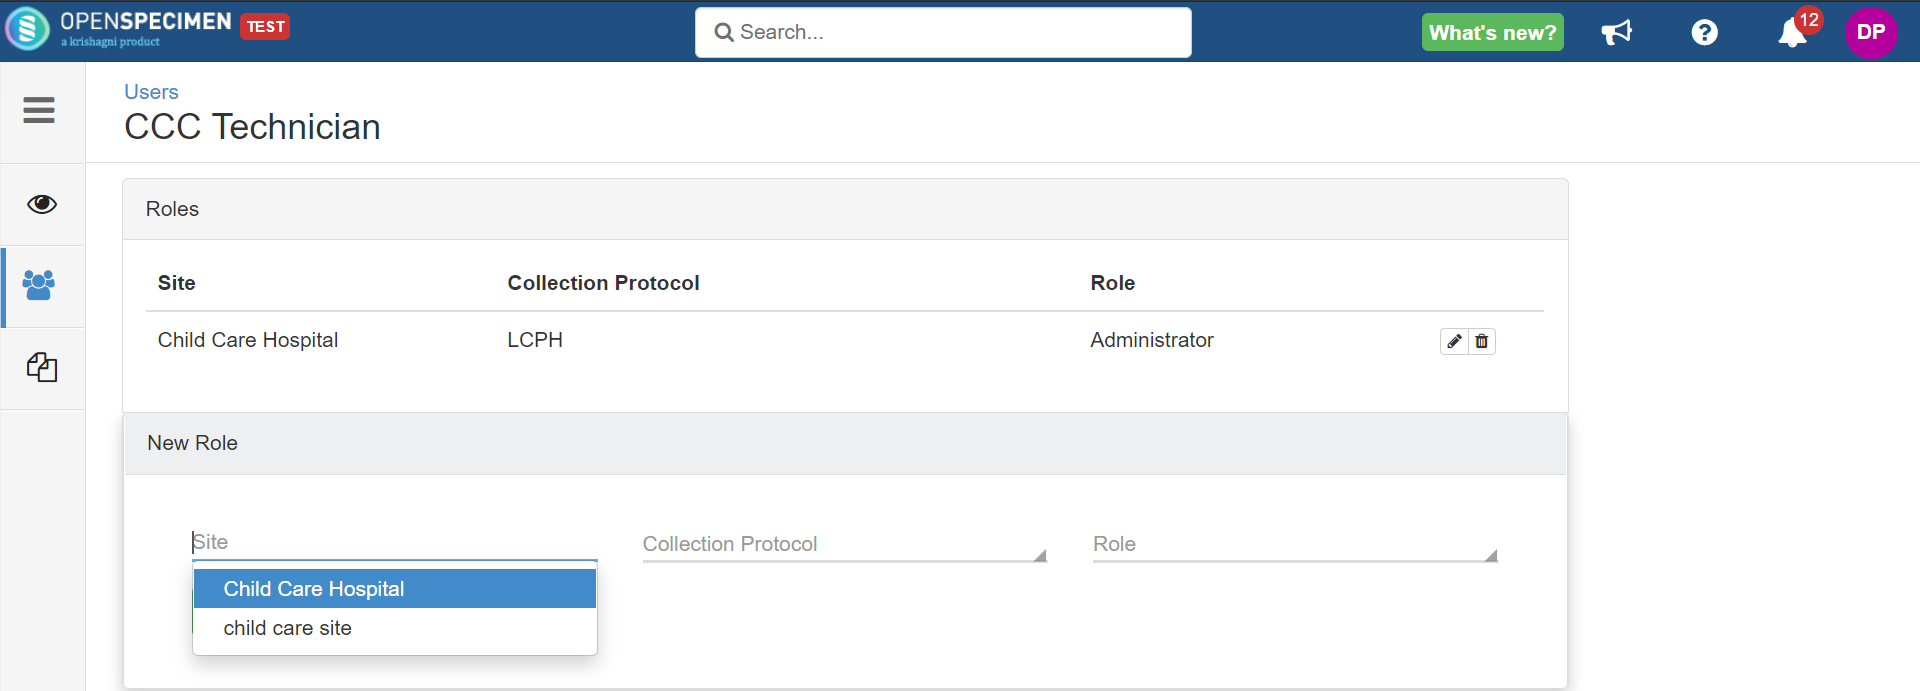
Once you create a regular user, you will need to assign roles like technicians, tissue bankers, etc., by clicking on the 'Roles' tab from a specific user overview page.
| Info |
|---|
The roles tab will only appear if 'Regular' is selected under the 'Type' field on the 'Create users' page. It will not appear if the user is a super administrator, institute administrator, or contact. |
| Expand | ||||
|---|---|---|---|---|
| ||||
|
For more information on default roles and privileges, refer to the wiki page.
Set Default Printer for User
You can set a 'Printer' value for each user from the dropdown. This dropdown is configurable through 'Extras → Dropdown Manager → Label Printer'. This value takes precedence over 'Print Rule' settings. This value is added in the generated label CSV. This way, you can set the Printer based on the logged-in user. It is typically helpful when multiple printers are available.
Edit
You might want to edit user details like the user's Institute, primary site, contact details, role, form management, etc. The super Admin can update all the profile attributes of the users.
| Expand | ||
|---|---|---|
| ||
Log in as a super admin and click on 'Edit' from the user overview page to edit the user. 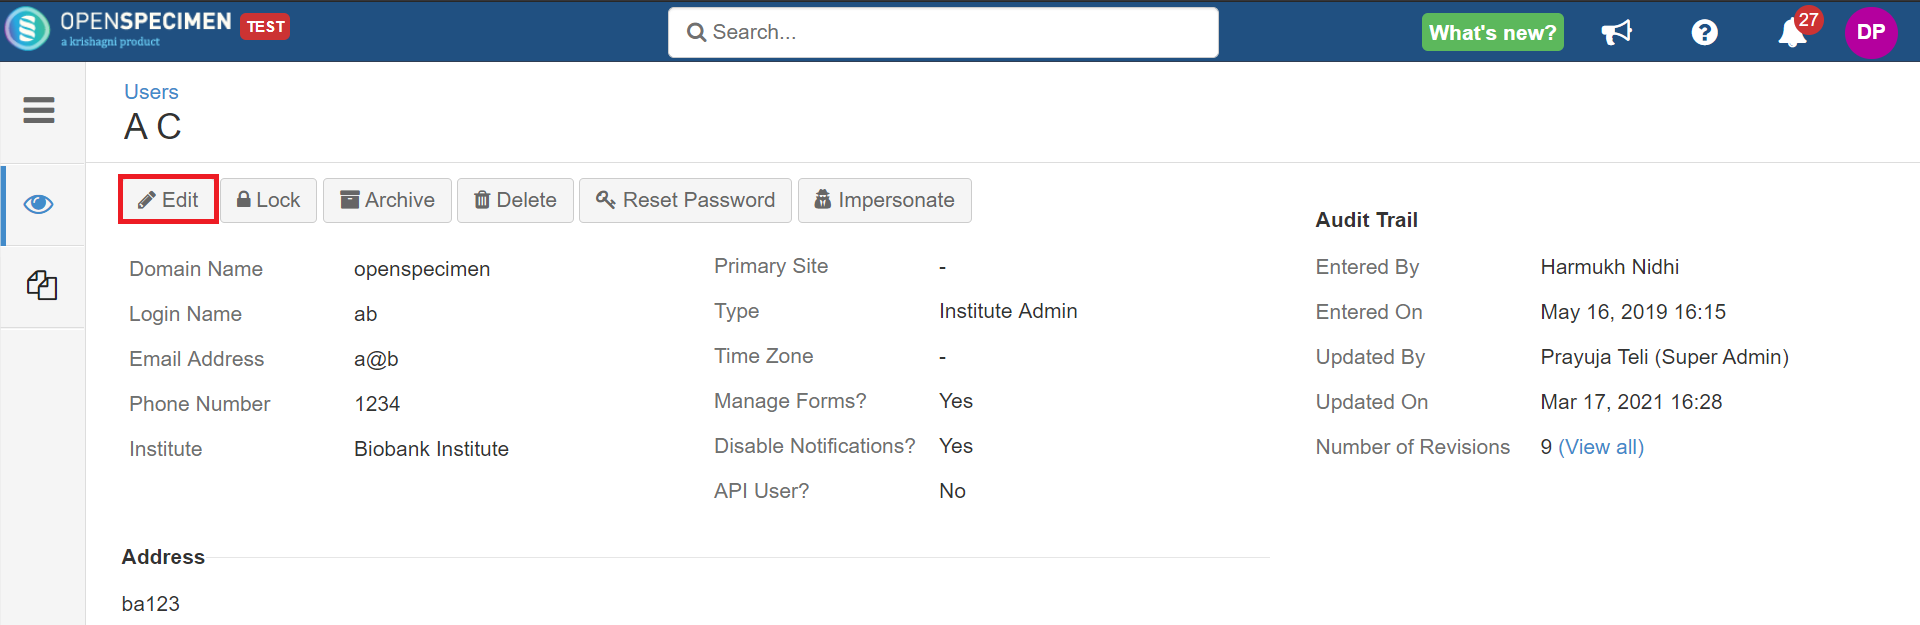 From v7.2, you can edit some basic details of their profile, such as phone number, time zone, address, and notification settings. This will help regular users to do minor profile edits without bothering admin users. Rest fields will be non-editable to regular users. 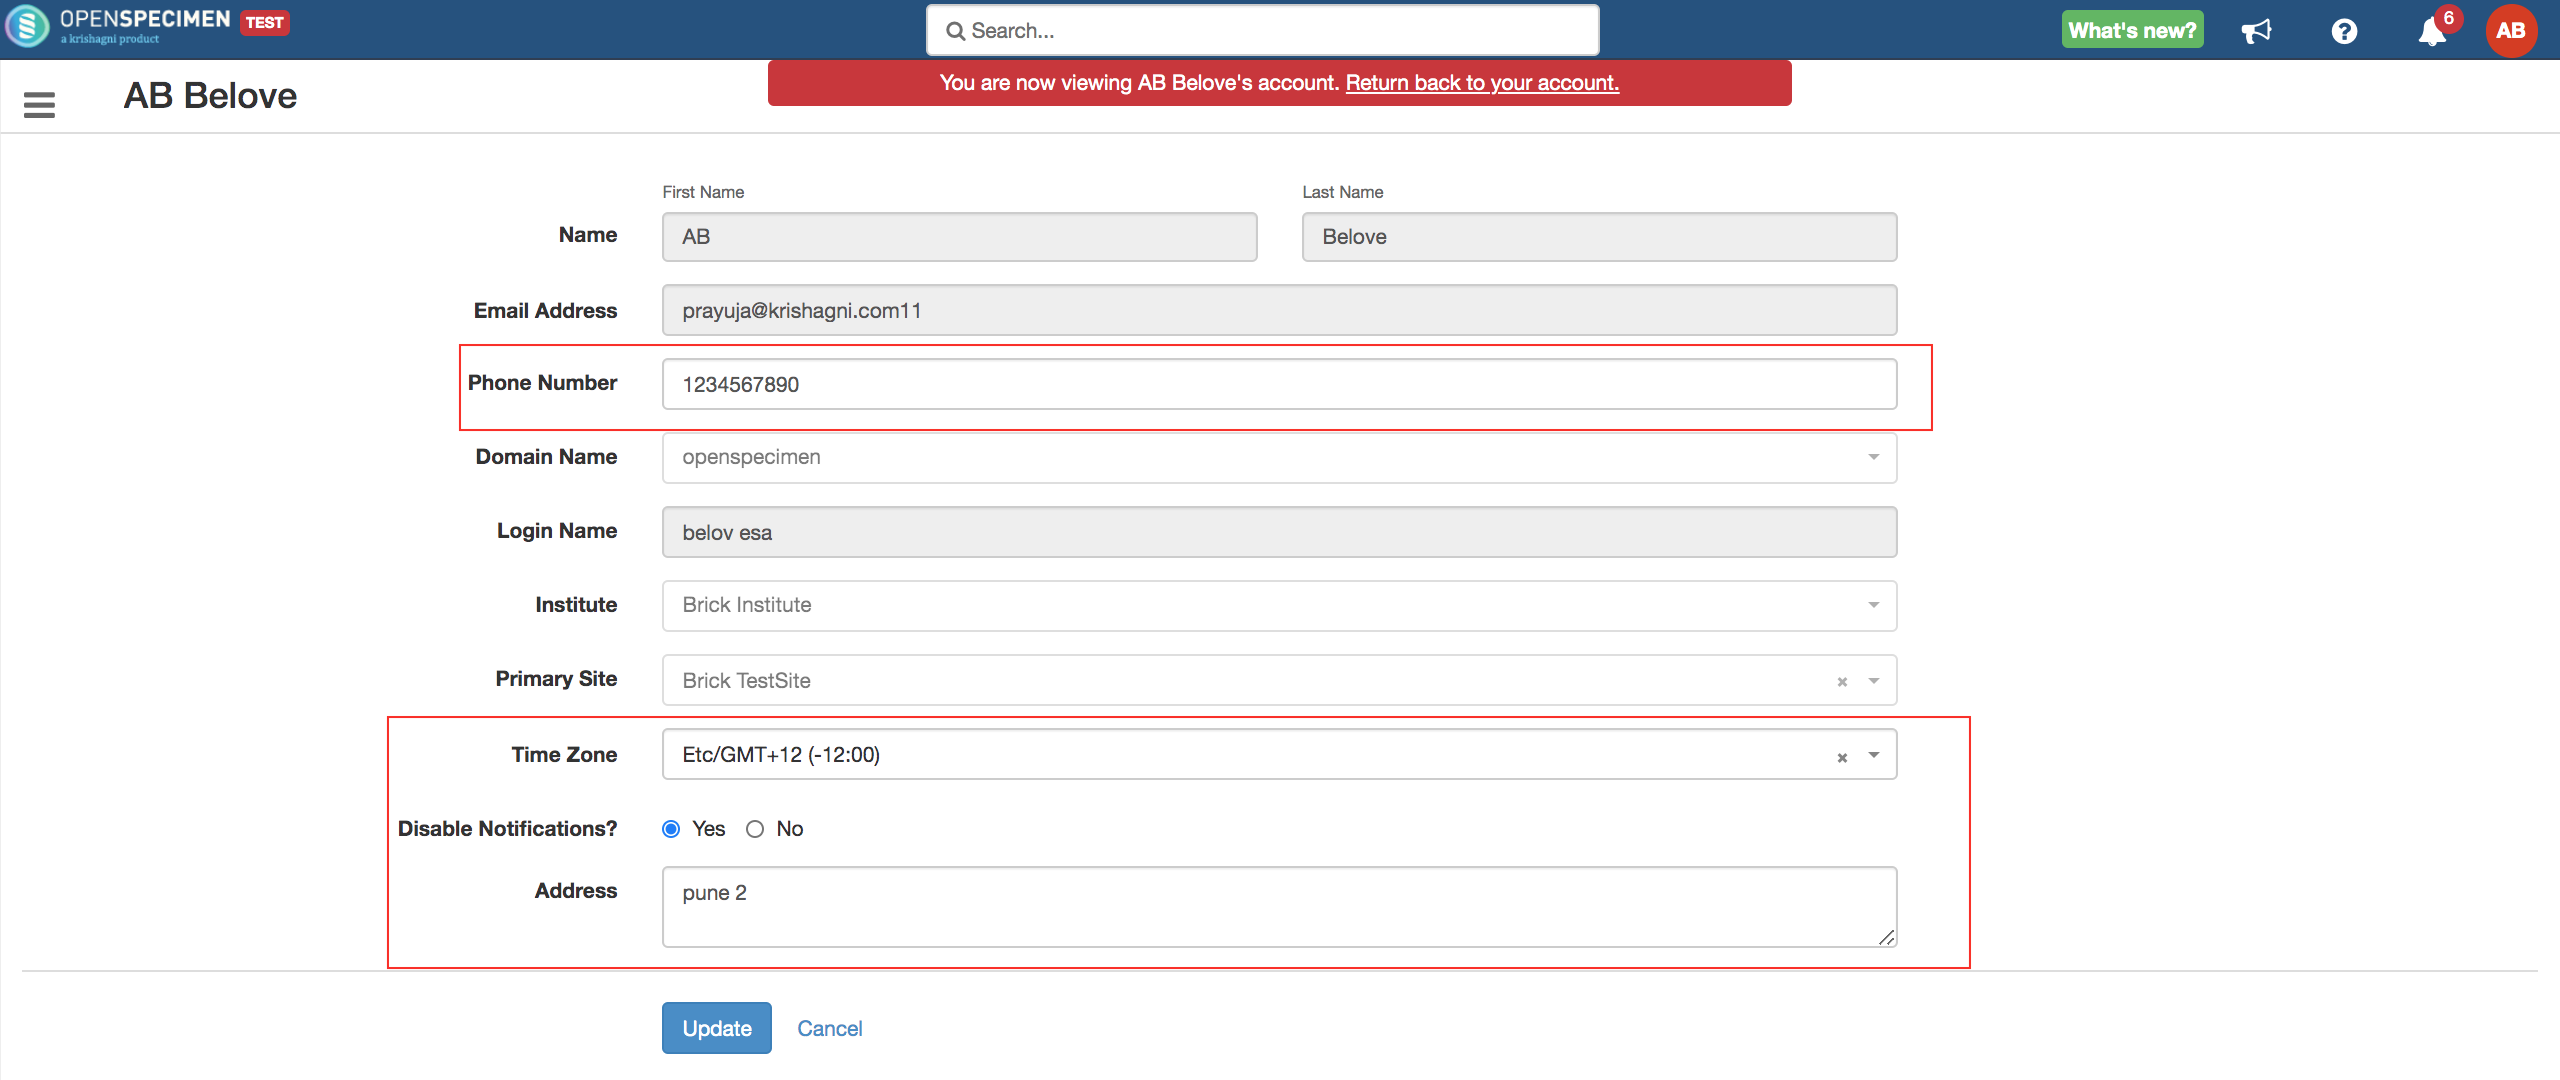 Steps to edit your own profile details :

|
Lock / Unlock
| Expand | ||
|---|---|---|
| ||
The user account will get locked in 3 cases:
The system throws an error on UI about the account locked at the time of login. Locked users have to contact their admins to get their accounts unlocked. To unlock a user account, search for the user's account → From the user overview page, click 'Unlock'. Following these steps, a user will get an email notification that the account is unlocked. Super admin, institute admin, and site admin users can lock/unlock user accounts. 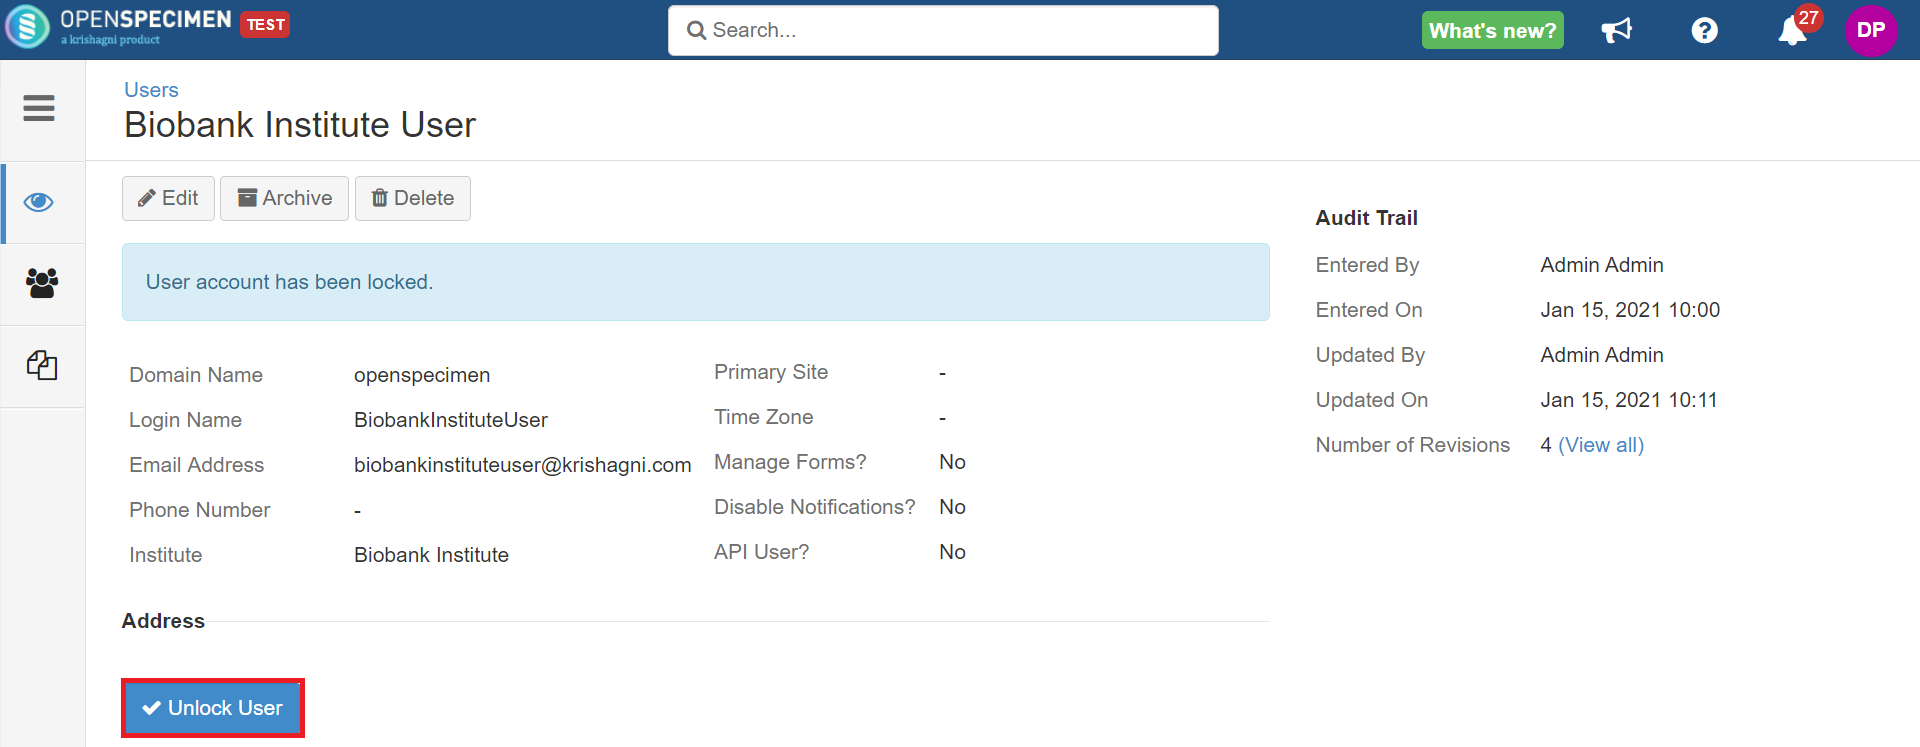
|
...
| Expand | ||
|---|---|---|
| ||
Using the 'Delete' tab, you can delete the users created by mistake or who are no longer needed. Before deleting a user, make sure that the user is not linked to any data in the system. e.g., as a PI, coordinator, or technician of a CP, since you won't be able to access data linked to the deleted user. To delete the user, go to the user's list page, search for the user's name and click on 'Delete'. Sometimes you might want to close a user account but retain data linked to the user. In such cases, you can archive the user account. The archived user would not appear in any dropdown list. However, you can access the older data linked with the user. 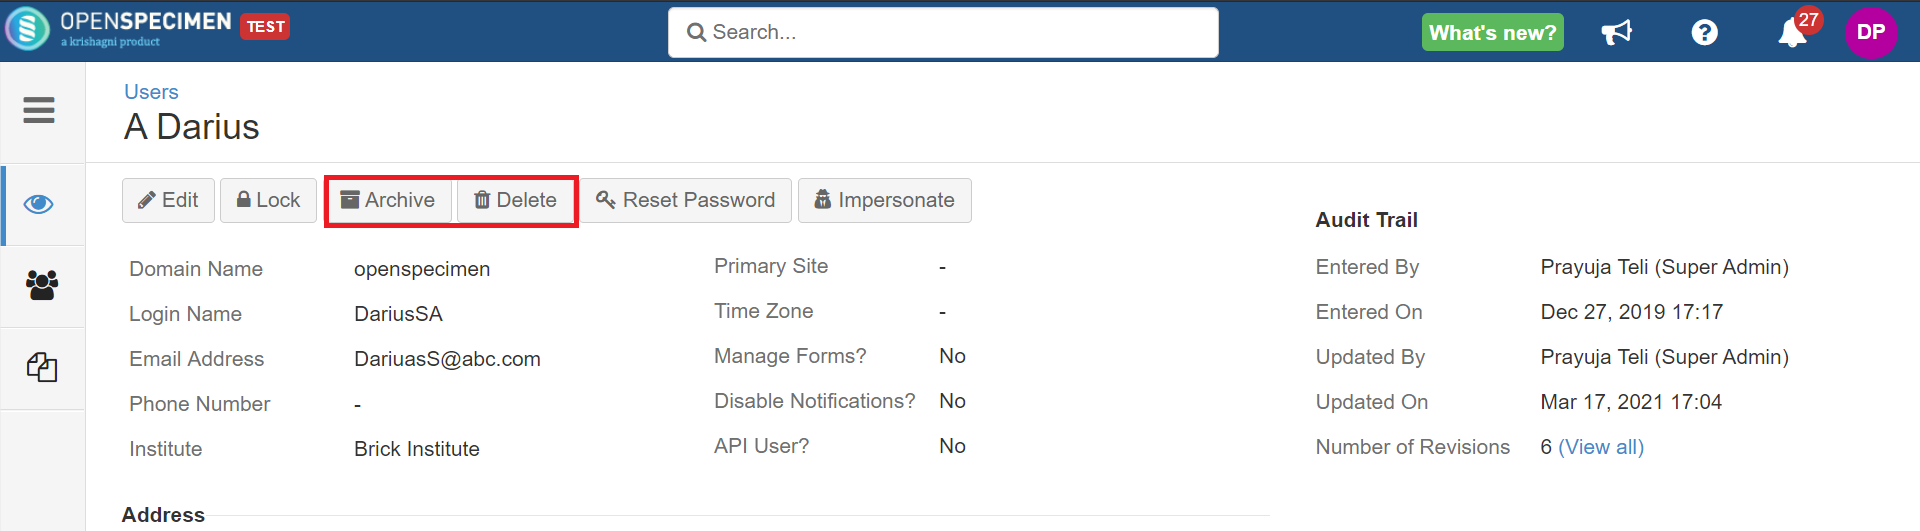 If you wish to reactivate the archived user - Go to the user's list page→ Set the activity status to 'Archived' in search filters. The archived users' list will appear. Click the user to be reactivated and click 'Reactivate'. 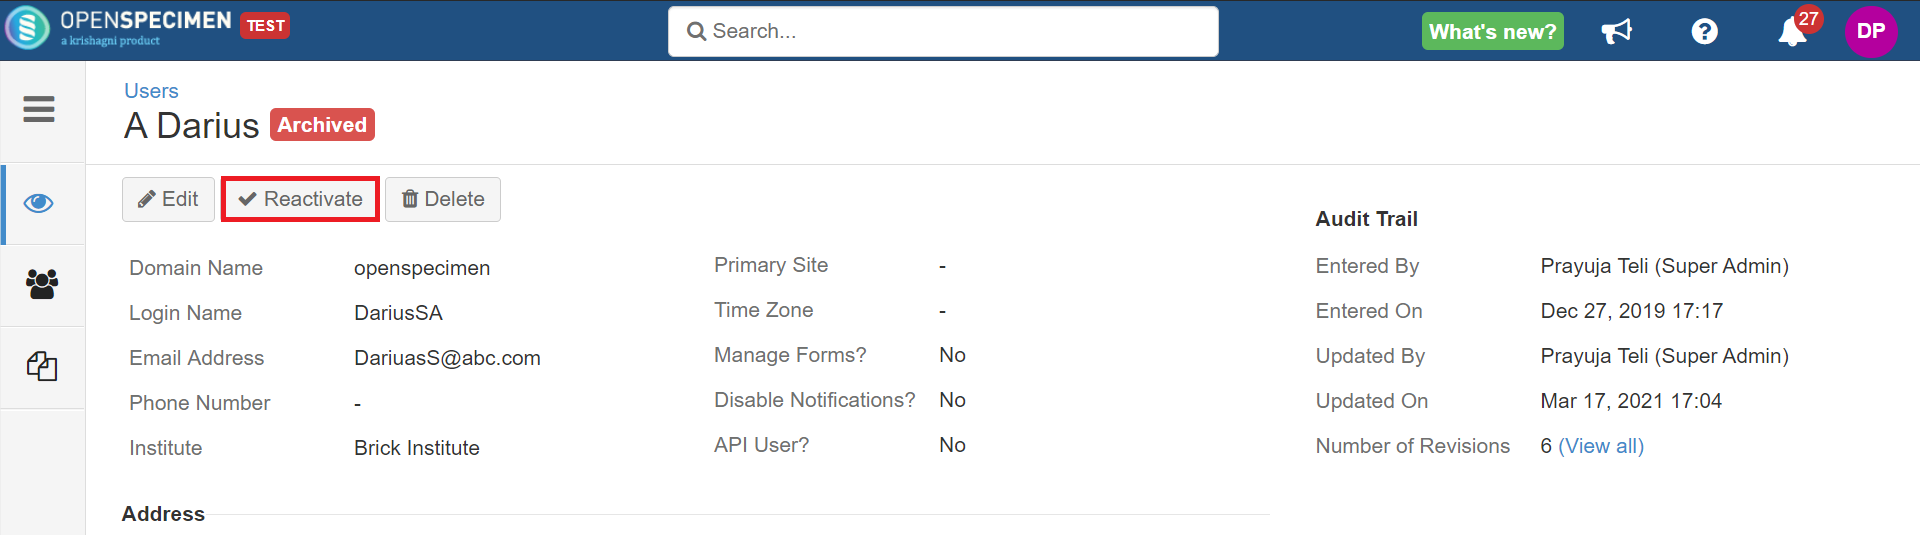 |
Impersonate
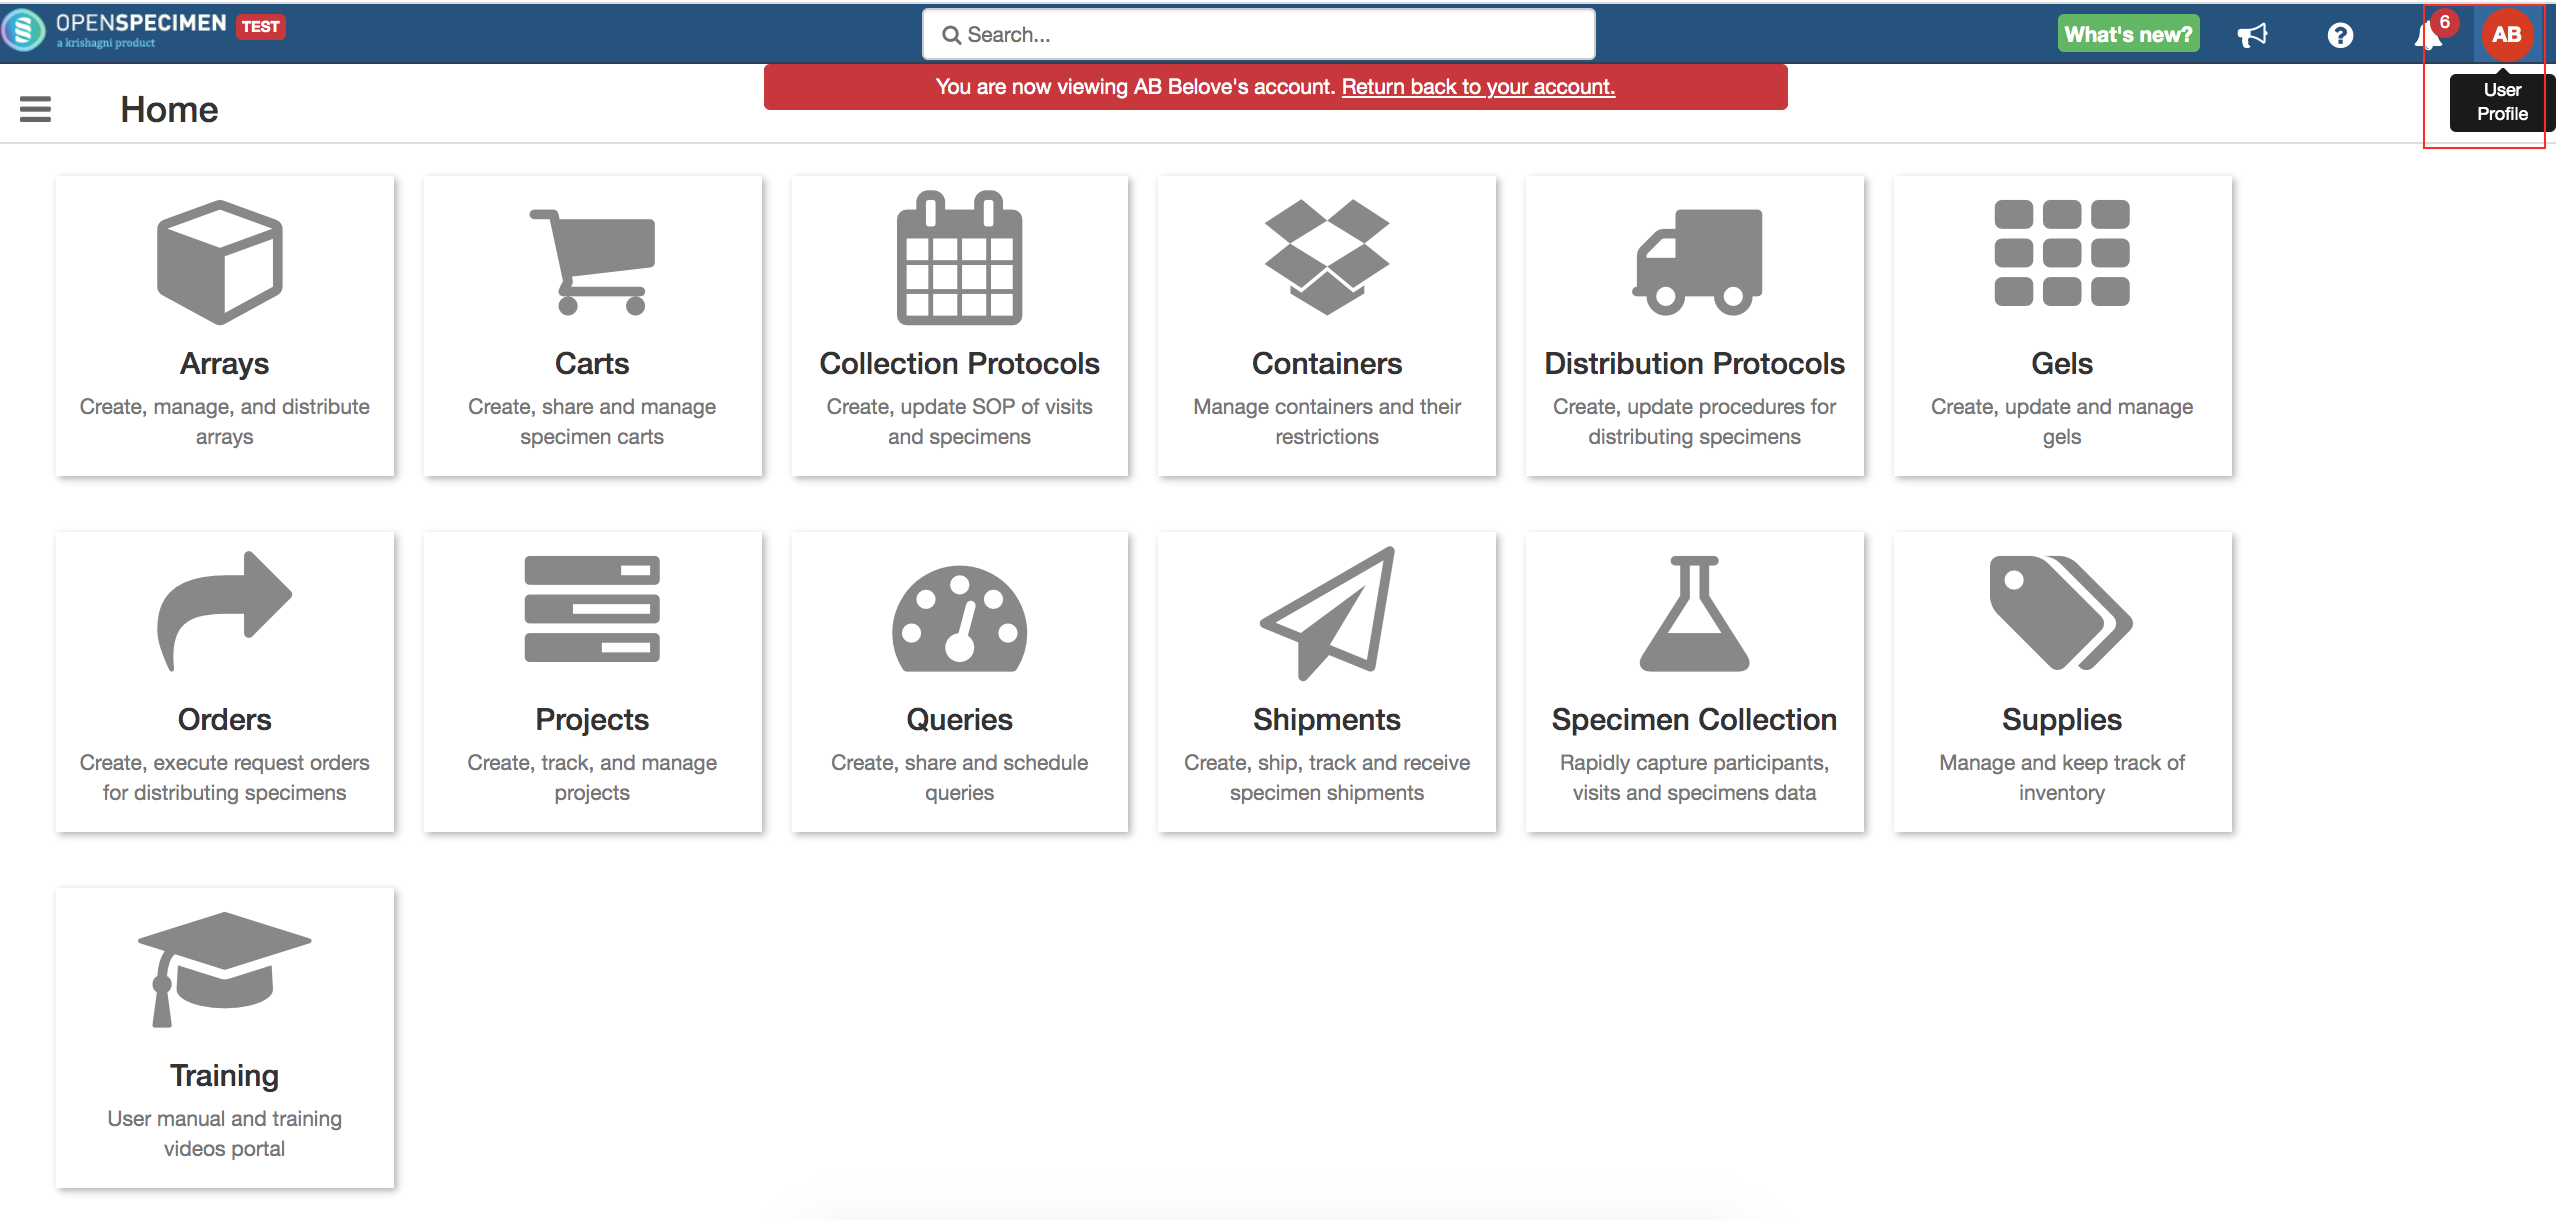
Super Admin can use the ‘Impersonate’ to log in as another user. This is useful for the support team to debug access issues or user-specific issues.
Post impersonation, the super admin’s UI will refresh the same as that of the user’s UI.
...
| title | Click here to view details... |
|---|
...
A message at the top of the page highlights the user impersonated and the option to return to the super admin’s account.
Email Notification (v8.1)
When you impersonate as a user, you will get a popup message asking if you still want to proceed.
...
An email is sent to both the impersonated user and who are impersonating.
...
| Child pages (Children Display) | ||
|---|---|---|
|