Got feedback or spotted a mistake?

Leave a comment at the end of this page or email contact@krishagni.com

Create and Edit Form

Who can create a form?

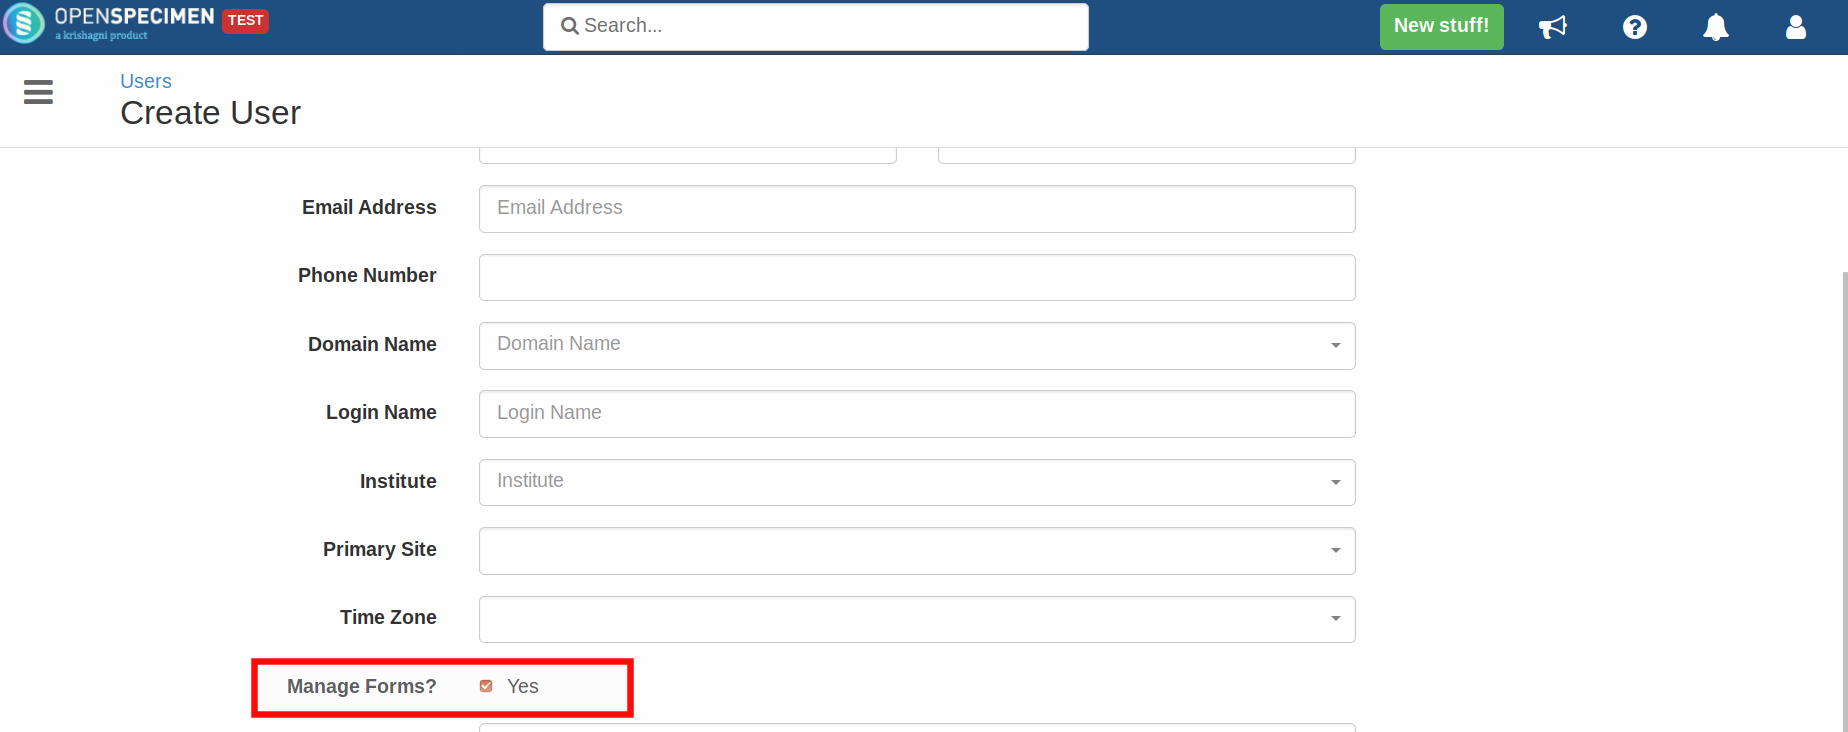
By default, super admins or institute admins can manage forms. To give this privilege to other users, select the 'Manage Forms?' checkbox on the 'Create User' page. 

How to create a form?

The user having the privilege on forms can create a custom form. 

 Click here to view the steps...
  1. Click on 'Forms' from the left side menu or from the home screen
  2. Click on 'Create' to create a new form

How to add controls to a form?

You can add multiple fields to a form using different controls.

 Click here to view the steps...
  1. From the edit page of the form, click on 'Add/Edit Control'
  2. Select the desired control type 

3. Provide all properties

Different Control Types:

 Expand to see different types of controls...
Control TypeDescription
String Text BoxThe field to add the string text
NumericThe field to add numeric values
Text AreaThe field to add long text like comments 
Radio ButtonThe field to have radio buttons like a field with 'Yes/No' options
Single CheckboxThe field to check/uncheck single value
Drop downThe field showing values as the dropdown
Multiple SelectThe field for which multiple values can be selected from the drop-down
CheckboxThe field showing checkbox for all values, you can check/uncheck any of the values
Date PickerThe field to select any date or date and time
File UploadThe field to upload a file in any format
Fancy ControlThe fields showing users/ sites/ storage containers dropdown
NoteThe field to add any notes in the form
SubformThe field to add subform within the main form

Field Properties:

 Expand to see details about properties...


Properties

Description

Applicable to Control Type

Permissible Values

1

Field Placement

The position of the field within the form

String Text Box
Numeric
Text Area
Radio Button
Single Checkbox
Drop-Down
Multiple Select
Checkbox
Date Picker
File Upload
Fancy Control
Note
Sub Form

Last Row

Row Before

Row After

Same Row

2

Field Name

Name of the form field

String Text Box
Numeric
Text Area
Radio Button
Single Checkbox
Drop-Down
Multiple Select
Checkbox
Date Picker
File Upload
Fancy Control

The display name for the form field

3

Tooltip

Pop up displayed when the user moves the mouse over the field. Useful to set description or guidelines about the field to the user.

String Text Box
Numeric
Text Area
Radio Button
Single Checkbox
Drop-Down
Multiple Select
Checkbox
Date Picker
File Upload
Fancy Control


4

Attribute Name

System generated name

String Text Box
Numeric
Text Area
Radio Button
Single Checkbox
Drop-Down
Multiple Select
Checkbox
Date Picker
File Upload
Fancy Control
Note
Sub Form

Do not change this or blank it out

5

Default Value

Default value set for the field

String Text Box
Numeric
Text Area

For enumerated field types like dropdowns, radio button or list box, the default value can be set within the ‘Permissible values’ section.

6

PHI

Checkbox to make any field as ‘Protected health information’. This value will be hidden to users who do not have access to PHI.

String Text Box
Numeric
Text Area
Radio Button
Single Checkbox
Drop-Down
Multiple Select
Checkbox
Date Picker
File Upload
Fancy Control


7

Mandatory

To set the form field as required

String Text Box
Numeric
Text Area
Radio Button
Single Checkbox
Drop-Down
Multiple Select
Checkbox
Date Picker
File Upload
Fancy Control


8

Show In Grid

For forms in which level is set as ‘Specimen Event’, this attribute is shown in the events list under each specimen.

String Text Box
Numeric
Text Area
Radio Button
Single Checkbox
Drop-Down
Date Picker
File Upload
Fancy Control


9

Width

The width of the field

String Text Box
Numeric
Text Area


10

Minimum Value

Minimum value to be restricted for the field

Numeric


11

Maximum Value

Maximum value to be restricted for the field

Numeric


12

Number of Digits After Decimal

The number of digits to show after the decimal

Numeric

Set this to zero if you want only whole numbers like for ‘Age’.

13

Number of Rows

Number of rows to be shown in the text area

Text Area


14

Data Type

The type of the data to be accepted as an input. Based on this the search filters allows different operators.

Radio Button

Drop-Down
Multiple Select
Checkbox

String

Integer

Float

Boolean

15

Permissible Values Ordering

Sorting order of the values to be displayed within dropdowns, radio buttons etc.

Radio Button

Drop-Down
Multiple Select
Checkbox

None

Ascending

Descending

16

Options Per Row

Values to be shown per row of the field

Radio Button

Checkbox


17

Default Checked

Checkbox to make field checked by default

Single Checkbox


18

Format

The format of the date field

Date Picker

Date Only

Date and Time

19

Default Date Type

Default date

Date Picker

None

Current Date

20

Note

The read-only text displayed within the form. Can be used for headings or instructions in questionnaires.

Note

HTML tags such as <b></b> for bold, <i></i> for italics, <u></u> for underline etc.  can be used.

21

Form Name

Name of the sub form

Sub Form


How to upload permissible values?

 Click here to expand...

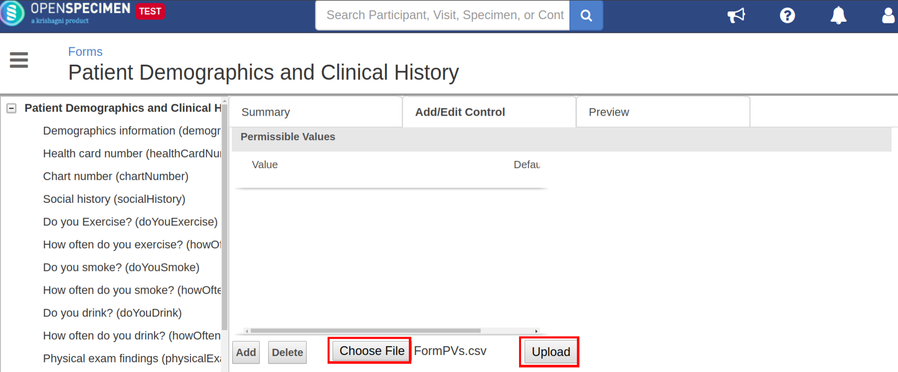
For the fields created using drop-down, radio button, multi-select, and check-box controls, you can add the permissible values manually or can upload the text or CSV file containing the permissible values. Follow below steps to upload PVs:

  1. Create text or CSV file of the permissible values to be added
  2. From the add/edit control page, click on the 'Choose File' button from the 'Permissible Values' section
  3. Choose the file of PVs to be uploaded and click on 'Upload' button

How to change control types?

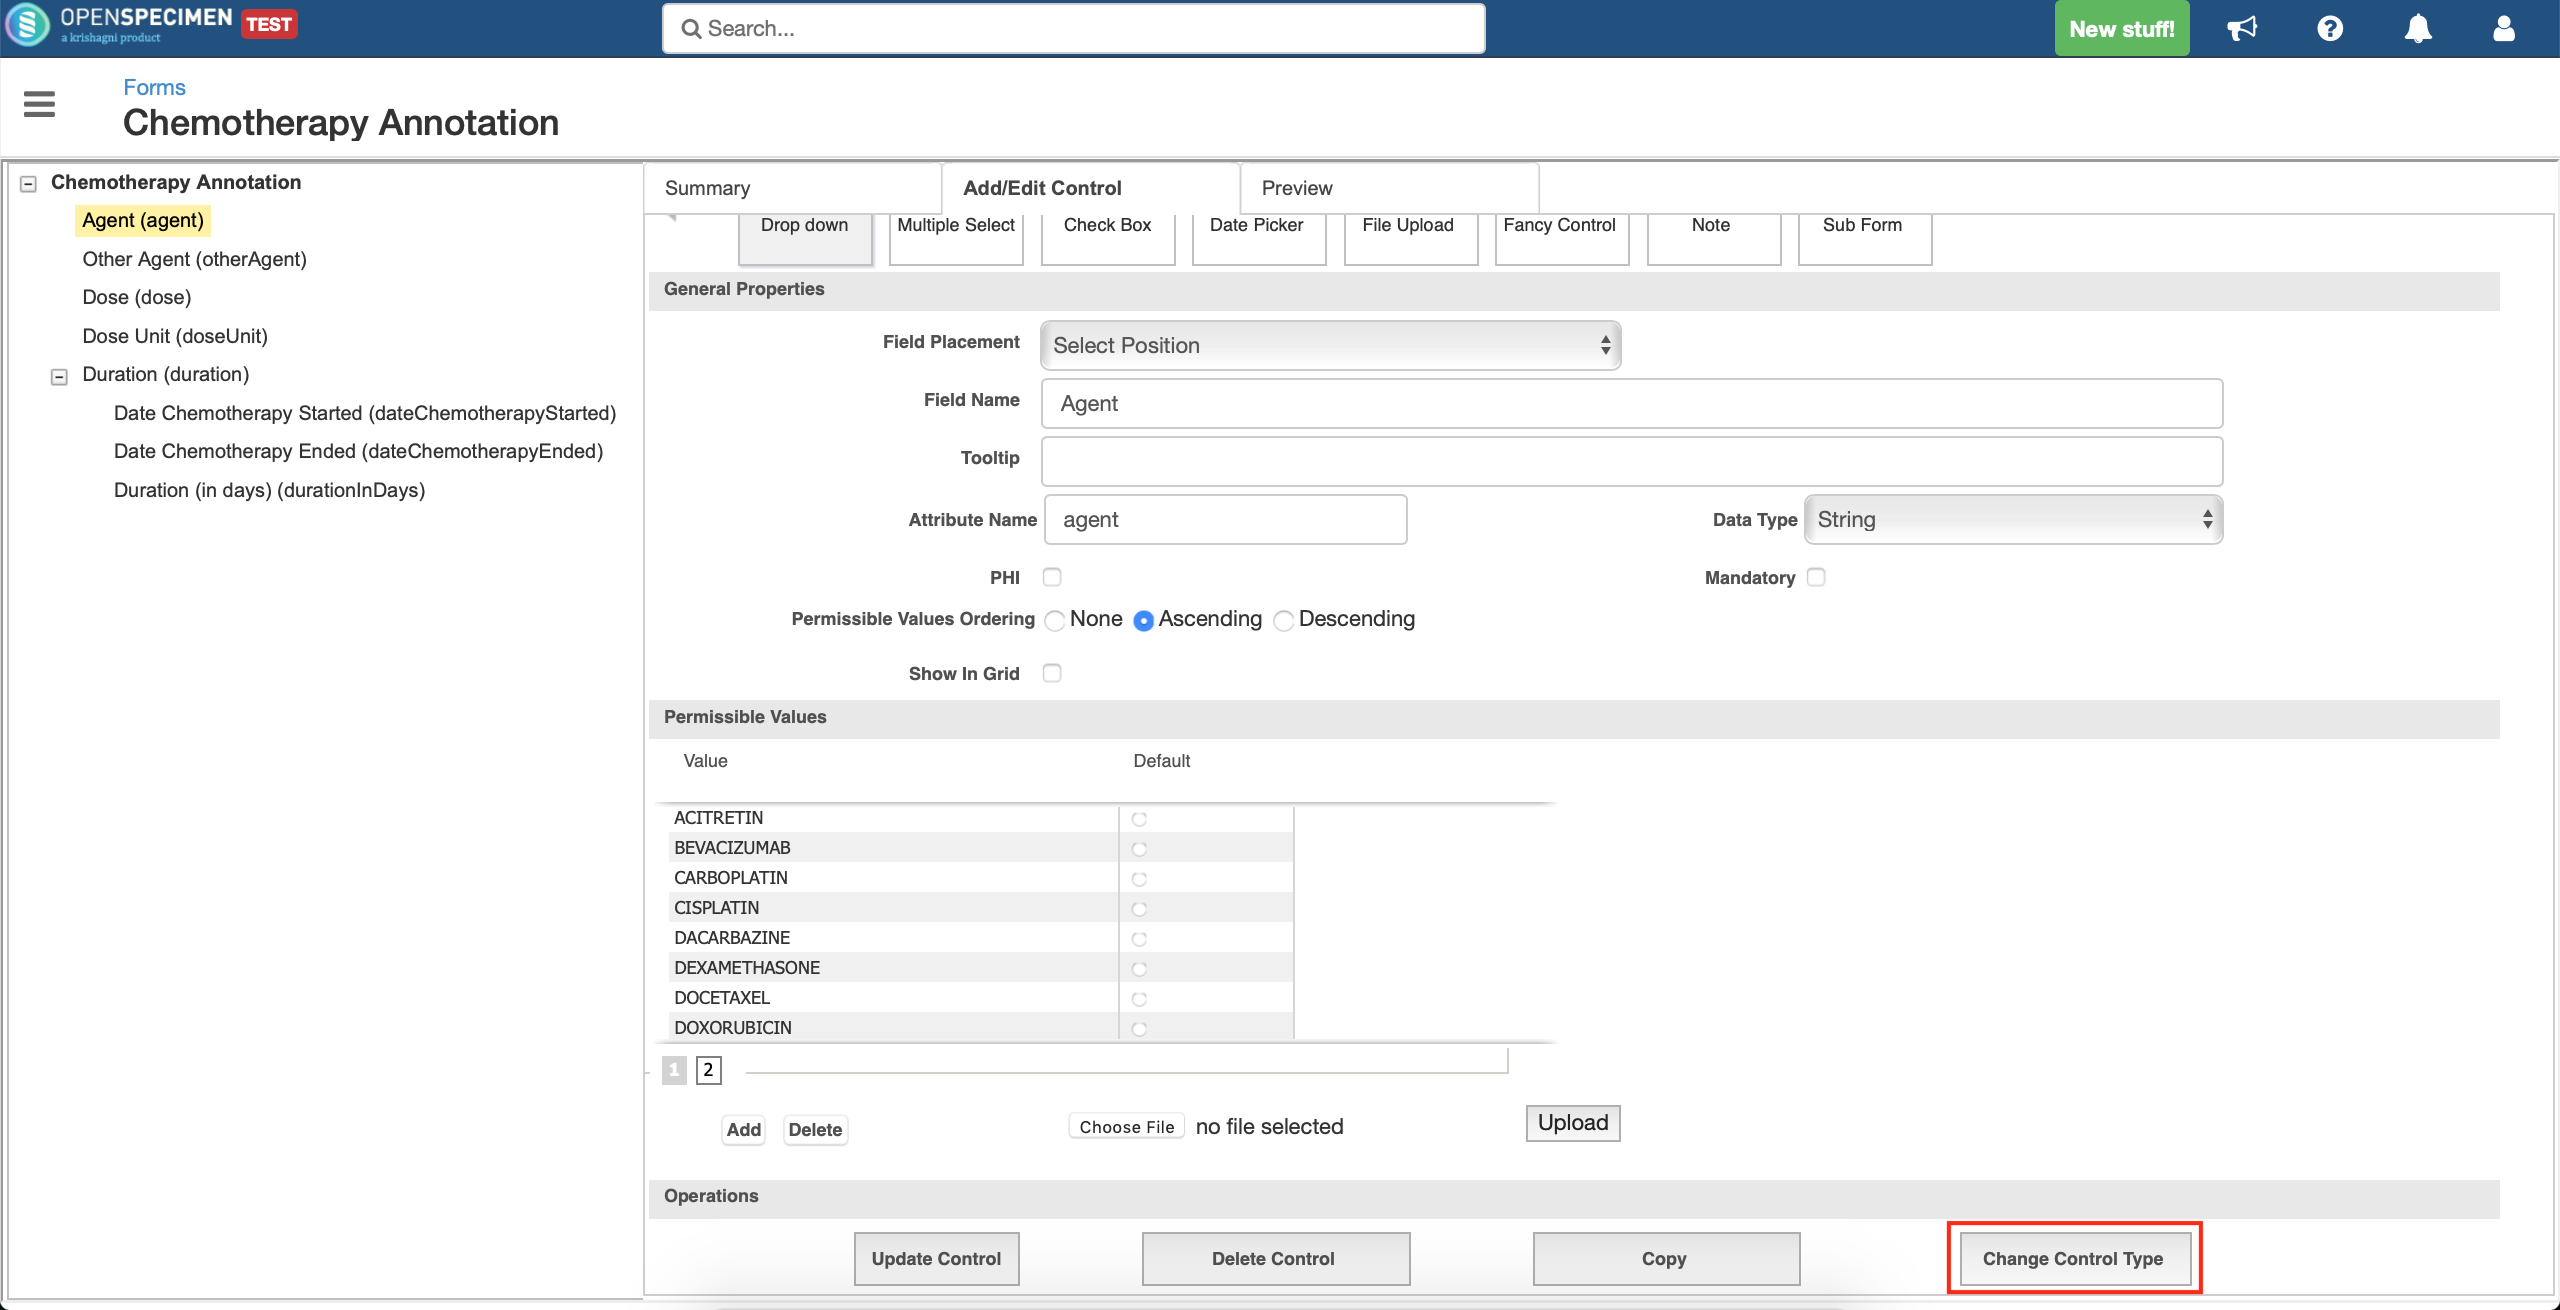
User can the control type of the form fields e.g. change a dropdown field to multi-select field.

 Click here to view the steps...
  1. Click on a field in the from the left side menu
  2. Click on 'Change Control Type'
  3. A menu will pop-up to select the new control type for the field.
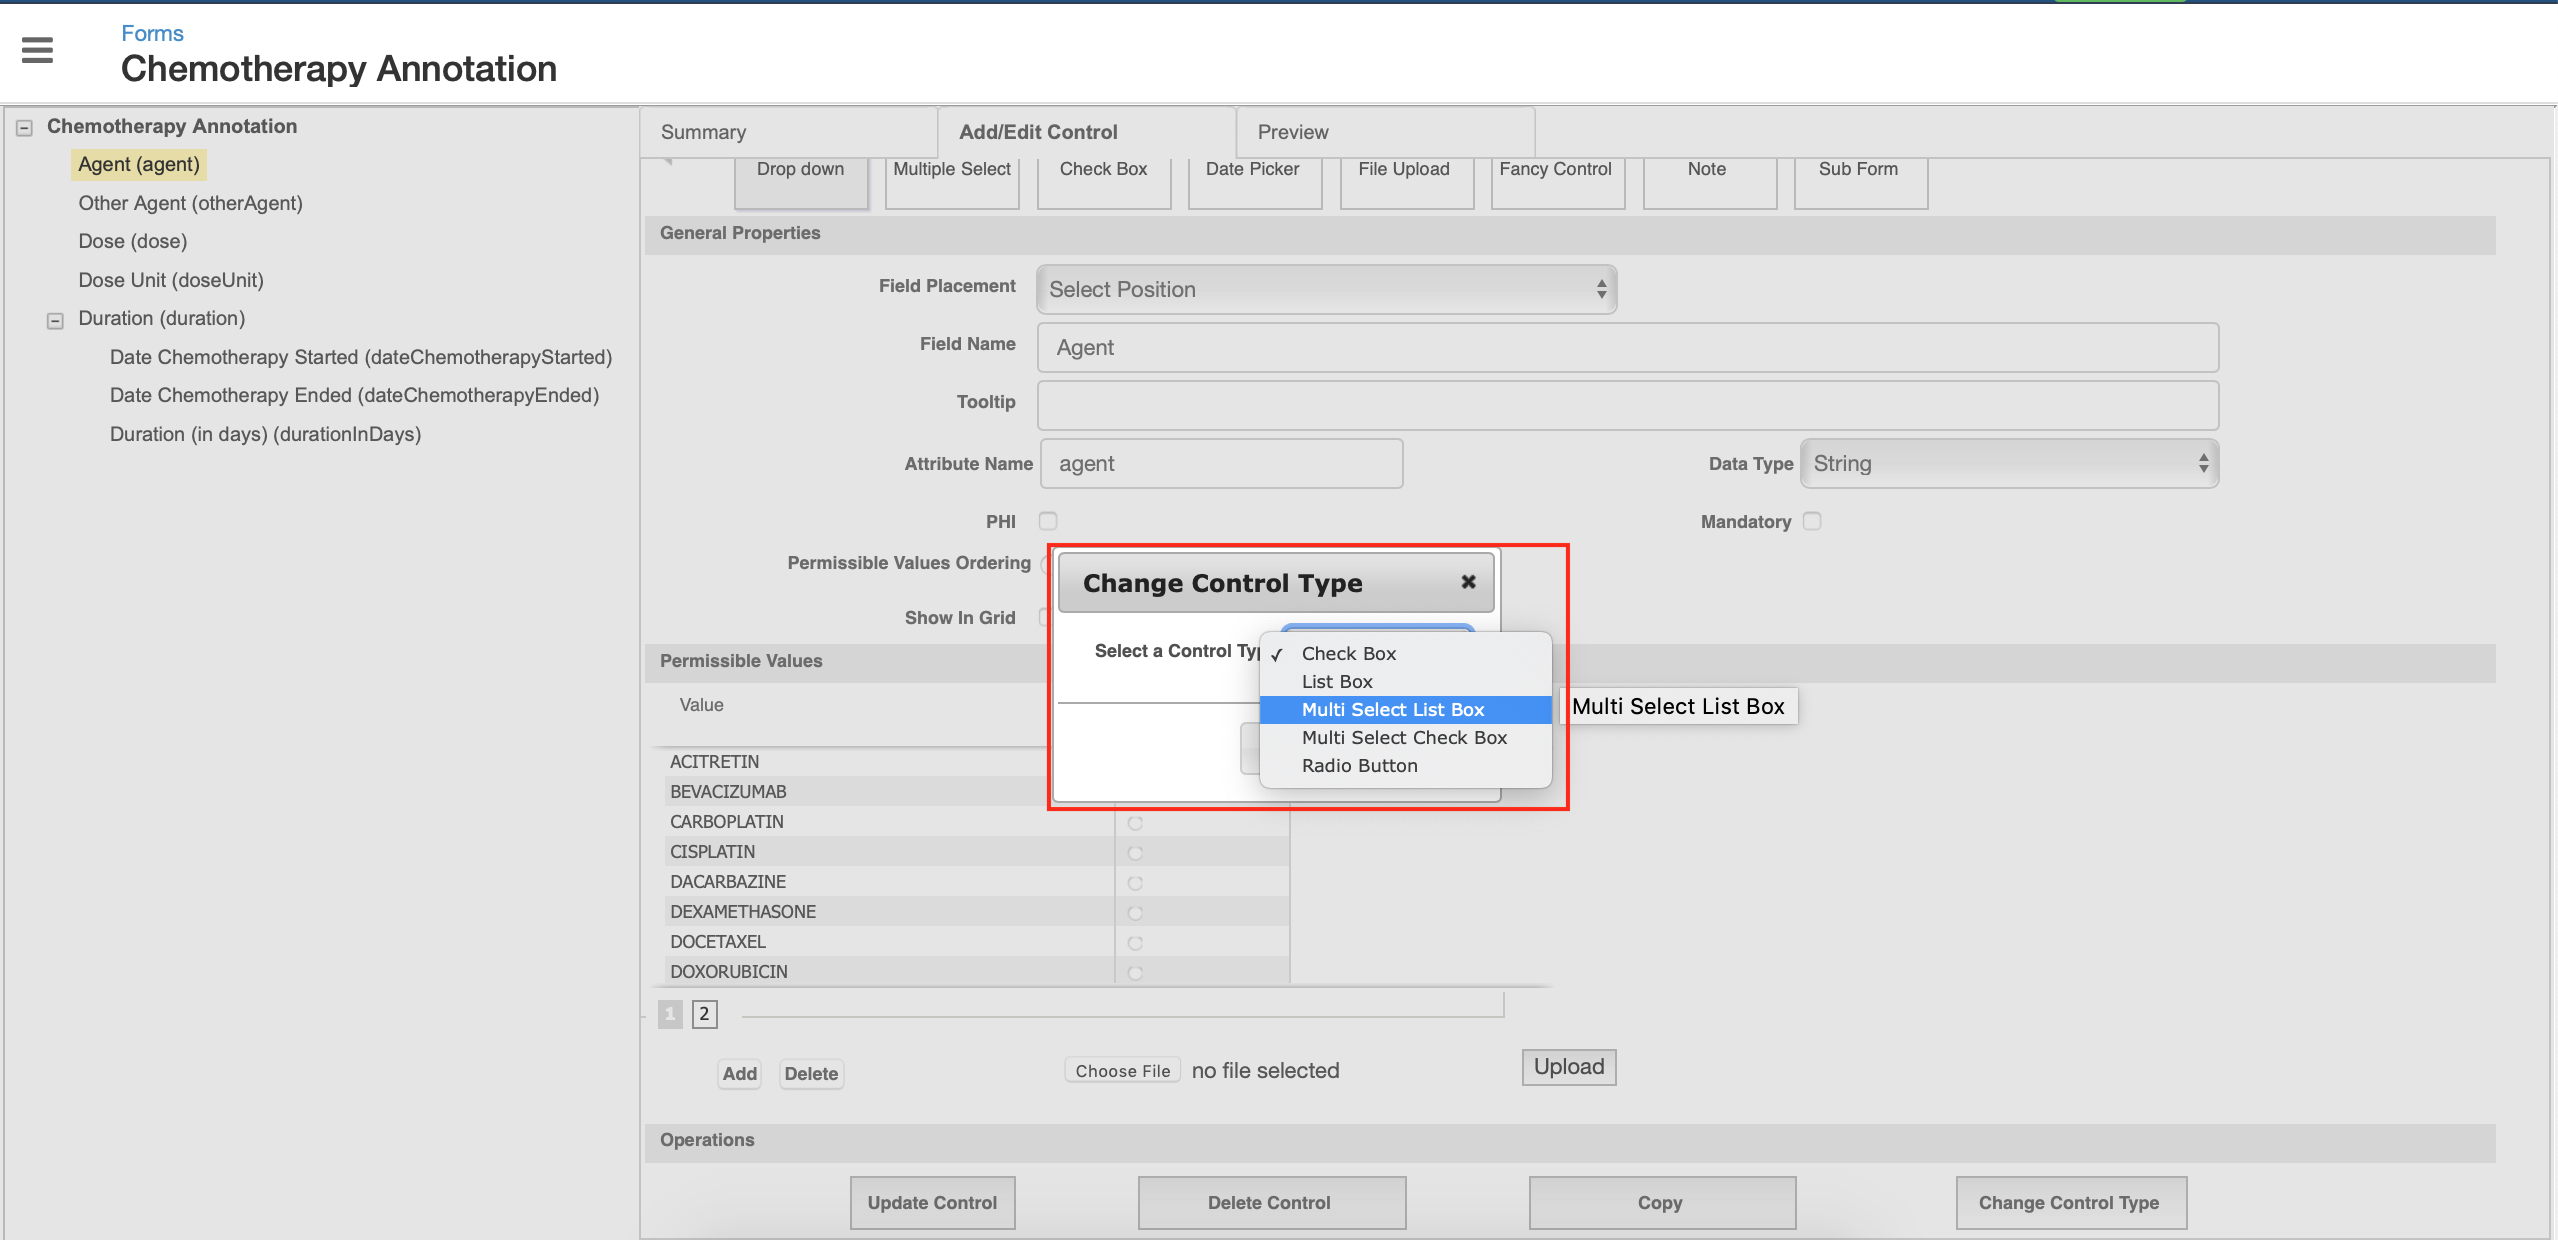
  4. Select 'Multi Select List Box' from the dropdown and click 'Ok'
  5. Click on 'Update' to confirm your actions for the field.

If collection protocol has a workflow configured with these fields defined in the dictionary section, you will have to change the control definition in the workflow as per the new control type selected in the UI. 
More information on how to define the various control types: Attribute Types Examples

How to change the arrangement of fields?

User can change the placement of fields using the 'Field Placement' option.

 Click here to view the steps
  1. Go to the form to be edited and click on the field whose placement is to be changed
  2. On the right side, in the 'Add/Edit Control' section, click on the 'Field Placement' dropdown


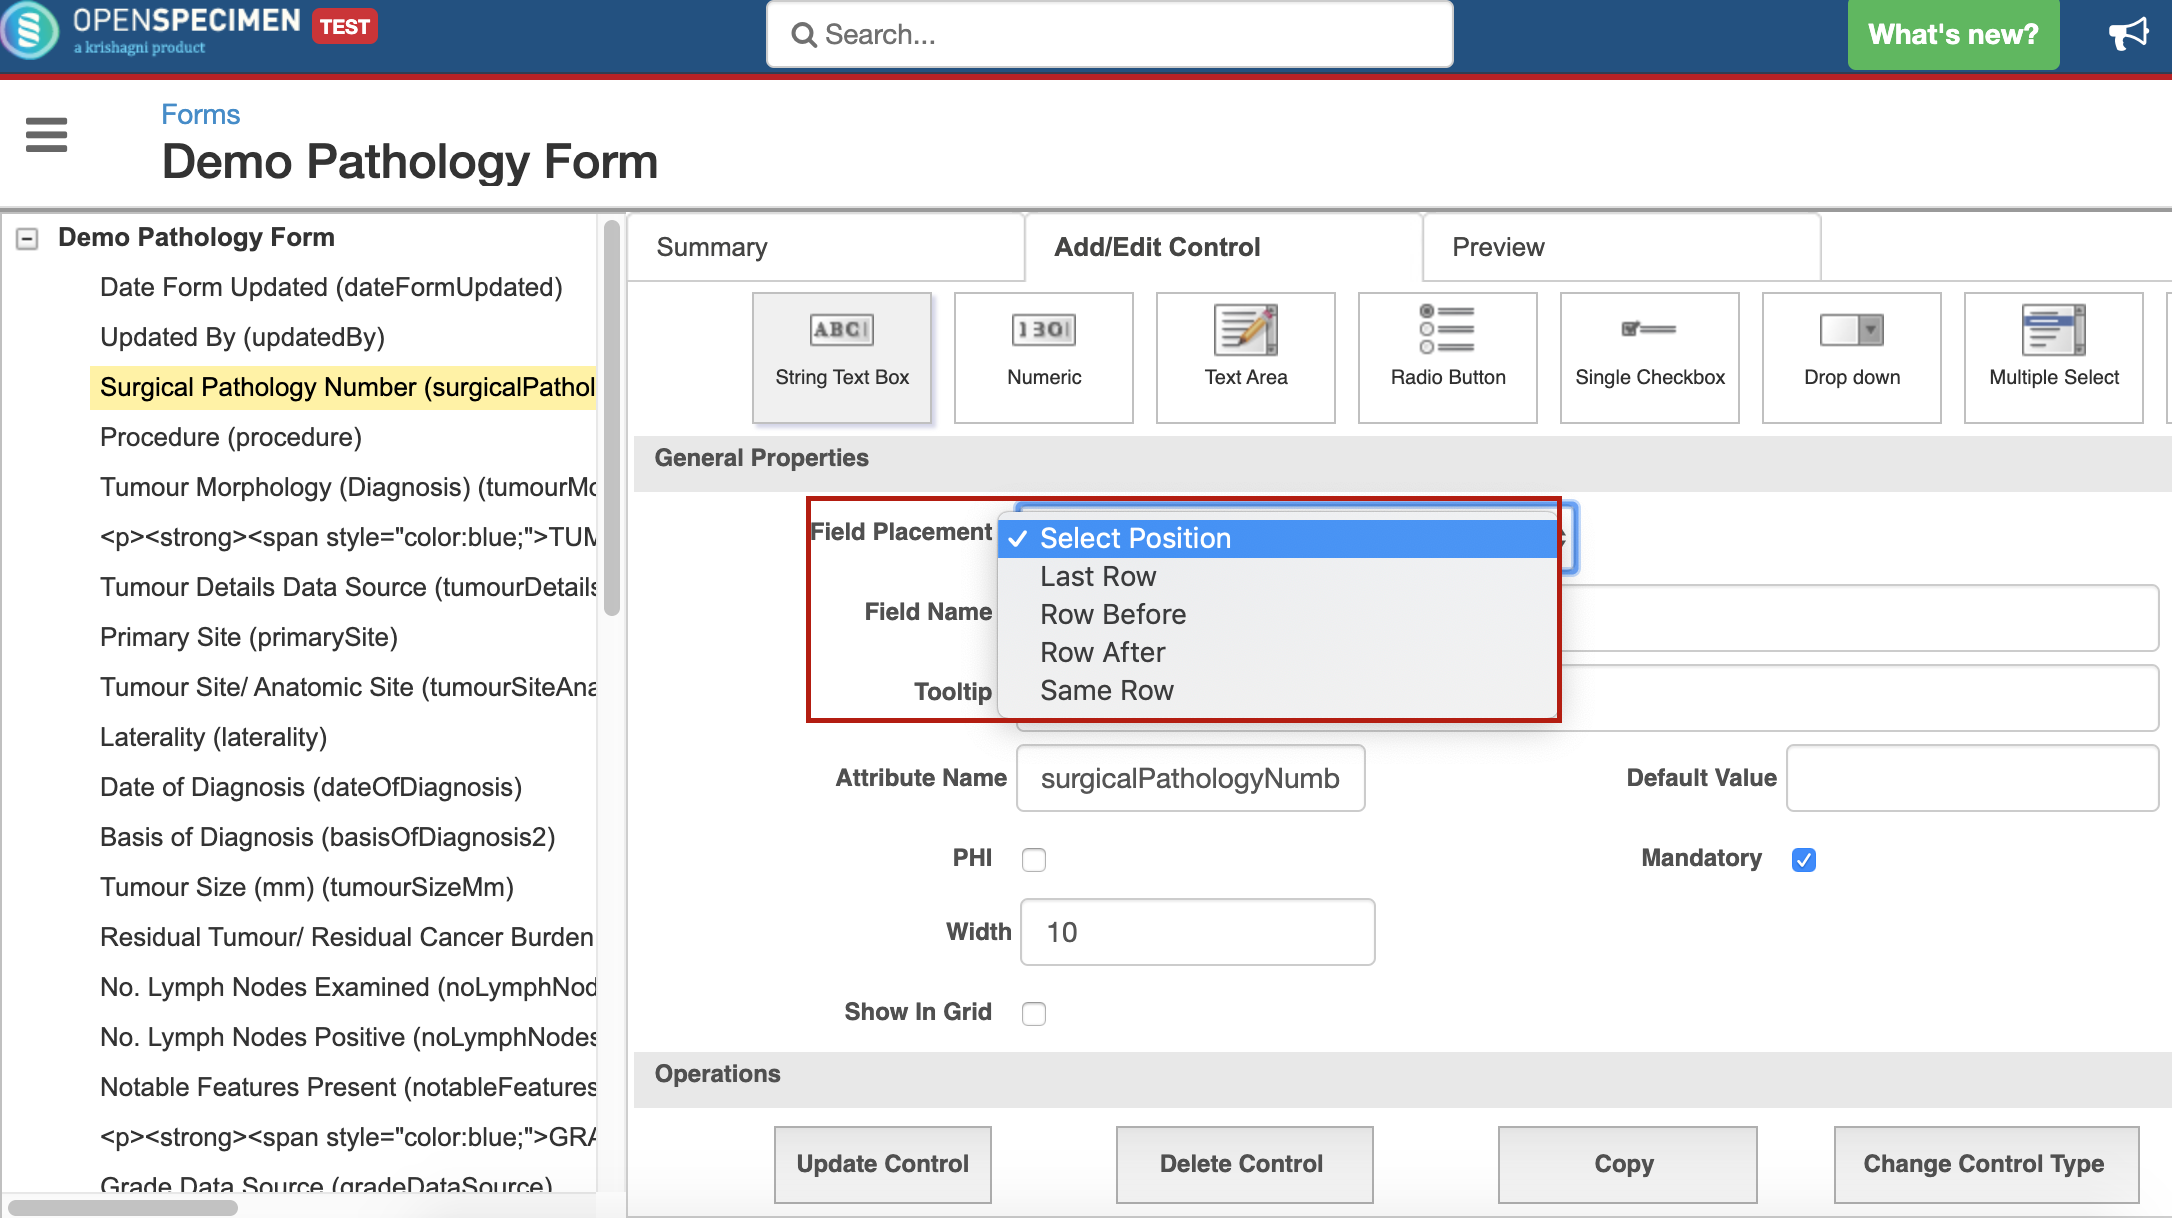
  3. Selecting one option from 'Row Before', 'Row After', 'Same Row' will display another field 'Select Control' beside this


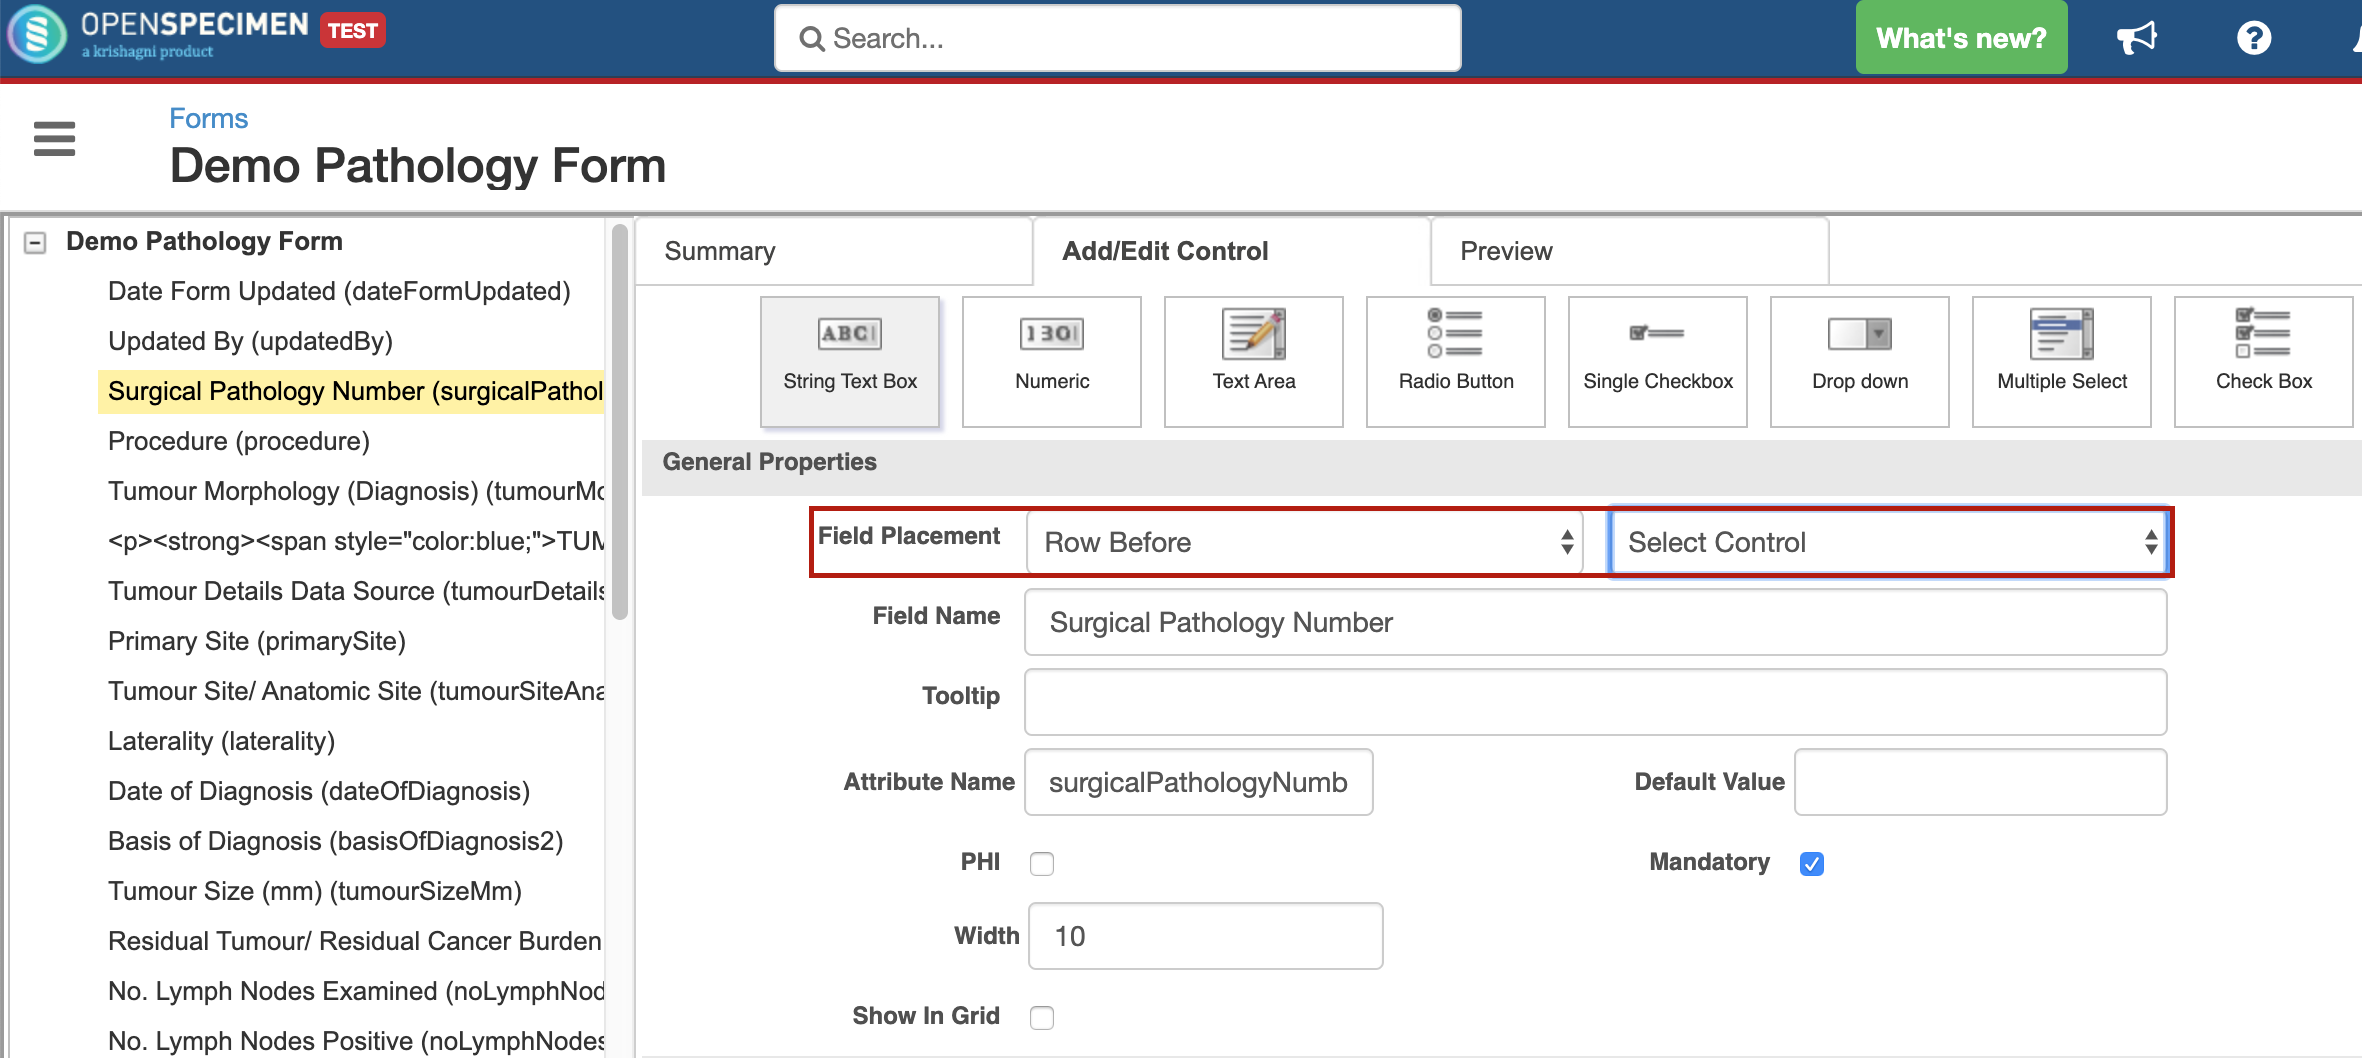
    This will contain a dropdown with all the control names present in the form


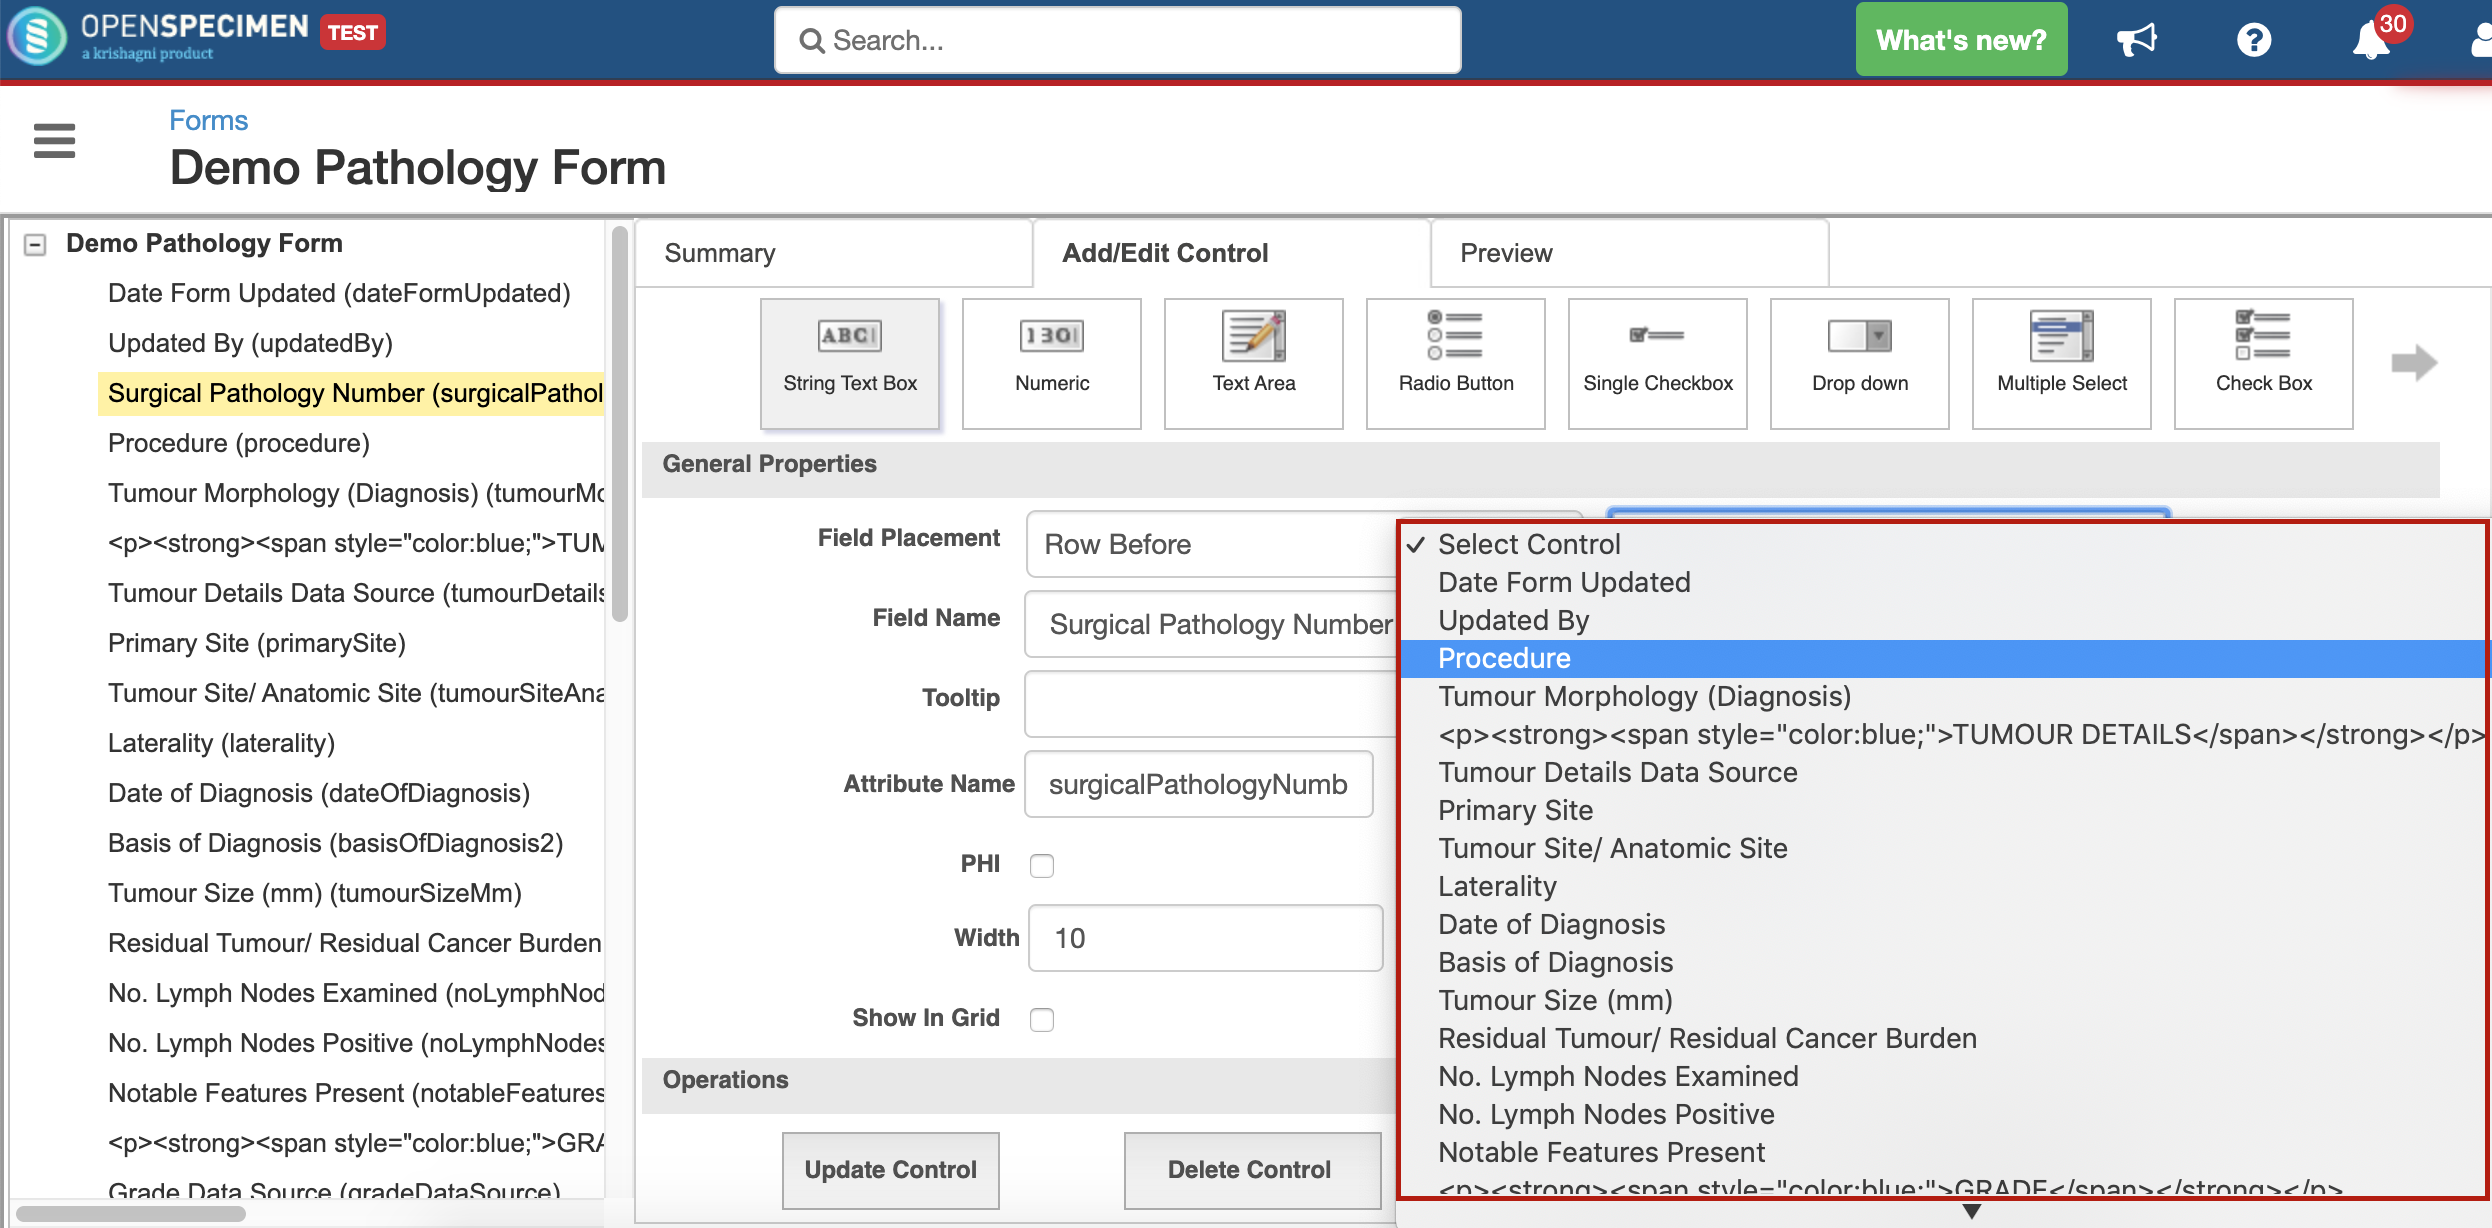
    The above example will place the field 'Surgical Pathology Number' before 'Procedure' field
  4. Click on 'Update Control' to save the changes. 
  5. Selecting 'Last Row' option from 'Field Placement' dropdown will move the field to the last row, after all fields.

Subform fields ordering

Reordering fields within a subform is not supported via user interface. If you want to rearrange the fields wihtin the subform:

  1. Download the form in XML format
  2. Edit the XML to change the fields' order in the subform section
  3. Import it back. The subform fields might appear twice but once refreshed, the order will be reflected as per changes in the XML.
Got feedback or spotted a mistake?

Leave a comment at the end of this page or email contact@krishagni.com