Leave a comment at the end of this page or email contact@krishagni.com
Attach a Custom Form
- Shraddha Ranpise (Deactivated)
- Srikanth Adiga
- Harshita Shivhare (Unlicensed)
Once the form is created, you can link the custom form at different levels. The forms attached at levels such as participant, visit or specimen level will appear as a separate form under forms tab. Whereas the forms attached at custom field level e.g specimen custom fields or container custom fields would appear on the main data entry screen. The custom fields within the main screen can be also be marked as "mandatory" fields.
How to attach a form?
The CP specific forms such as registration, specimen and visit level forms can be attached to one or multiple collection protocols.
- Select 'Forms' from the left side menu or the home screen
- Click the 'Attach' button (spanner icon) next to the form

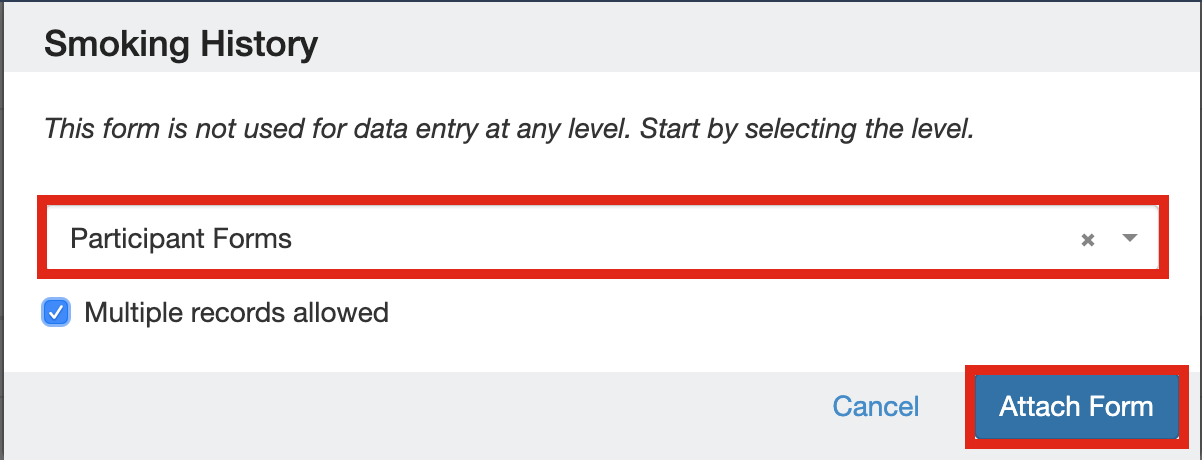
- Select the CP specific level e.g. registration, specimen or visit form (when levels not specific to CP such as container custom fields are selected, the options to select CP will not be displayed)
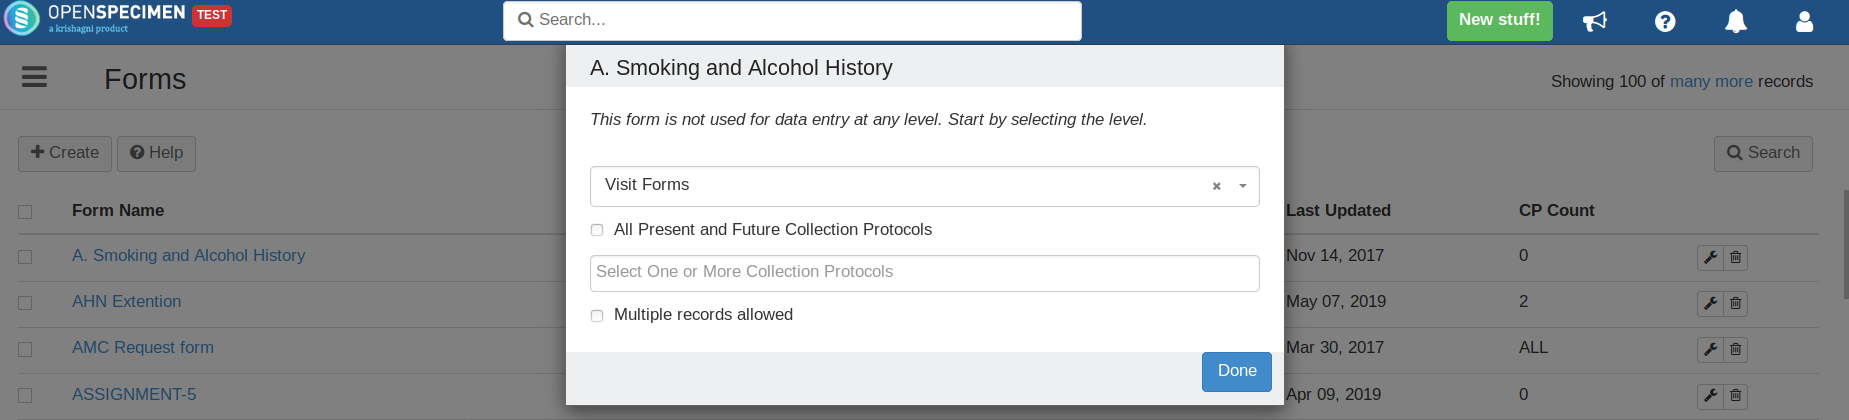
- Check 'All Current and Future Collection Protocols' checkbox if you want to link the form with all protocols in the system
- In case you want to link it to more than one Collection Protocol, click in the collection protocol box and select one or more collection protocols to which the form has to be linked
In case of forms not related to specific CP (for example forms attached at Distribution Protocol Custom Fields, Container Custom Fields etc.), user will be able to just select the level of attachment.

Different levels at which forms can be linked
Custom forms and fields can be linked at different levels like participant, specimen, project, distribution protocol etc.
Multi-record forms
Some forms like test results, surveys etc. might have to be collected multiple times. To do this, check "Multiple records allowed" checkbox while attaching a form at particular level.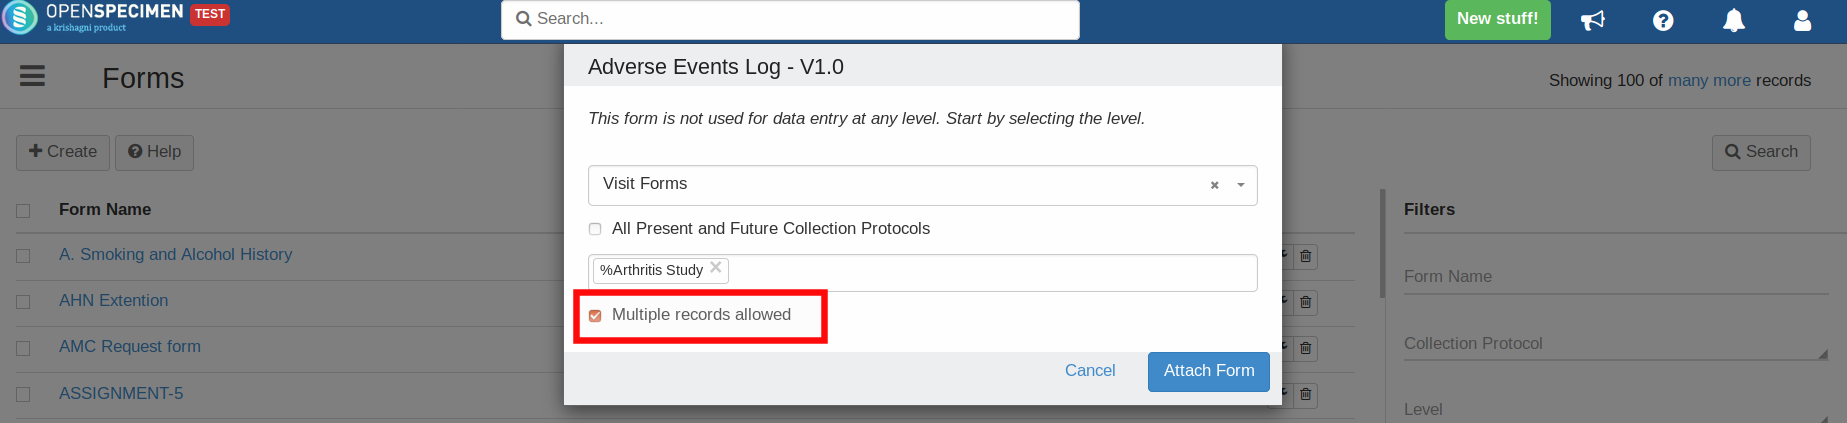
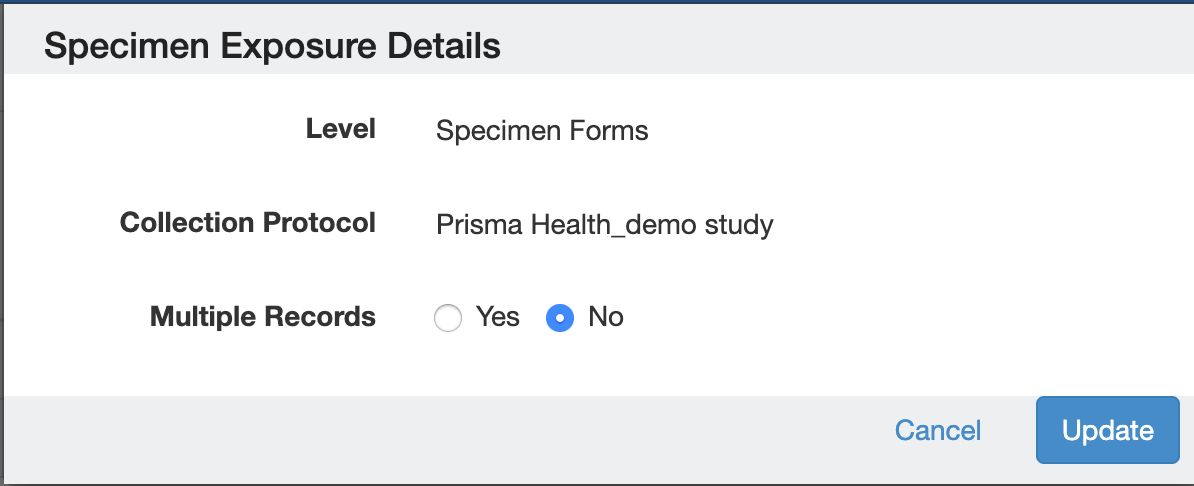
Editing the attachment level of the form
For forms that are attached at Participant Forms, Visit Forms, Specimen Forms, Registration Forms levels, user is able to edit whether a form can have single record or multiple records.
This can be done by clicking the attachment level (spanner icon) and then 'Edit'.
For forms attached at any level other than these, if a user wants to change the attachment level, he can follow one of the below approaches:
1. No data present in the form:
User can delete the attachment and attach it to another required level and collection protocol/s. To do this, follow the below steps:
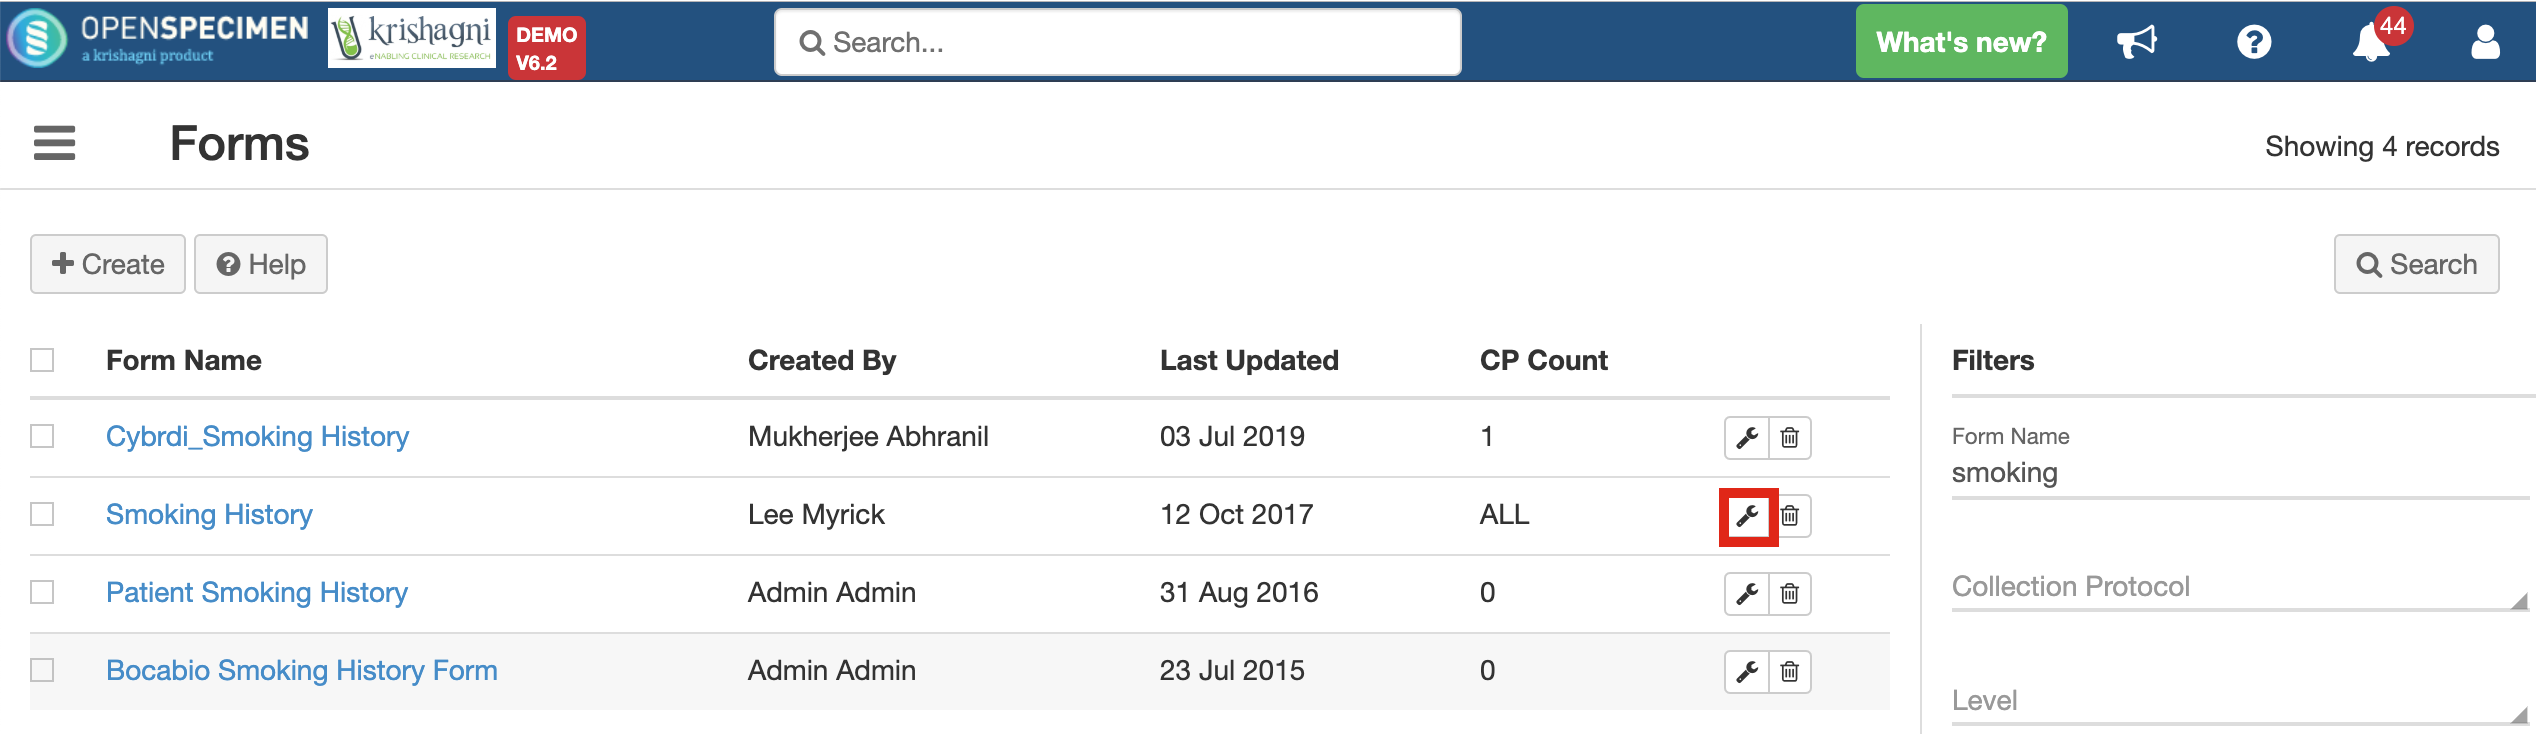
- Click on the 'Spanner Icon' in front of the desired form. This will display the present attachment level of the form.
- Click on the 'Delete' icon beside the attachment level
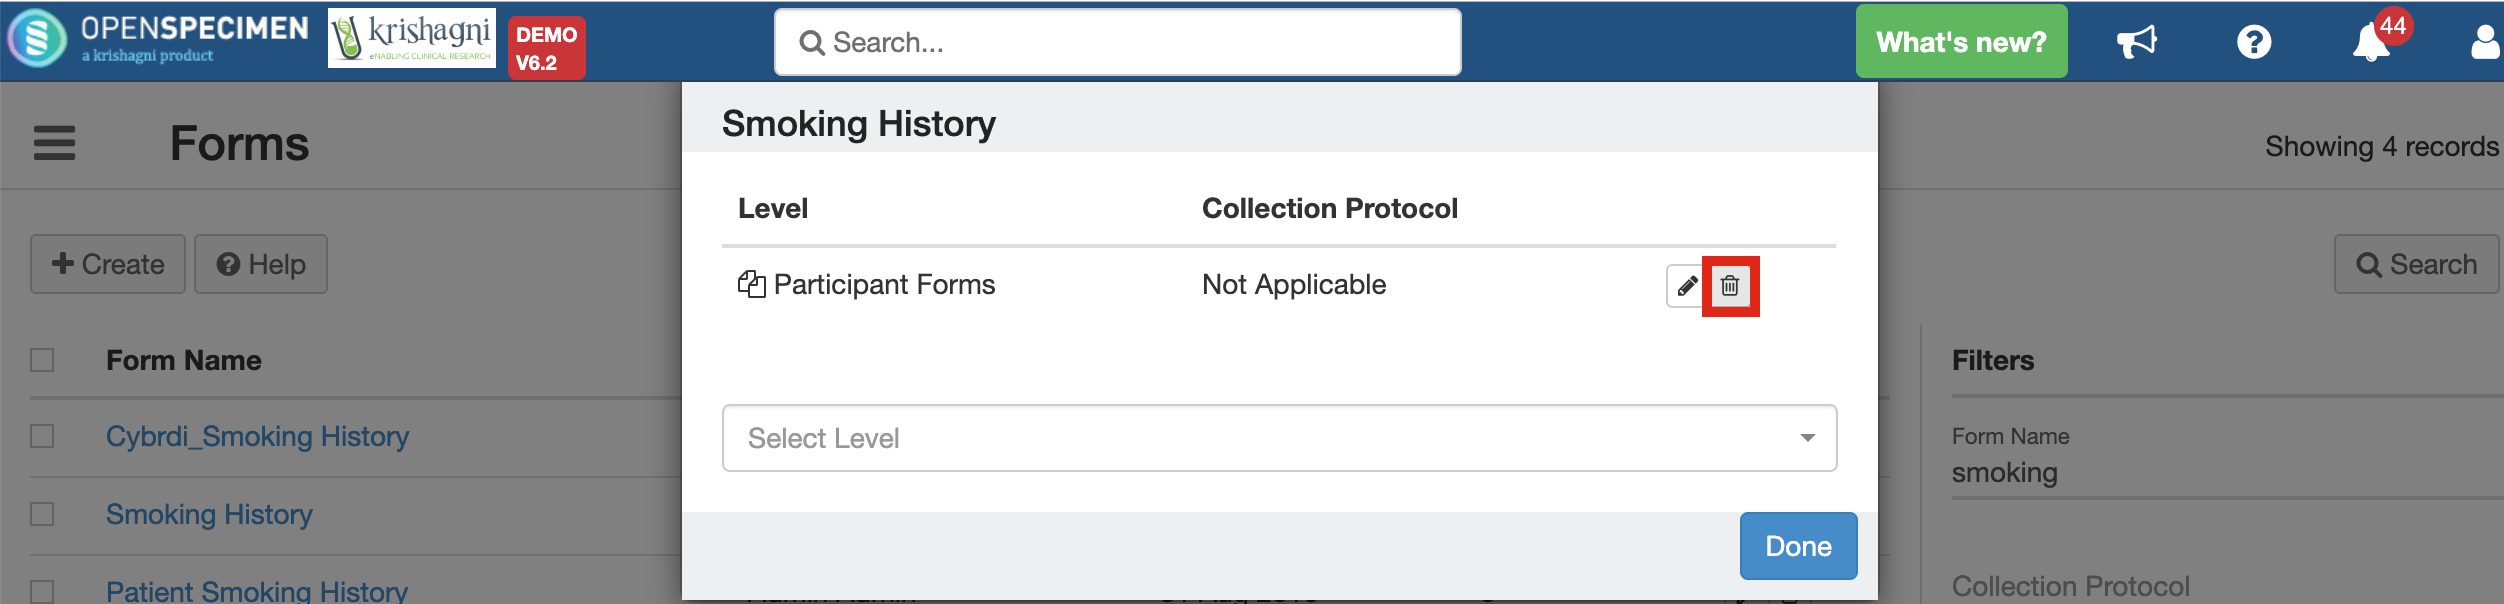
- Follow these steps ONLY when there is no data present in the forms or in a case where the data need not be preserved, otherwise deleting the attachment level leads to deletion of related data.
2. Data is present in the form:
Heads up! Deleting an attachment level leads to the deletion of the data related to those forms. In a case the data needs to be preserved and then the form reattached it to another level, user can follow the below steps:
Case 1: Changing the attachment level from ALL to single/multiple CP
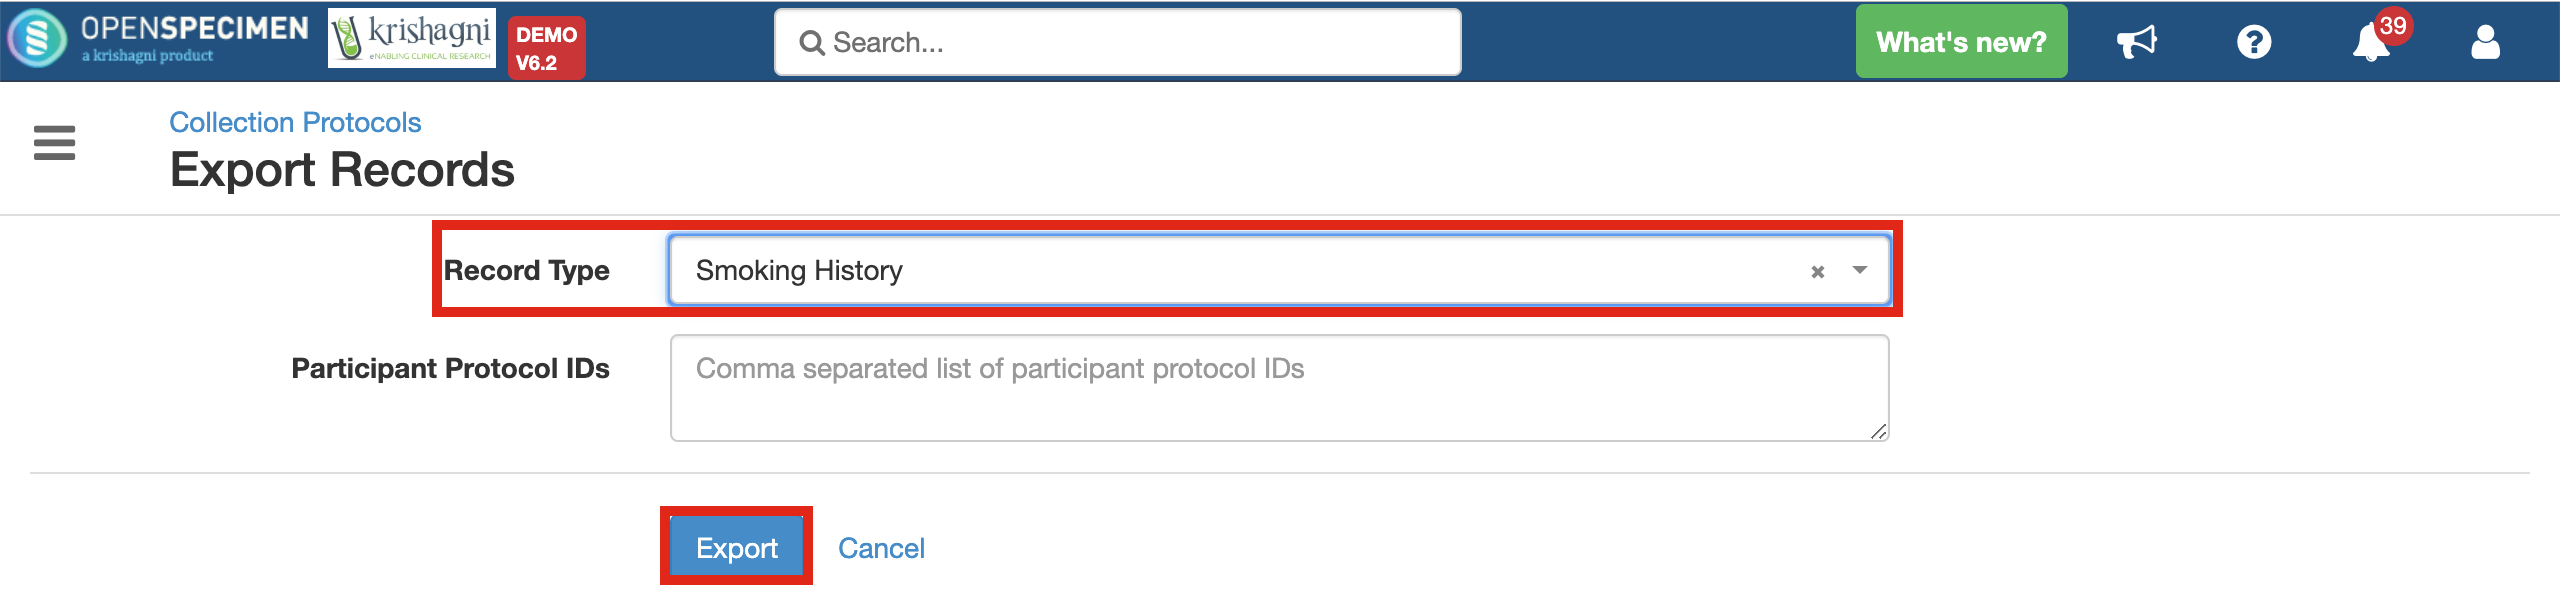
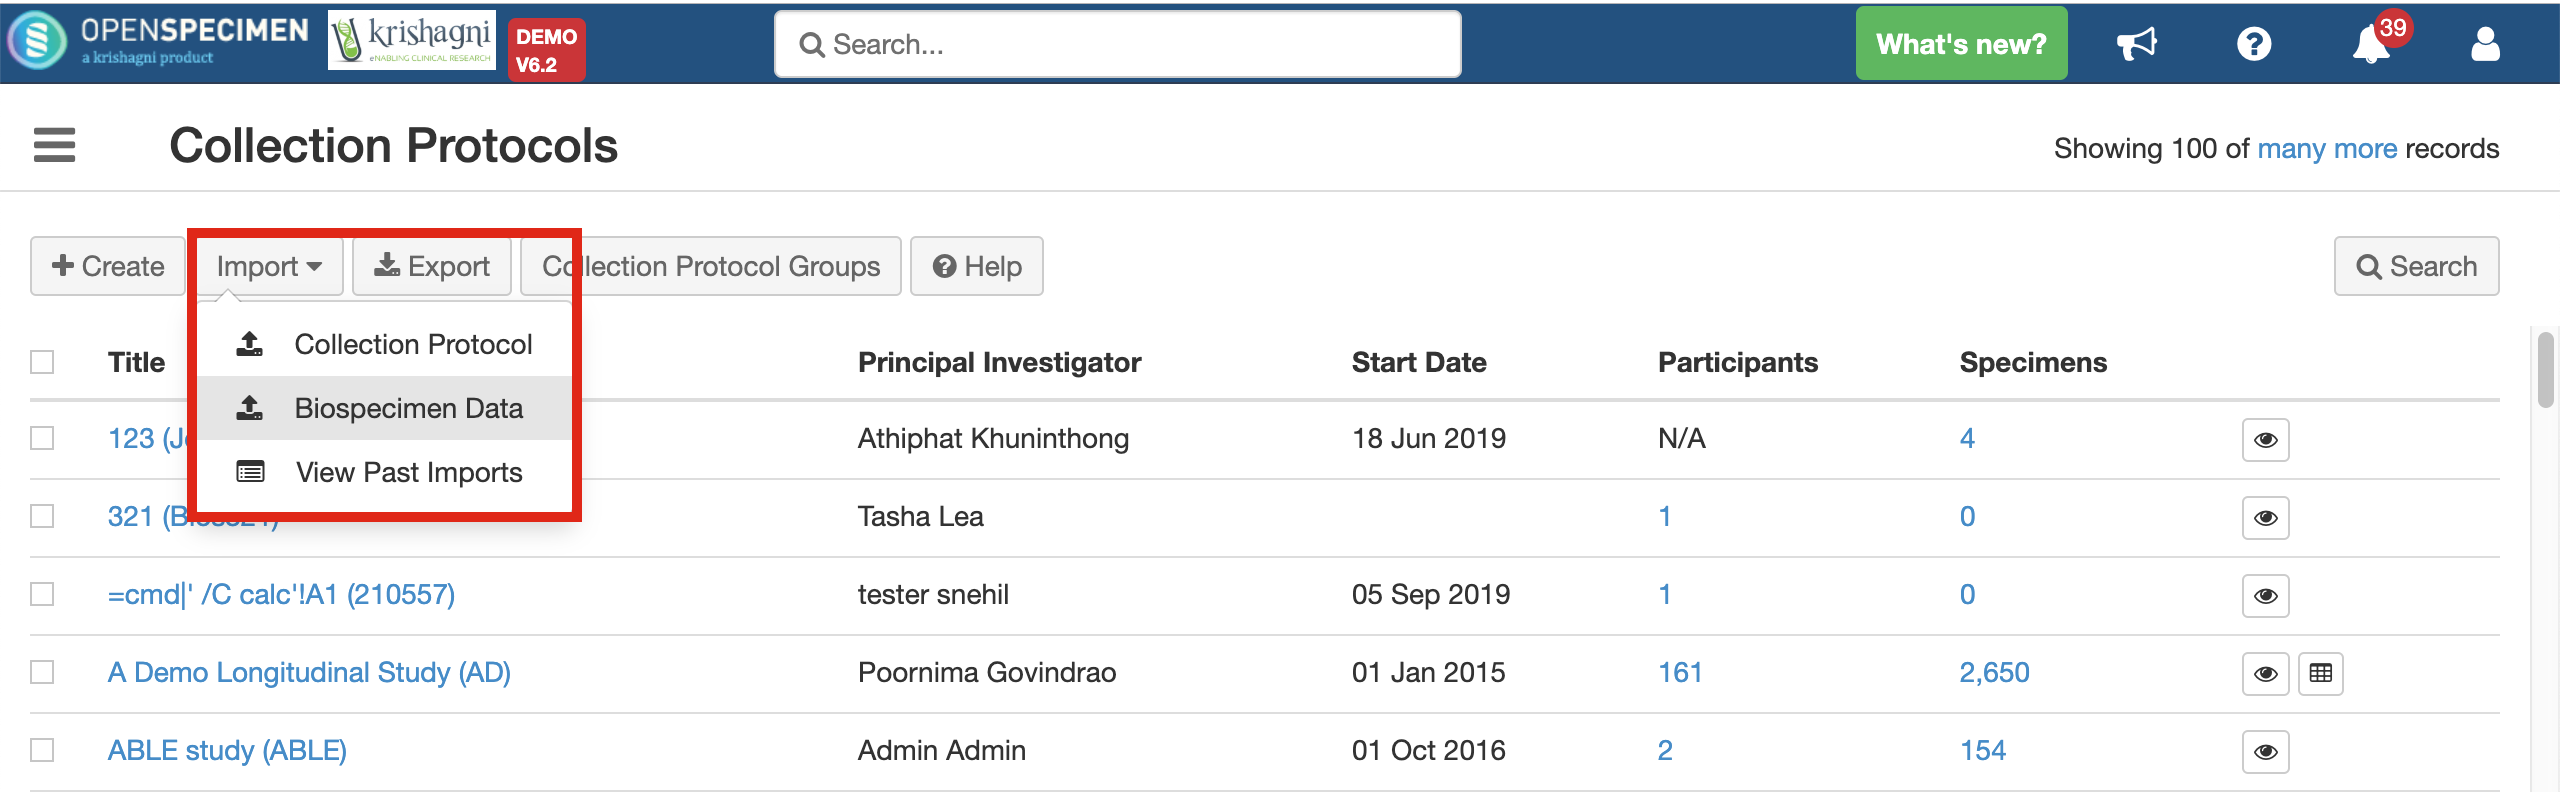
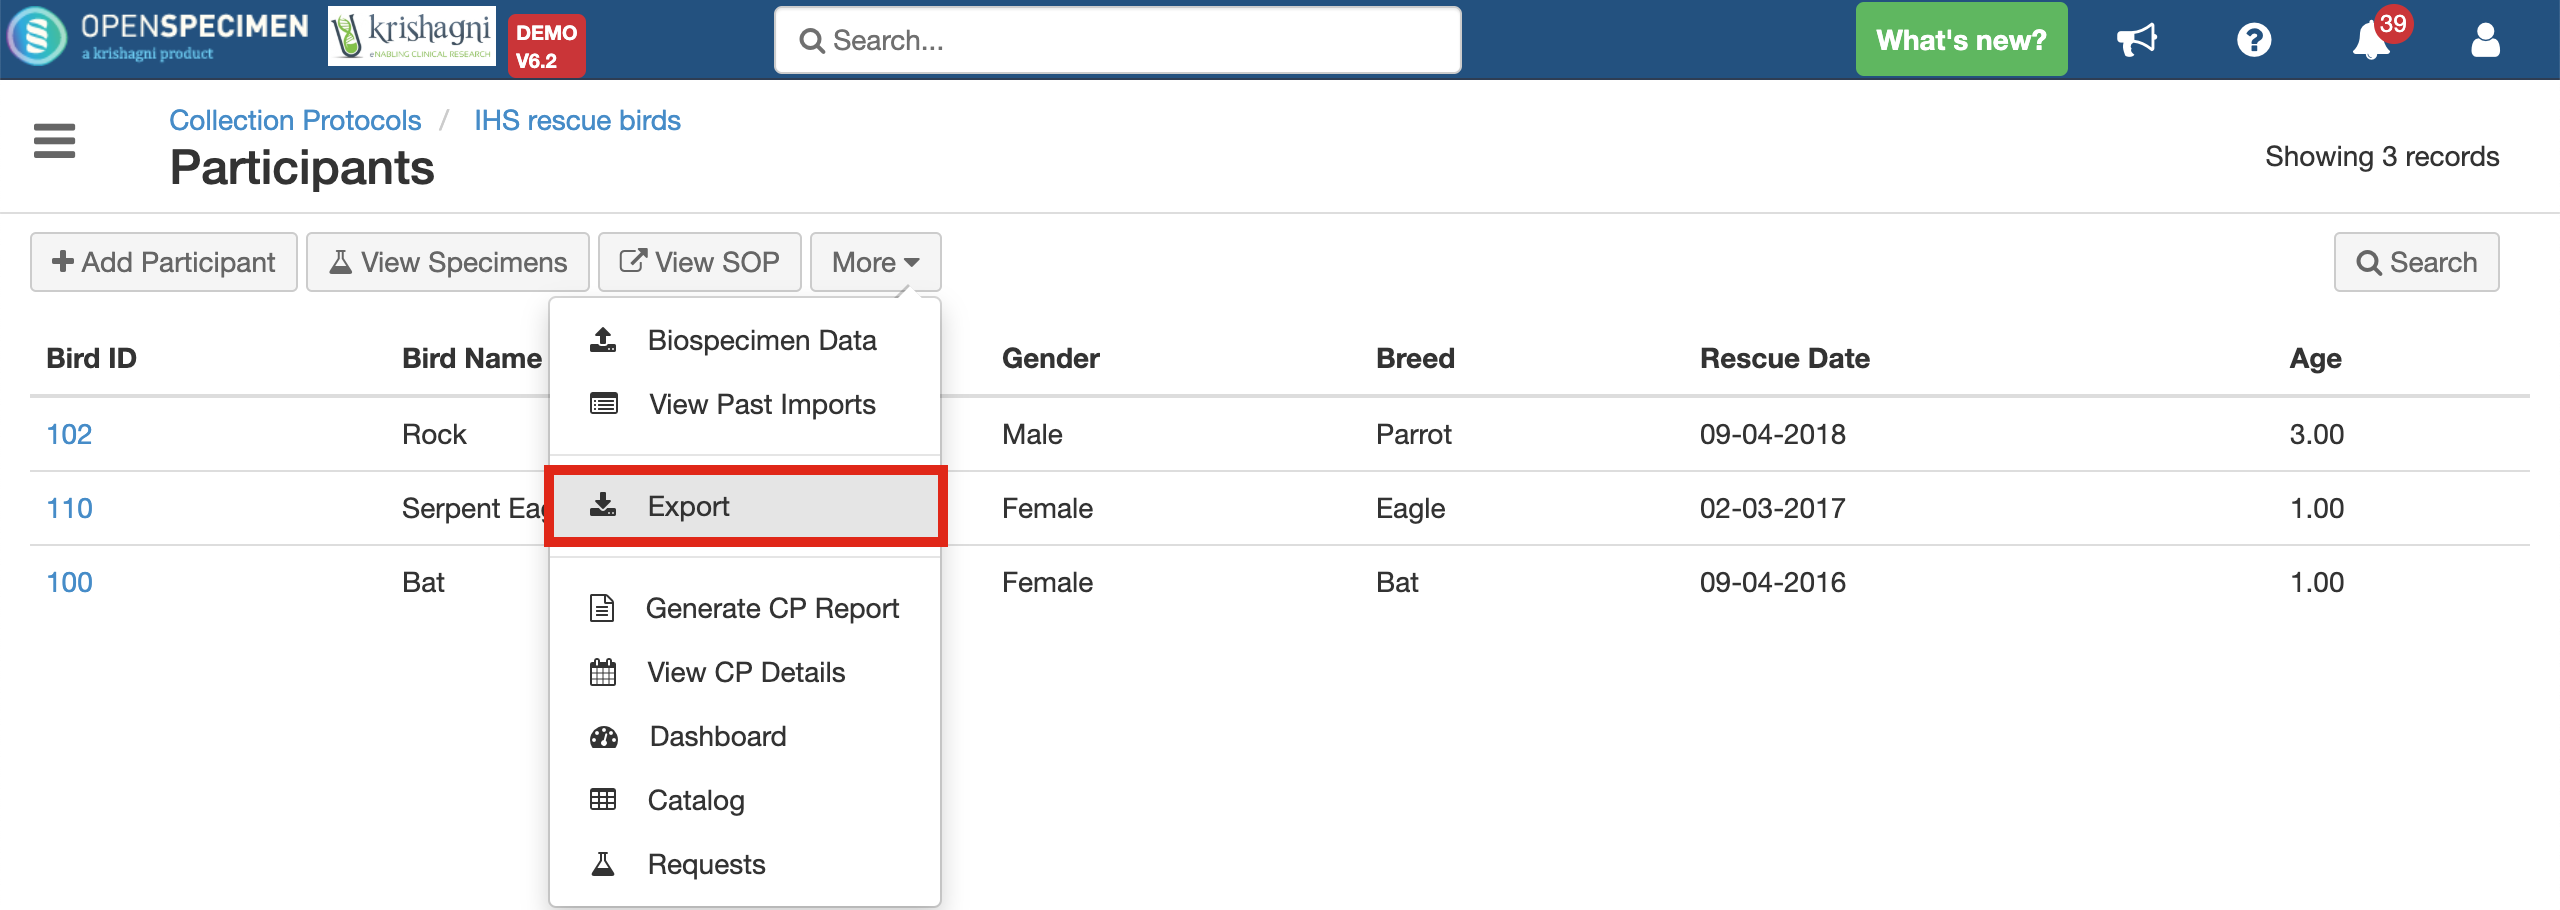
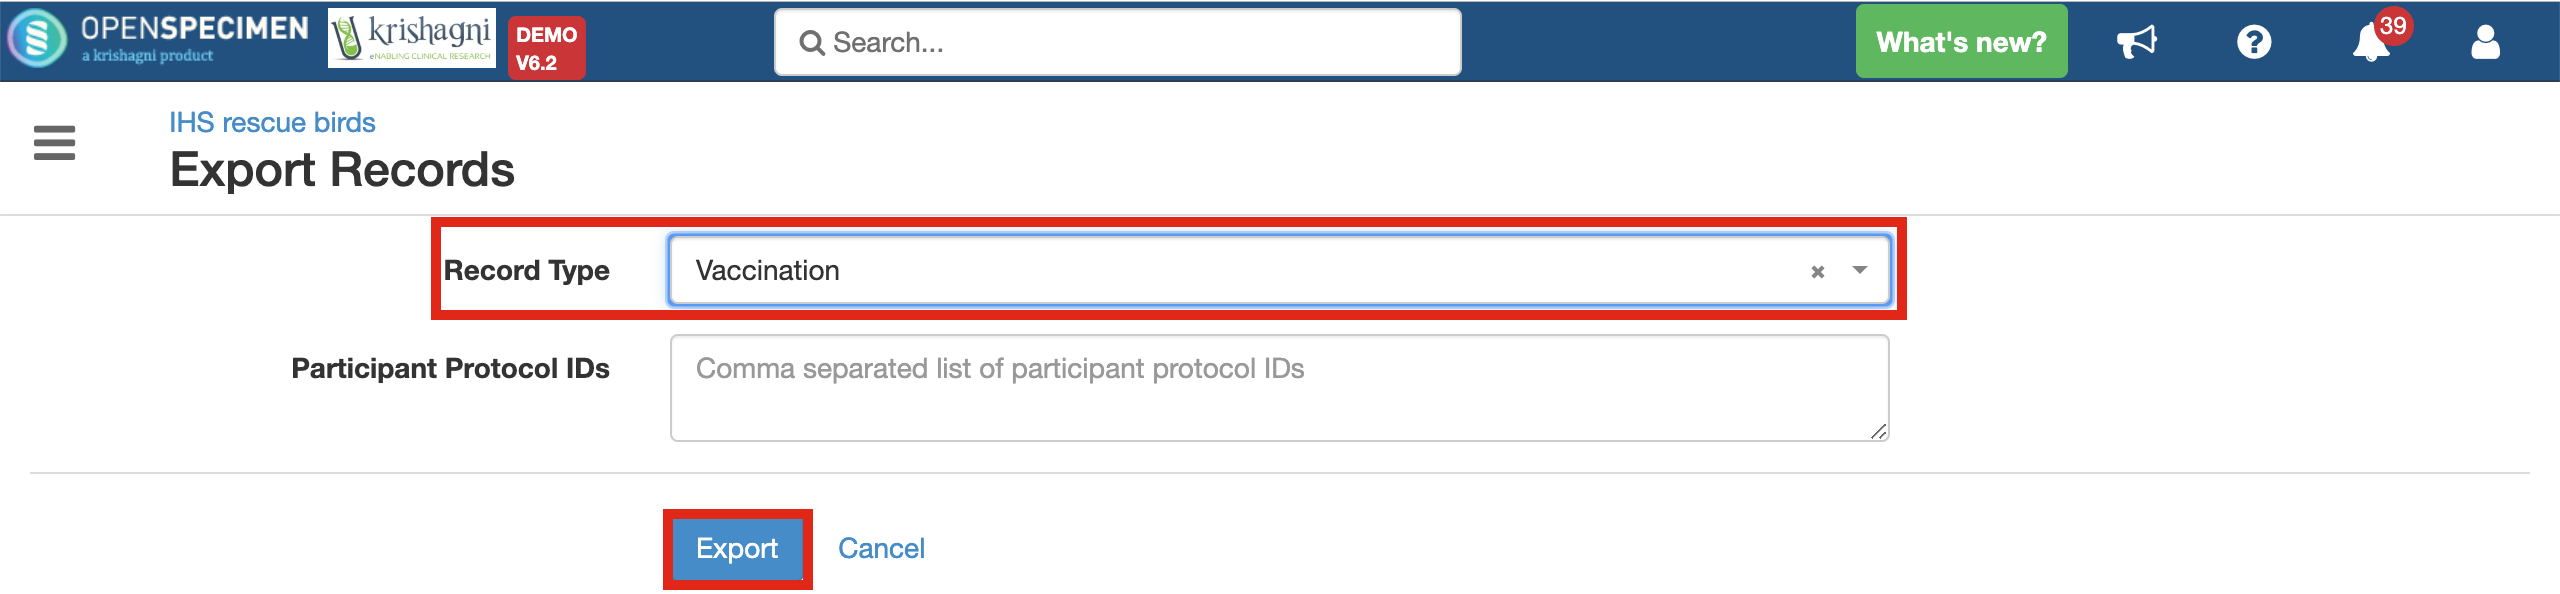
- Go to the Collection Protocol list page and click on 'Export'.
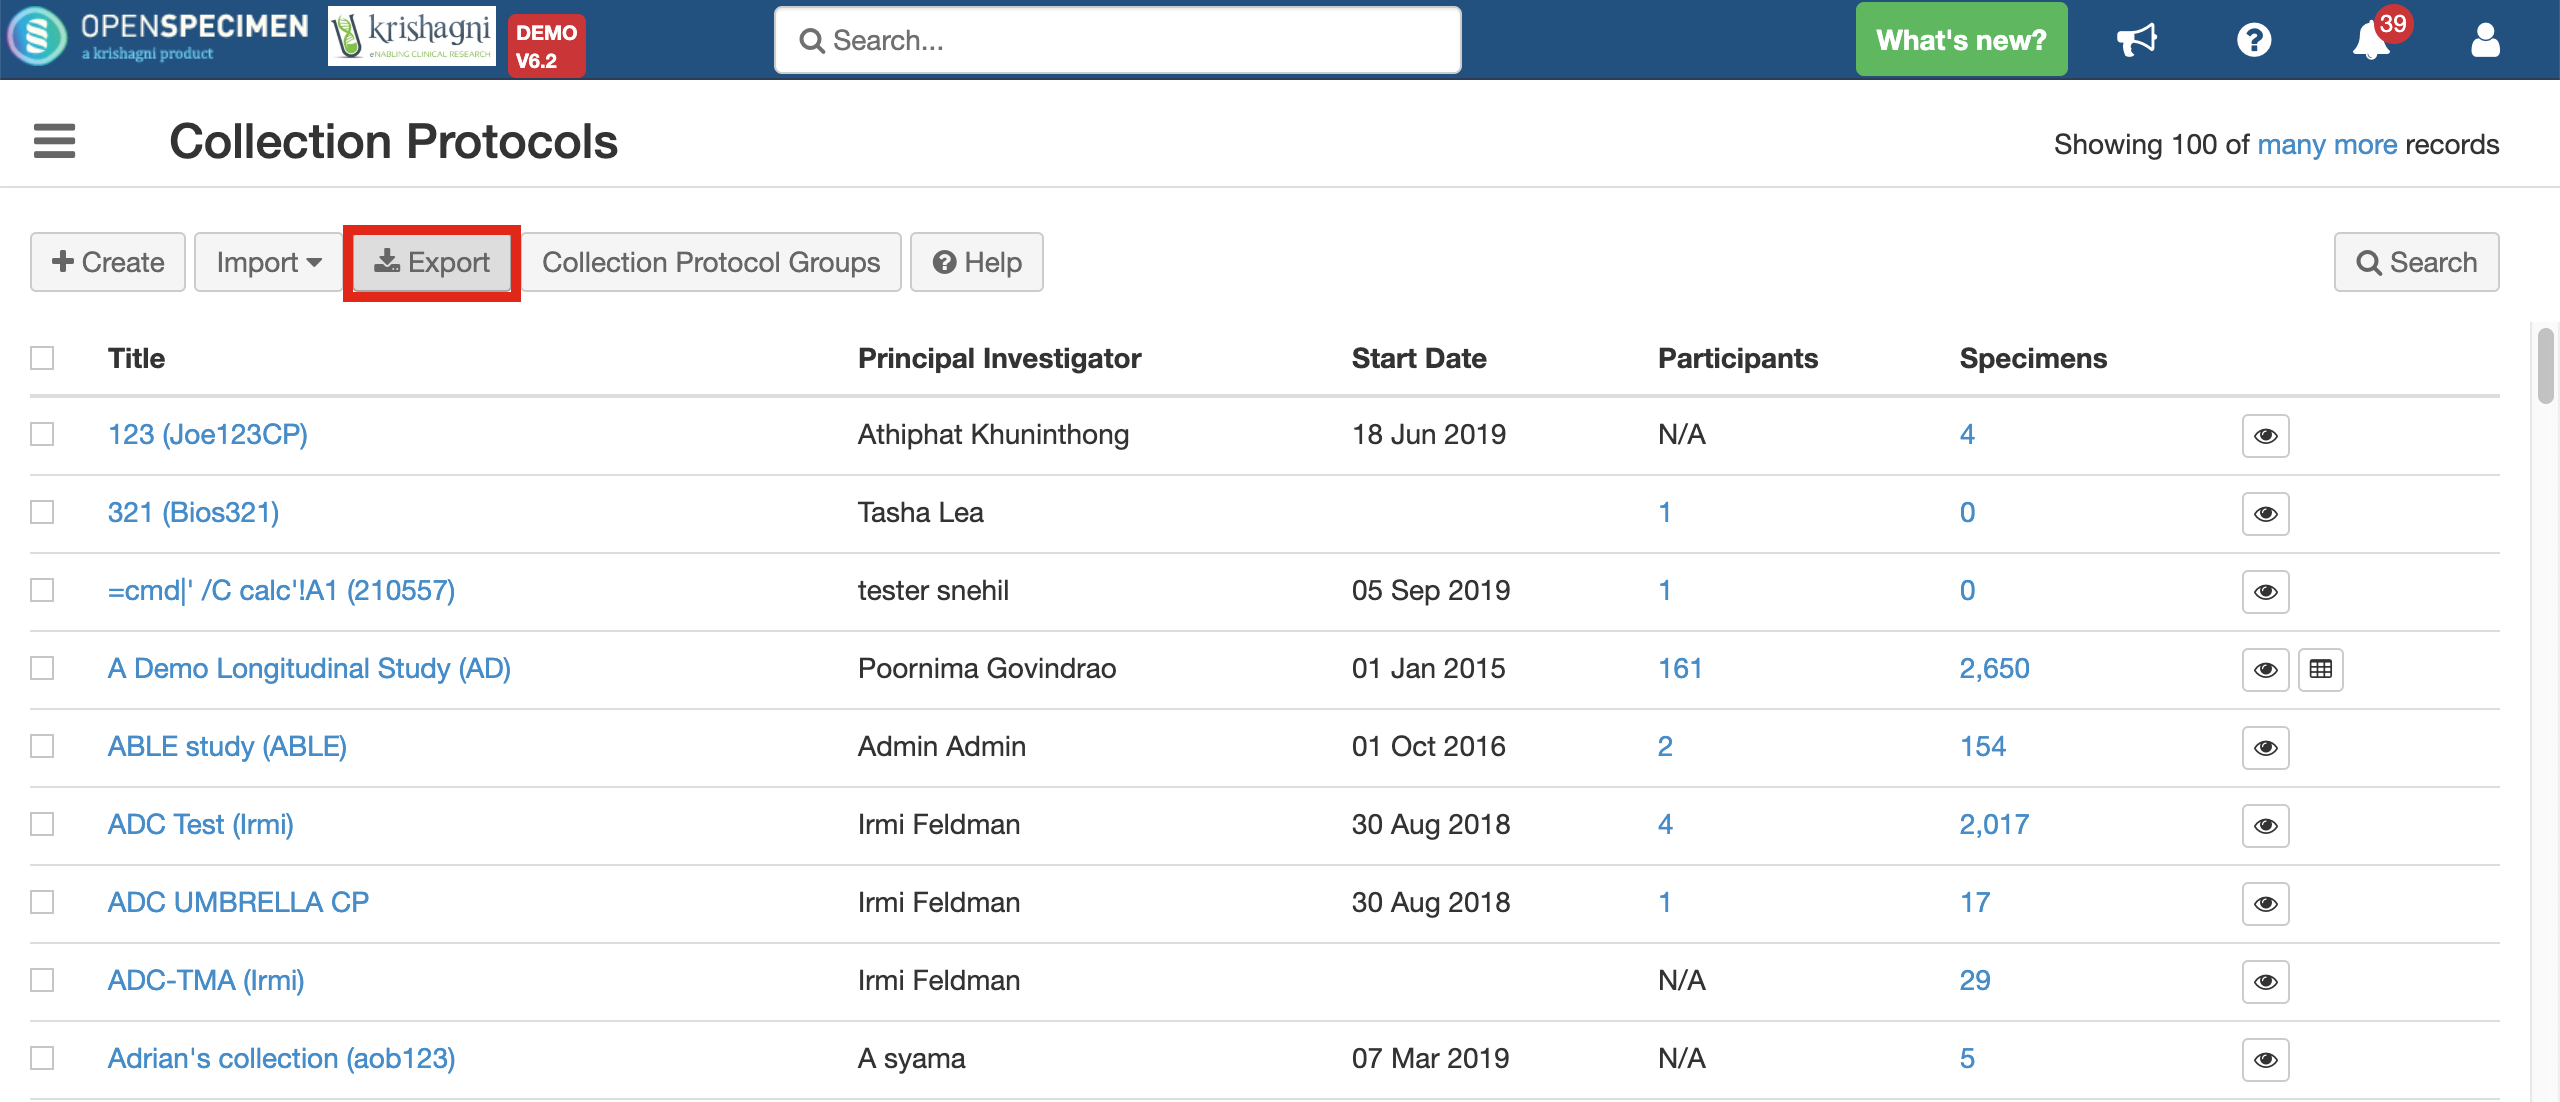
- Select the name of the form in 'Record Type' and click on 'Export'. A CSV file containing the form records will be exported.
- Go to the forms list page, search for the form for which attachment was to be changed, click on the spanner icon and delete the previous attachment level.
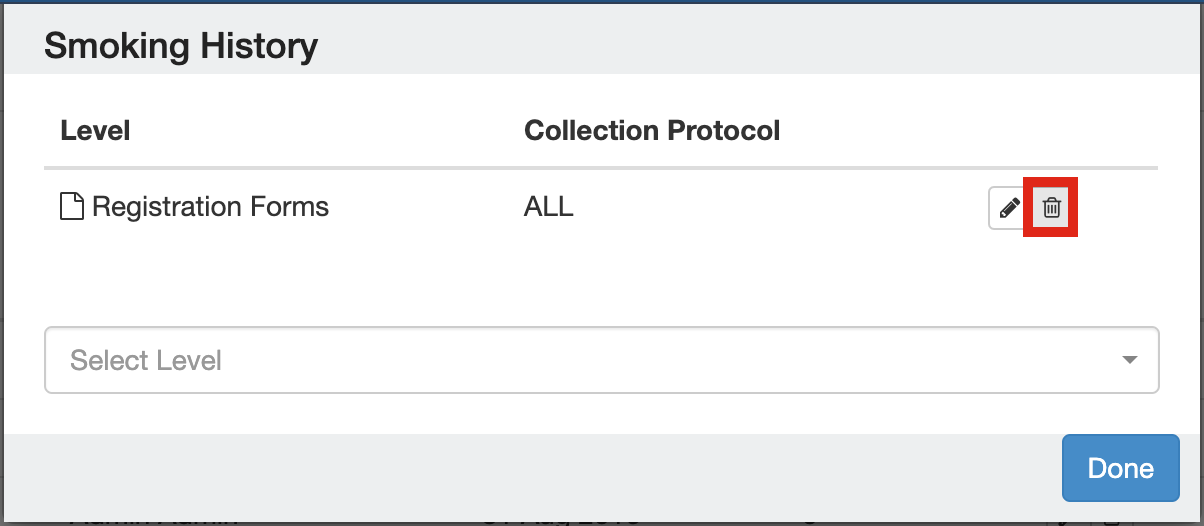
- Add the new attachment level and click on 'Done'
- Go to the exported form records CSV (exported in step 2) in any text editor.
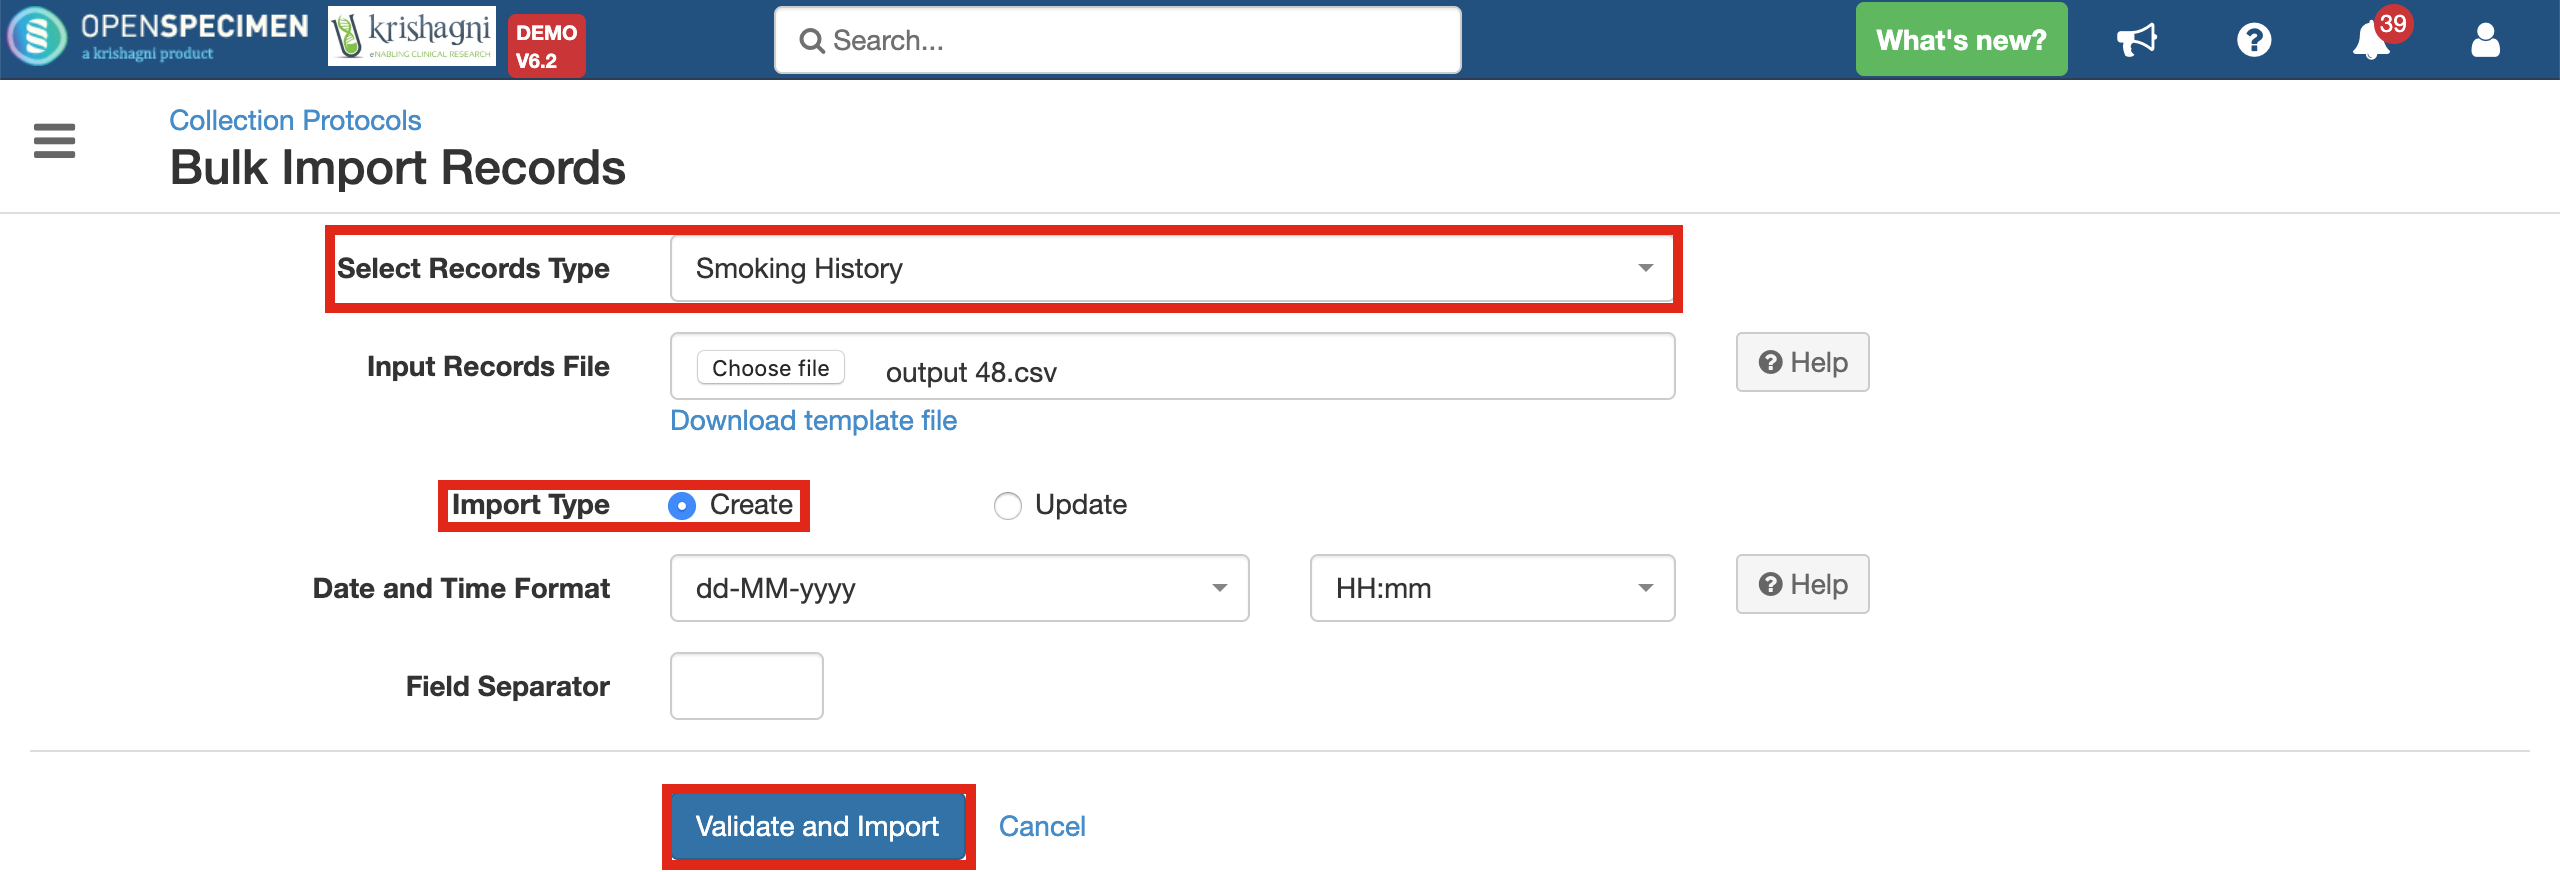
- Remove the first column (Identifier) and save the file. In case the new attachment level added was CP specific, go to that CP and click on 'Import'. In case the new attachment level added was not CP specific, go to the Collection Protocols list page and click on 'Import'.
Select the form name from the 'Record Type' dropdown and click on 'Validate and Import'
Case 2: Changing the attachment level from single/multiple CP to ALL
- Go to each CP's participant list page, to which the form is attached, click on 'Export'
- Select form name from the 'Record Type' dropdown and click on 'Export'
- Repeat the steps 3 to 6 from Case 1.
However, in case the user wishes to attach the same form at the same level to multiple collection protocols, this can be done using Collection Groups. You can refer Collection Protocol Groups for more information. Here's a short video that will give you an idea of how to perform this using Collection Protocol Groups: Reattaching form to Collection Protocol Group
Leave a comment at the end of this page or email contact@krishagni.com