Leave a comment at the end of this page or email contact@krishagni.com
Configuring Fields in Specimen Table and Tree
In OpenSpecimen, two new tabs are added to view specimens across visits - Specimen Table and Tree View. The table helps in getting a summary of all specimens for a participant irrespective of visits. The tree is displayed on the left side of the participant, visit, and specimen overview pages.
Specimen Table
The specimens that are displayed in the table view are arranged according to their lineage. The fields that are displayed in the specimen table are configurable. The same table is displayed on the visit and specimen overview pages.
Using JSON workflow below can be configured:
- Fields to be displayed in the table.
- Content of the description column.
- To what level should the tree be expanded or collapsed.
As you have seen in the above screenshot, you can configure the fields (Add/remove) in the specimen table. Refer to the below code to add/remove fields.
Description Field
Description Field: To configure this field, you have to use code in spmnDescTmpl from the Common section. You can add any field information you want in the description.
Description Field
Fields In Table: To add the fields in the above specimen table, you need to define them in specimenTree under fields sections.(Refer below Code)
{
    "name": "common",
    "view": null,
		"ctrl": null,
    "data": {
     "spmnDescTmpl": "<span><span ng-if=\"specimen.lineage == 'New'\">{{specimen.type}} </span> <span ng-if=\"specimen.lineage == 'Derived'\"> Derived {{specimen.type}} </span> <span ng-if=\"specimen.lineage == 'Aliquot'\"> Aliquot {{specimen.type}}</span></span> "
   }
},
{
  "name": "specimenTree",
  "data": {
    "defaultExpandDepth": 0,
   "fields": [
     {
       "name": "specimen",
       "caption": "Description",
       "type": "specimen-description",
       "width": "40%"
     },{
       "name": "specimen.type",
       "baseField": "specimen.type"
     },
     {
       "name": "specimen.label",
       "baseField": "specimen.label"
     },
     {
       "name": "specimen.barcode",
       "baseField": "specimen.barcode"
     }
   ]
  }
}
Download: Specimen Table Configuration.json
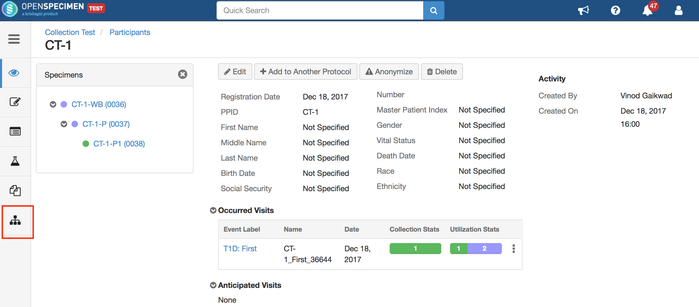
Specimen Tree
The specimen tree can be opened by clicking on the tree icon. By default, the tree displays <label> (<barcode>) and can be configured as needed.
Configure Specimen Tree
In the example below, the fields included in the table are 'Description', 'Location' and 'Lab Number'. In the tree on the left, the fields displayed are specimen labels and specimen type abbreviations in the bracket. The specimen hierarchy is displayed in a collapsed view. That is, it shows only the first level of specimens like primary and its children. Any hierarchy below this will be collapsed.
- One single block "specimenTree" can be used to configure the tree and the table.
- The code has to be configured in workflow JSON in the new section "specimenTree".
- "summaryDescTmpl" is used to configure the specimen tree.
Example 1: To include Specimen Type in the specimen tree
Example 2: To include a Custom Field in the specimen tree
Setting Display of Hierarchy
Based on the property 'defaultExpandDepth', specimen table and tree hierarchy will be collapsed or expanded to a certain level. Refer to the code above to know how to use this property.
If it is set to the '1', it shows the primary specimen, and only one level below it will be displayed. The rest of the specimens under the hierarchy below it will be collapsed.
If it is set to the '0', it shows the primary specimen only in a table or tree.
This way, it can be set to display any level. The number indicates the level you wish to display. If there are 6 levels then the code will be "defaultExpandDepth":6. Thus, depending upon the level, the value can be inserted.
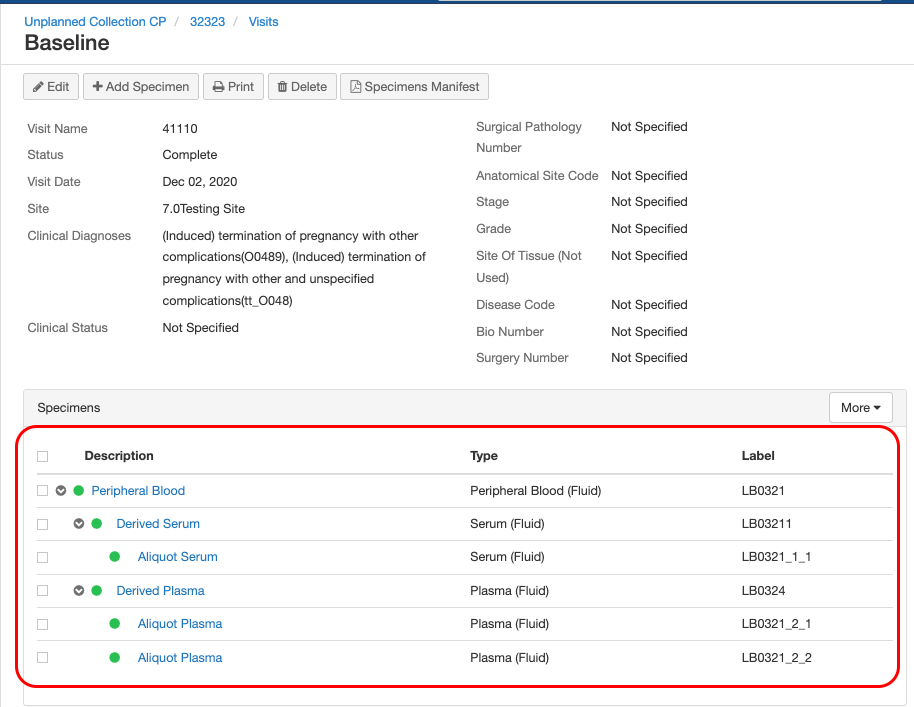
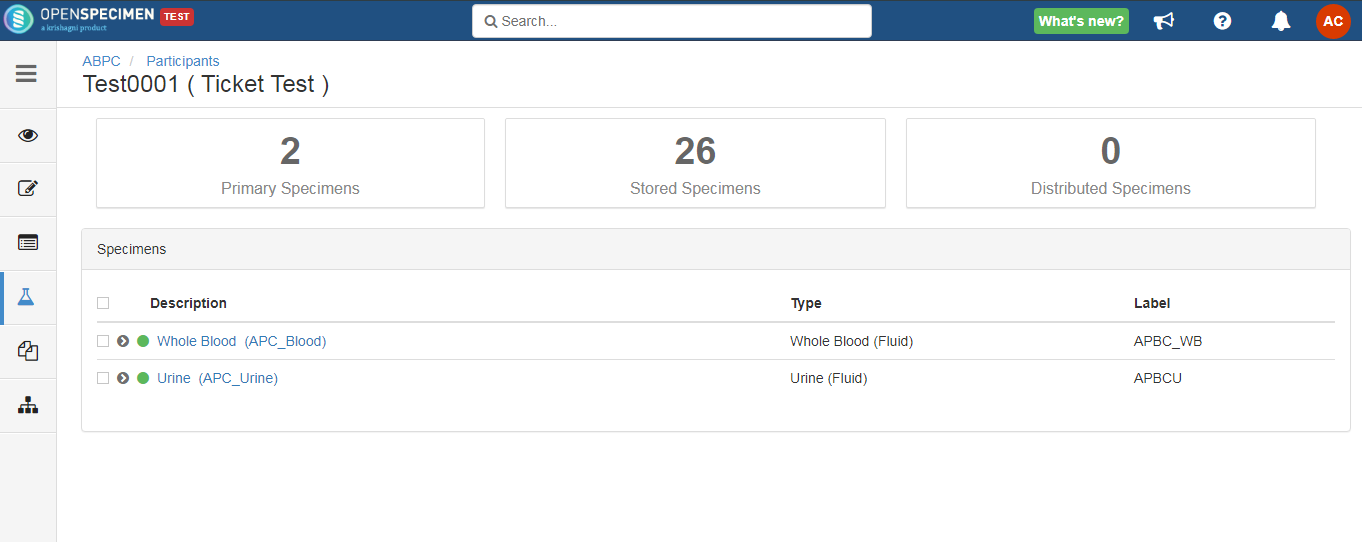
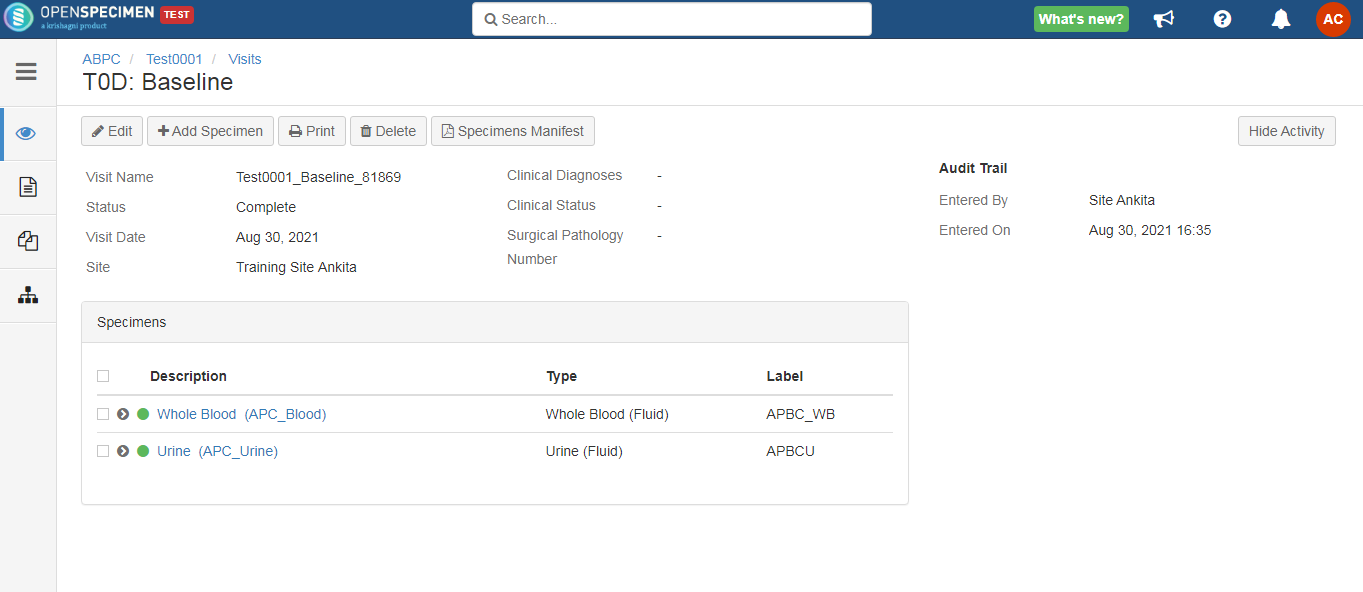
Example: On using the above JSON, below are pages where the changes will be reflected:
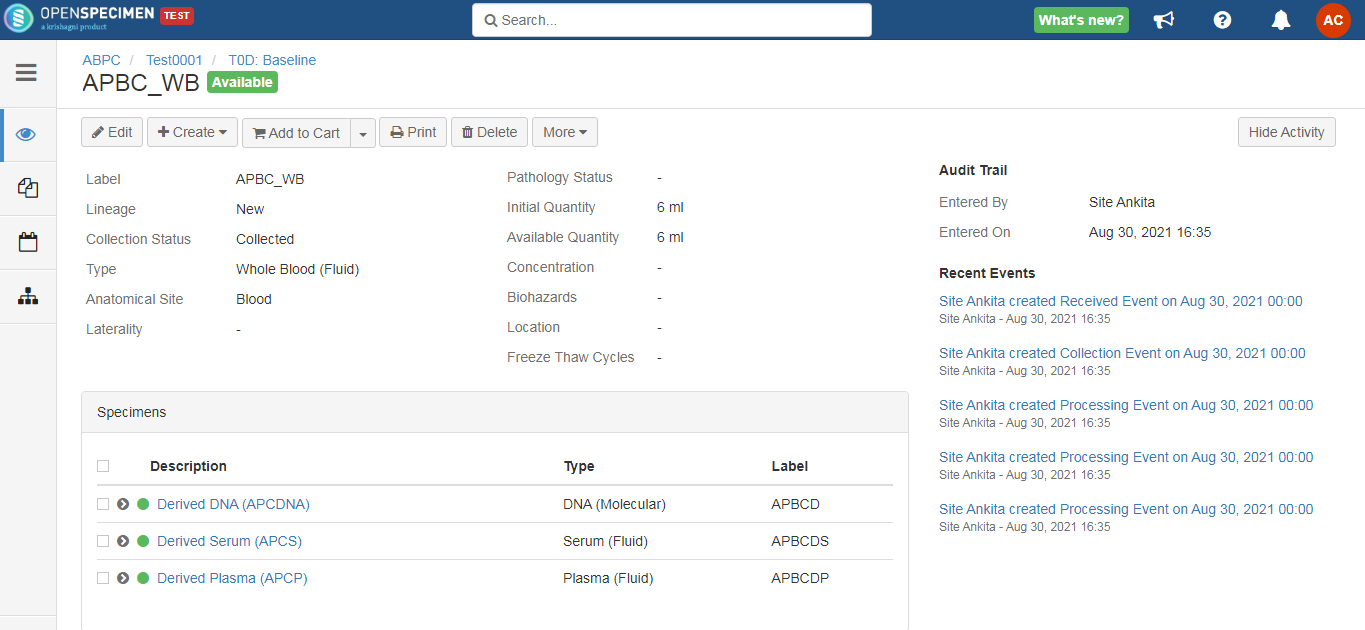
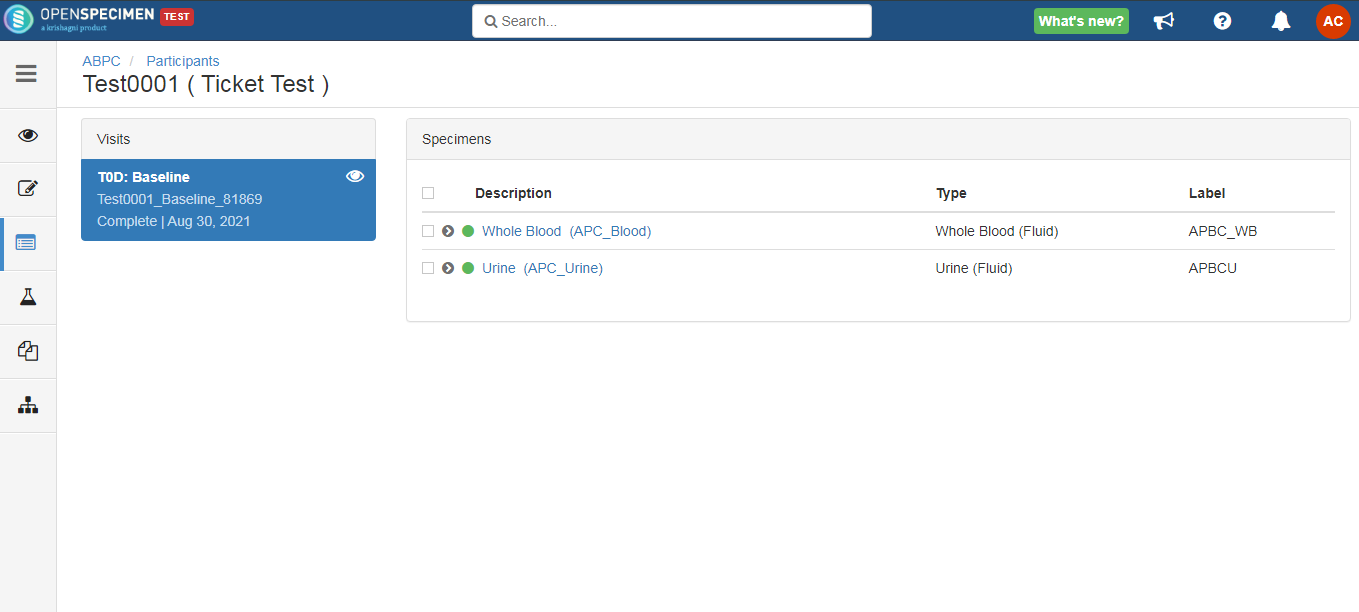
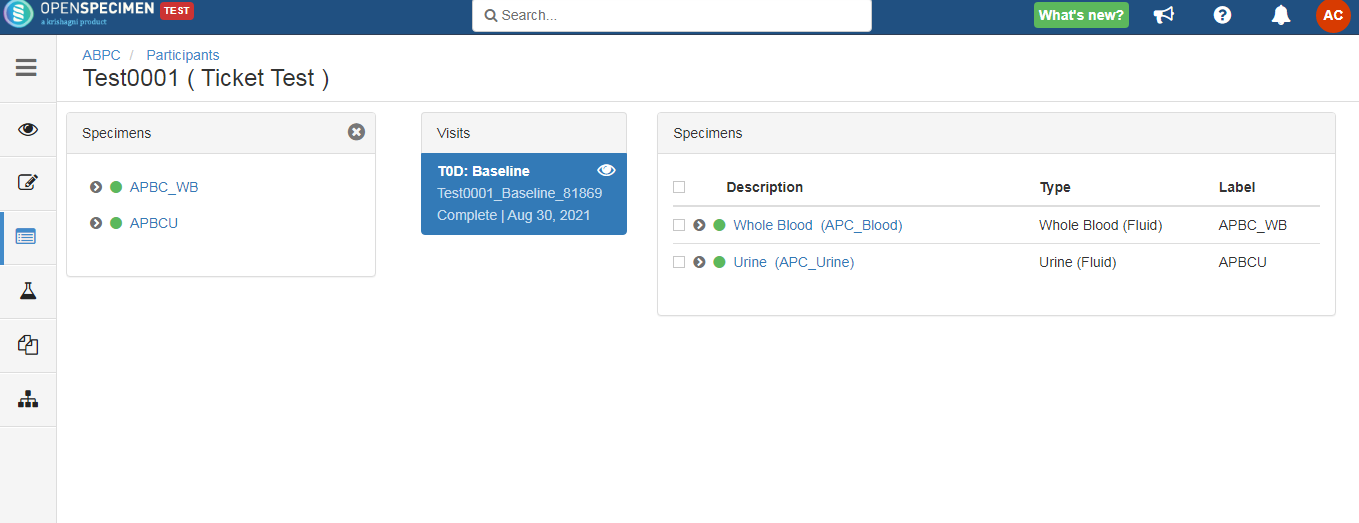
1. Specimens tab on the participant detail page with all the specimens for that particular participant:
2. Visit overview page:
3. Specimen overview page:
4. Visit page:
5. Specimen tree on the left with label and type abbreviation:
For a detailed description about the specimen tree, refer to https://openspecimen.atlassian.net/wiki/x/MIDsC
Example JSON
Leave a comment at the end of this page or email contact@krishagni.com