
Introduction
The container type is a 'template' used to create containers. You can create it once and reuse it every time you create new containers.
Container type is optional in creating a container. From v4.2, OpenSpecimen is shipped with default container types. |
Prerequisite
Only super administrators or institute admins can add or edit a container type. Before creating a container, one should have the below-mentioned details:
From v10.3 onwards: Naming format for container type is optional. Many clients do not use the auto-generated names (e.g., F1_S1_R1_D1) for the boxes as they move across drawers/racks. Thus, while creating boxes via UI using container type, they have to edit individual box name after creation. |
Creating a container type
Select 'Containers' from the dashboard
Click on 'Types' and then click 'Create.'
Bottom-up approachSet up container types using the 'bottom-up' approach. For example, to create a type for a -80 freezer that holds racks and boxes, create types in the order of Box→Rack→Freezer. Otherwise, you will not be able to select container type for the 'Can hold' field for the freezer. (Since you have not created rack and box first.) |
Create a container type for a box
The example below shows a box that has a dimension of 9 rows by 9 columns. This means each box can hold a maximum of 81 specimens. 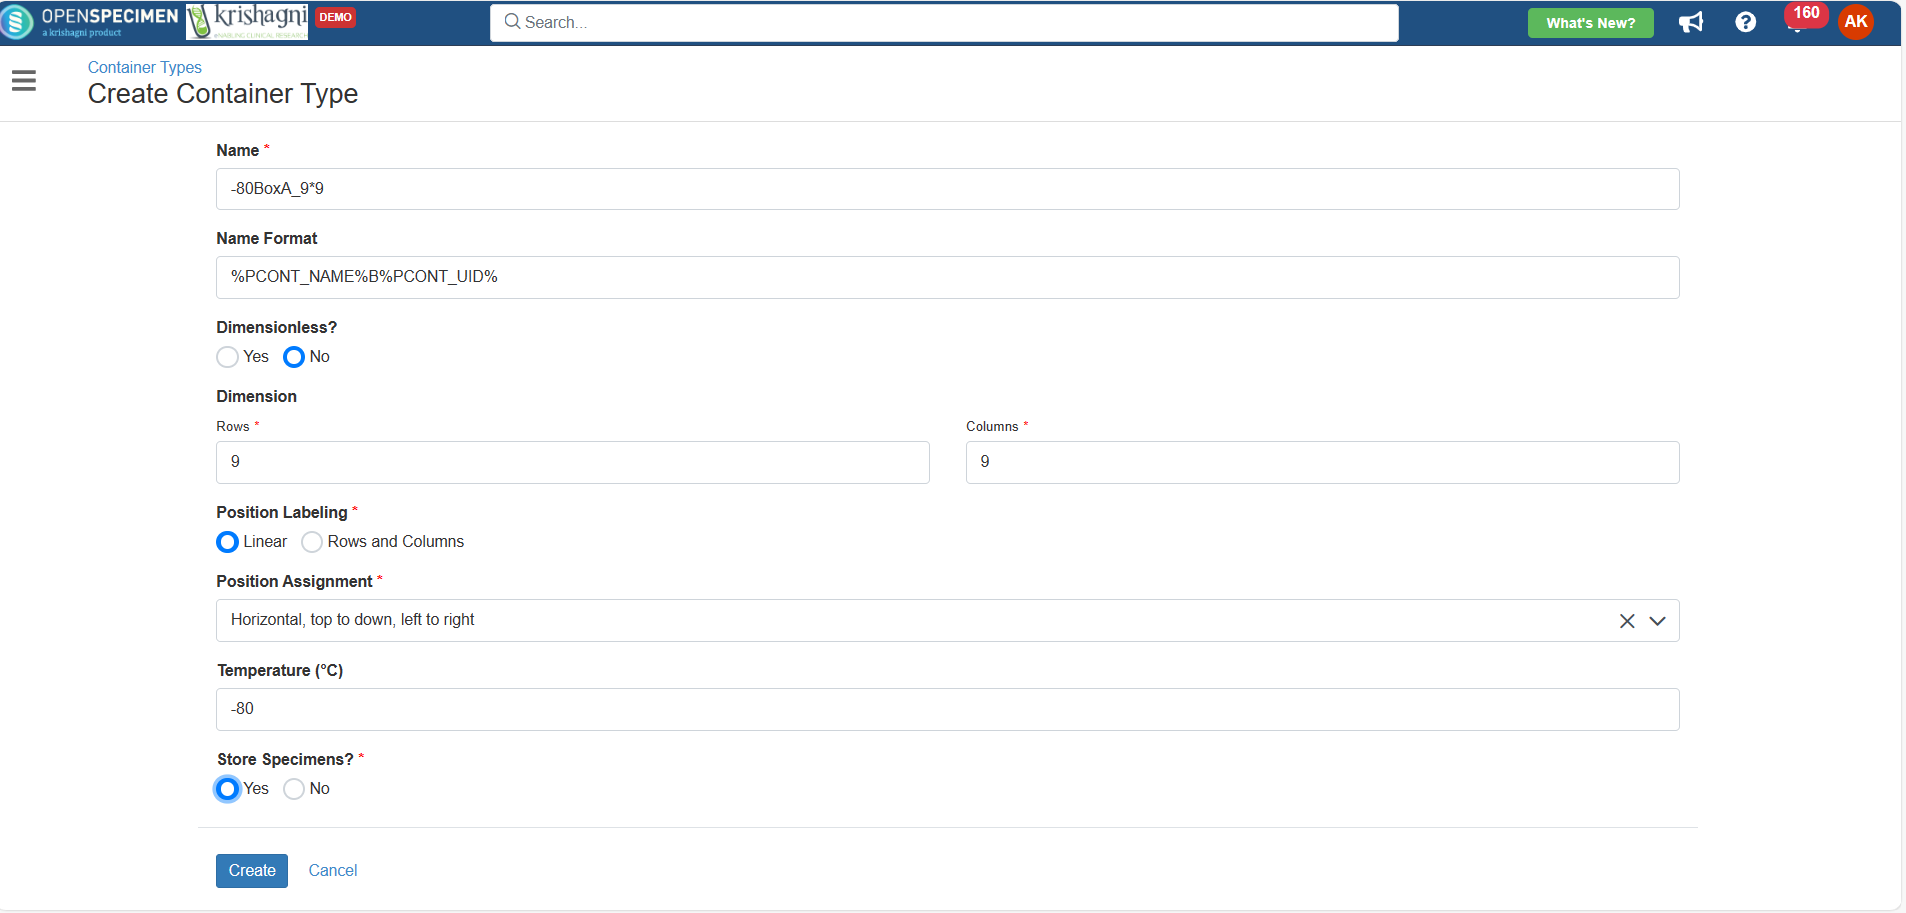
2. Create a container type for a rack that holds a box The example below shows a -80 rack with a dimension of 4 rows by 4 columns. This means that it has 16 shelves so that each rack can hold 16 boxes. 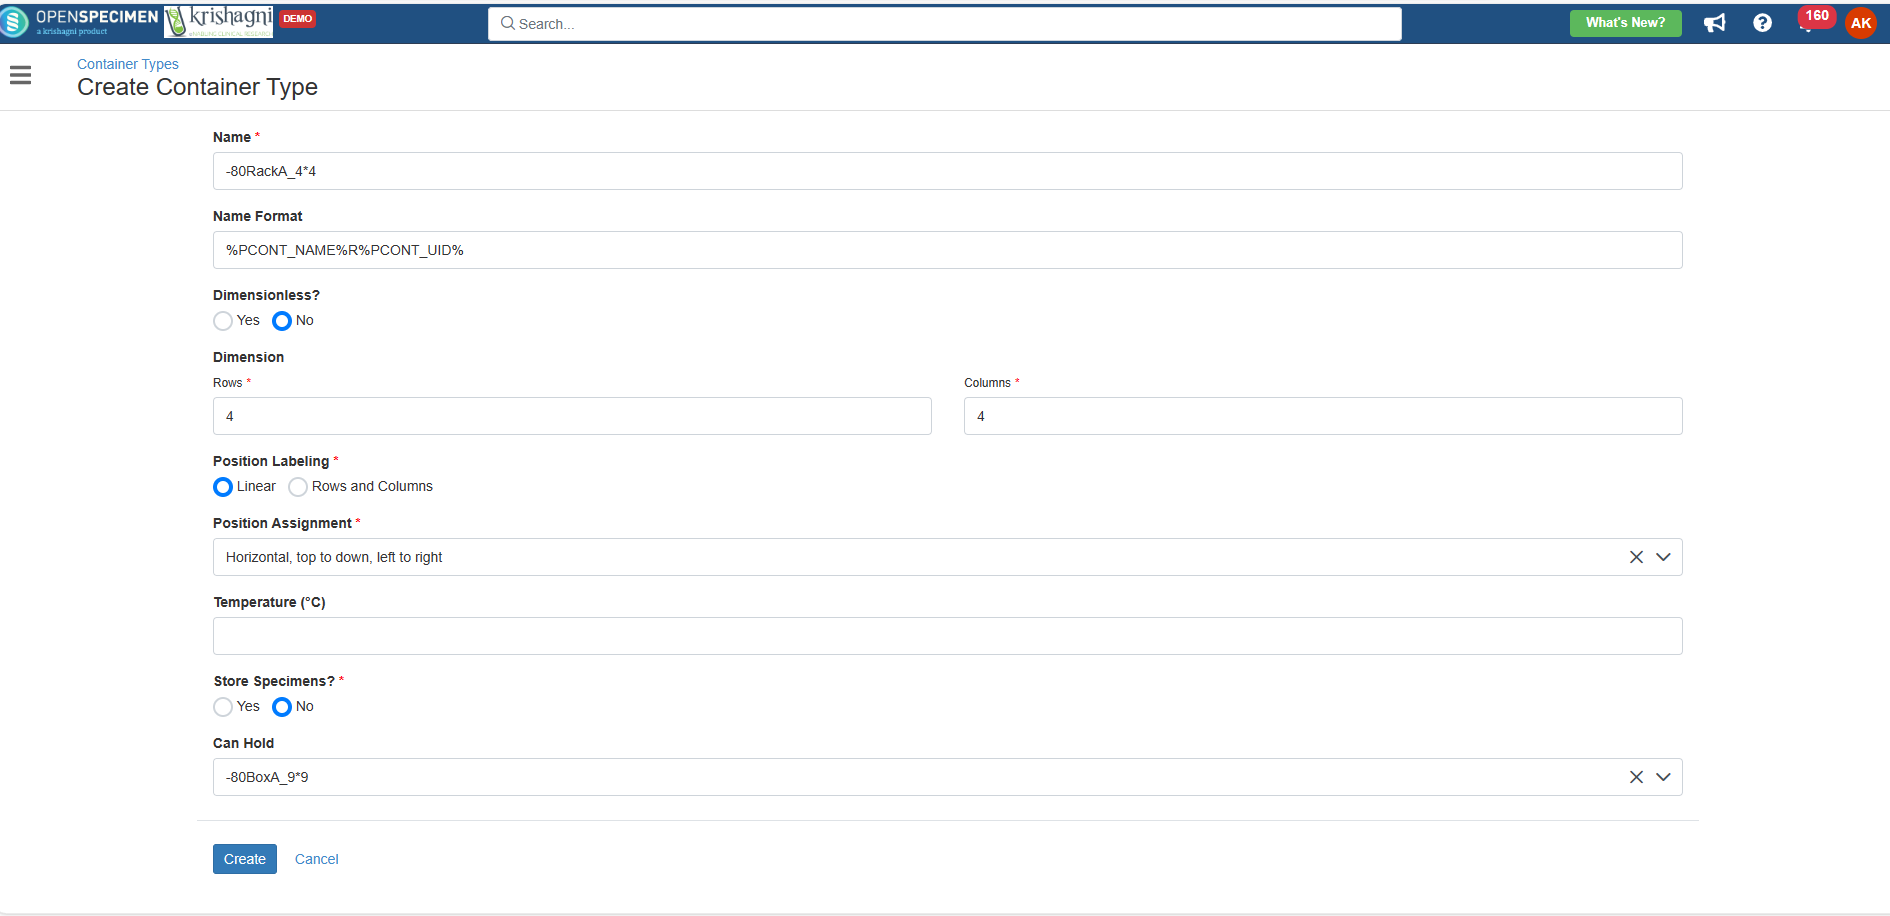 3. Create a container type for a freezer that holds the rack The example below shows a -80 freezer with a dimension of 4 rows by 4 columns. This means it has 16 shelves so the freezer can hold 16 racks. 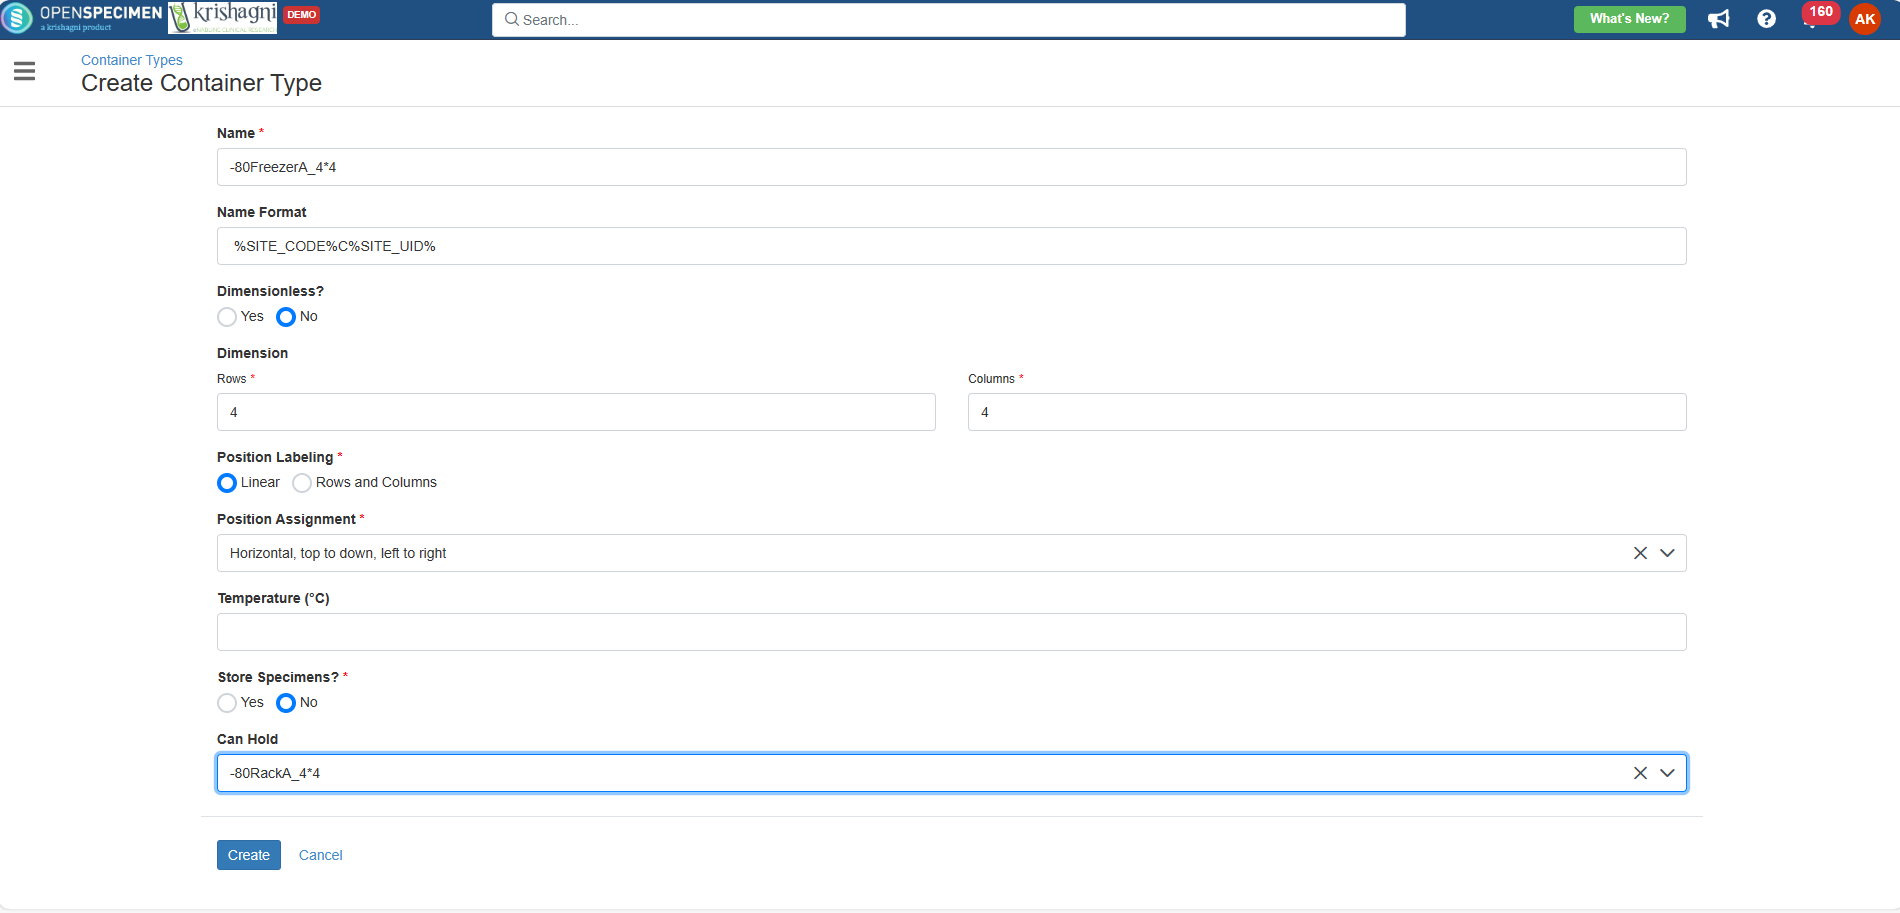
|
Create dimensionless container type (v10.3)
From v10.3 onwards, you can create dimensionless container types that can be used to create containers and in container auto-allocation strategy. Refer to the wiki page Dimensionless containers for more details
Label formats to create container types
Users can use available tokens to generate unique container names to define container name format. This allows the system to auto-generate container names rather than a user creating labels at every level manually.
Notes:
To create containers based on hierarchy, it is mandatory to have container label formats defined.
While defining label formats, you must ensure that it will create a unique label.
From v10.3 onwards, Label formats for container types has been made optional. Thus, when creating container hierarchy using types, the hierarchy is created up to the level for which names can be auto-generated. E.g., if container types contain label formats for Freezer, Shelf, Rack but is not defined for Drawers, boxes, only containers upto Rack level will be created |
Tokens | Description | %PCONT_NAME% | Token to include parent container name. Note: This cannot be used at the root level like the parent as there is no container level on top of it. E.g., For LN tank, it cannot be used for the parent freezer, LN Tank. This can be used for the child containers | %PCONT_UID(n)% | Token to include a sequential number for each child container within a parent. This can be used for the child containers (n) - Specify the number of digits. For example, if (2) is used, the numbers generated will be 01, 02, 03, etc. | %PCONT_ALPHA_SEQ% | Token to include a unique alphabetical sequence within the parent container | %SITE_CODE% | Token to include the container's site code which helps to make containers unique across sites. Users have to set this Code while creating Site. Note: It is necessary to add site code to ensure the uniqueness of the container. | %SITE_UID(n)% | Token to include a sequential number for each root container within the site. (n) - Specify the number of digits. For example, if (2) is used, the numbers generated will be 01, 02, 03, etc. |
Examples: Freezer level: If the format '%SITE_CODE%_F%SITE_UID(n)%' is set, the container name generated is 'BCS_F1'. 'BCS' is the site code for the site selected as the parent site. Sub container level like rack: If the format '%PCONT_NAME%_R%PCONT_UID(2)%' is set, the container name generated is like 'BCS_F1_R1'. This is the first rack within the freezer.
Similarly, the formats can be set for different levels of the container. From V9.1 onwards, an additional field as 'Display Name' has been introduced, allowing users to mention a user-friendly name to the container as per their requirement. This field do not have uniqueness constraint and thus it is possible that multiple boxes can have same Display name. |
Create container types in bulk
From v5.1, you can create multiple container types in bulk through a bulk operation; refer to the wiki page for more details.
Edit container types
The existing container types can be edited by Super/Institute administrators as per the requirement.
On the container type page, click on the container type to be edited. On the container type overview page, click on 'Edit' tab.
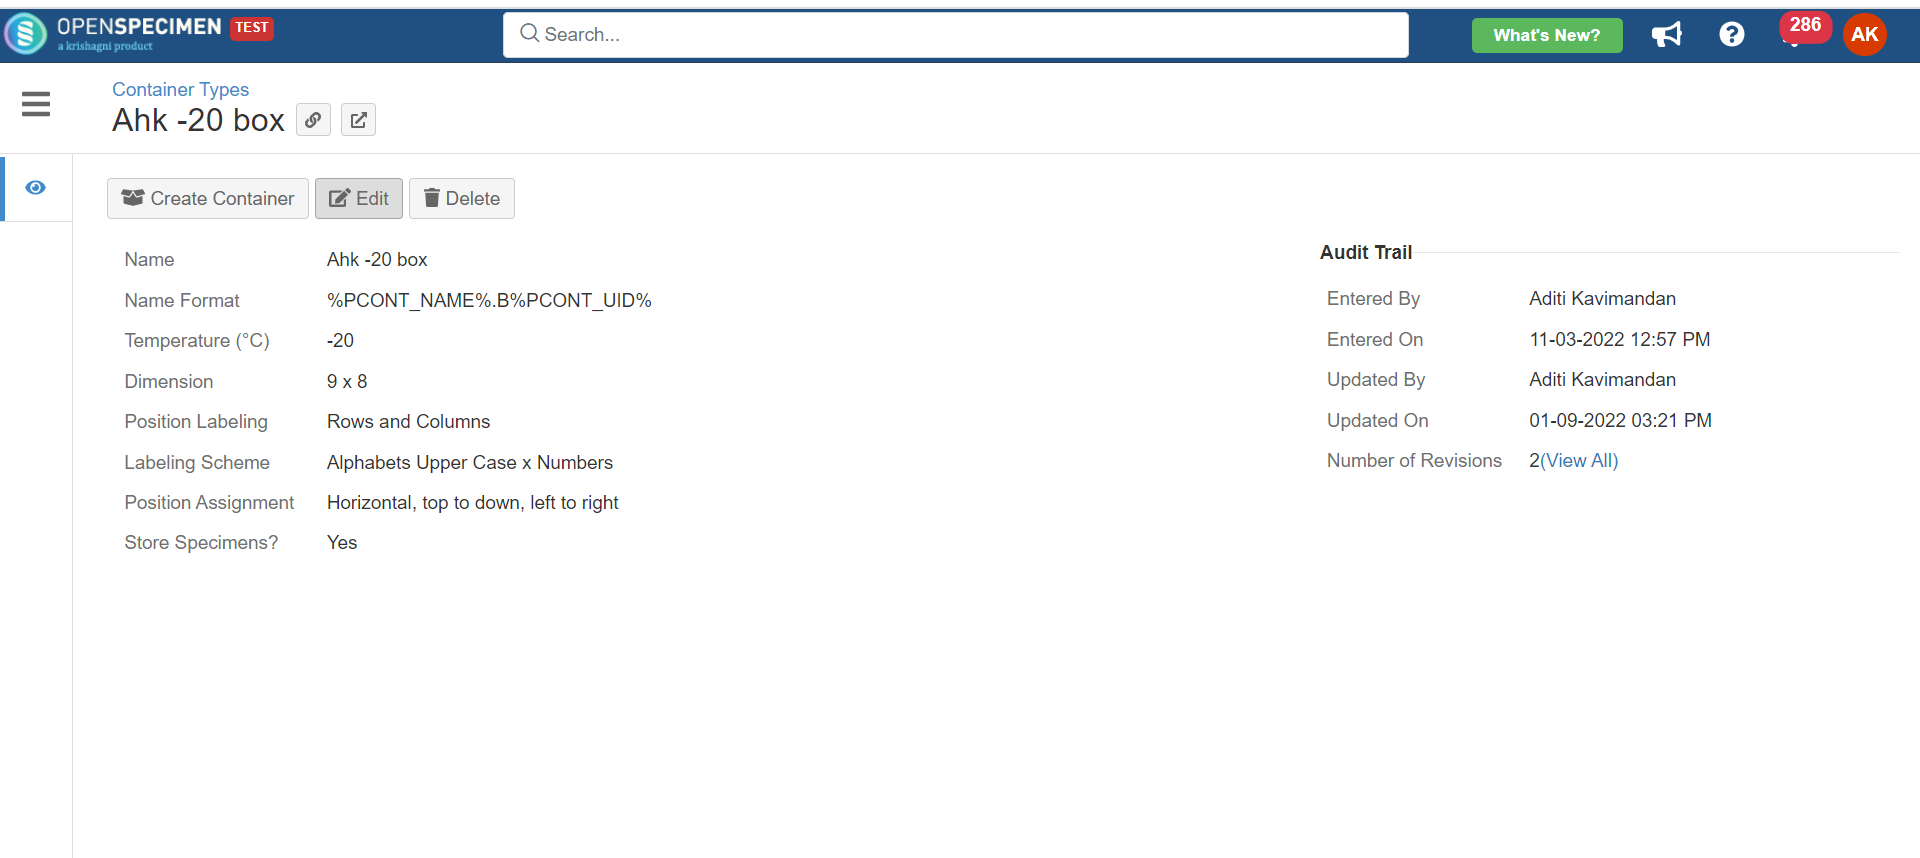 3. Perform the changes on the edit page of container type, click on update. 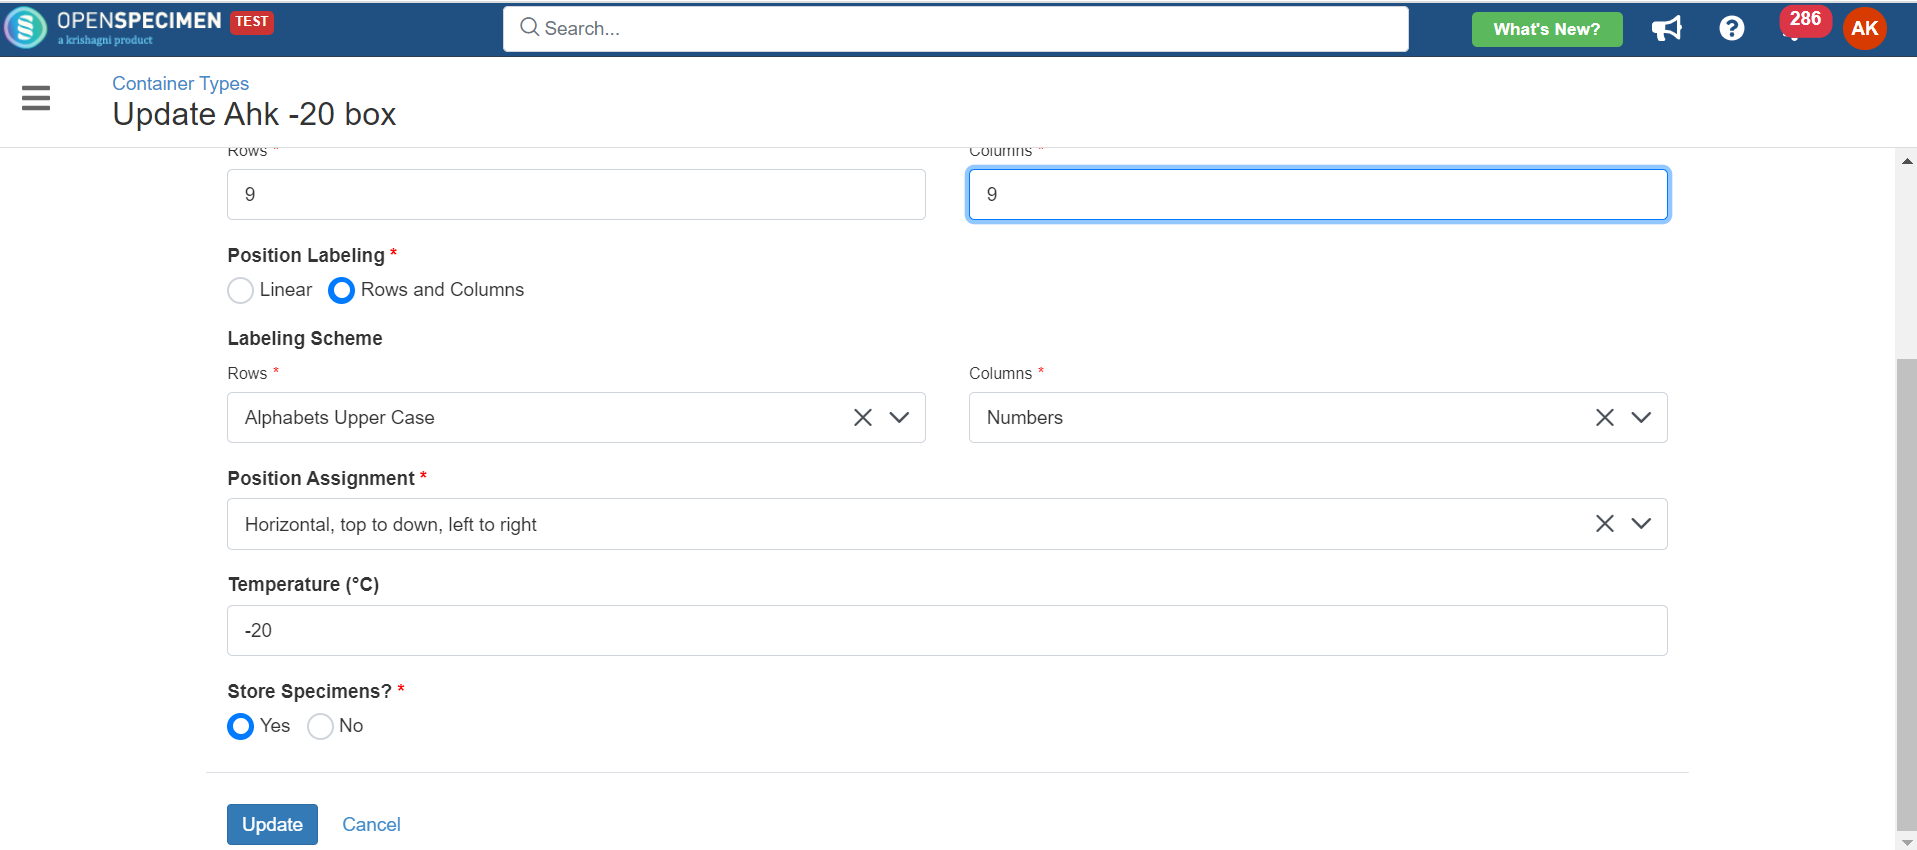 |
Delete container types in bulk
You might want to delete container types created by mistake or are no longer in use. From v6.1, OpenSpecimen supports deleting multiple container types. To delete multiple container types -
Go to the 'Container Types' page Select the container types to be deleted. The search filters can be used to search for the container types to be deleted.
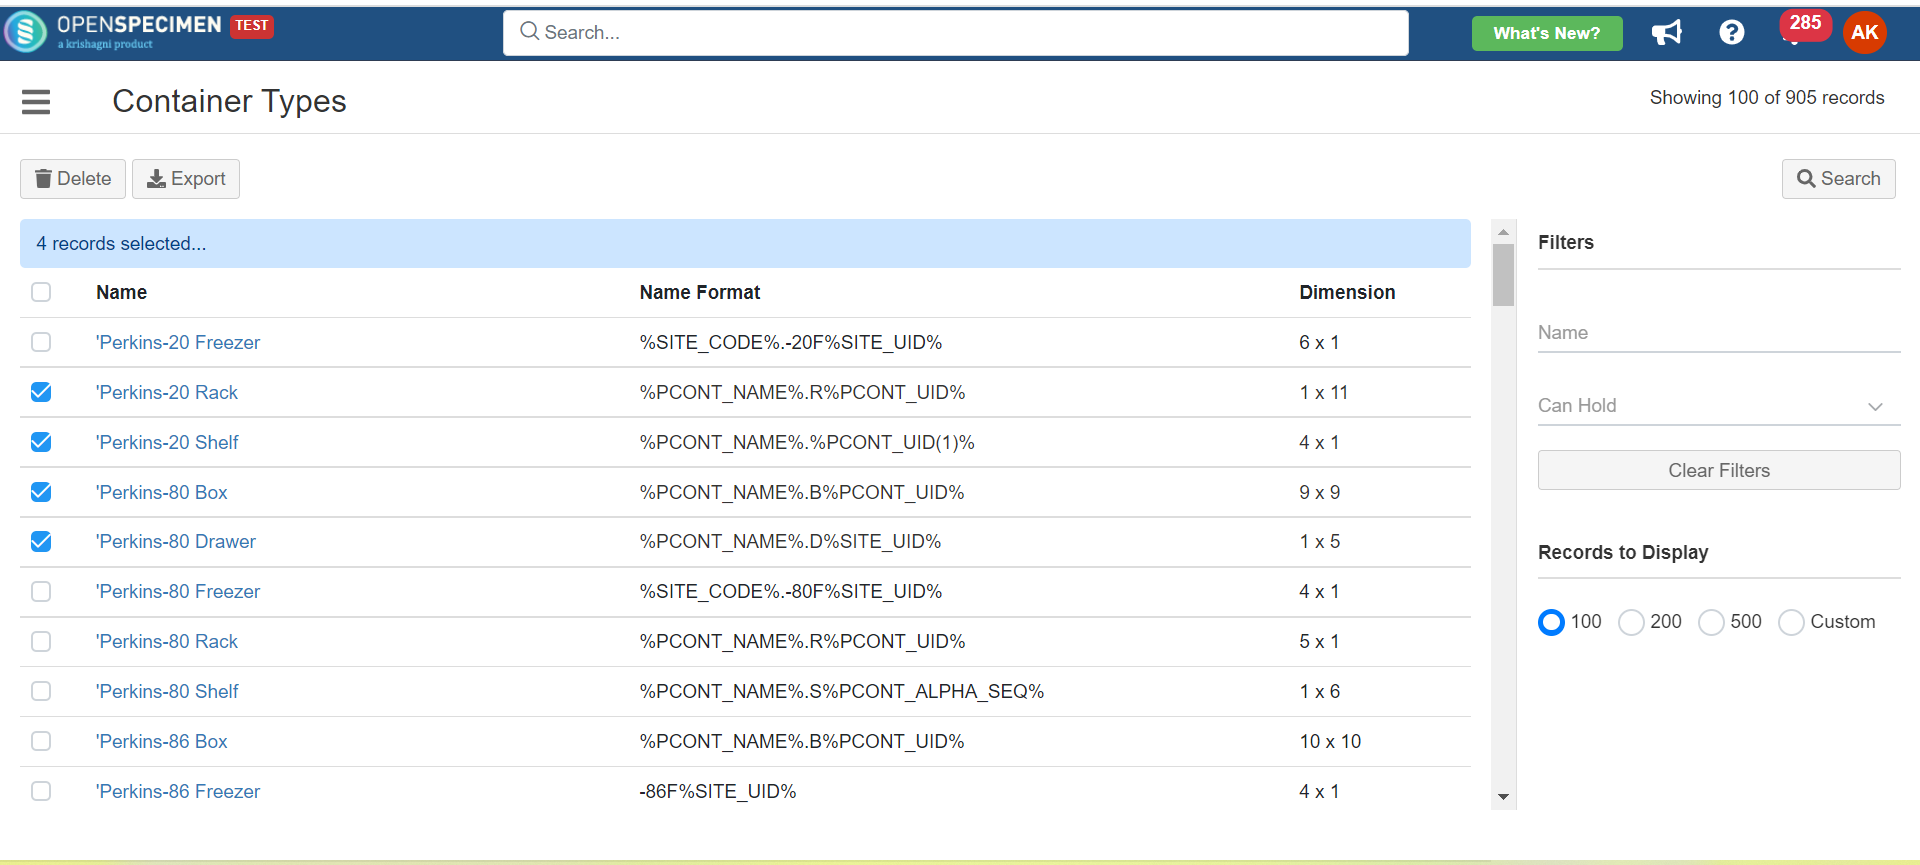 3. Click on the 'Delete' tab. A delete confirmation tab will pop up. 4. Enter the 'DELETE ANYWAY' words in the pop-up window and click on 'Yes.' 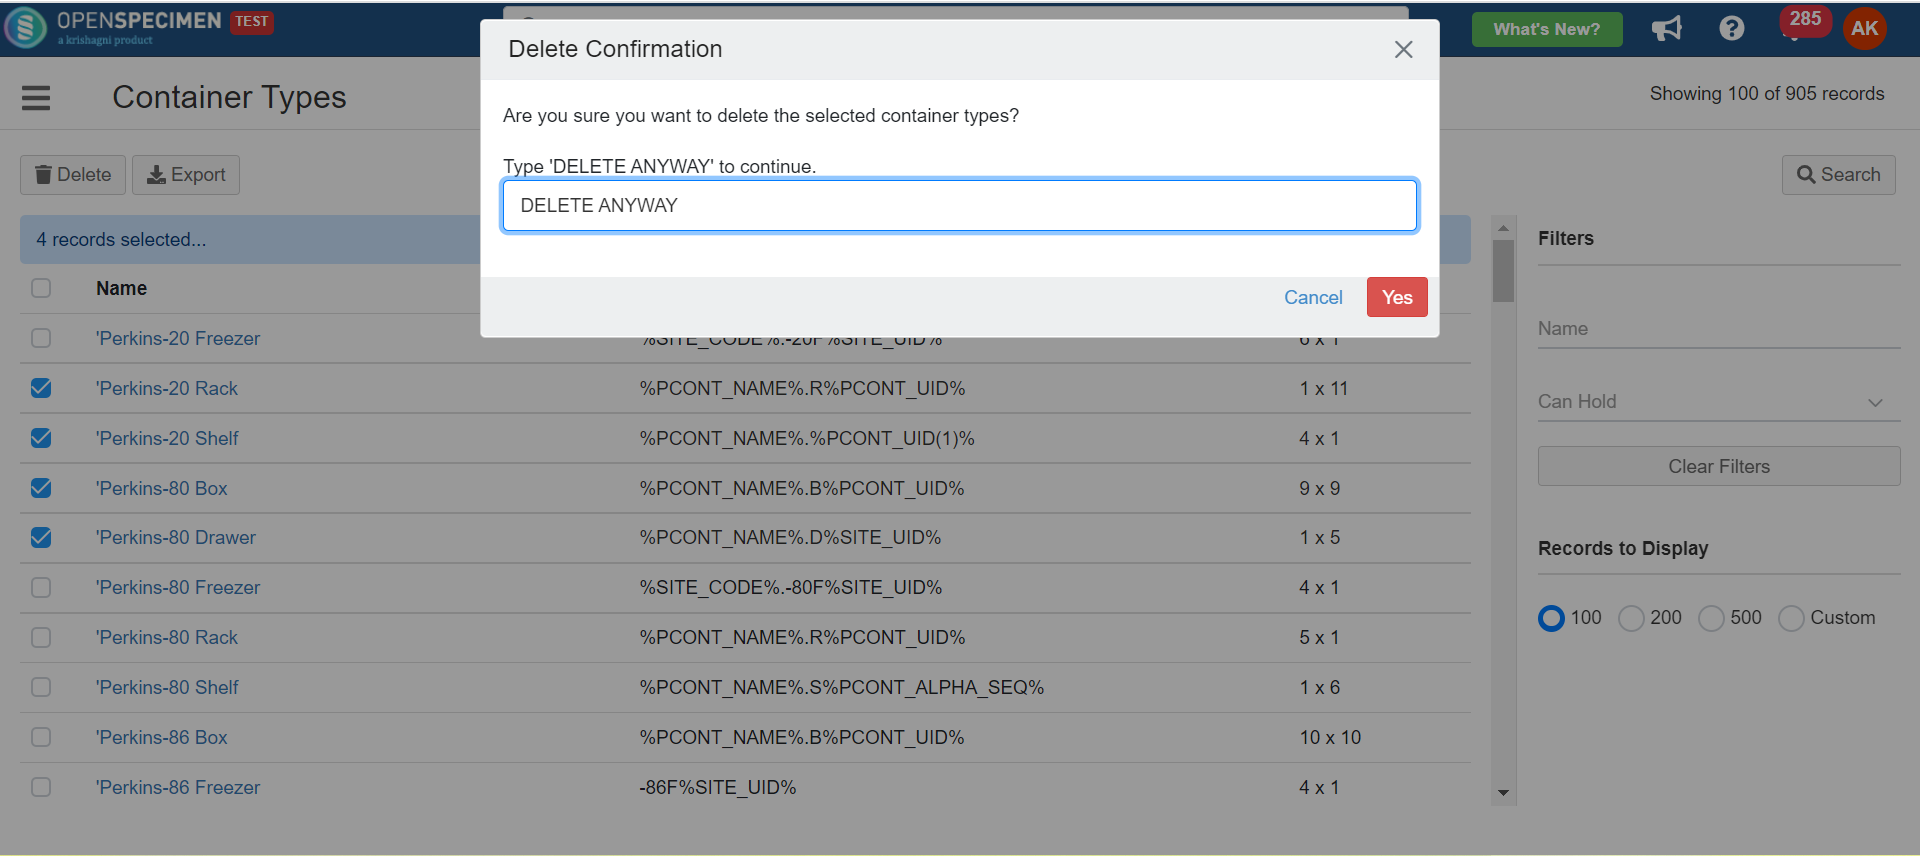 |
Export/Import Container types in bulk
From v6.1, OpenSpecimen supports exporting container types in bulk. This is useful when container types are set up on the test server and have to be moved to the production server.
To export container types: Go to the 'Container Types' page Select the container types to be exported. The search filters can be used to search the container types to be exported. Click 'Export'. This will export a CSV file.
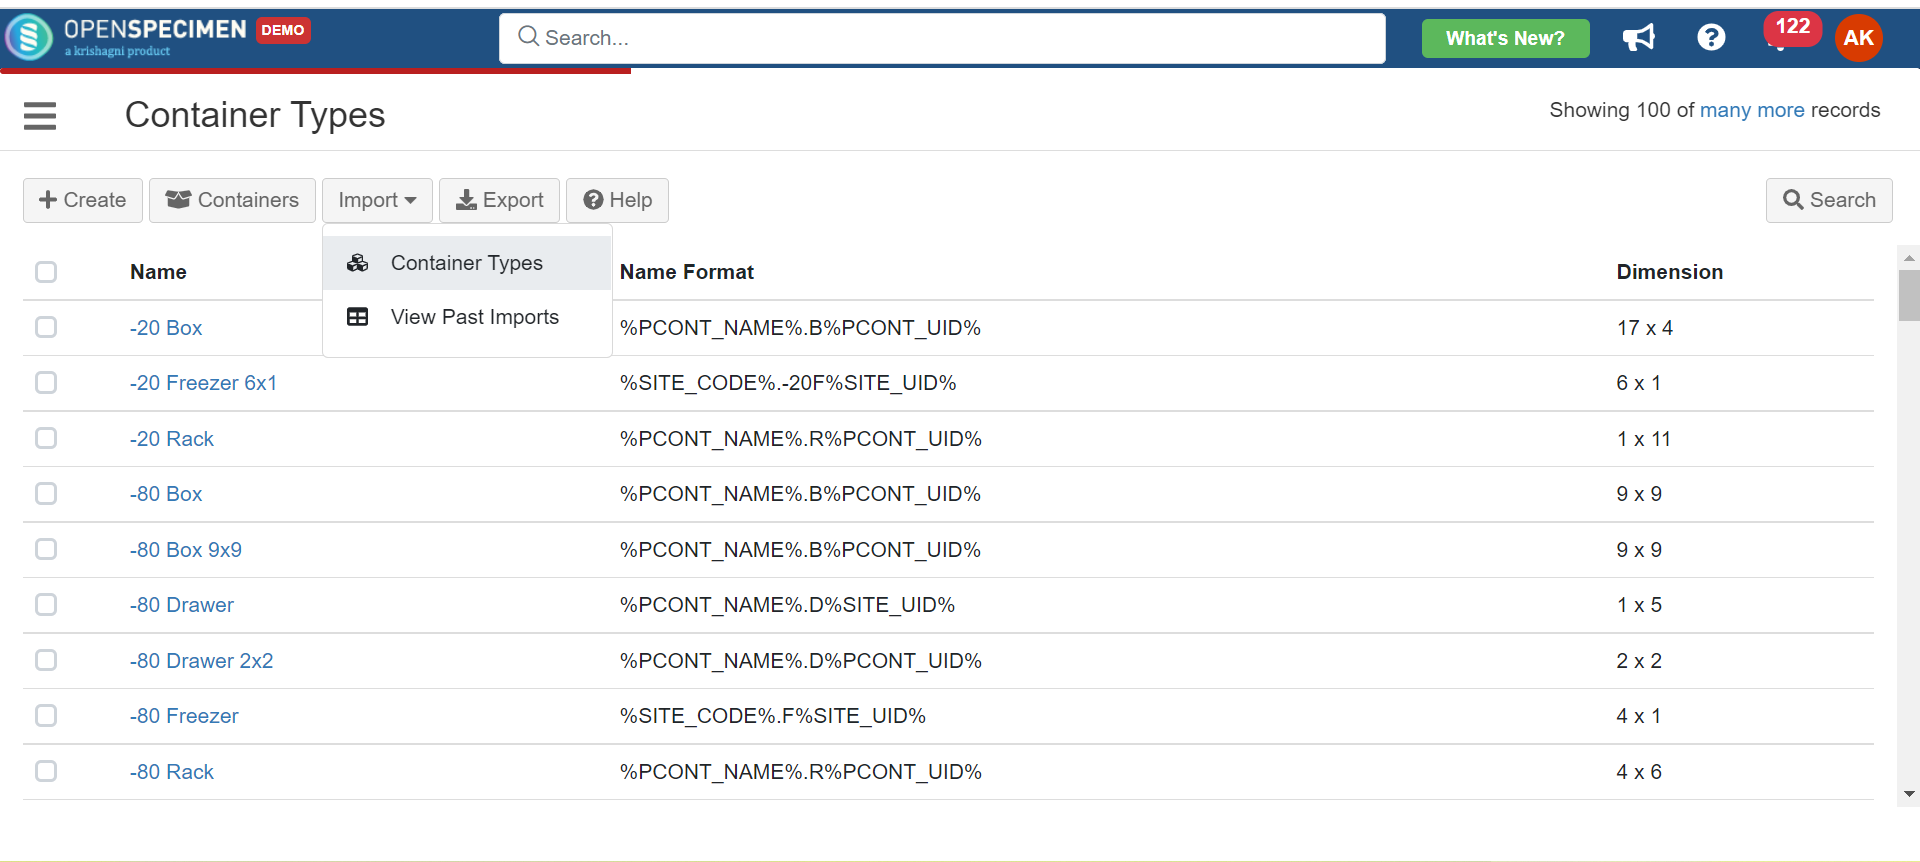
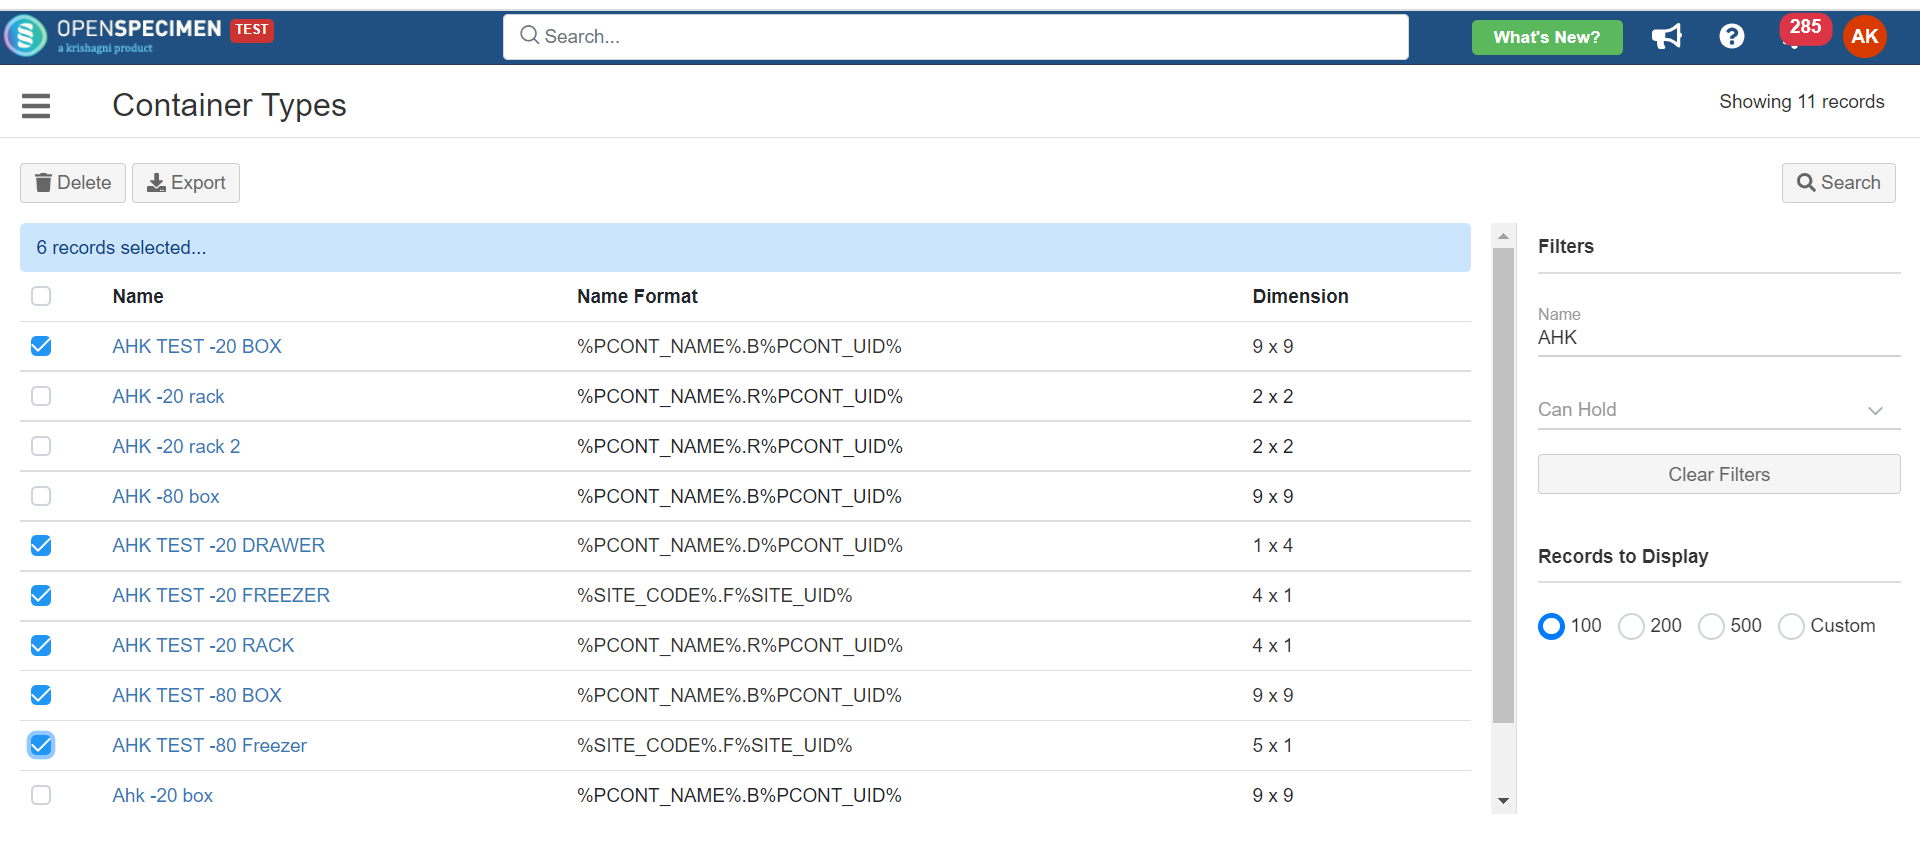 To import container types: Go to the 'Container types' page of another instance of OpenSpecimen where the container types are to be imported. Click on 'Import' and select 'Container Types'.
 3. Upload the CSV file. 4. Click 'Validate and Import' 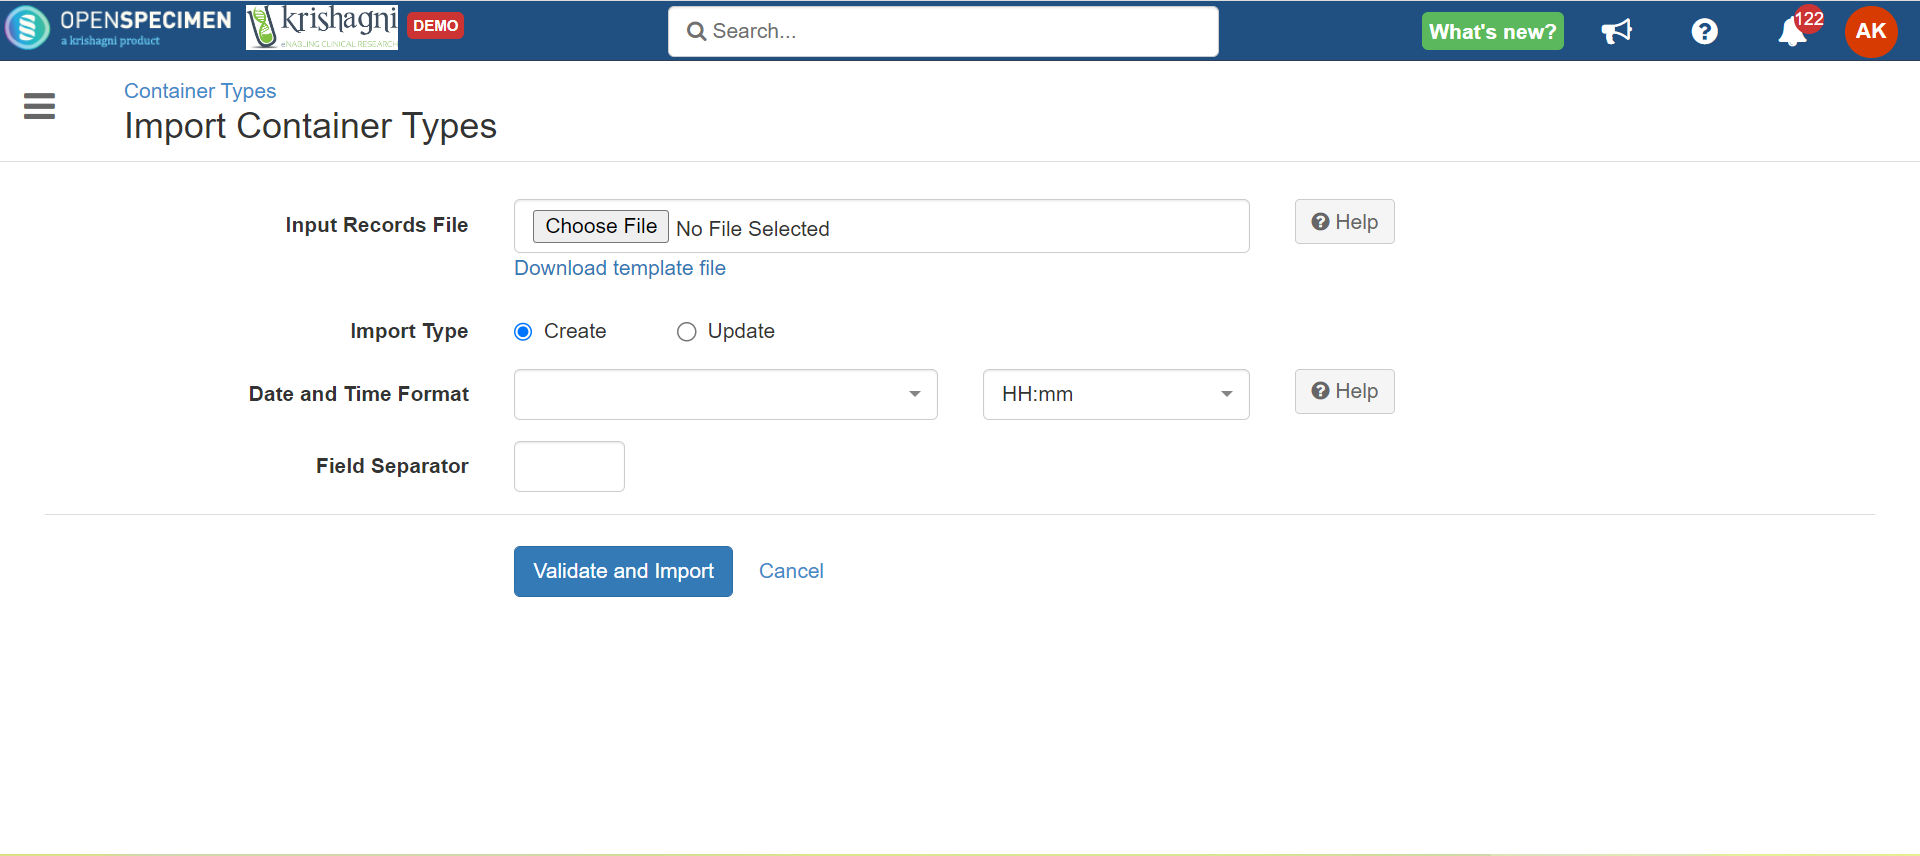 |


