Self Sign Up
If you are a new user and want to sign up to access OpenSpecimen, go to the dashboard page and click on the 'Sign Up' button.
Click here to expand...
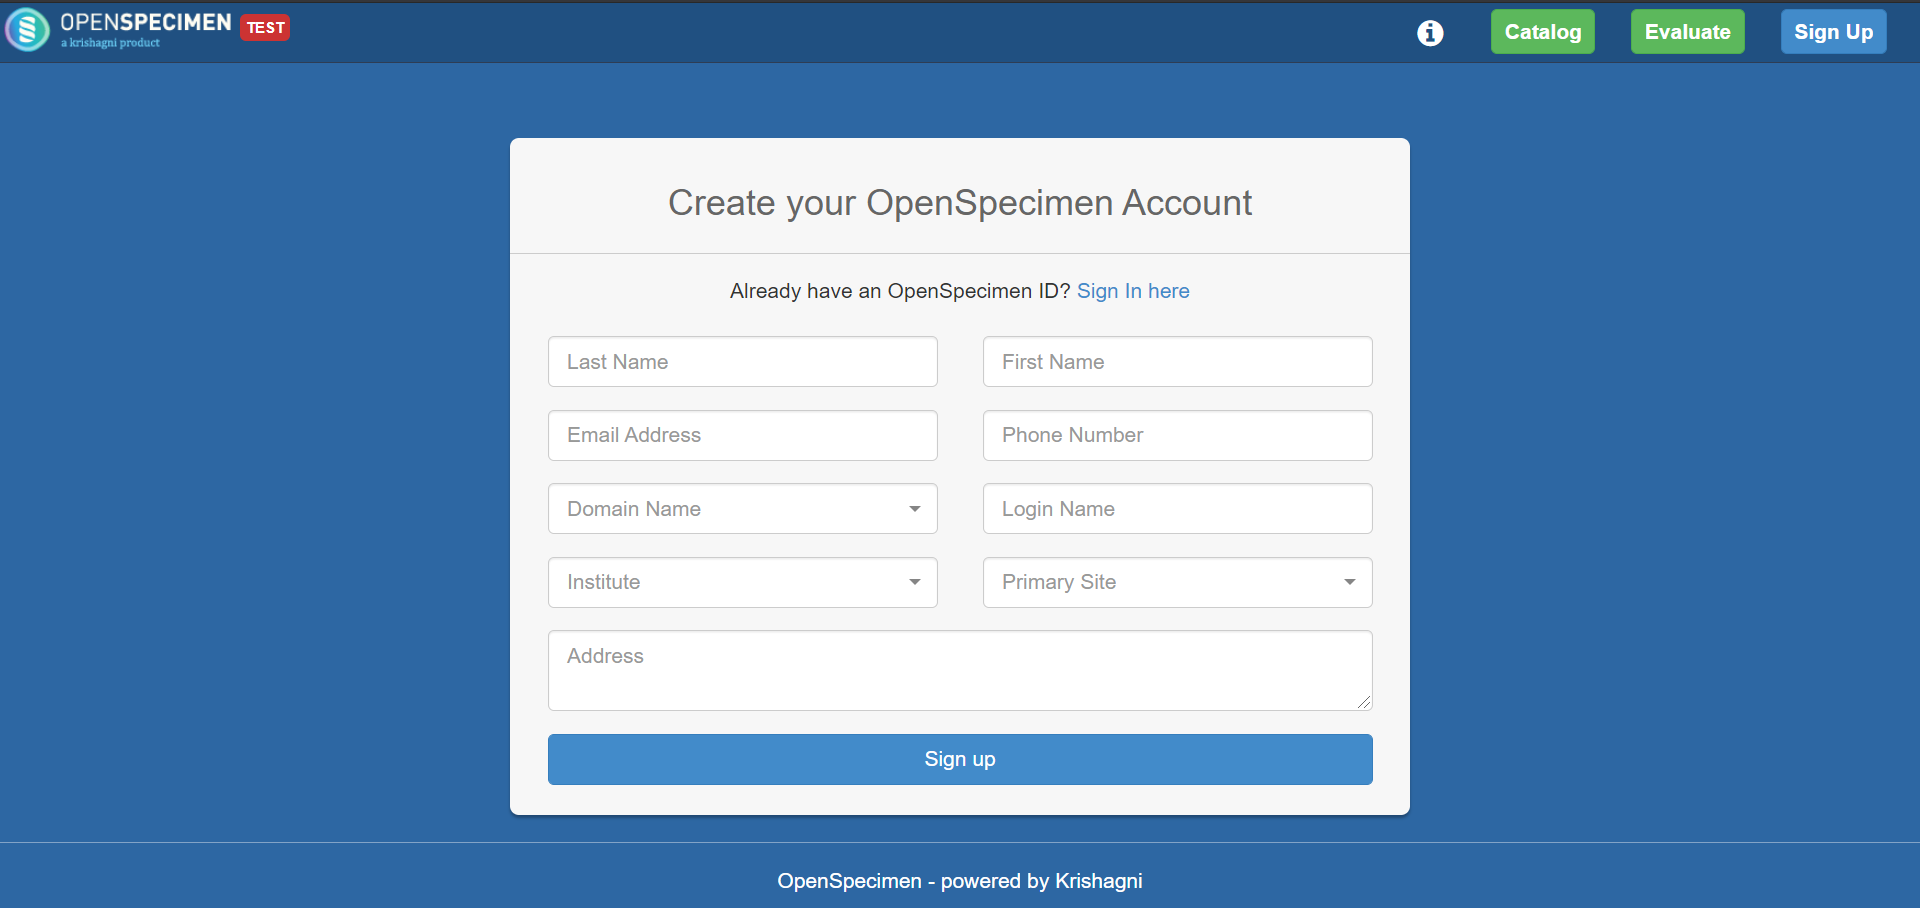
Fill up details and click on 'Sign up.'
Once you sign up, the admin will receive an email.
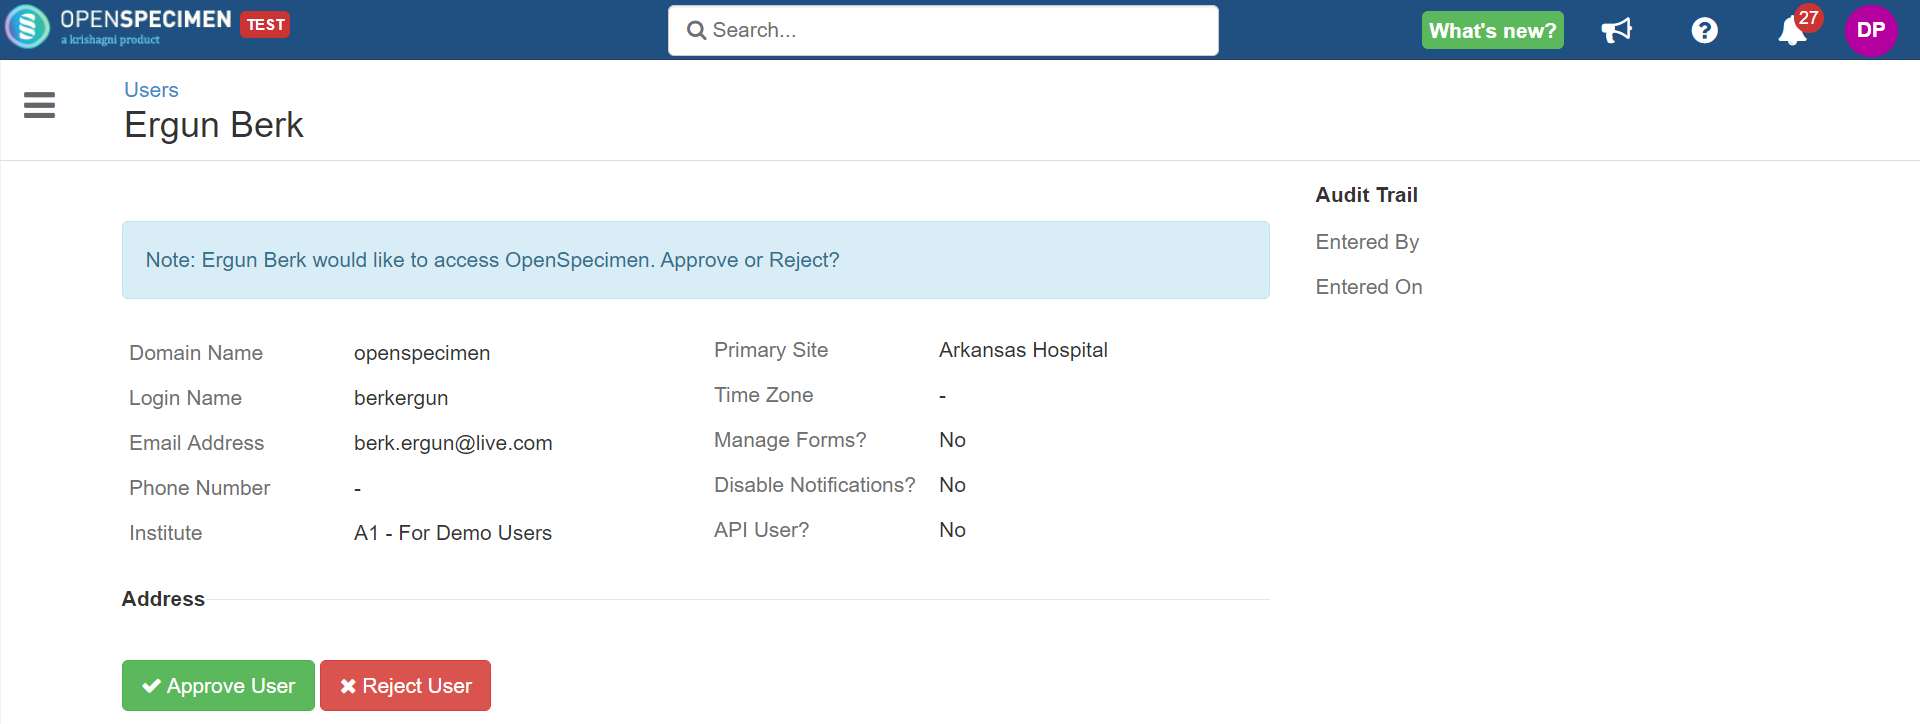
- Admin can approve your user account, assign roles and privileges.
- Once approved, you will receive an email with the login information and how to set up their password.
- If your request gets rejected, you will be notified via email.
Create
Types of Users
| Type | Description |
|---|
| Super Administrator |
|
| Regular User |
|
| Institute Administrator |
|
| Contact User |
|
Data Entry Users
Administrators (Super/Institute/Site) can create authorized users and provide them with specific access privileges in OpenSpecimen. These users can be Site Managers, Biobank Managers, Laboratory Managers, Clinicians, Technicians, etc.
To create a user -
Select the 'Users' card from the home page or menu and click 'Create'. The type of users depends on their role and their respective responsibilities.
Type of OpenSpecimen users:
- Super administrator: Has access to all the data and operations across all the sites and institutes in the application.
- Institute administrator: Has access to all the data and operations within all the sites of the institute to which the user is associated.
- Regular: Selecting 'Regular' will allow you to assign different roles to the user other than super and institute admin.
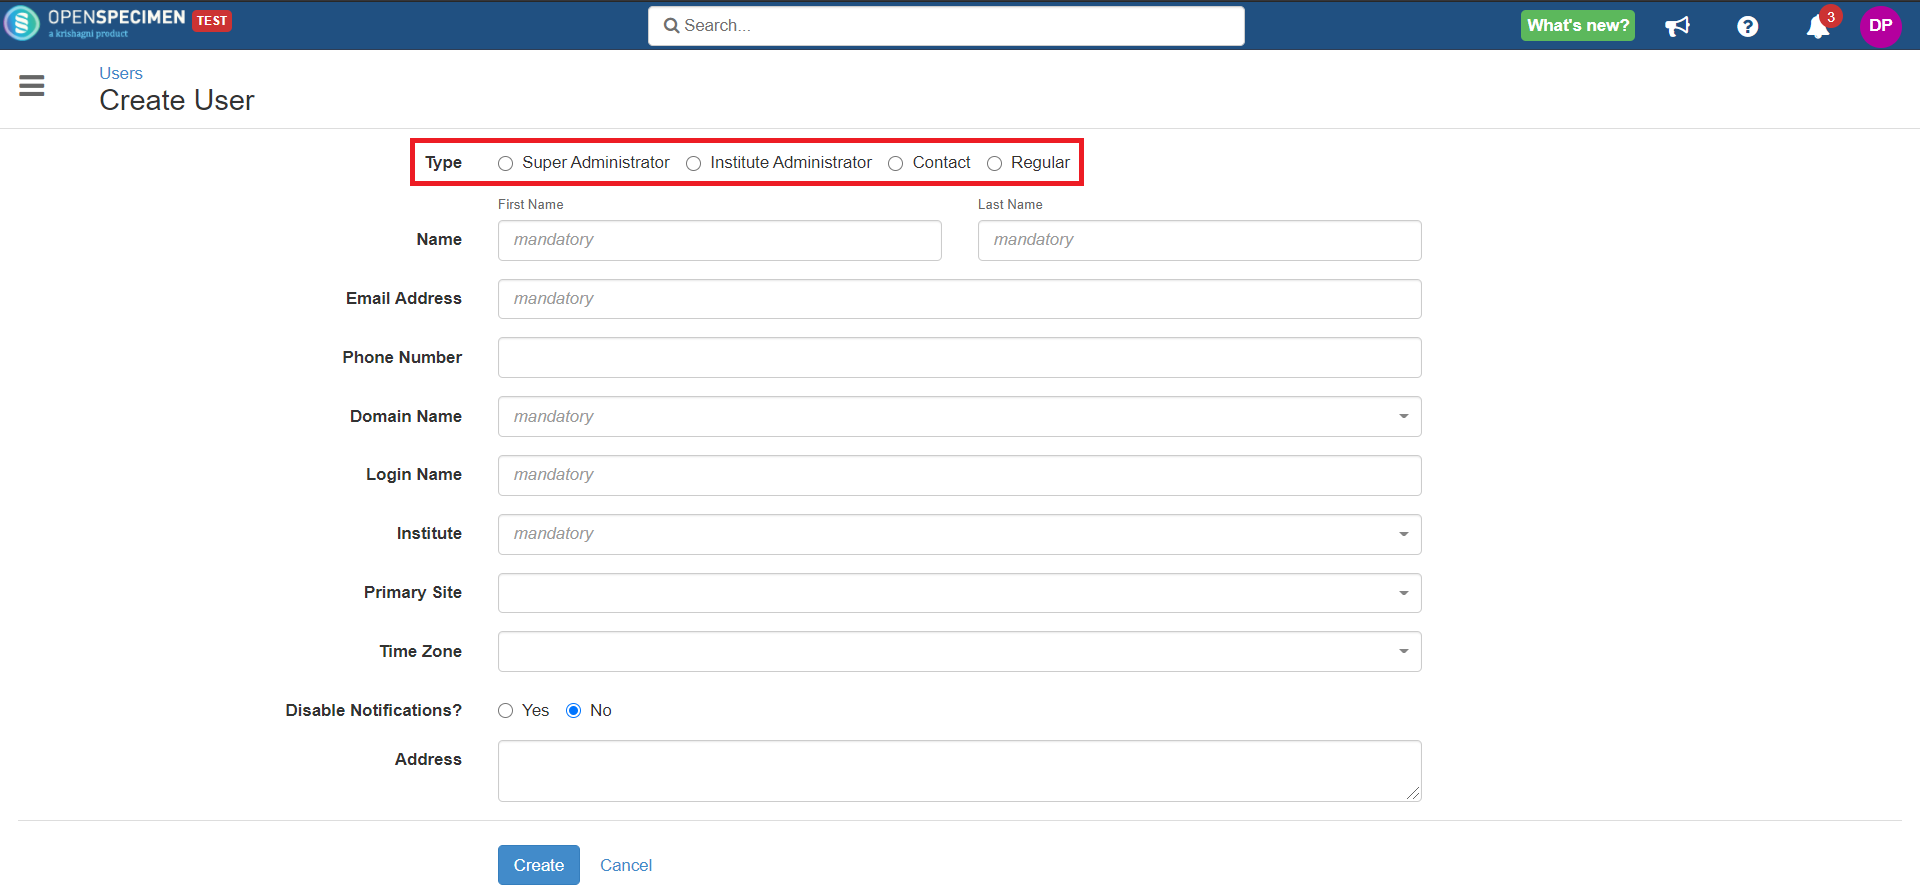
Some users (e.g., PI of the study, external lab members, nurses, etc.) do not log into OpenSpecimen. For such types of users, you can create a 'Contact' user type.
Click here to expand...
The contact users can be used in the below fields:
- CP PI or coordinator
- Specimen events
- DP PI or coordinator
- Order requestor
- Custom form
- Project PI
Assign Roles
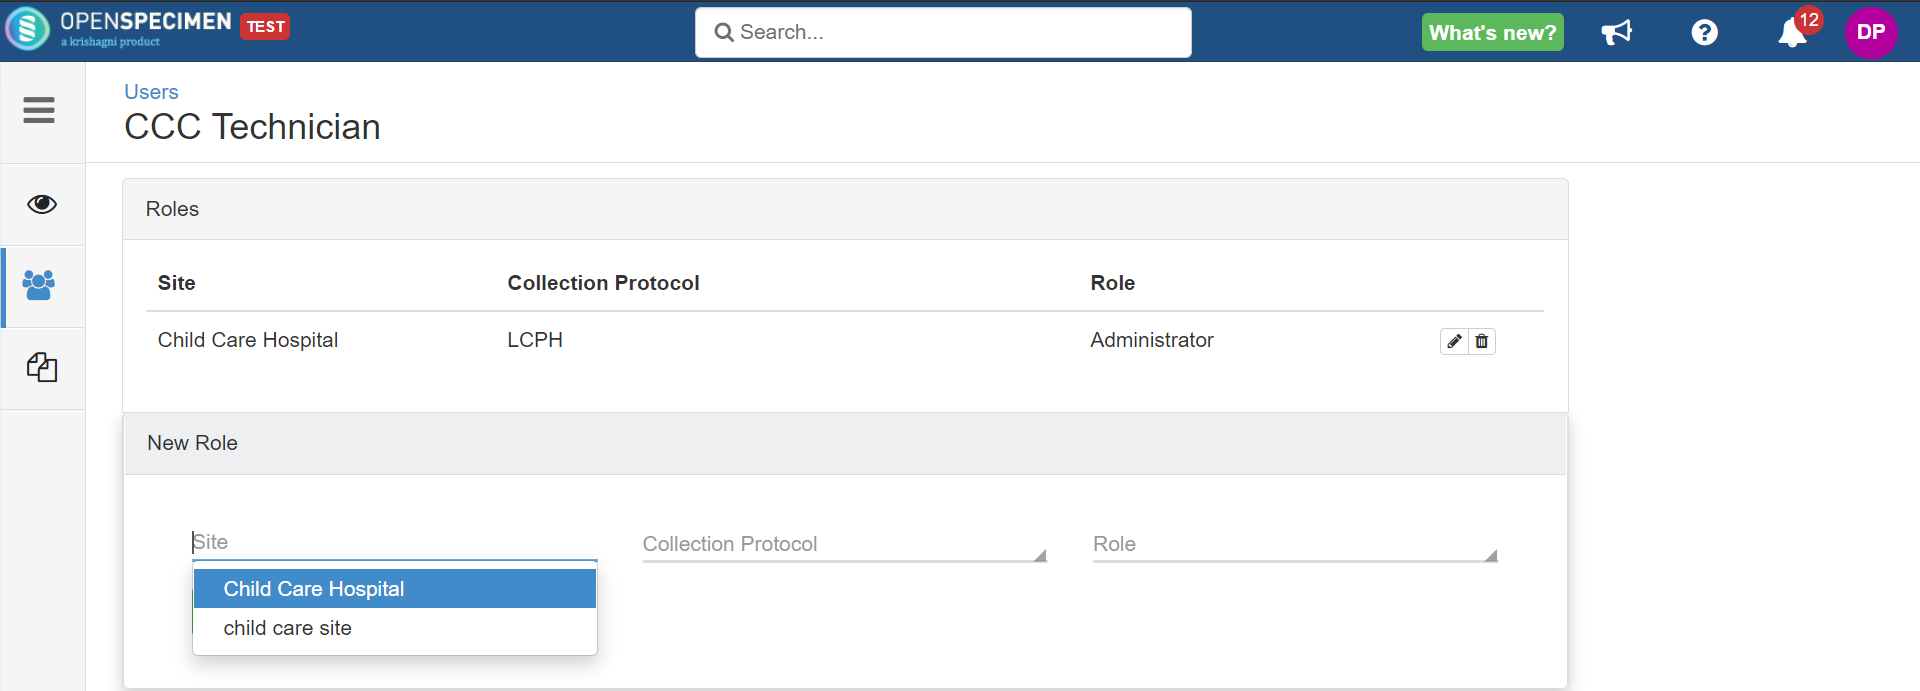
Once you create a regular user, you will need to assign roles like technicians, tissue bankers, etc., by clicking on the 'Roles' tab from a specific user overview page.
Click here to expand...
The roles tab will only appear if 'Regular' is selected under the 'Type' field on the 'Create users' page. If the user is a super administrator, institute administrator, or contact, the roles tab will not appear.
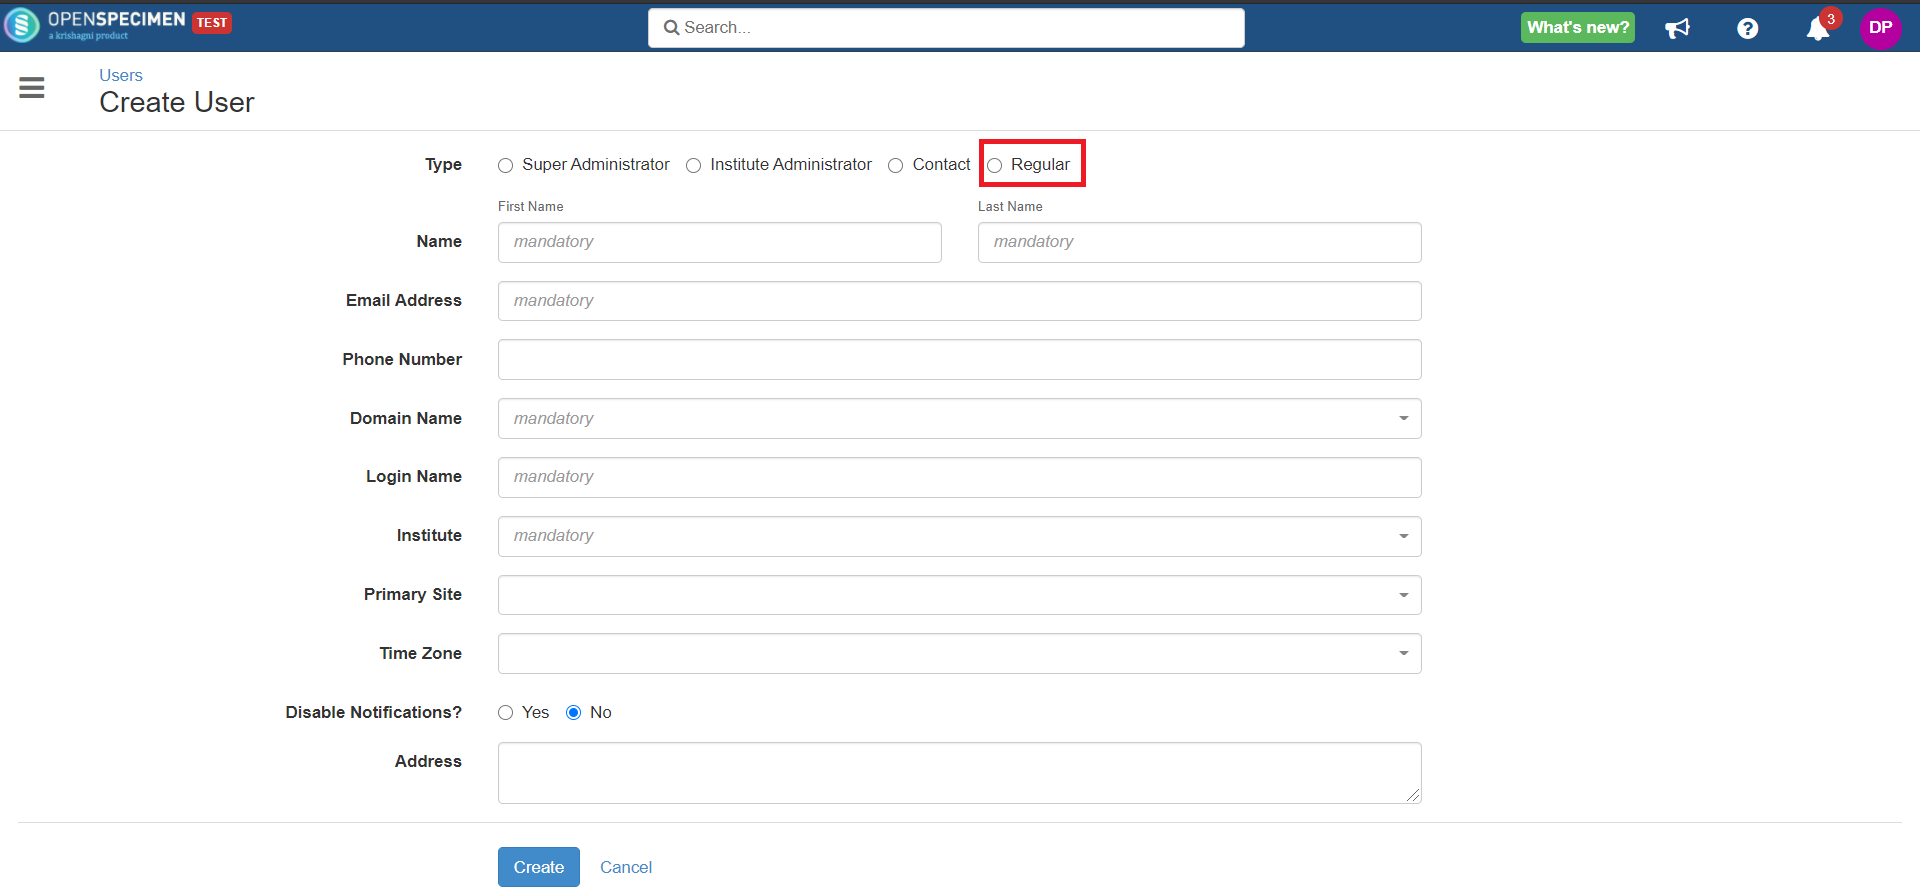
Steps
- Click the 'Roles' tab on the user overview page.

- Click 'Add role' and start entering data. Users can either assign privileges to all (current & future) CPs or specific CPs of a site.

For more information on default roles and privileges, refer to the wiki page.
Edit
You might want to edit user details like user's Institute, primary site, contact details, role, form management, etc. The super Admin can update all the profile attributes of the users.
Click here to expand...
To edit the user, log in as a super admin and go to the user overview page→ click 'Edit.

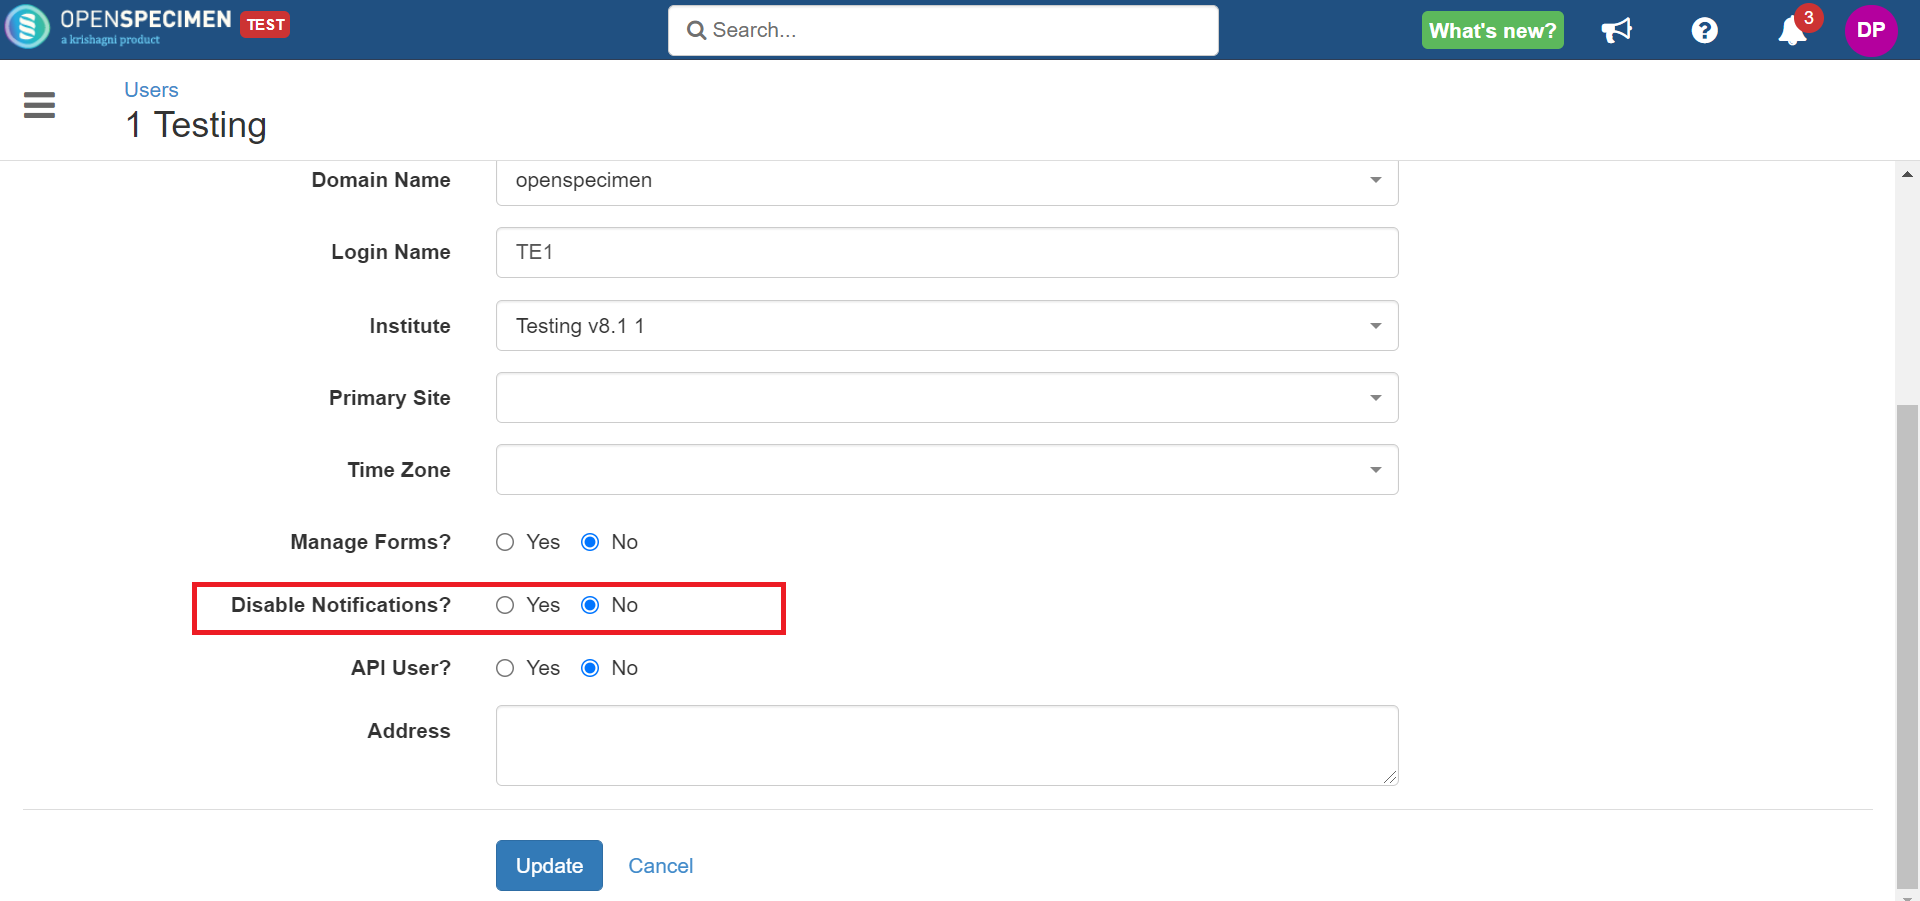
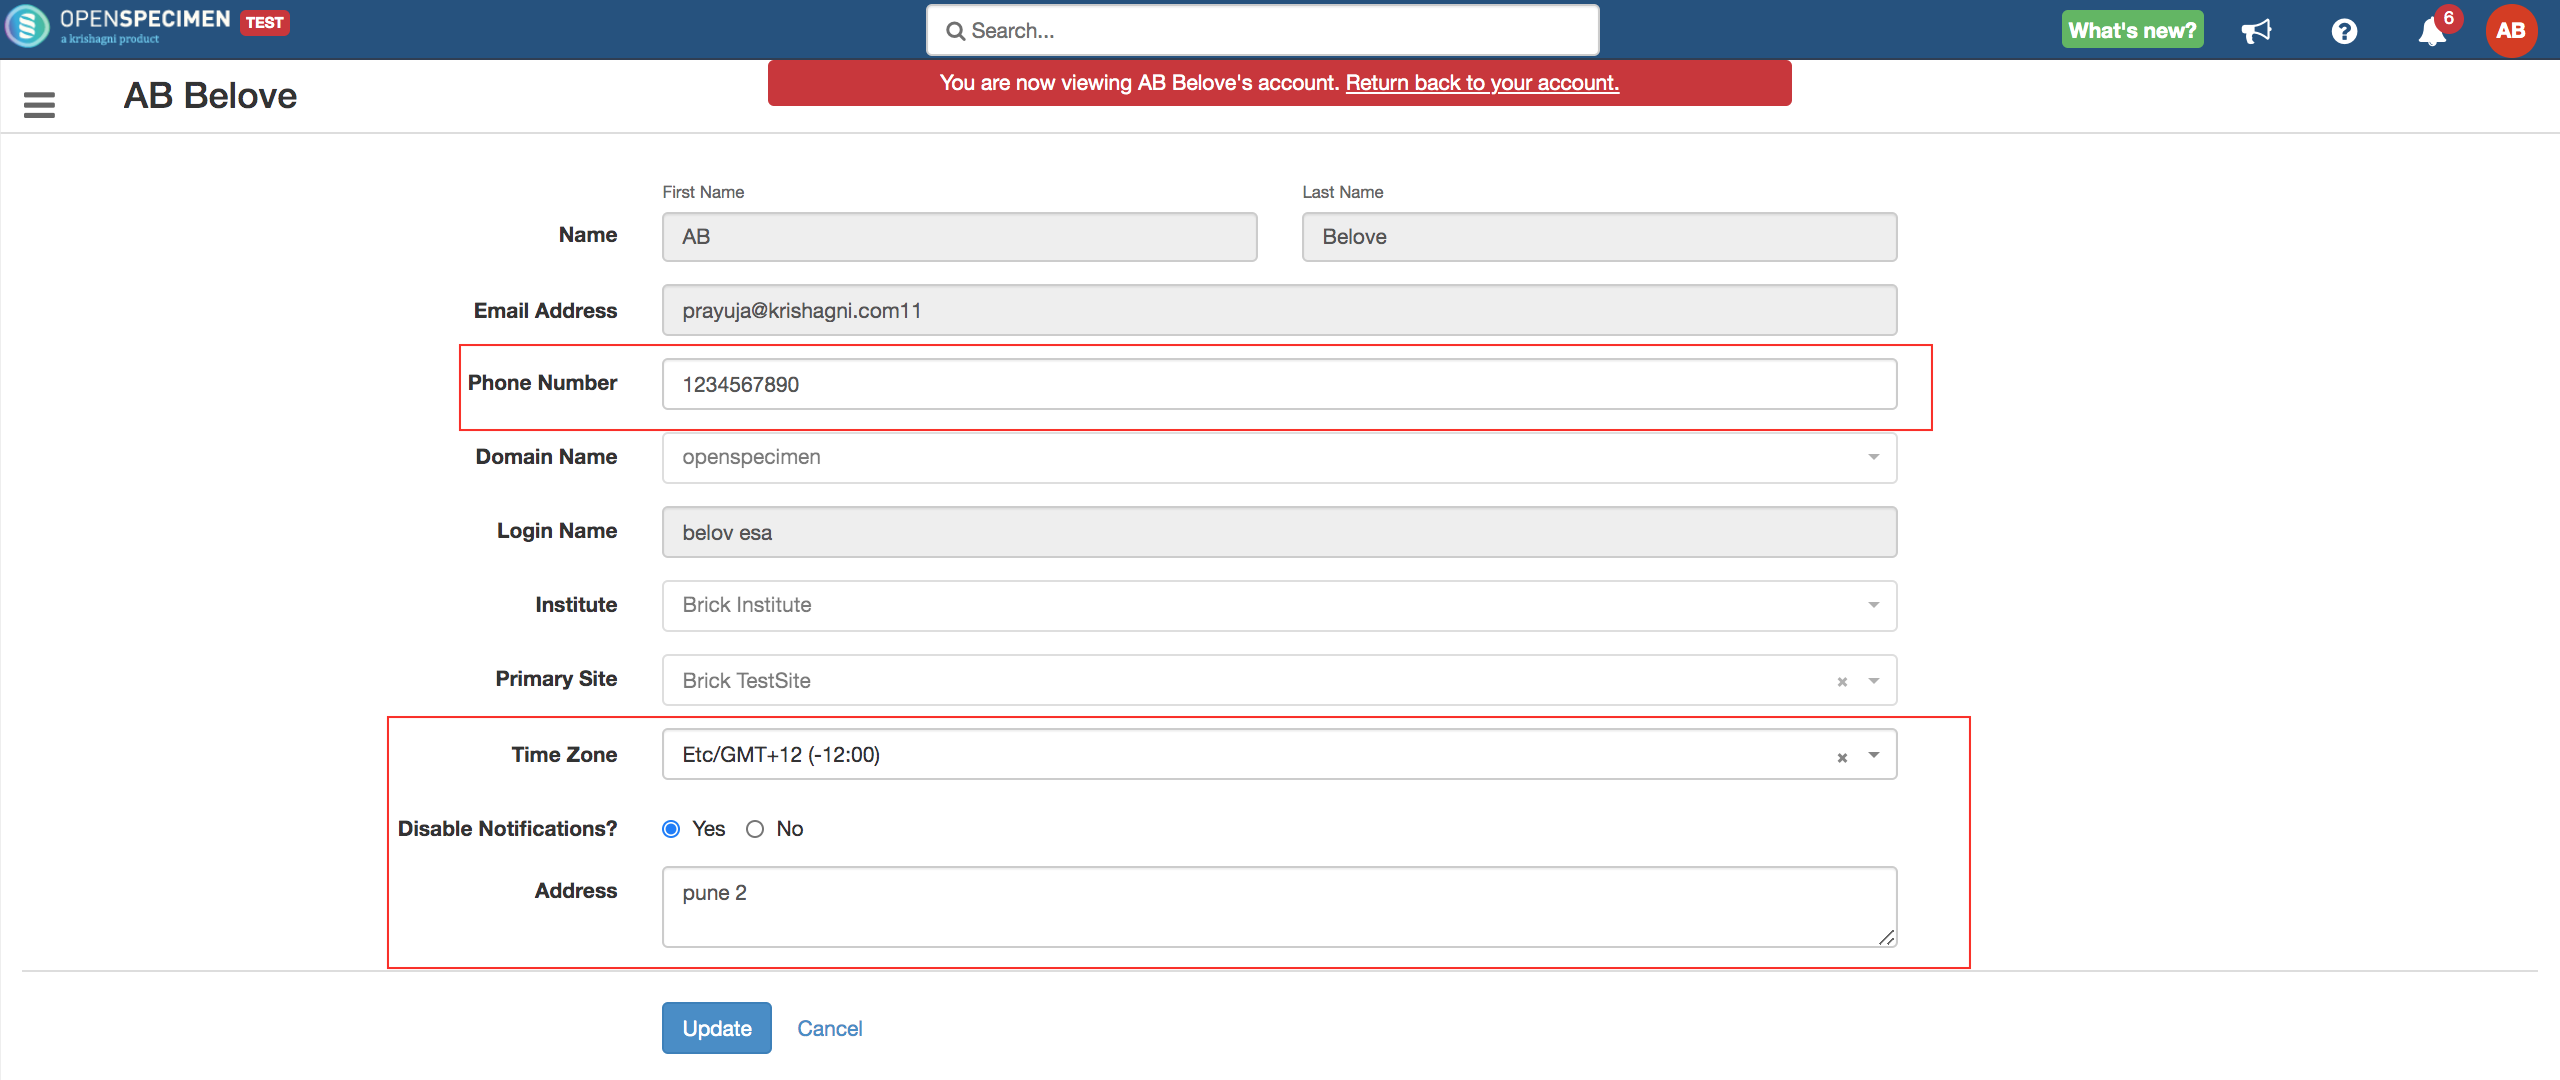
From v7.2, you can edit some basic details of their profile such as phone number, time zone, address, and notification settings. This will help regular users to do minor profile edits without bothering admin users. Rest fields will be uneditable to regular users.
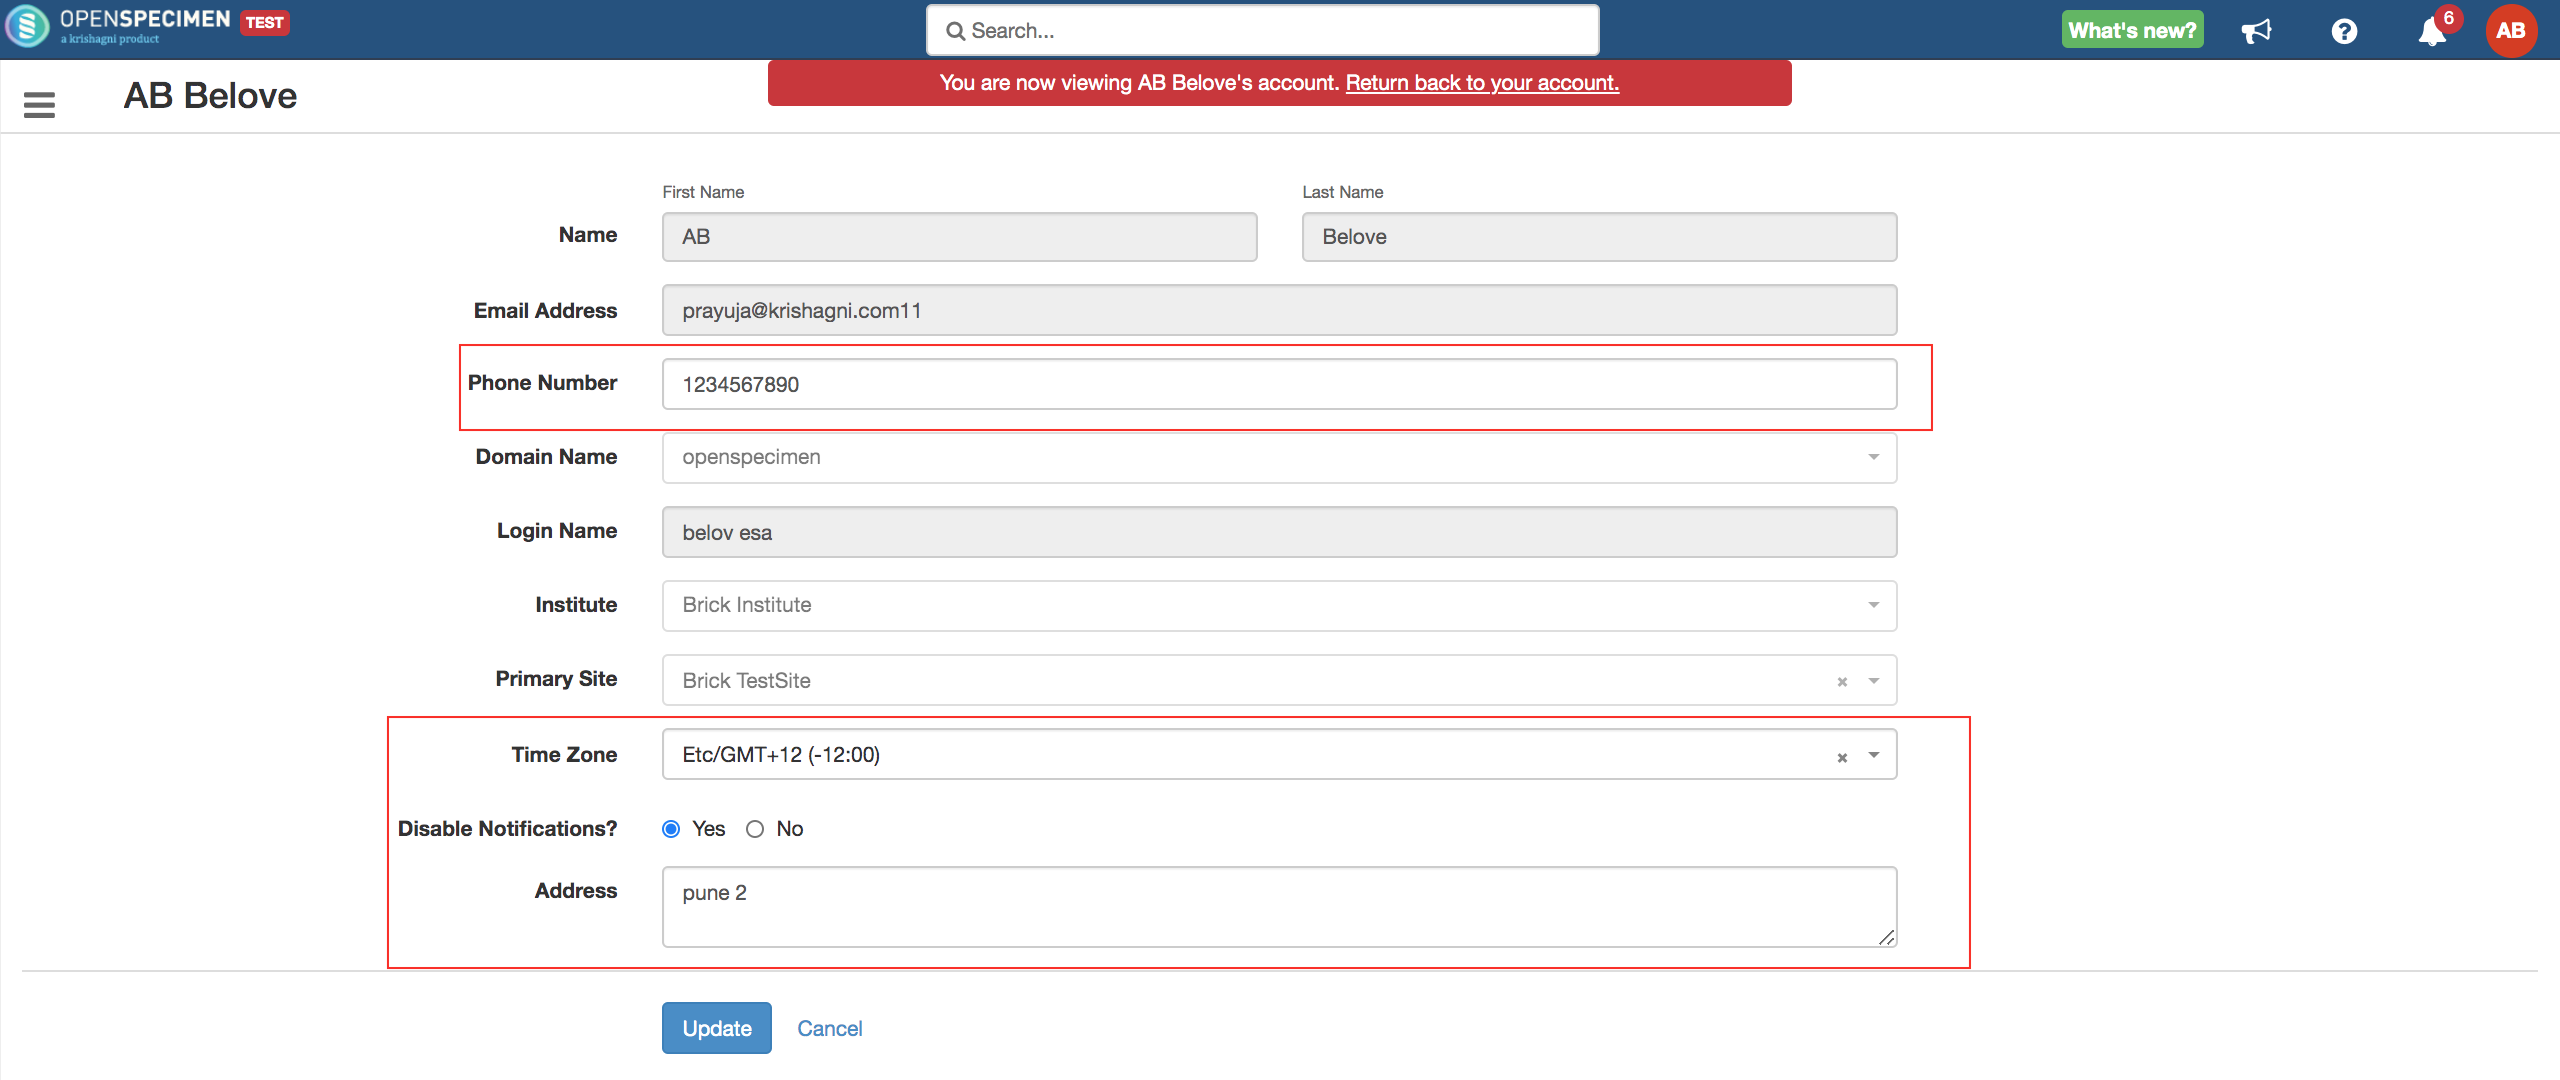
Steps to edit your own profile details :
- Log in to OpenSpecimen → Click on the 'User Profile' icon at the right-hand side top corner as shown below.
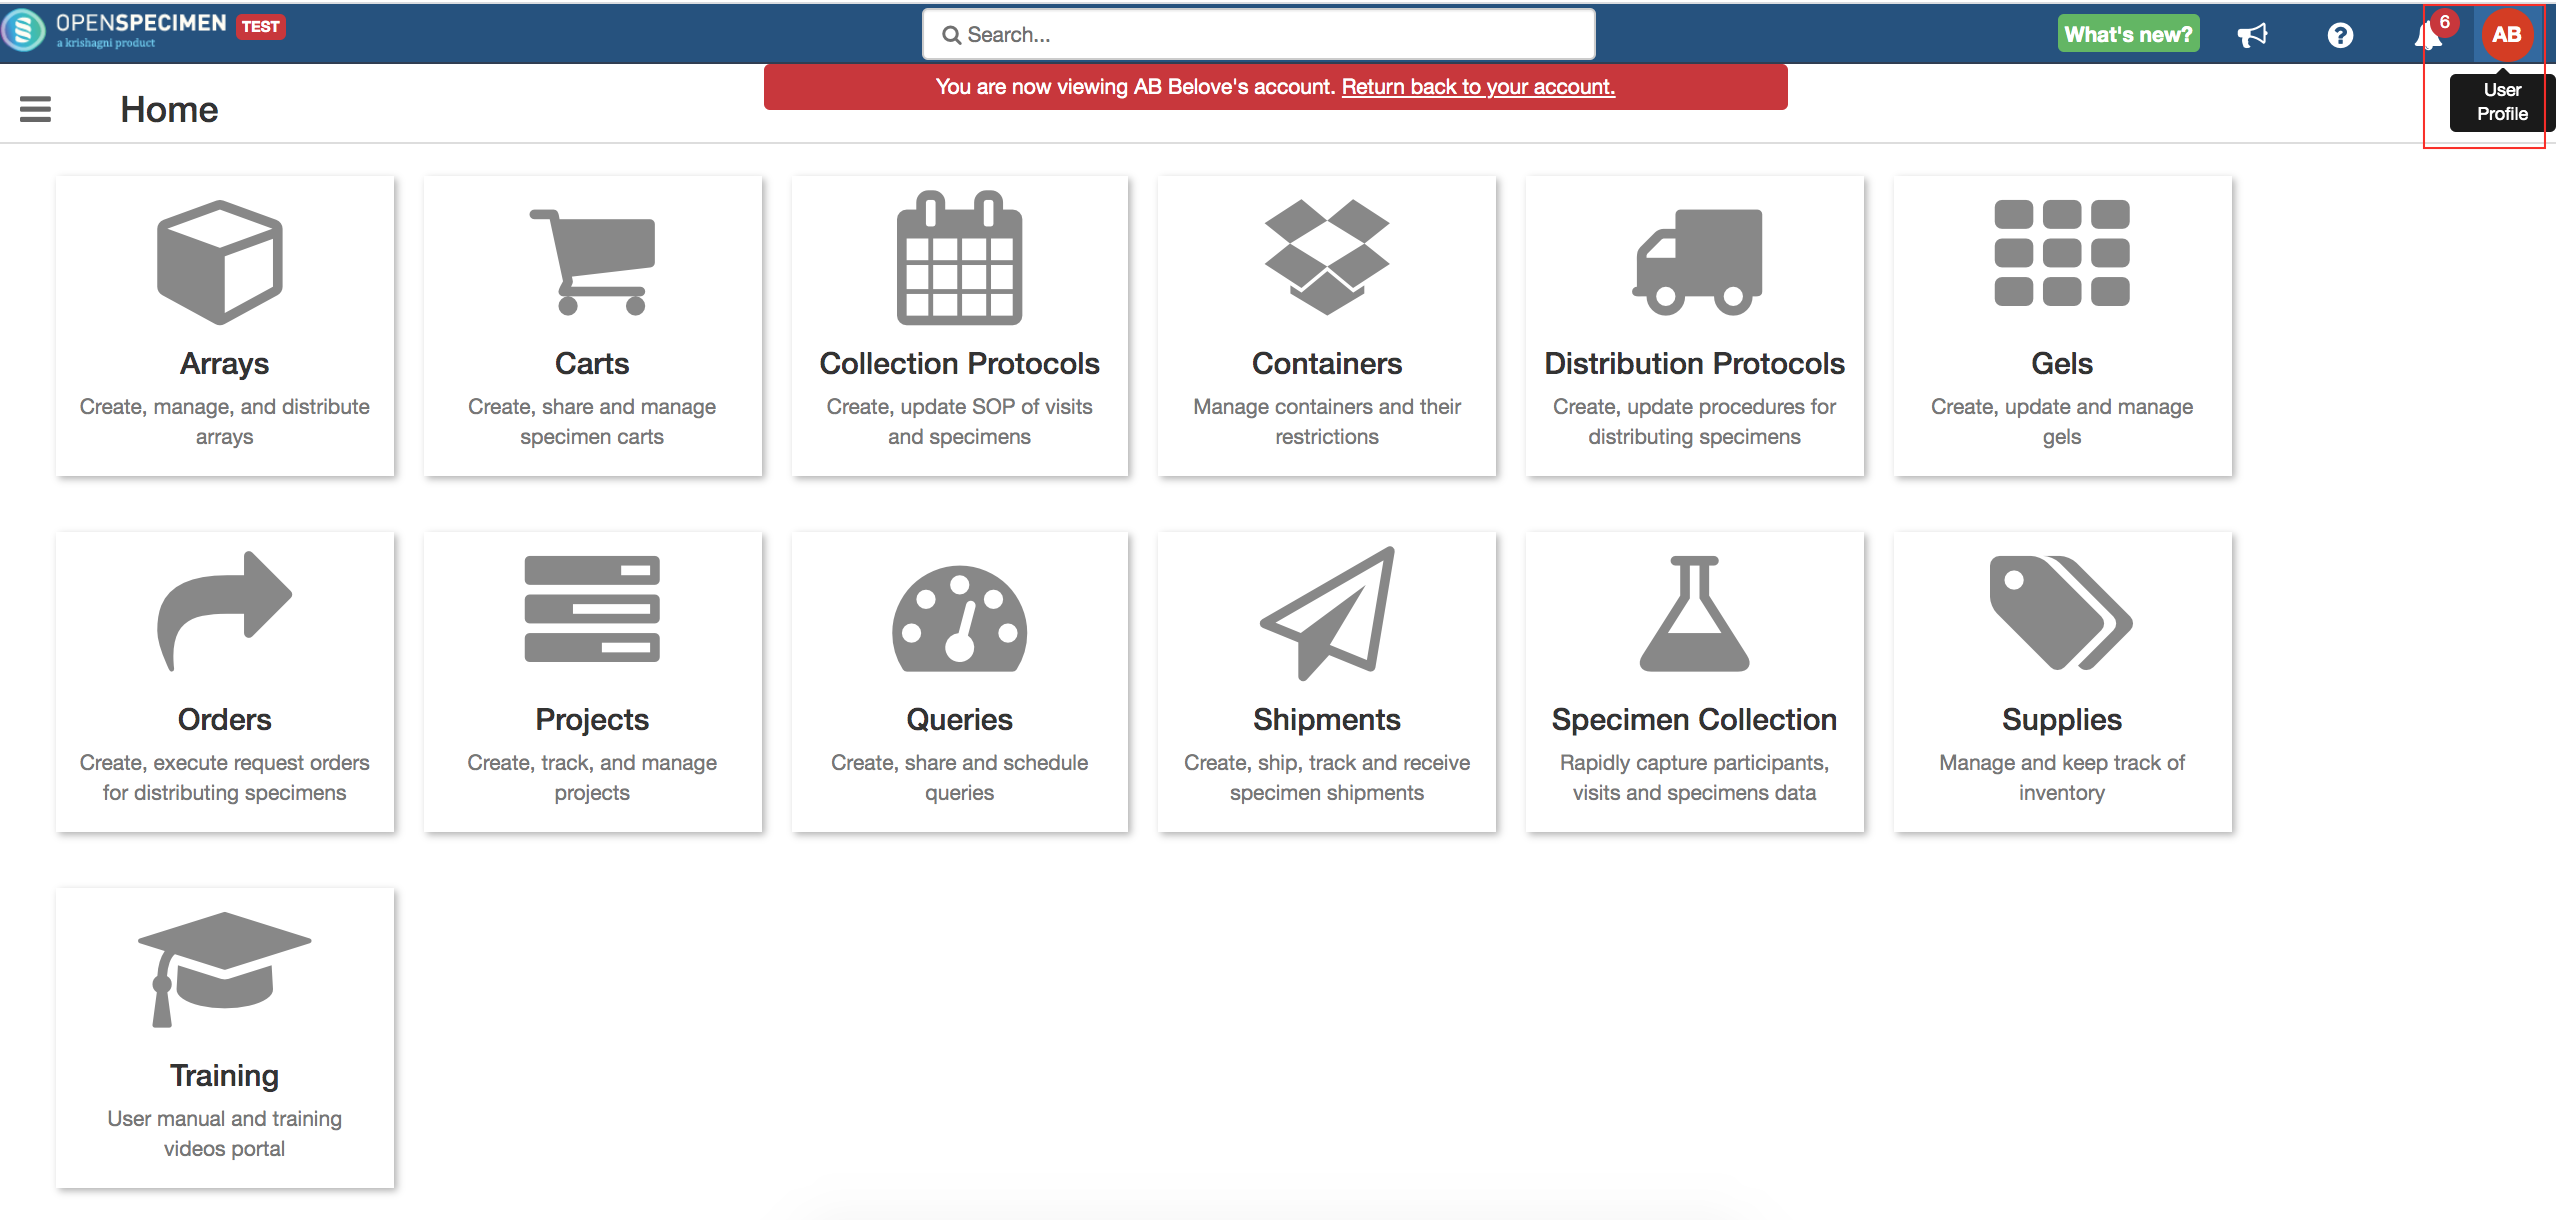
- Click on the user name as shown below.
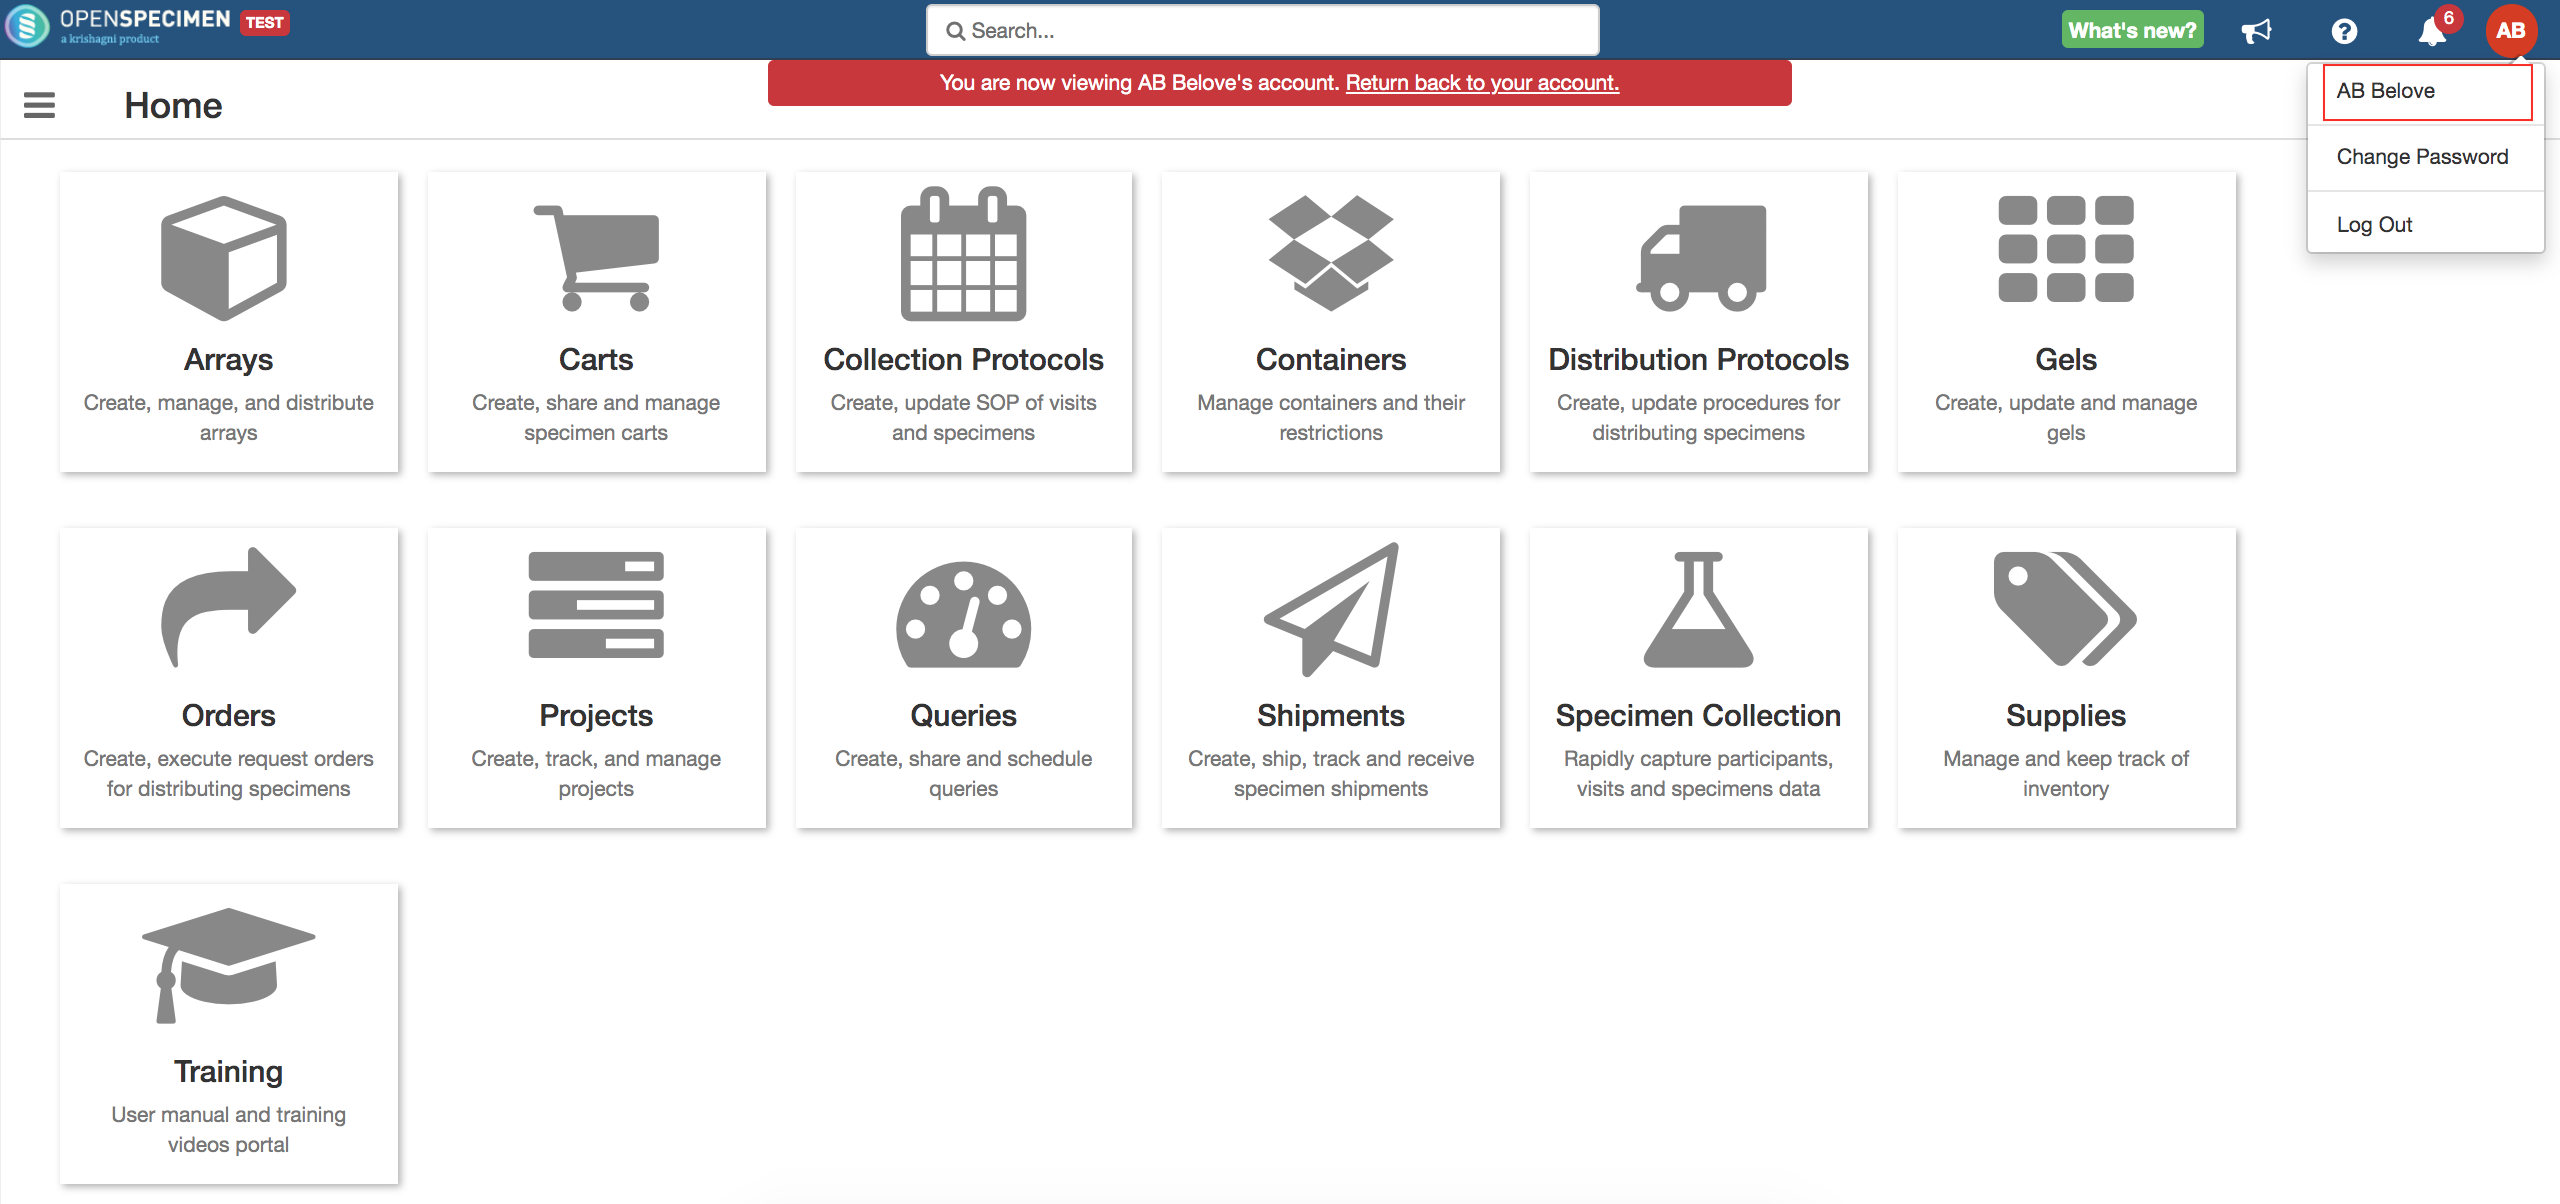
- Edit phone number, time zone, address, and notification settings → Update. Verify if the details are updated.
Lock / Unlock
Click here to expand...
User account will get locked in 3 cases:
- The user has tried maximum failed login attempts.
- The user is inactive for the 'N' number of days.
- Super admin forcefully locked the user account.
The system throws an error on UI about the account locked at the time of login. Locked users have to contact their admins to get their accounts unlocked.
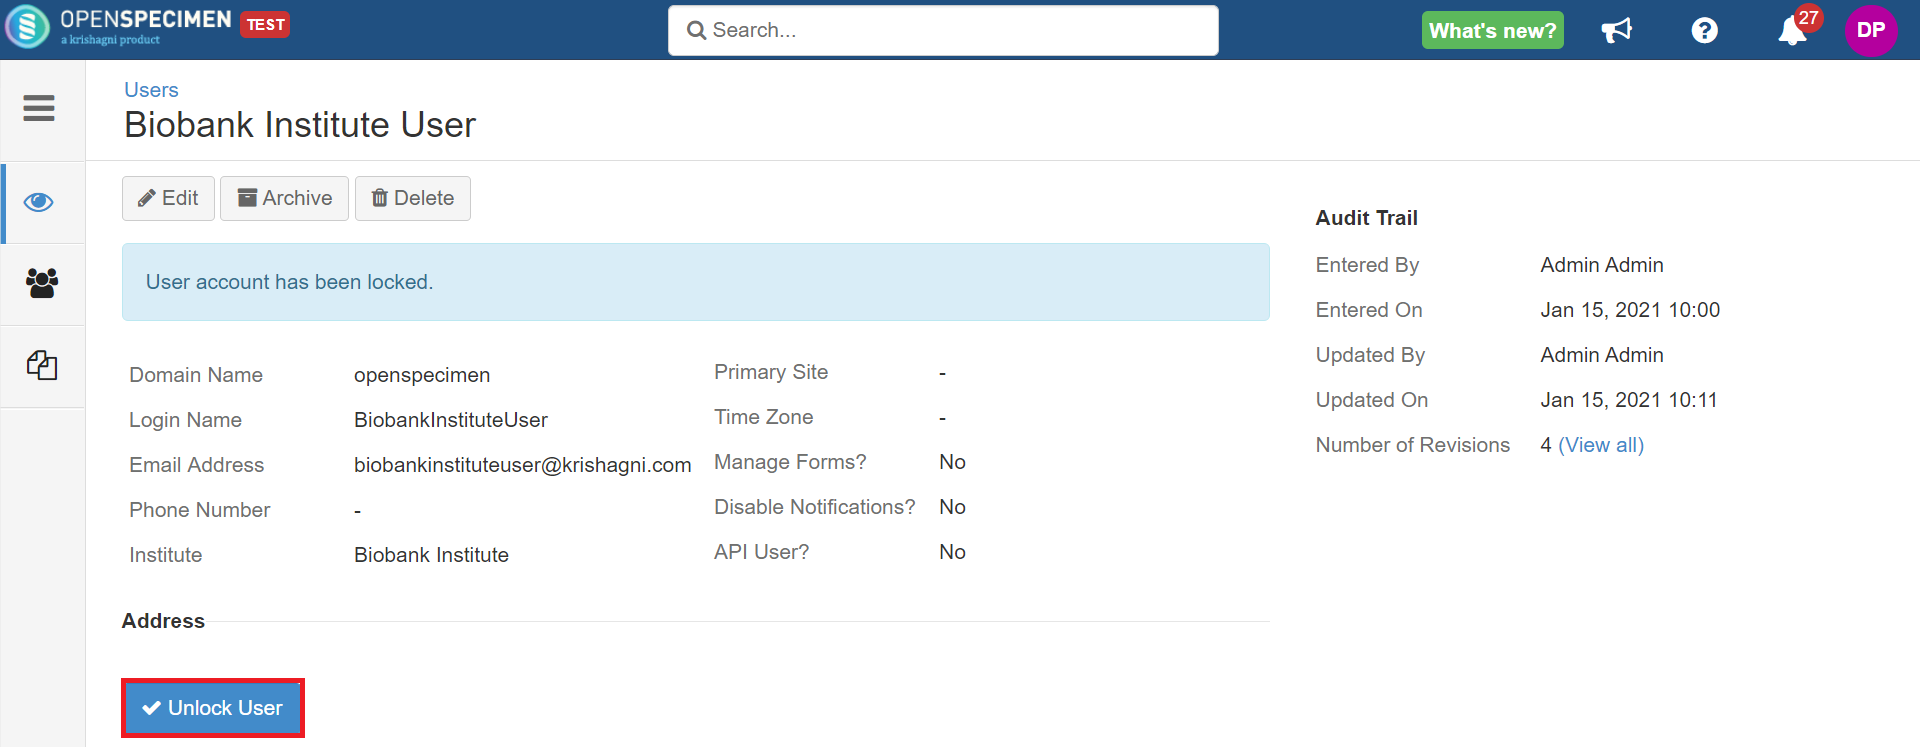
To unlock a user account, search for the user's account → From the user overview page, click 'Unlock'. Following these steps, a user will get an email notification that the account is unlocked. Super admin, institute admin, and site admin users can lock/unlock user accounts.
Delete / Archive
Click here to expand...
Using the 'Delete' tab, you can delete the users created by mistake or who are no longer needed.
Before deleting a user, make sure that the user is not linked to any data in the system. e.g., as a PI, coordinator, or technician of a CP, since you won't be able to access data linked to the deleted user. To delete the user, go to the user's list page, search for the user's name and click on 'Delete'.
Sometimes you might want to close a user account but retain data linked to the user. In such cases, you can archive the user account. The archived user would not appear in any dropdown list. However, you can access the older data linked with the user.

If you wish to reactivate the archived user - Go to the user's list page→ Set activity status to 'Archived' in search filters. The archived users' list will appear. Click the user to be reactivated and click 'Reactivate'.

Impersonate
Super Admin can use the ‘Impersonate’ to log in as another user. This is useful for the support team to debug access issues or user-specific issues.
Post impersonation, the super admin’s UI will refresh the same as that of the user’s UI.
Click here to expand...

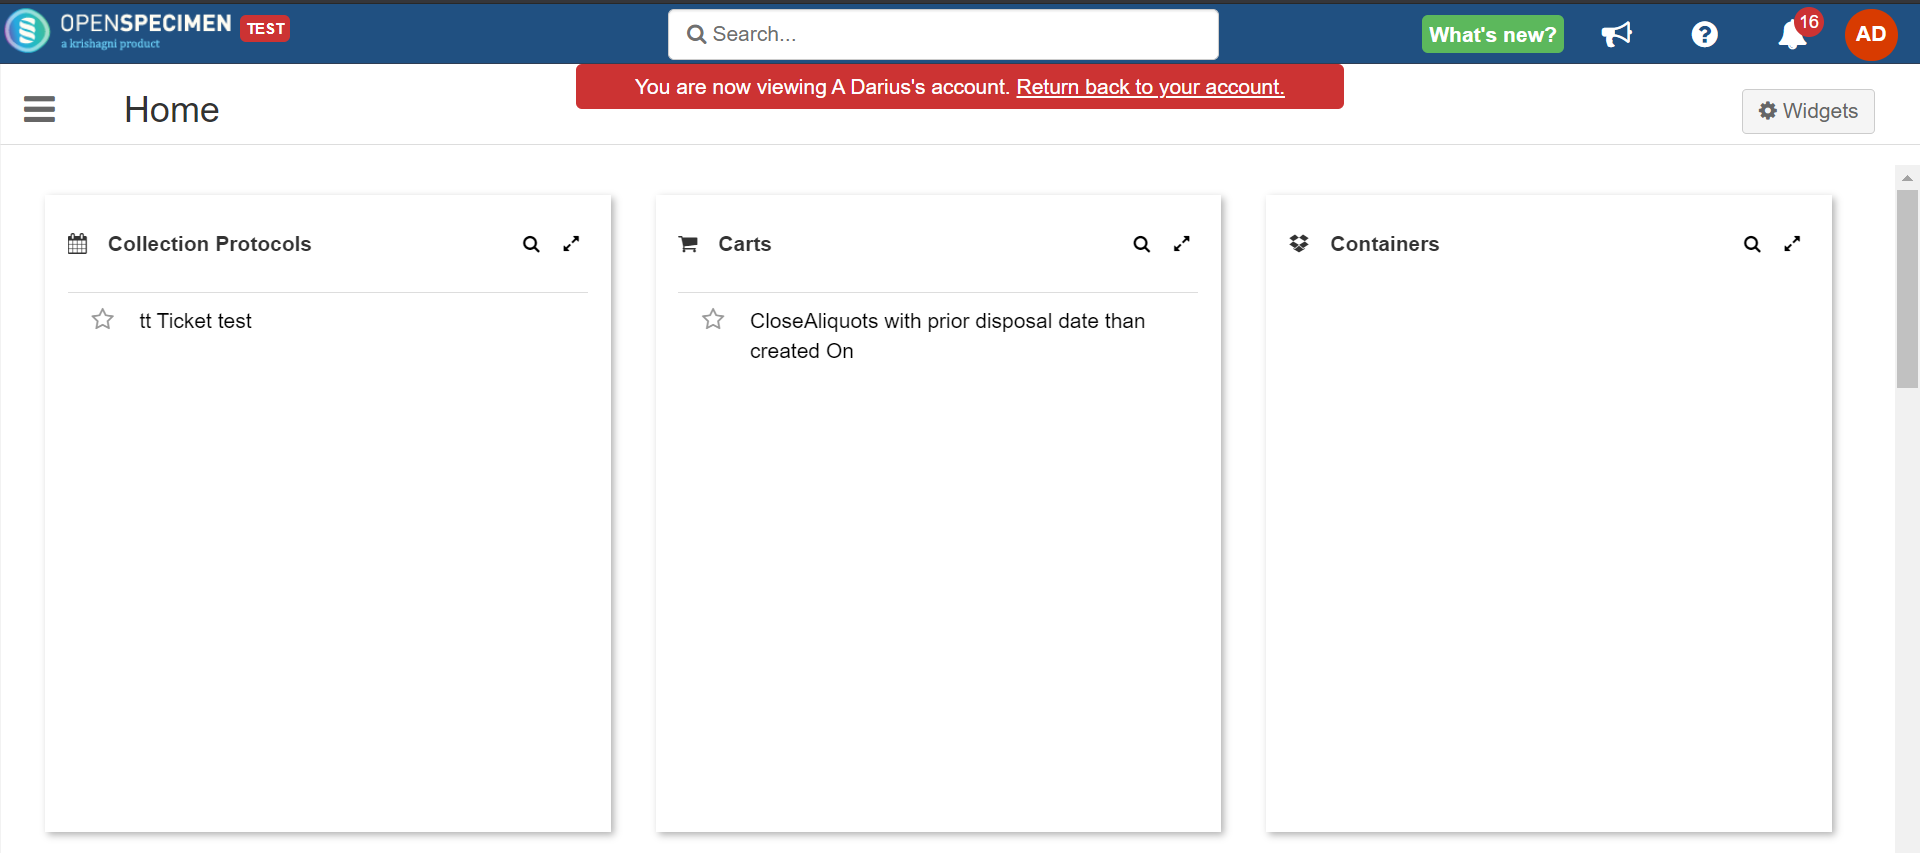
A message at the top of the page highlights the user impersonated and the option to return to the super admin’s account.
Email Notification (v8.1)
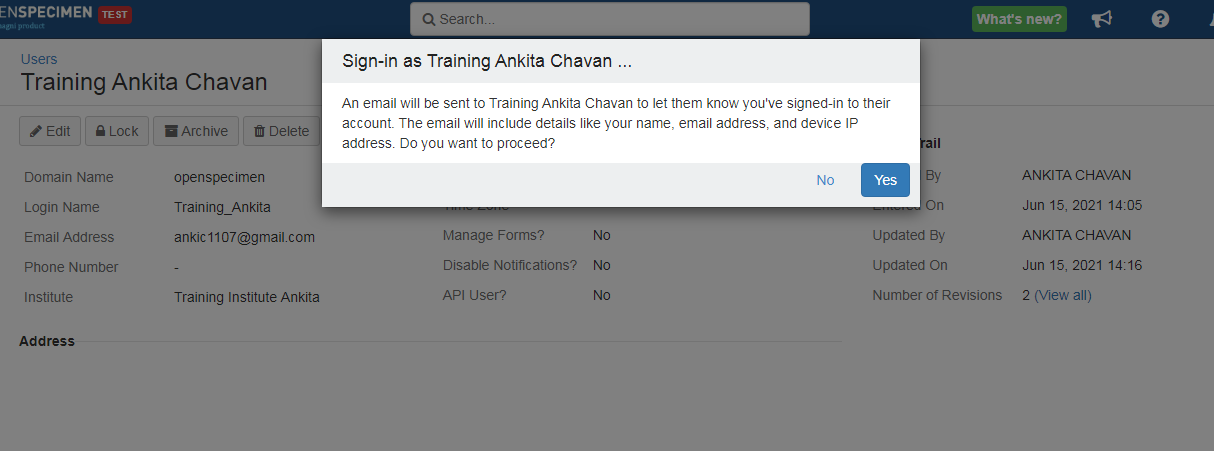
When you impersonate as a user, you will get a popup message asking if you want to still proceed.
Import
You can create multiple users, assign roles to them and add user training form data in bulk.
Export
You can export users, user roles (from v7.0), and user forms (from v8.0).
Export Users
You can export all the users or selected users.
Click here to expand...
- Login as Super Administrator.
- Navigate to the 'Users' page.
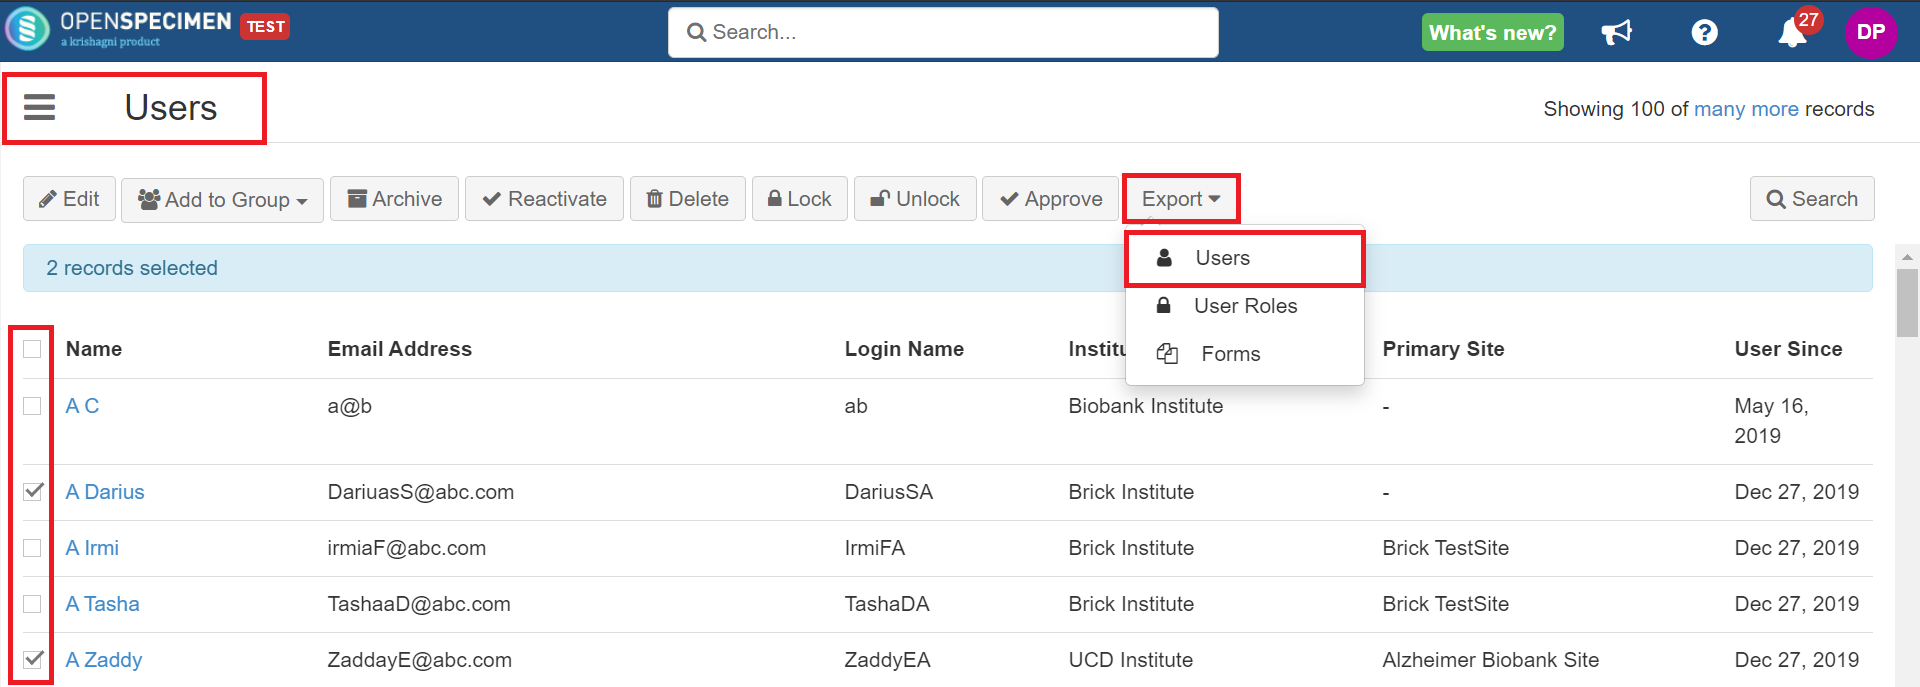
- Click on 'Export' and select the 'Users' option. This will export all the users as a CSV file.

- To export the selected users, select the users by checking the checkbox present against the user from the list view. Then select the 'Users' option from the 'Export' button. The selected user details will get exported as a CSV file.
Export User Roles
You can export the roles assigned to a specific user or all users. It will make it easier to create a new user with the same permissions as another user. You can also use it to bulk review and check the CPs and roles assigned to users.
Click here to expand...
- Login as Super Administrator.
- Navigate to the 'Users' page.
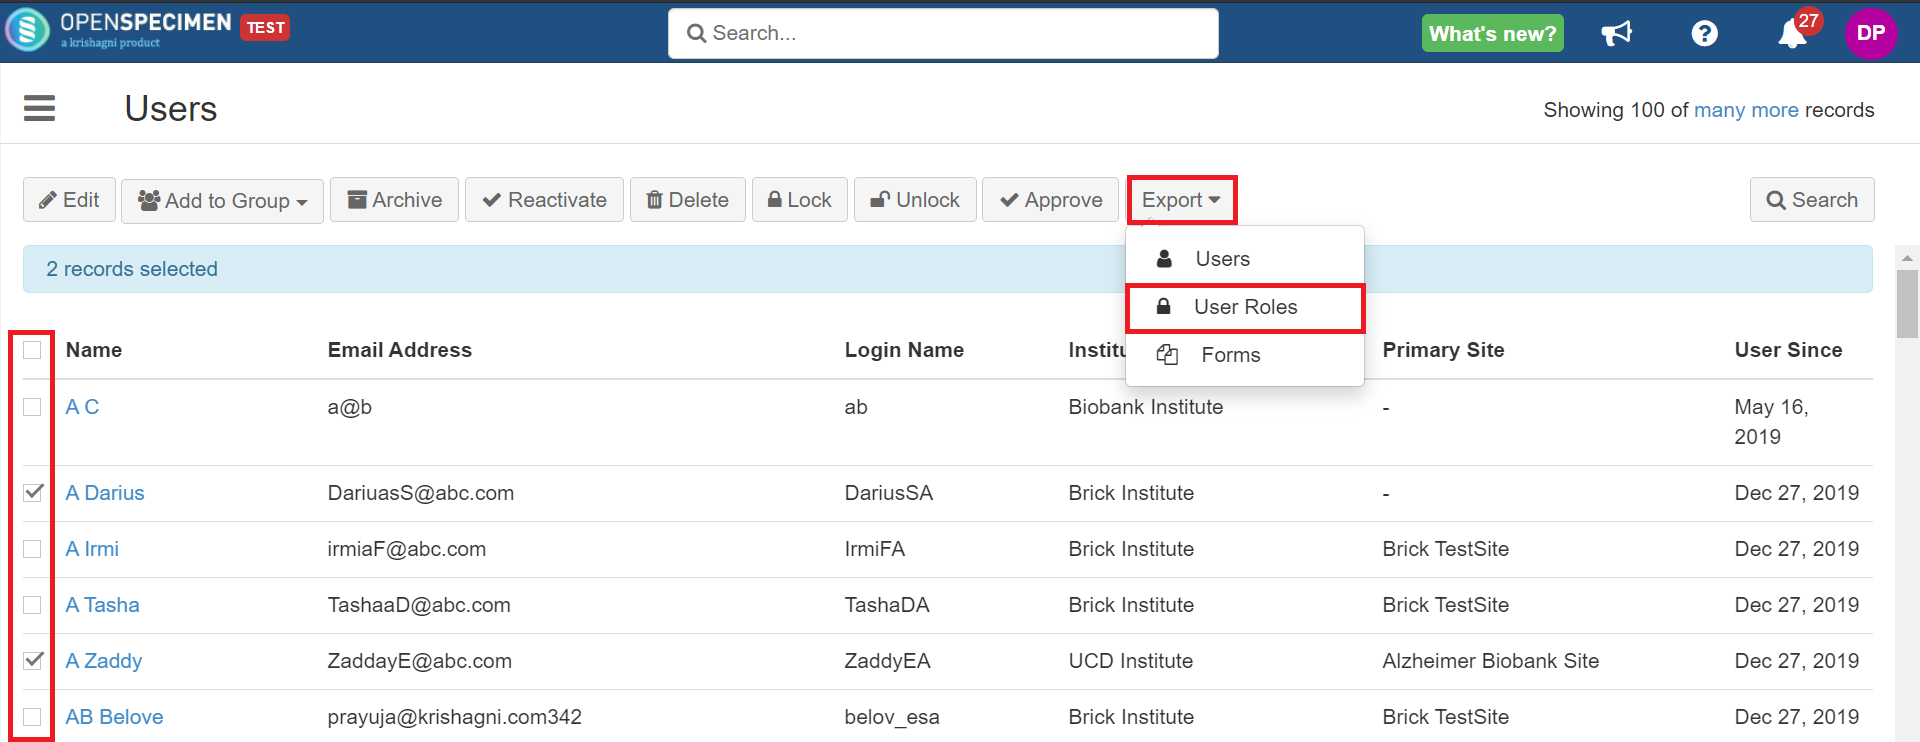
- Click on 'Export' and select the 'Users Roles' option. This will export all the user's roles as a CSV file.

- To export the selected user's roles, select the users by checking the checkbox present against the user from the list view. Then select the 'Users Roles' option from the 'Export' button. The selected user's roles details will get exported as a CSV file.
- You can create the user's with the same user roles, which are exported. For example, the 'Tasha V' user has the same user roles as 'Steph Jorge.'


- Users can bulk review the user's assigned roles, CPs, and site access.

Click here to expand...
- Login as Super Administrator.
- Navigate to the 'Users' page.
- Click on 'Export' and select the 'Forms' option. This will export all the users' forms as a CSV file.
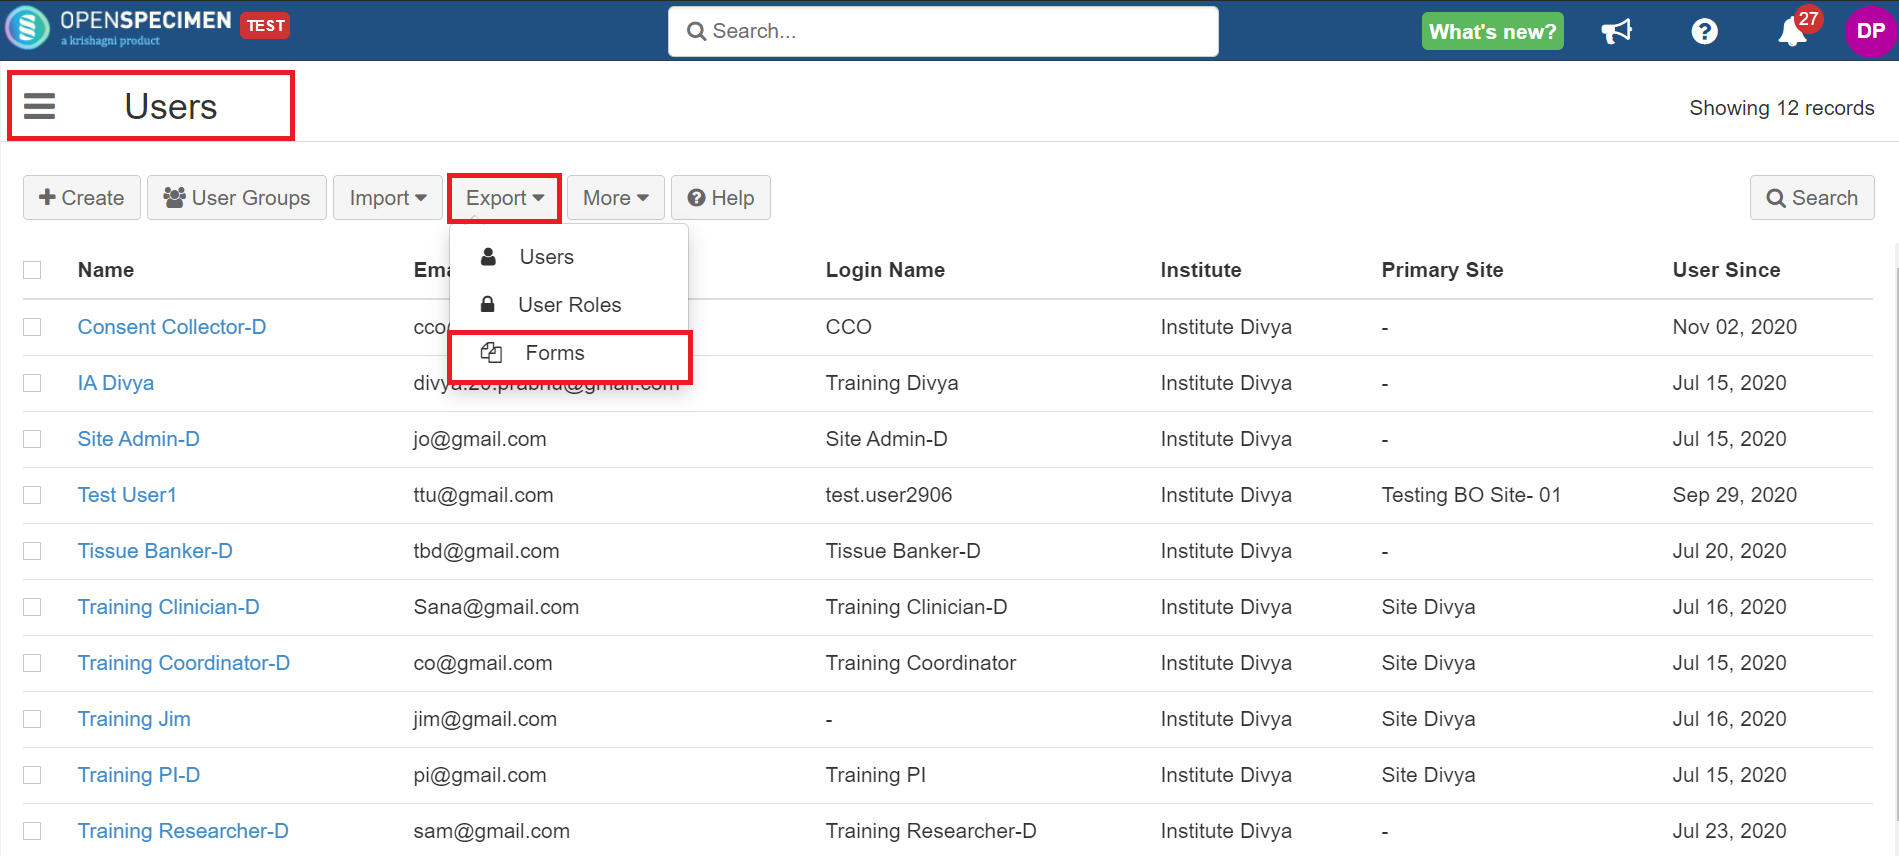
- Select the user form you want to export in 'Record Type' and click on 'Export'.

- To export the selected user's forms, select the users by checking the checkbox present against the user from the list view. Then select the 'Forms' option from the 'Export' button. The selected user's form details will get exported as a CSV file.
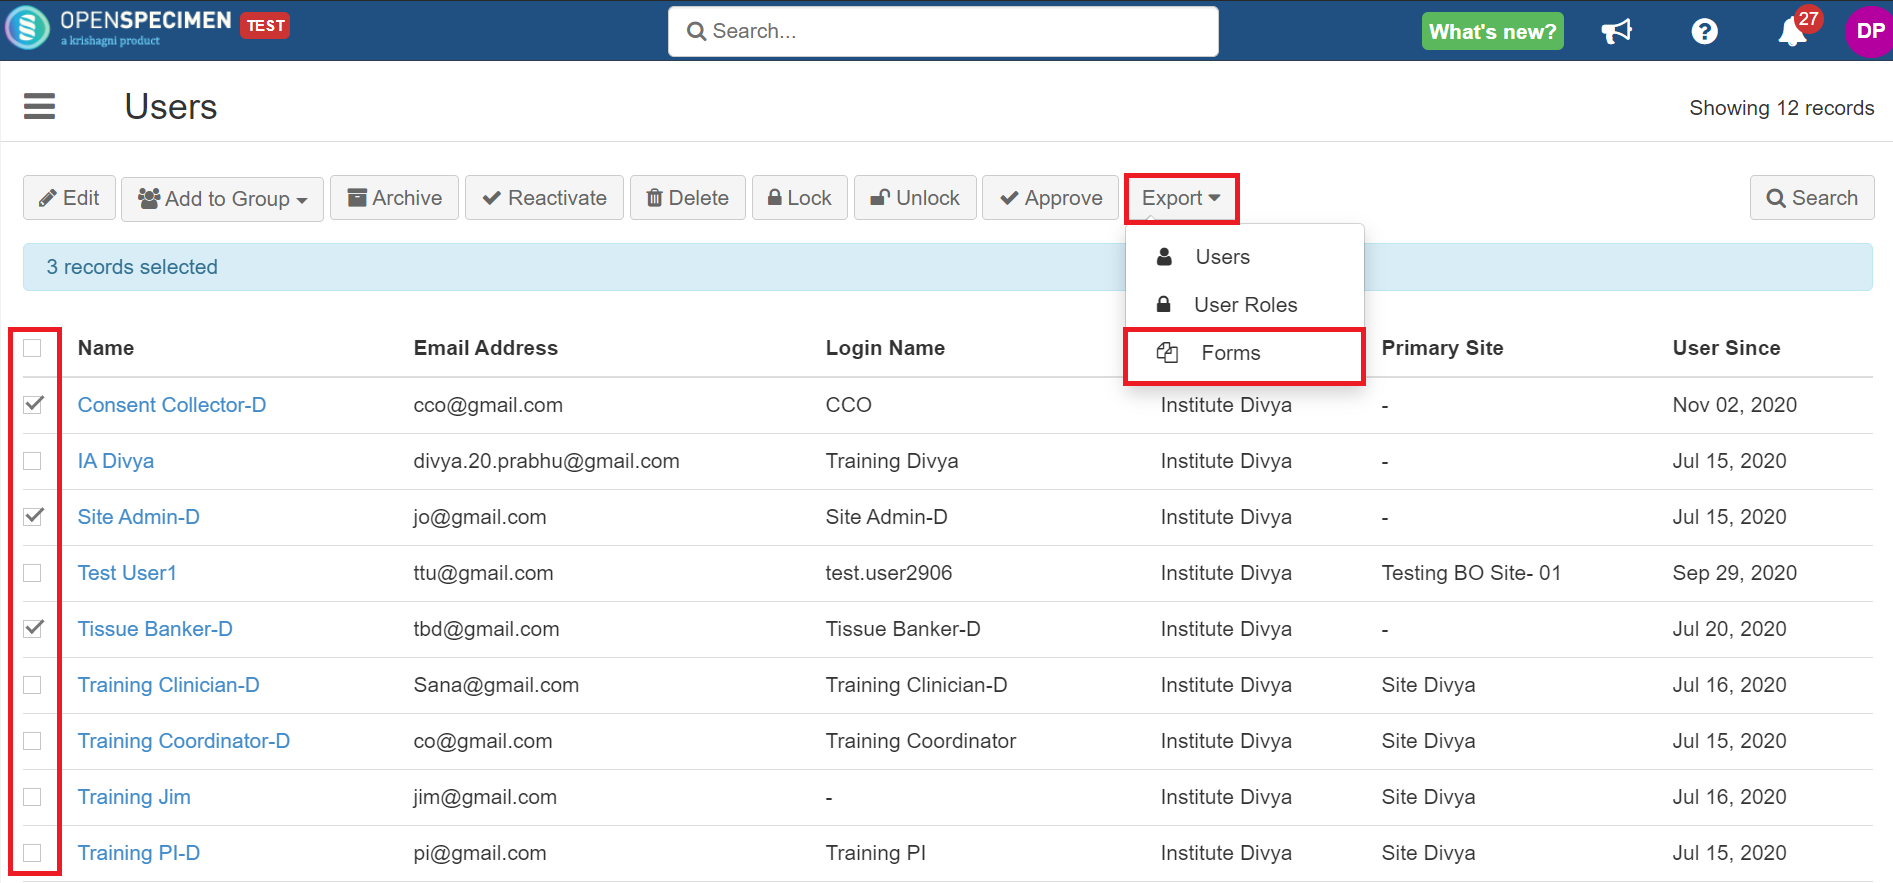
- Select the user form you want to export in 'Record Type', verify the users' list and click on 'Export'.


