...
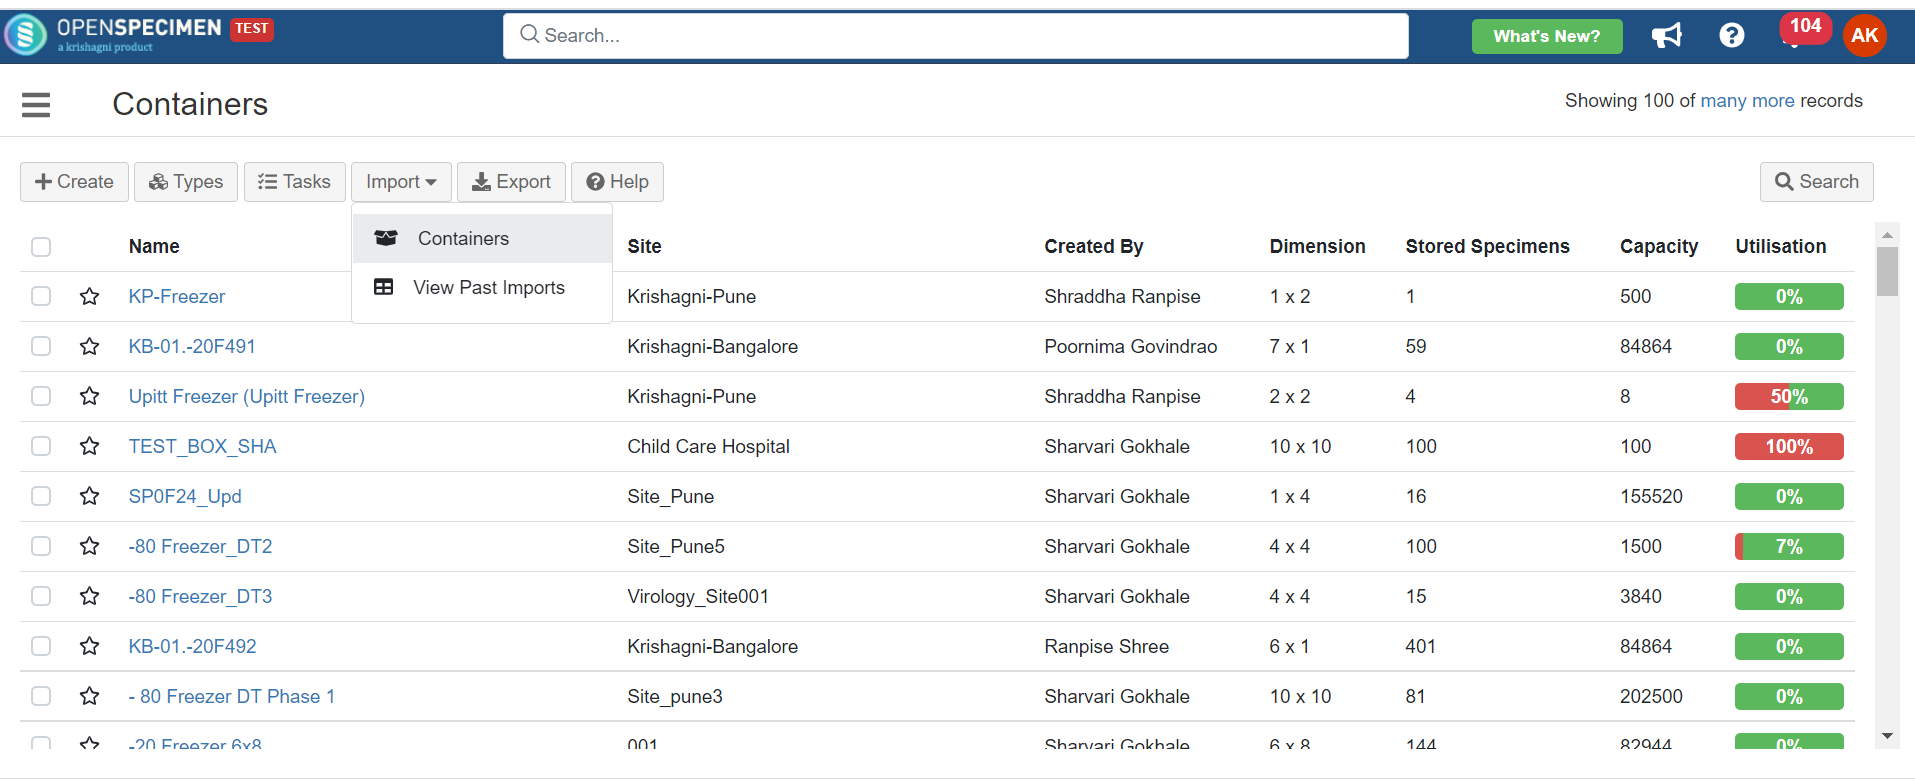
Transfer containers within/across freezers via UI
| Expand | ||
|---|---|---|
| ||
2. Scan/paste the container's unique name or barcode and Click on Add 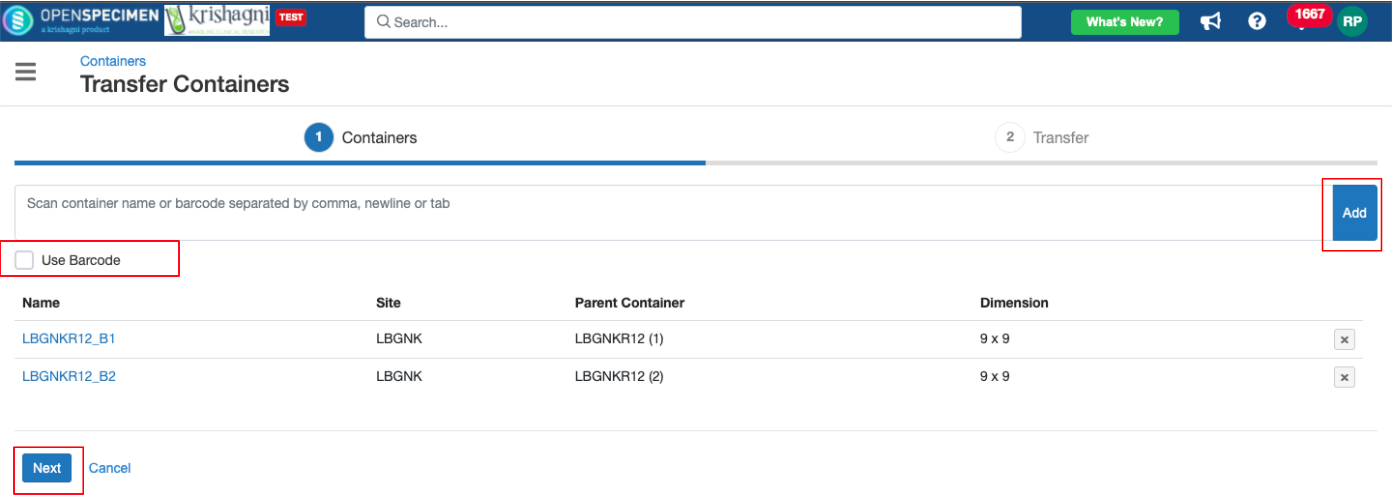 |
...
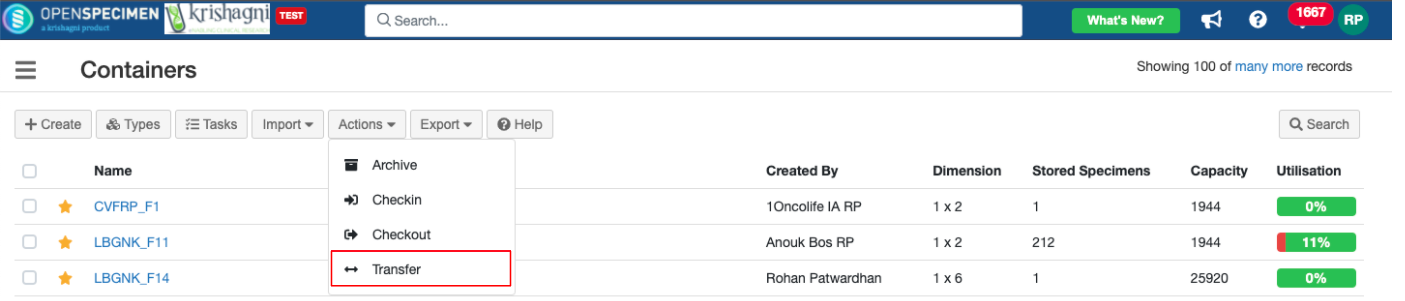
5. You can also ‘Transfer’ individual containers from the container overview page → More → Transfer
...
| Note |
|---|
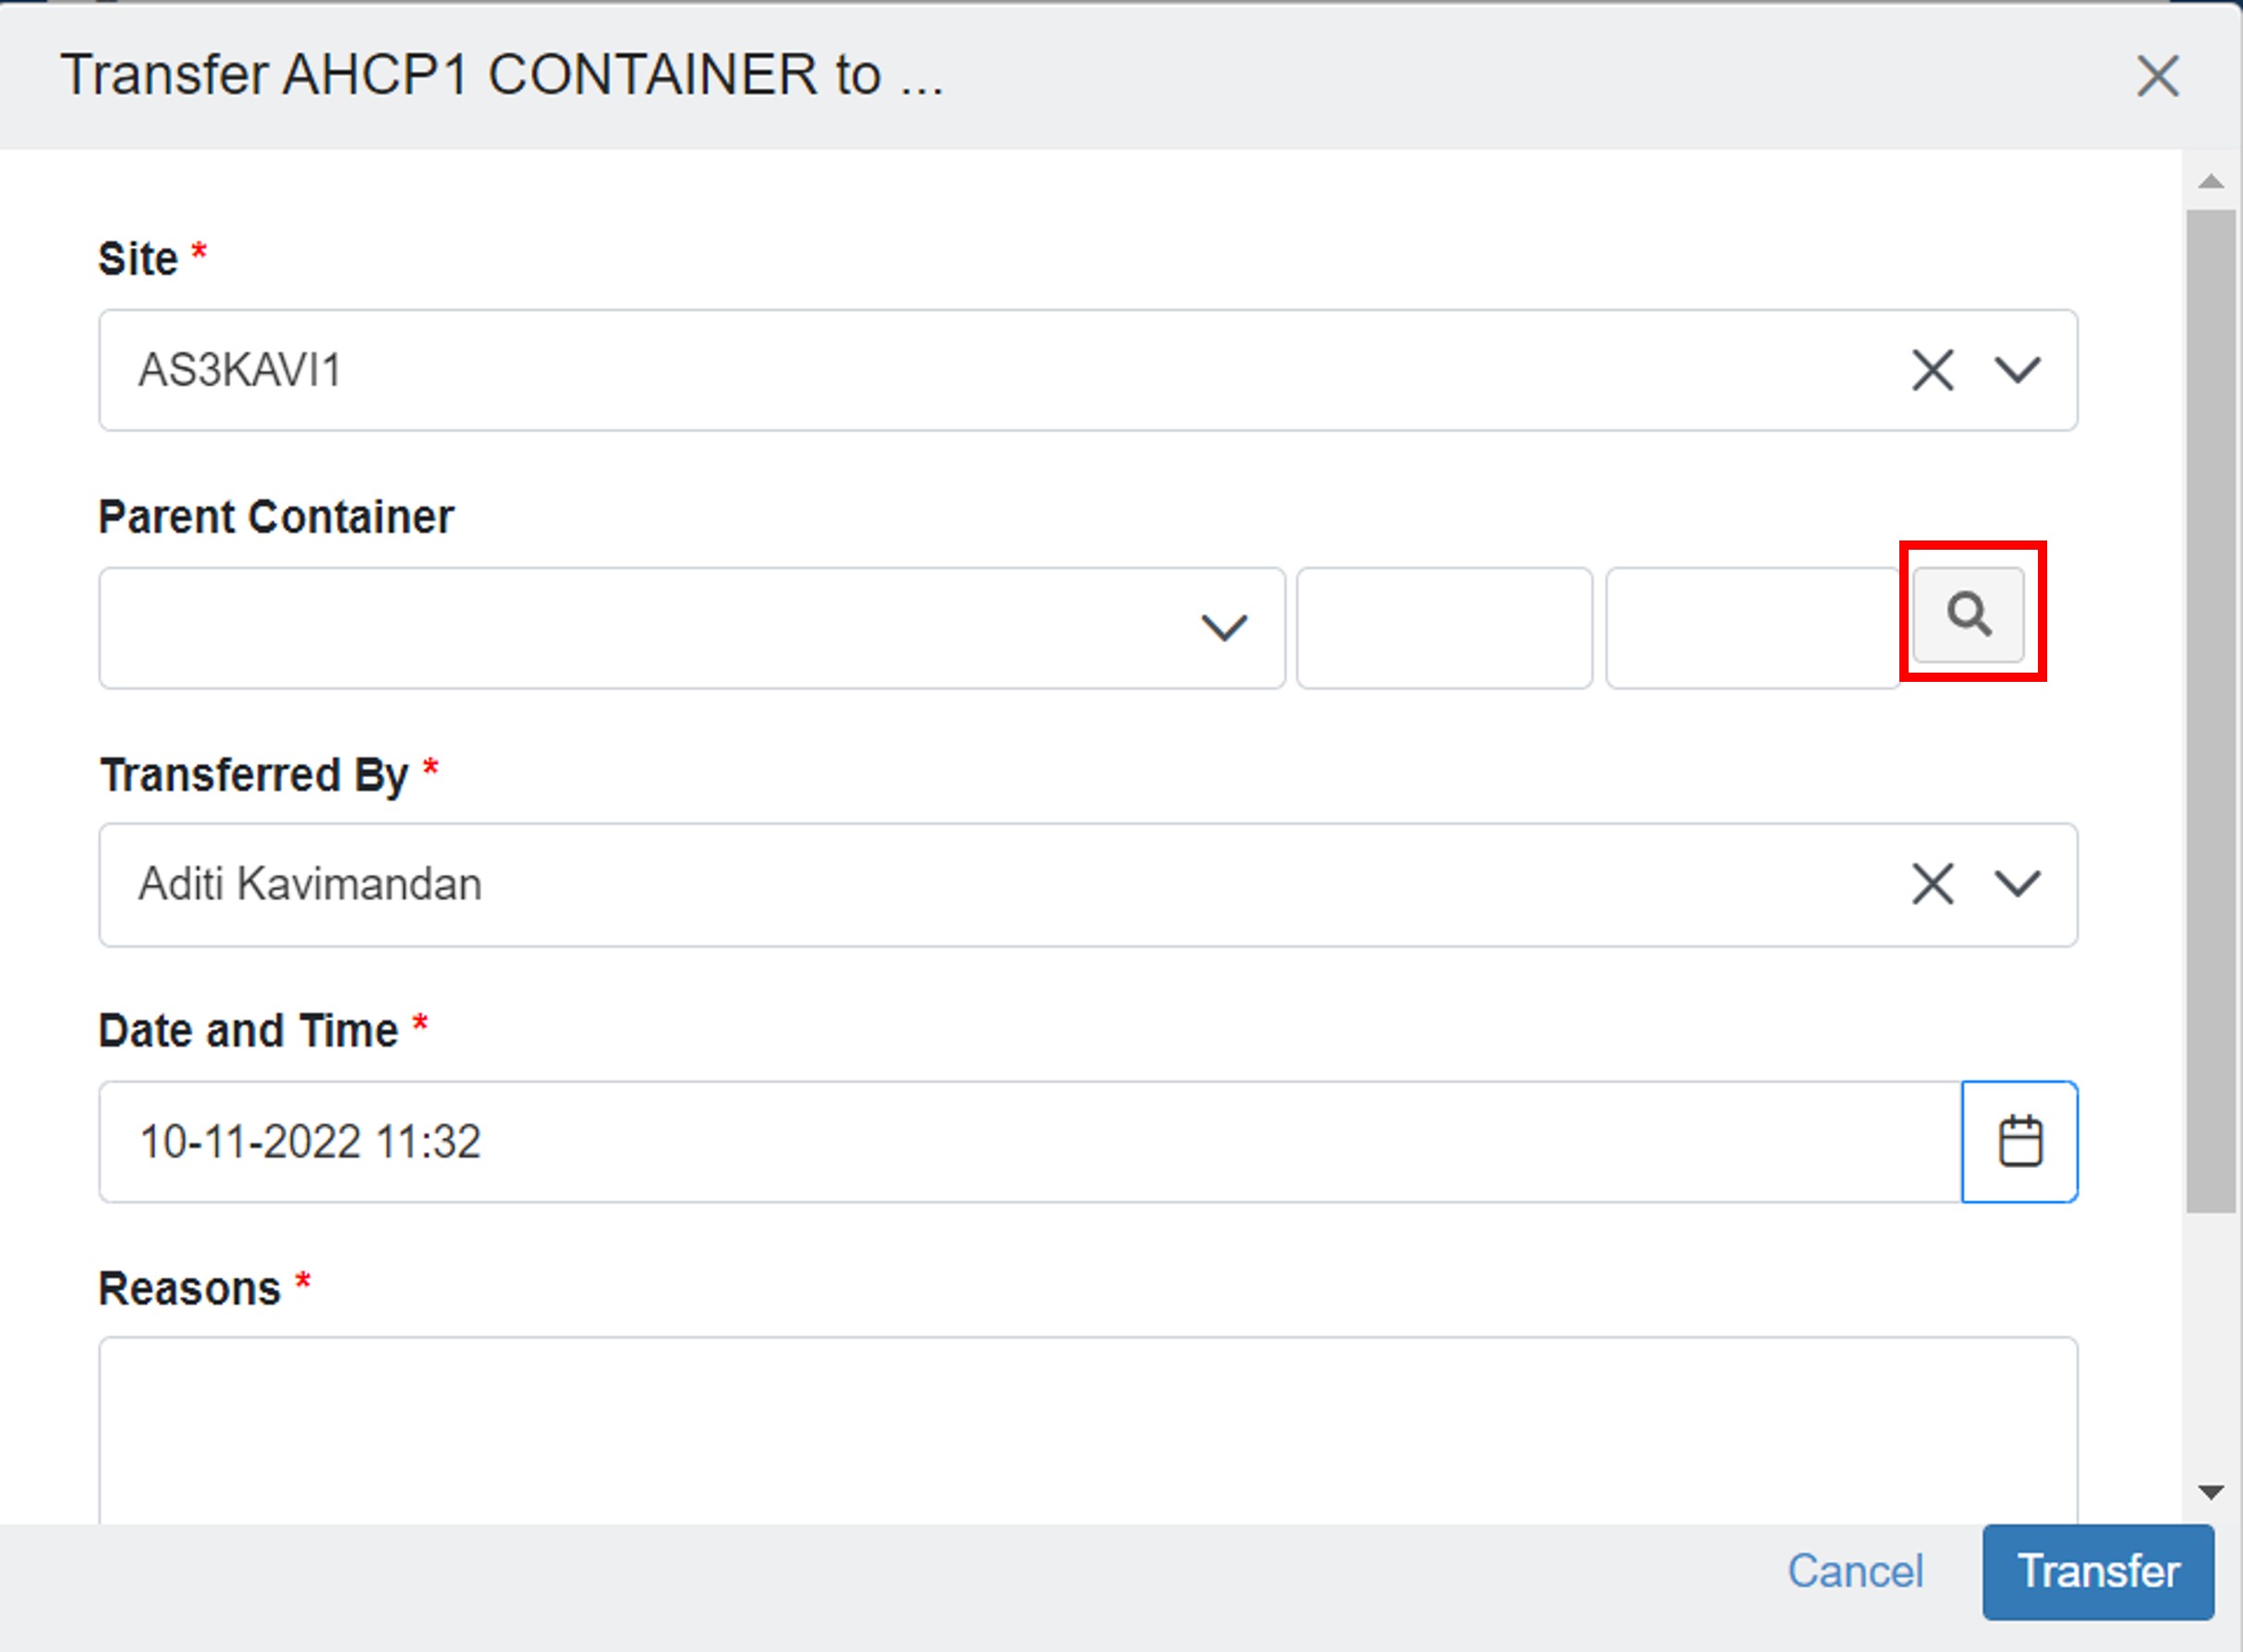
Note:- Selecting Parent Container:
|
Move Containers
...
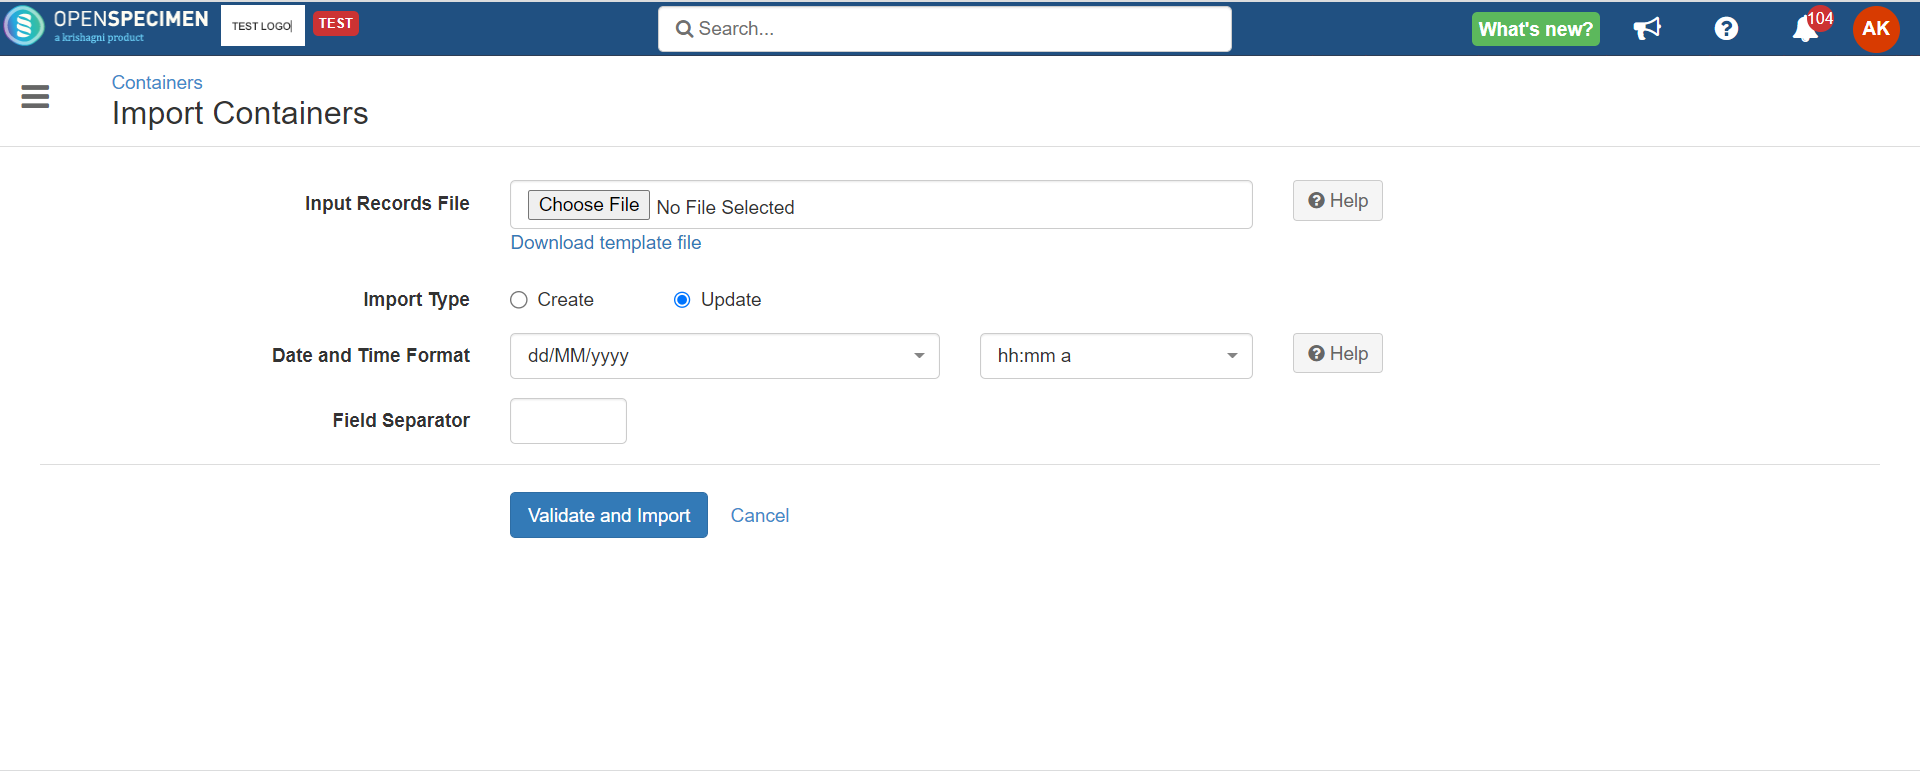
Go to the containers page, and select the container to be moved.
On the container overview page, click on 'Transfer'.
The transfer tab is available at each container level, enabling its transfer. Hence a user can transfer a box, a rack, a shelf, etc., from one container to another.
...
in
...
Click on Transfer.
...
Note:
The dropdown shows the first 100 values that are available.
You can click on the "Search" icon (magnifying glass) from the pop-up to see the containers eligible as a parent location for the transfer container.
Alternatively, you can start typing the initials of the container name, and it will appear.
Select any container by clicking on "Select".
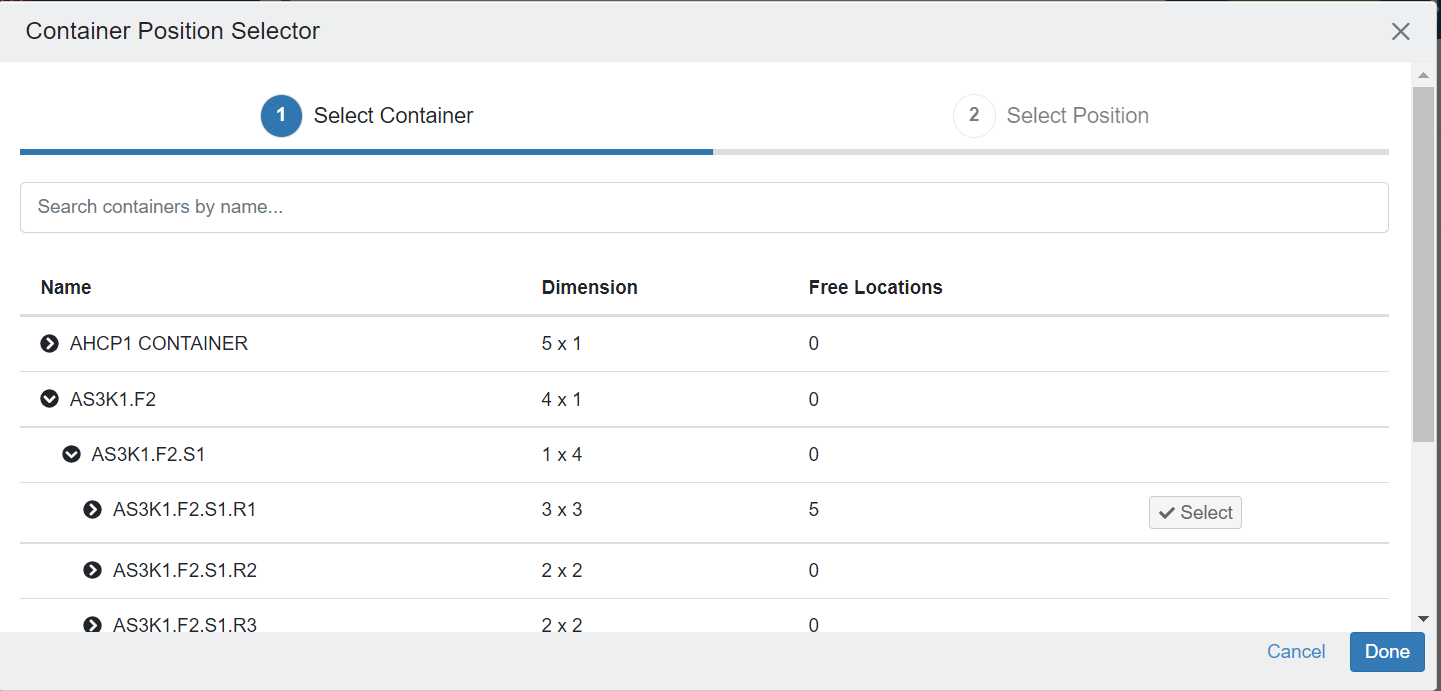
Choose the location you want to move the container in and click on "Done".

...
Fields
...
Description
...
Site
...
The parent site to which the container is to be transferred
...
Parent Container
...
The name of the destination parent container under which the transfer is to be made transferred. A dropdown will show containers specific to the selected parent site.
...
Transferred by user
...
User who is performing the transfer. It defaults to the logged-in user data
...
Date and Time
...
The timestamp at which the transfer is made. By default, it is the current datetime
...
Reasons
...
You can specify the reason for the transfer.
Move Containers in Bulk
| Expand | |||||||||||||||||||||||||
|---|---|---|---|---|---|---|---|---|---|---|---|---|---|---|---|---|---|---|---|---|---|---|---|---|---|
|
Transfer Event
...
|
...
If specimens are stored inside such a box, a transfer event is also created for each specimen, along with the container transfer event.
...
Clicking on the 'Container Transfer Event' from the 'Specimen Overview' page displays the details about the transferred container.
...