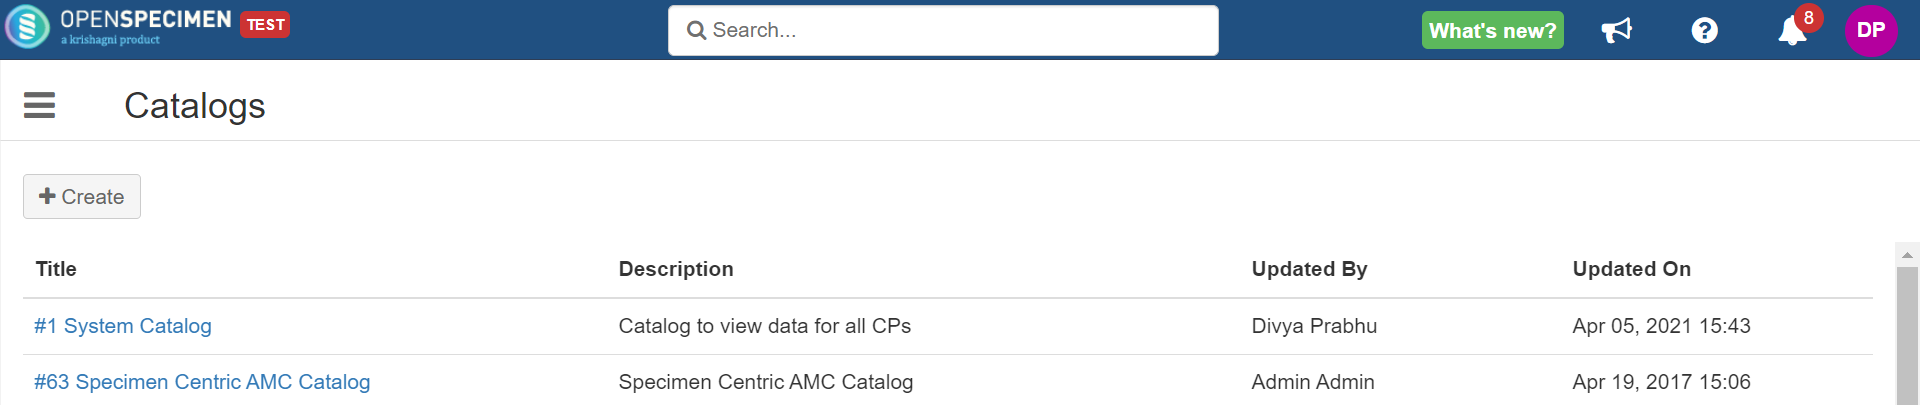
Click on the '+Create' button from the catalogs list page.
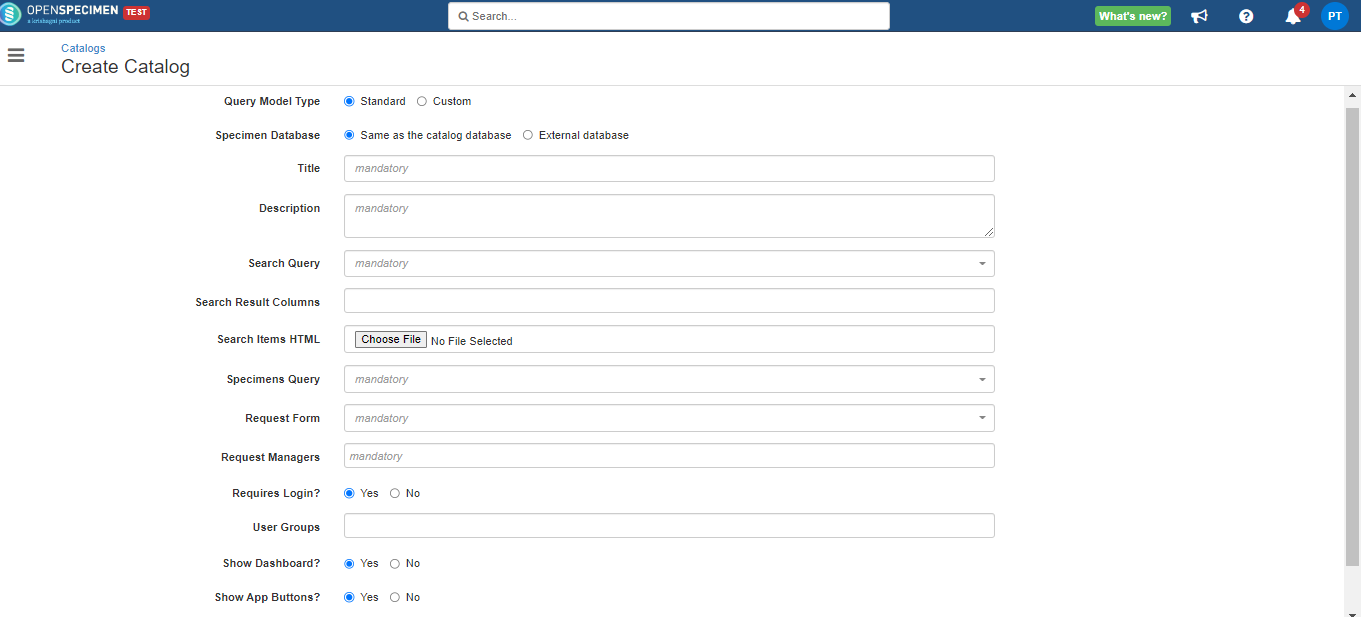
Enter all the valid details → Create.
Note
title
Note:
You can use a custom form that you have created as a request form or use the system-generated 'Specimen Request Details' form.
Expand
title
Fields and description
Field
Description
Title
Title of the catalog
Description
The description of the catalog
Search Query
Create a query based on which CPs you want to include in this catalog, filters, columns, etc. This query decides which specimens and columns are displayed in the catalog result view.
Specimens Query
This query is used internally. Once someone requests specimens, this query is used to display the columns while distributing the requested specimens.
This saved query must have the 'Specimen > Identifier' selected from the 'Columns'.
Request Form
This is a custom form that is used as the request form. Each catalog can have its request form. The requester must fill out the form while requesting the specimens.
Request Managers
The users will receive an email notification when a new request is created.
Requires Login
If 'Yes' is selected, the user must log in to access the catalog. If not, then the catalog can be accessed without logging in.
Show Dashboard (New in v6.3)
It allows the user to decide whether to display the dashboard for the catalog.
Show App Buttons (New in v6.3)
It allows hiding app buttons like 'sign in' or 'sign up.' It is useful for catalogs that are shared with researchers who do not need login.
List of default columns to display in catalog result view page. This will be the subset where you can add minimum columns like specimen label, identifier, type, etc., which will be default columns on the catalog result view.
It appears only if the catalog is private. The users who are part of this group can access the catalog. Otherwise, no other user can access that catalog.
Help URL
Users can add catalog-specific Wiki or SharePoint points to help the researchers to use the catalog. Users with 'Update' access to the catalog can add/update these details.
Show Items (W
If the user keeps the configuration as 'W
Similarly, the admin can create multiple catalogs.
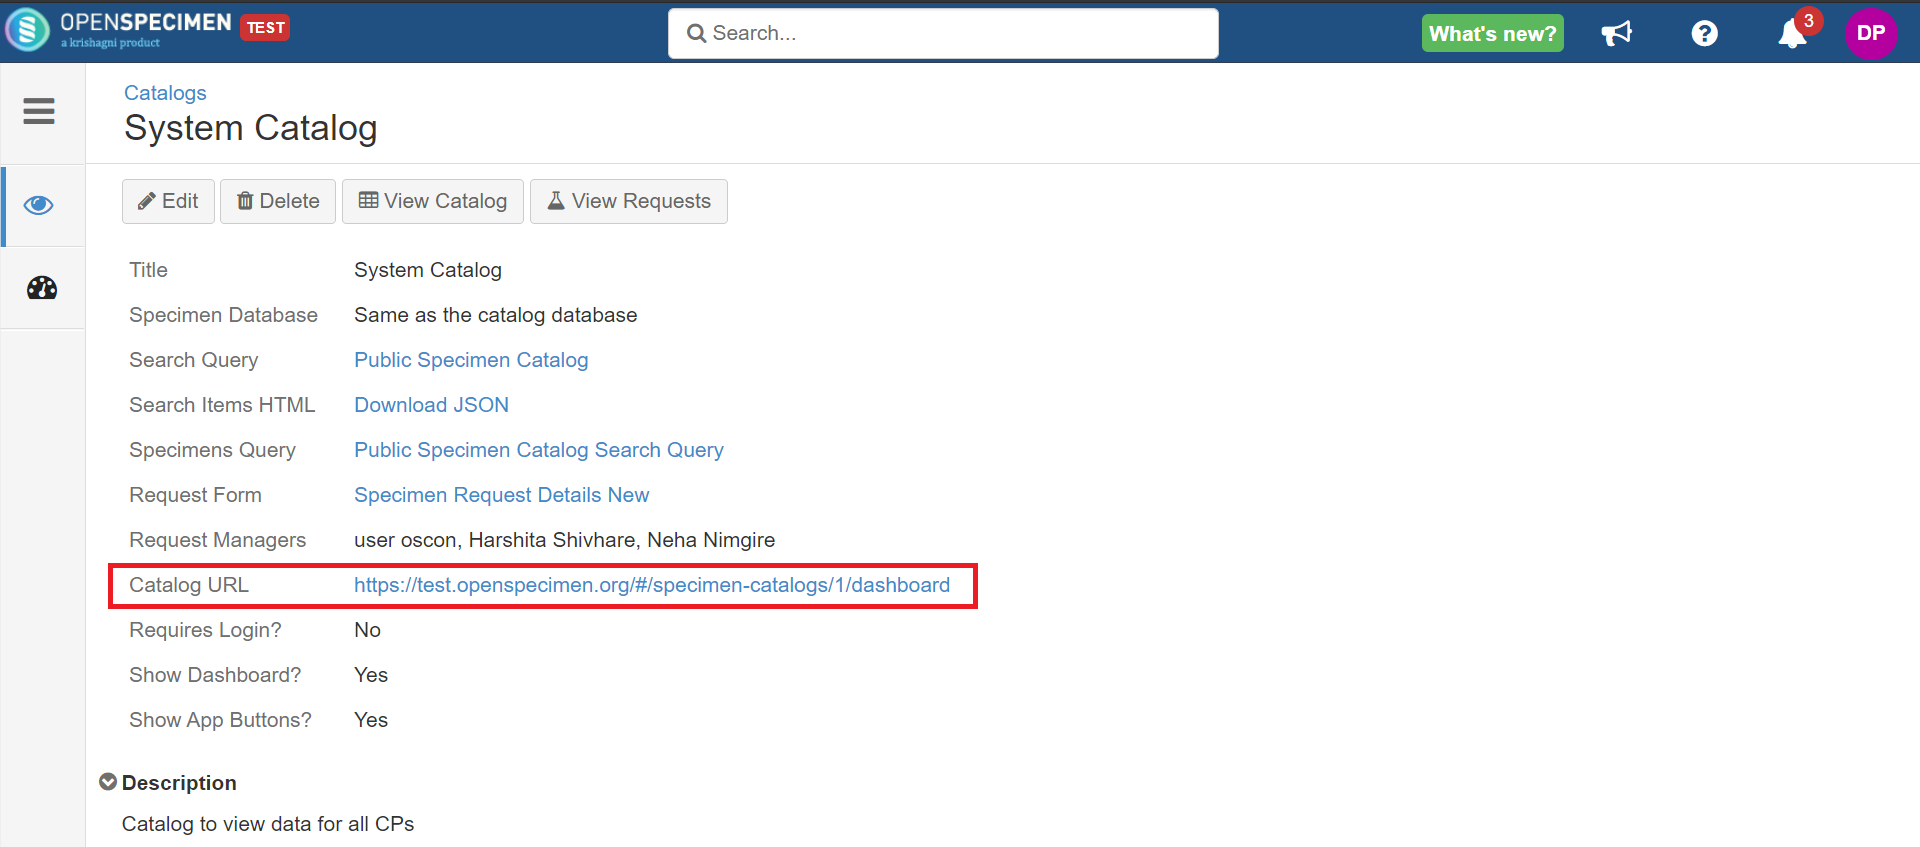
If you are signed in to OpenSpecimen and want to view any catalog, you can click on the "Catalog URL".
If you want to share the catalog URL with others who are not logged in to OpenSpecimen or make the catalog publicly available, you will have to select the URL as shown below:
After selecting the URL, you can copy it (Ctrl + C) and Paste it (Ctrl + V) wherever you want. The right-click. → Copy link address method will not work in this case.
Info
The user with the catalog URL can access the catalogs and look for the specimens of interest.
Users can access this without login if the catalog is set with 'Requires Login' as 'No'.
Note
title
Note:
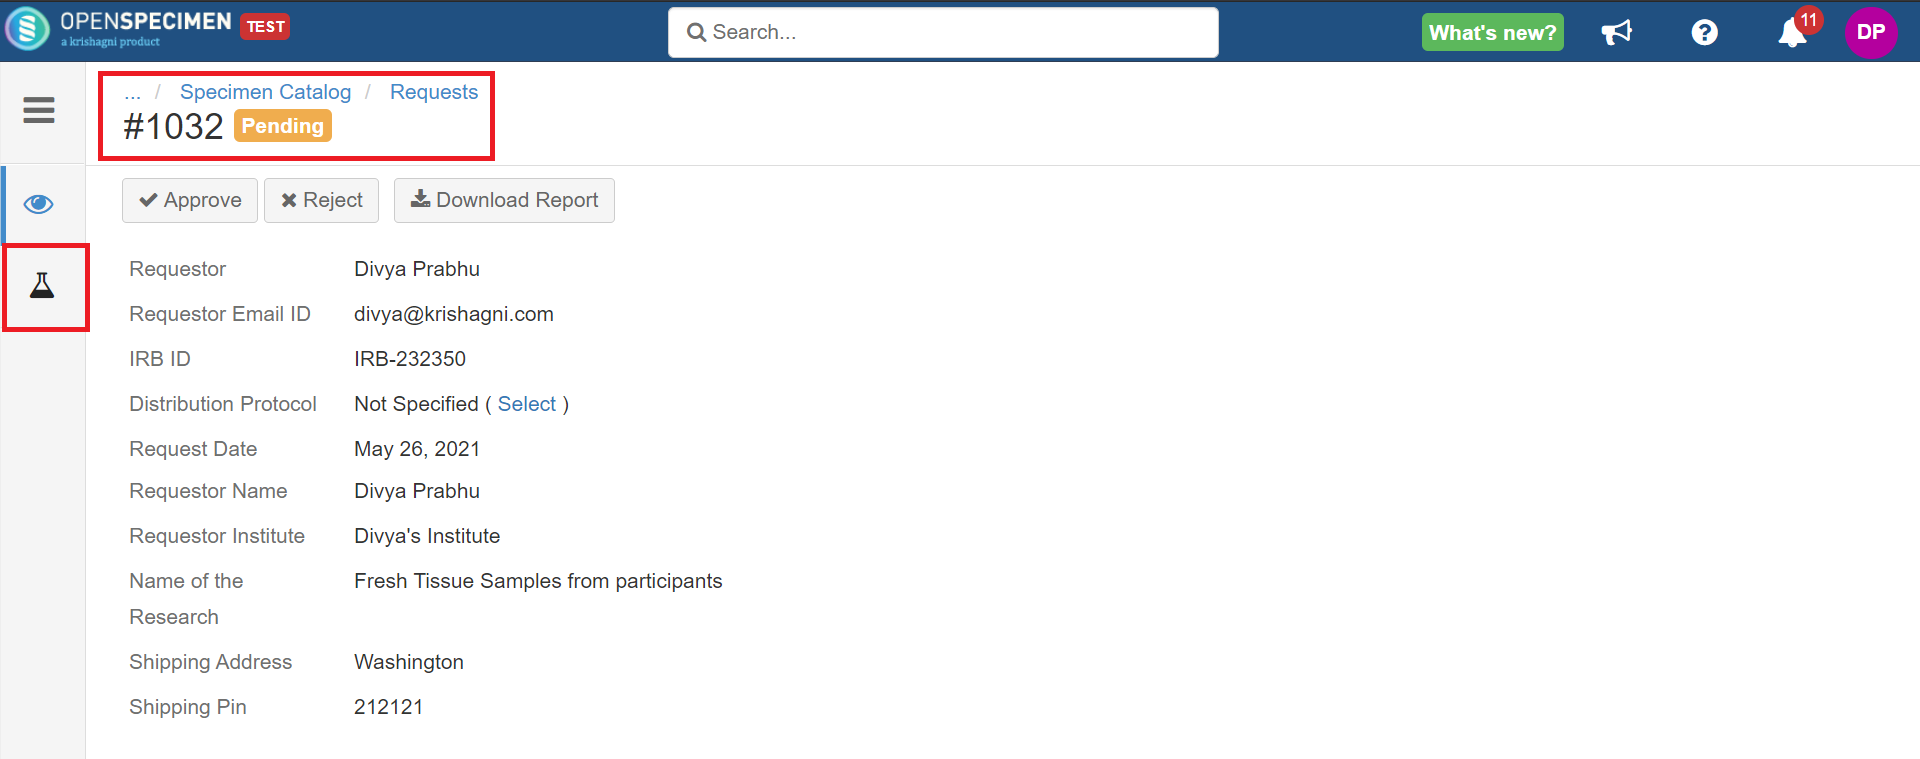
Case 1:
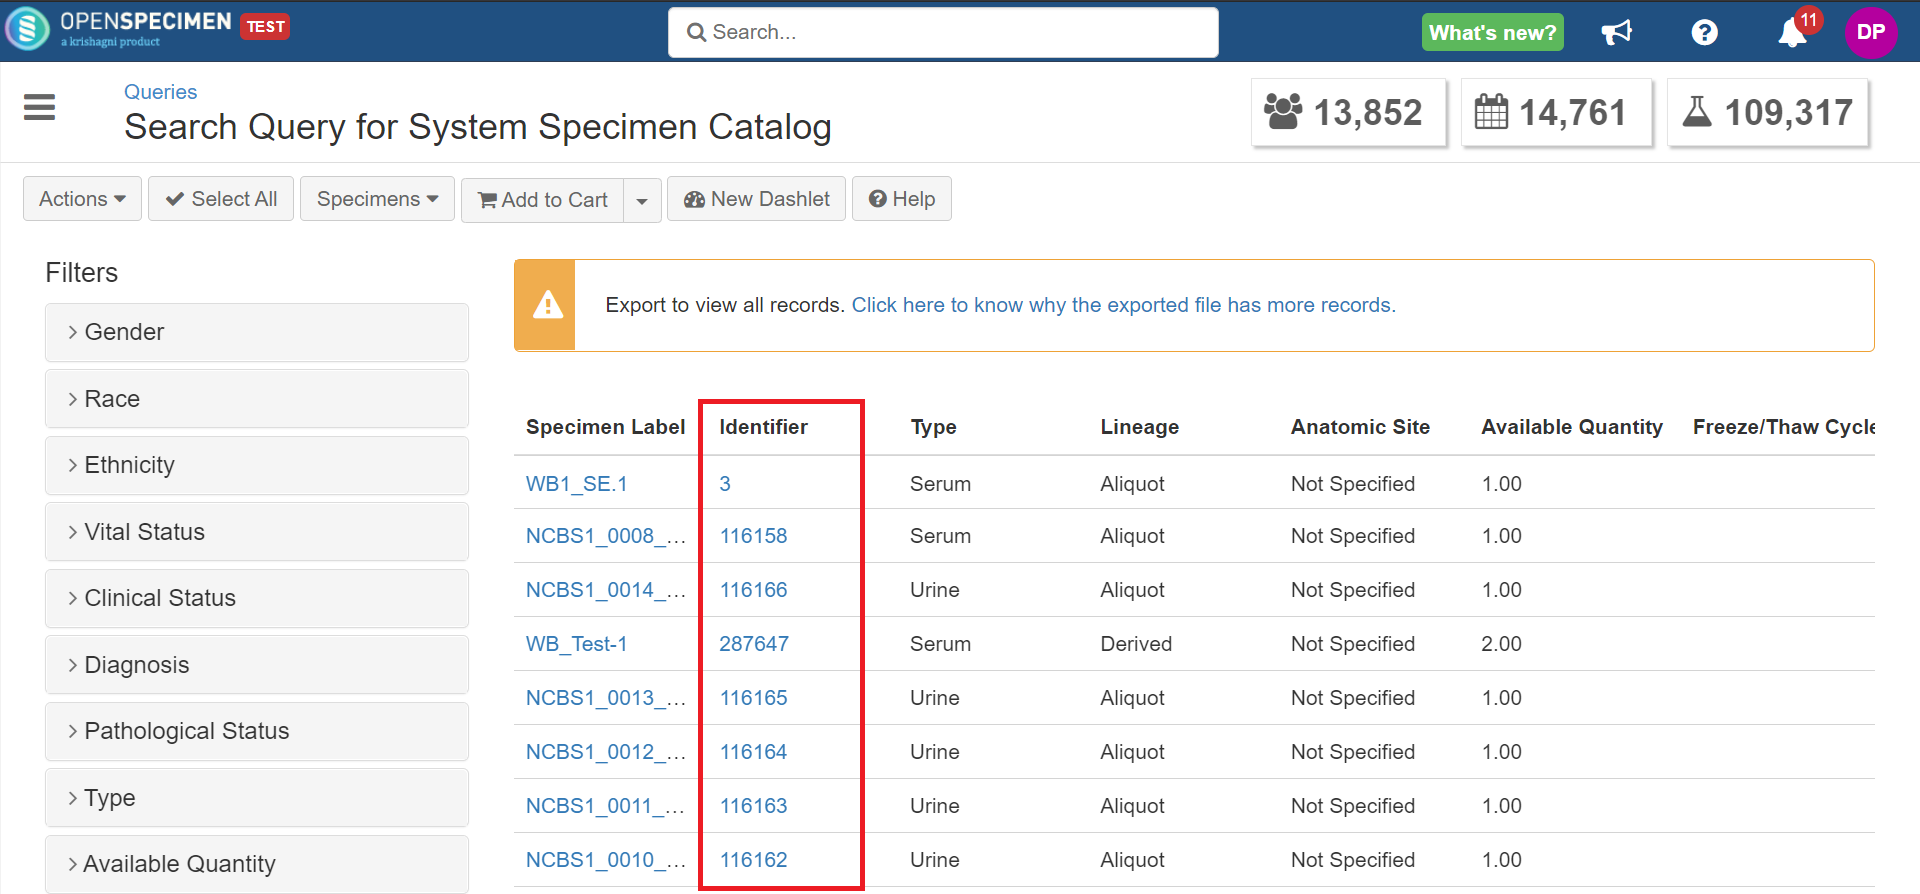
If your catalog's 'Search Query' has a specimen 'Identifier' column, the request overview page will have the 'Specimens' tab on the left-hand side.
Once the request is approved, you can distribute all the requested specimens.
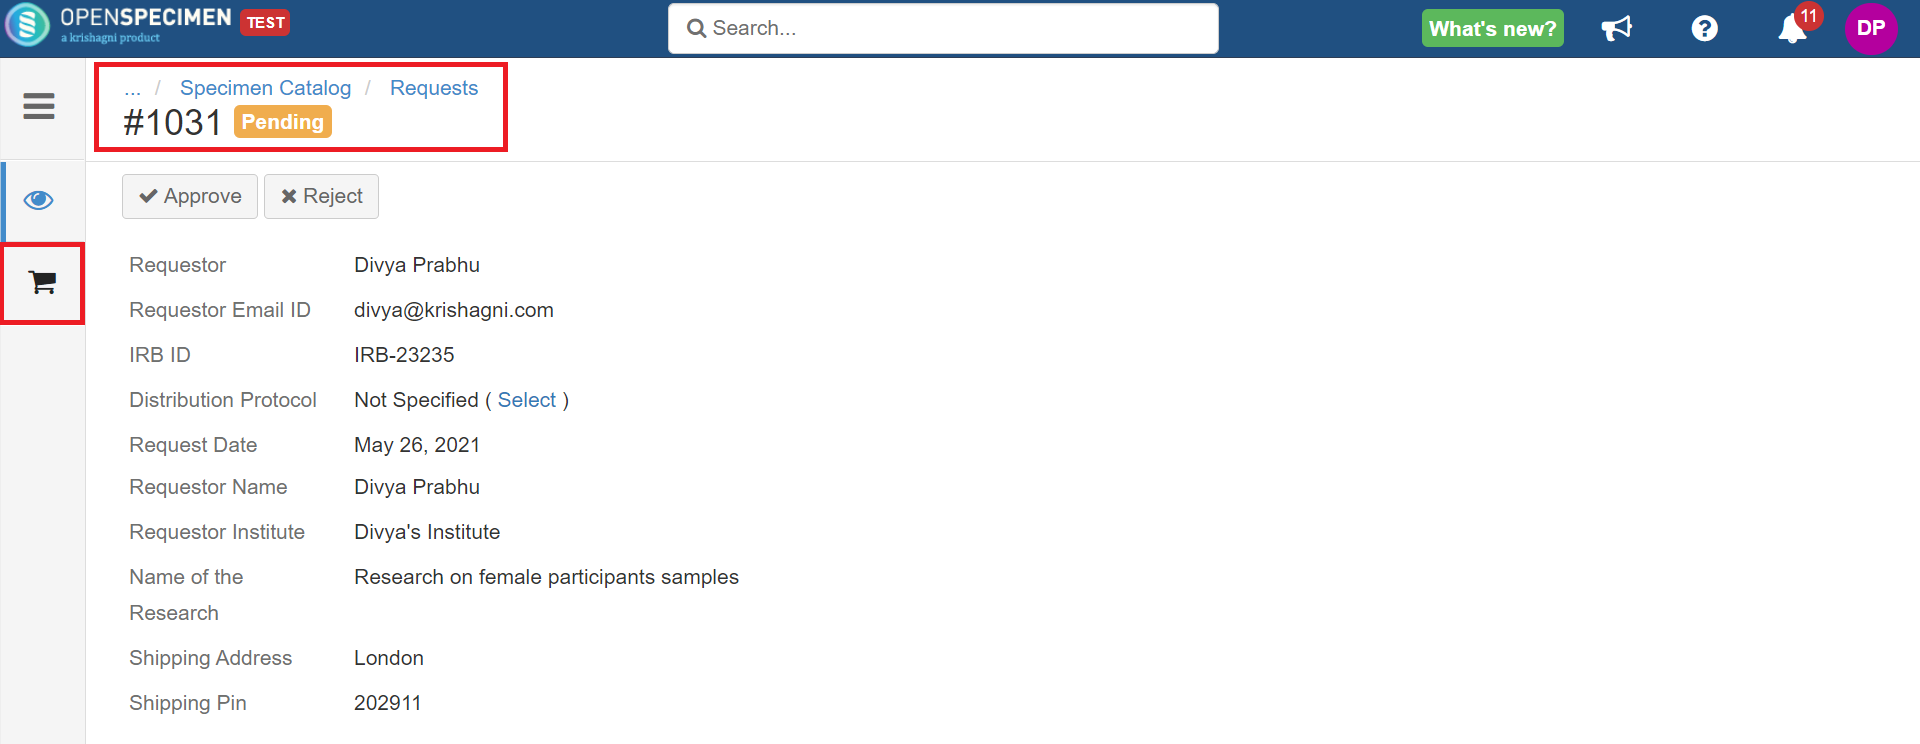
Case 2:
If your catalog's 'Search Query' does not have a specimen 'Identifier' column, the request overview page will have the 'Carts' tab on the left-hand side.
Once you approve the request, you must select the specimens you want to distribute → Add to the cart → Distribute. Refer to wiki a page for more details.
Note
Help Page Display
After selecting the URL, you can copy it (Ctrl + C) and Paste it (Ctrl + V) wherever you want. The right-click. → Copy link address method will not work in this case.
Help URL Display
Users can add catalog-specific Wiki or SharePoint points to help the researchers to use the catalog. Users with 'Update' access to the catalog can add/update these details. This configured help button will appear beside the catalog's name on the result view page.