Versions Compared

Key

  • This line was added.
  • This line was removed.
  • Formatting was changed.

Table of Contents

...

Expand
  1. Log in to OpenSpecimen as Super Admin/ Institute Admin.

  2. Navigate to 'Distribution Protocols' card.


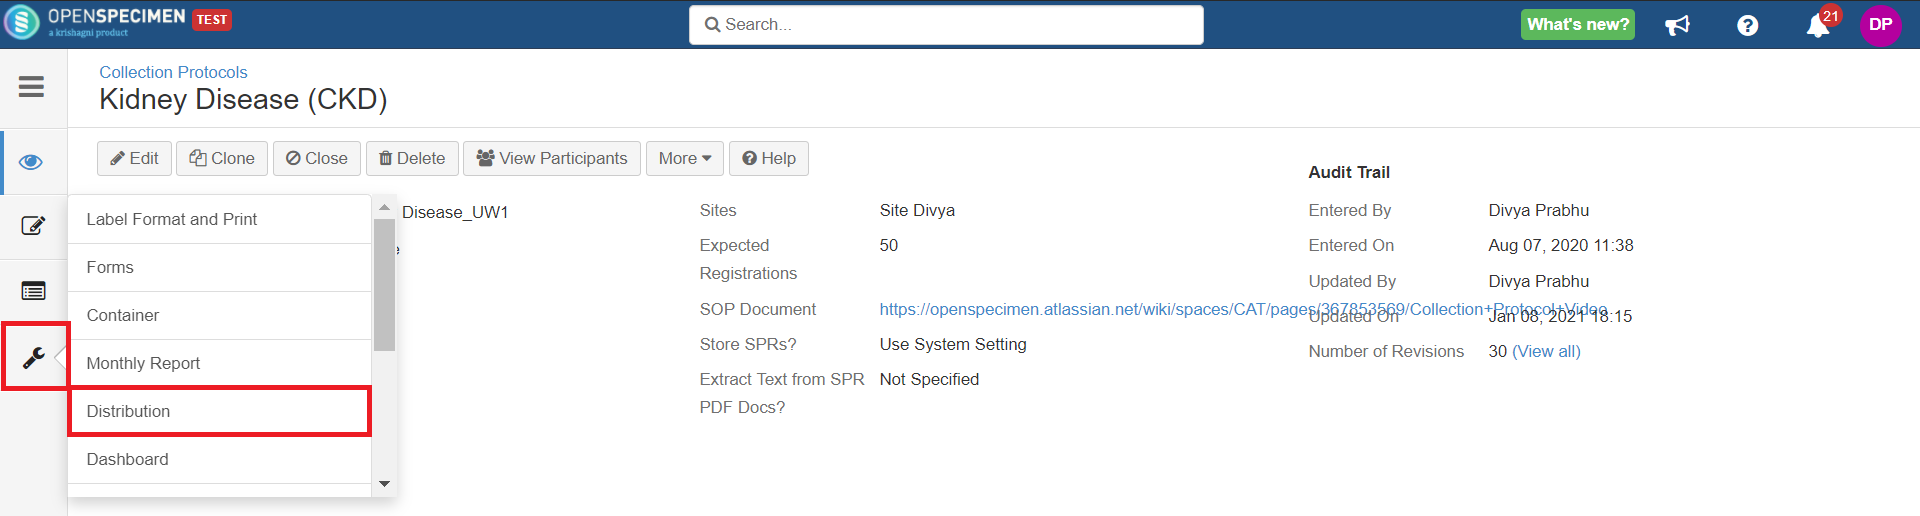
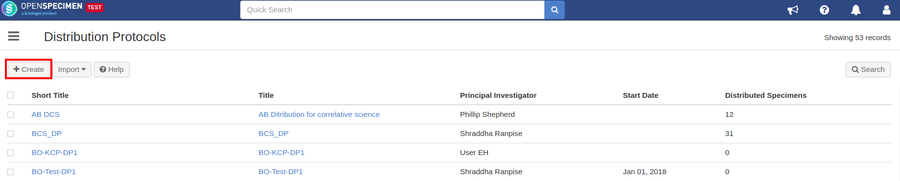
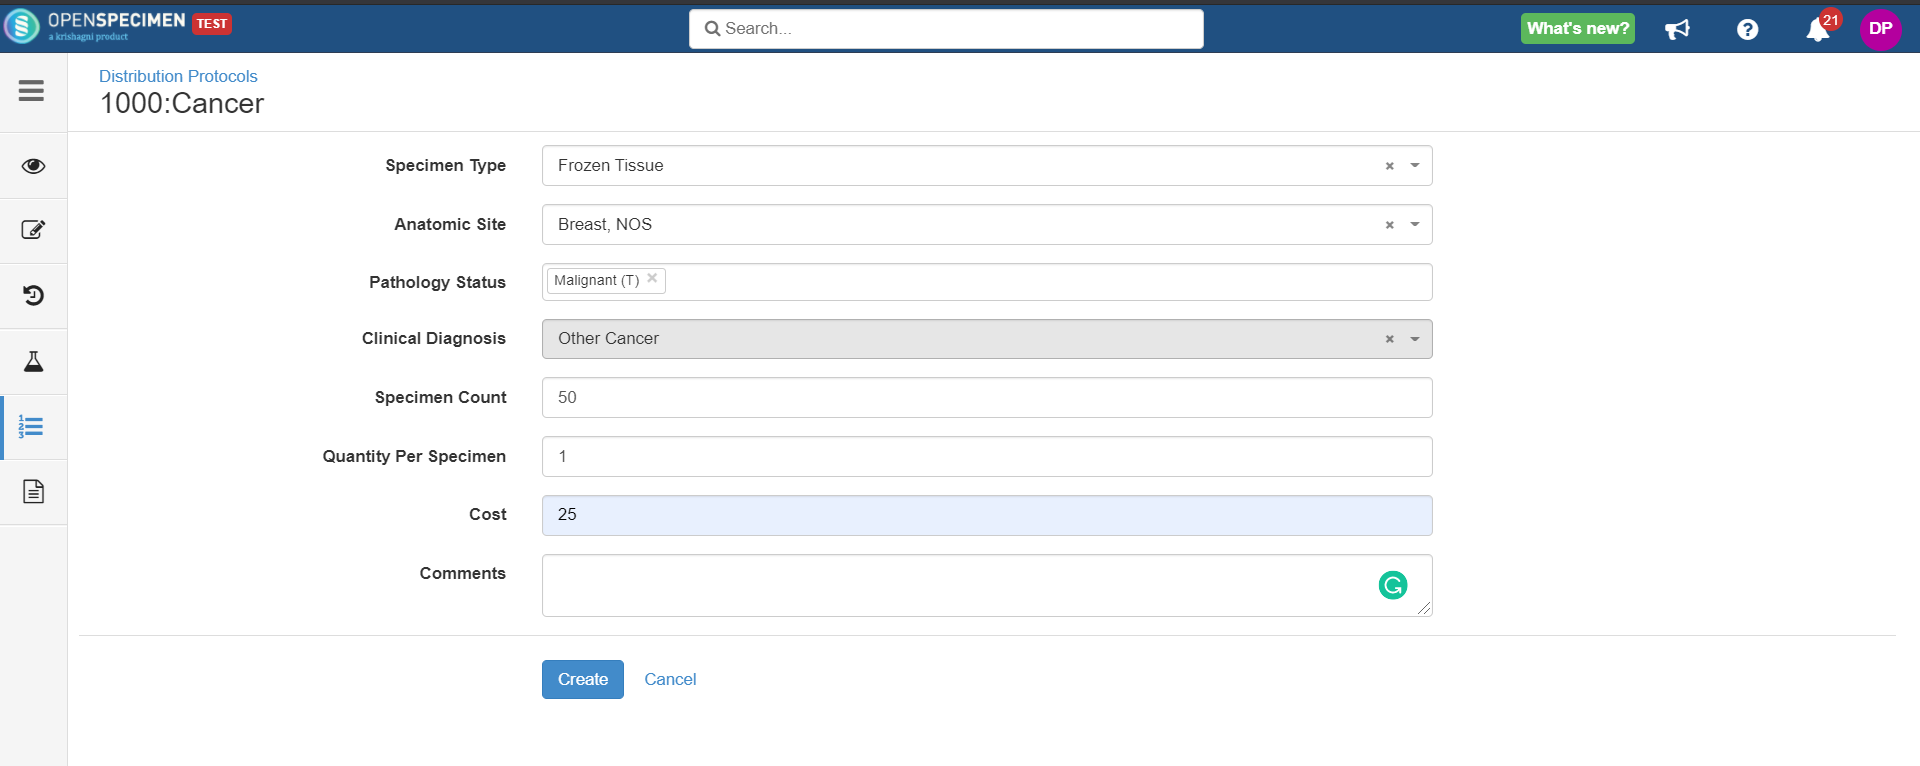
3. Click on ’+Create’ button (top left side).


4. Fill in the details and click on ‘Create.’ 


Important fields:

  • Title and short title of the project.

  • Receiving institute and site: The receiving site for this project.

  • Order report: You can configure a customized report (saved query) based on the project's data needs. Refer to ‘Reporting Manual’ for more details on creating a saved query.

  • Distributing sites: Sites from where the specimens can be distributed to this project.

Note

You can configure custom fields on the create distribution protocols page, refer to the wiki page for more details.


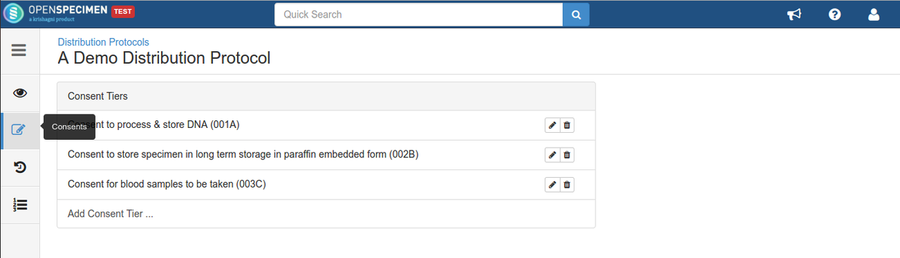
Adding Consent Statements

If configured, OpenSpecimen will verify these consents against the consents of the specimens being distributed. The specimen's distribution is restricted if the consents are not matching. 

On the left-hand side, click on 'Consents' tab under 'Overview.' To add statements, click on 'Add Consent Tiers,' select a statement from the dropdown, and click on 'Add.'


Setting up the requirements

For some projects, you might have specific targets to be met. E.g., 50 breast tumor tissue samples to be distributed. This feature lets you configure such specimen requirements and then track the progress on an ongoing basis.


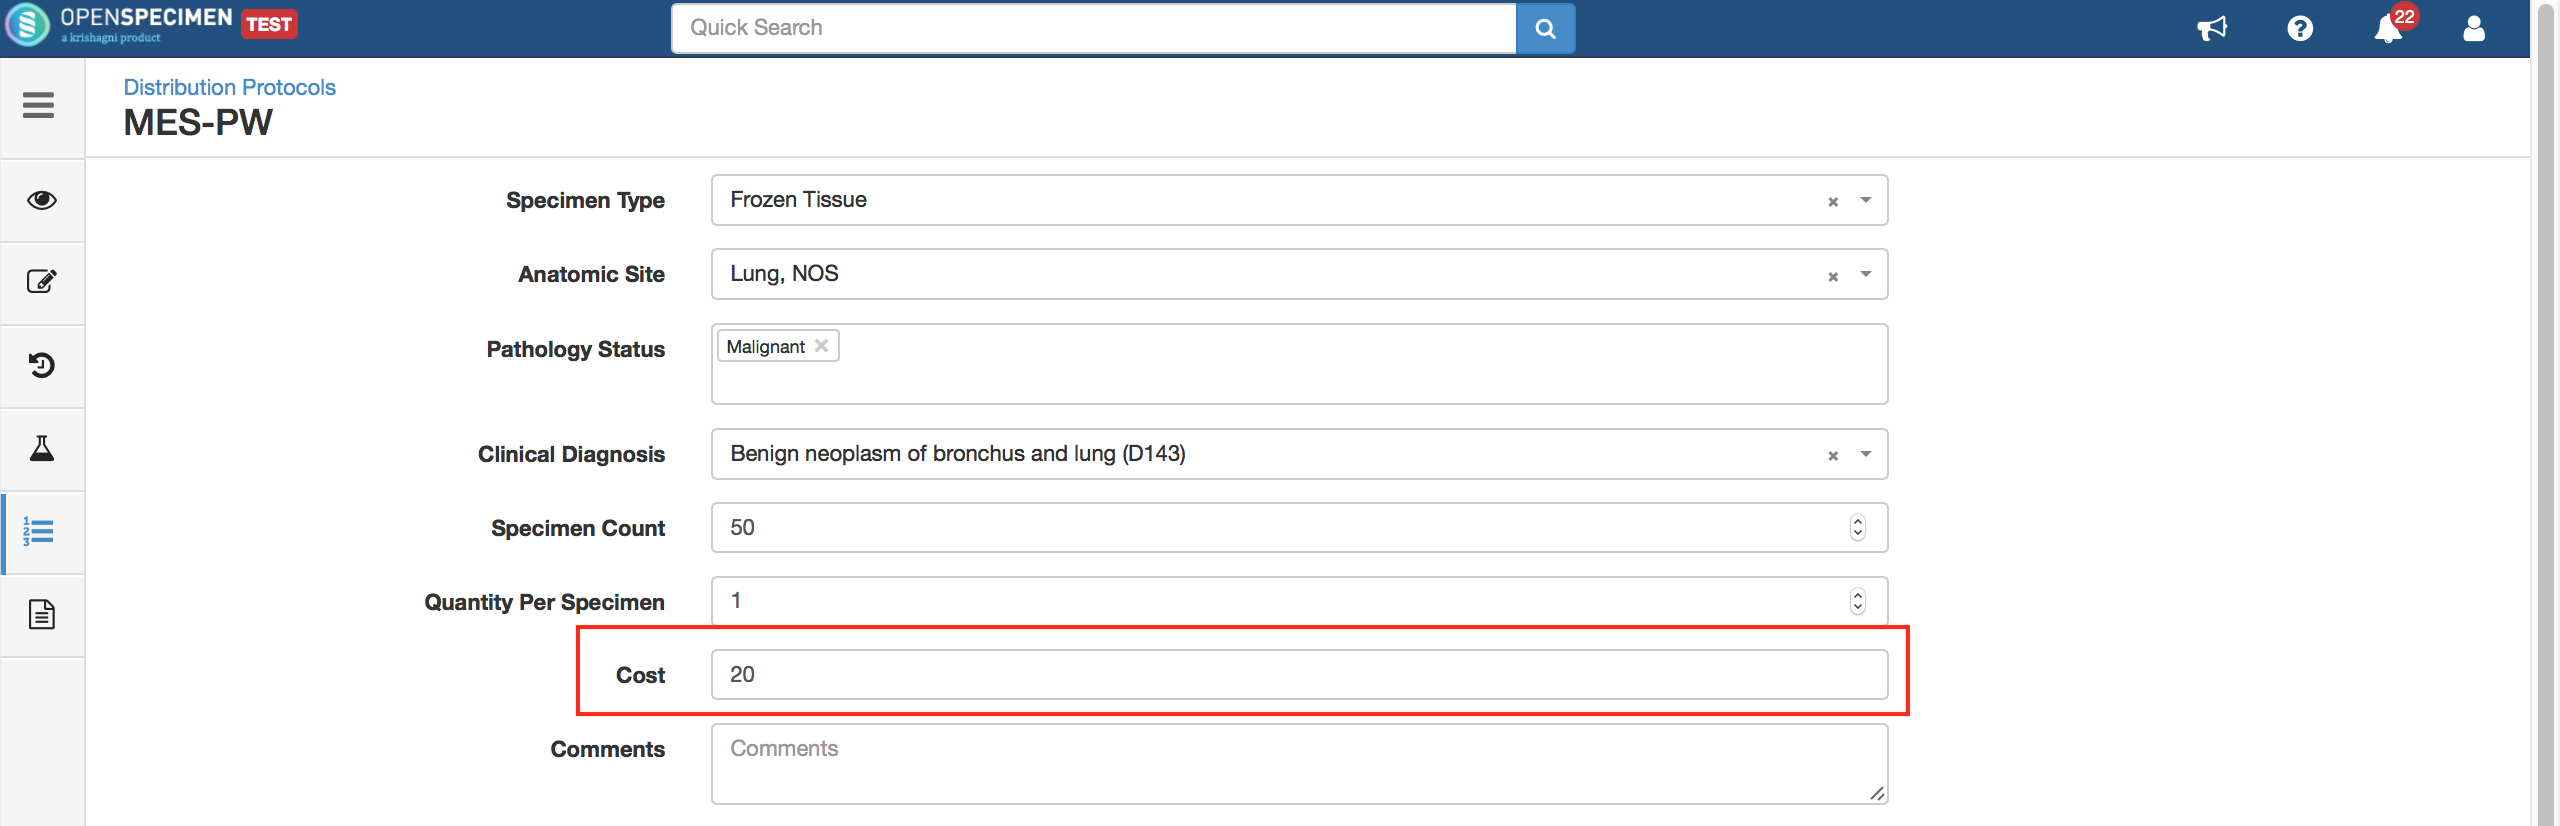
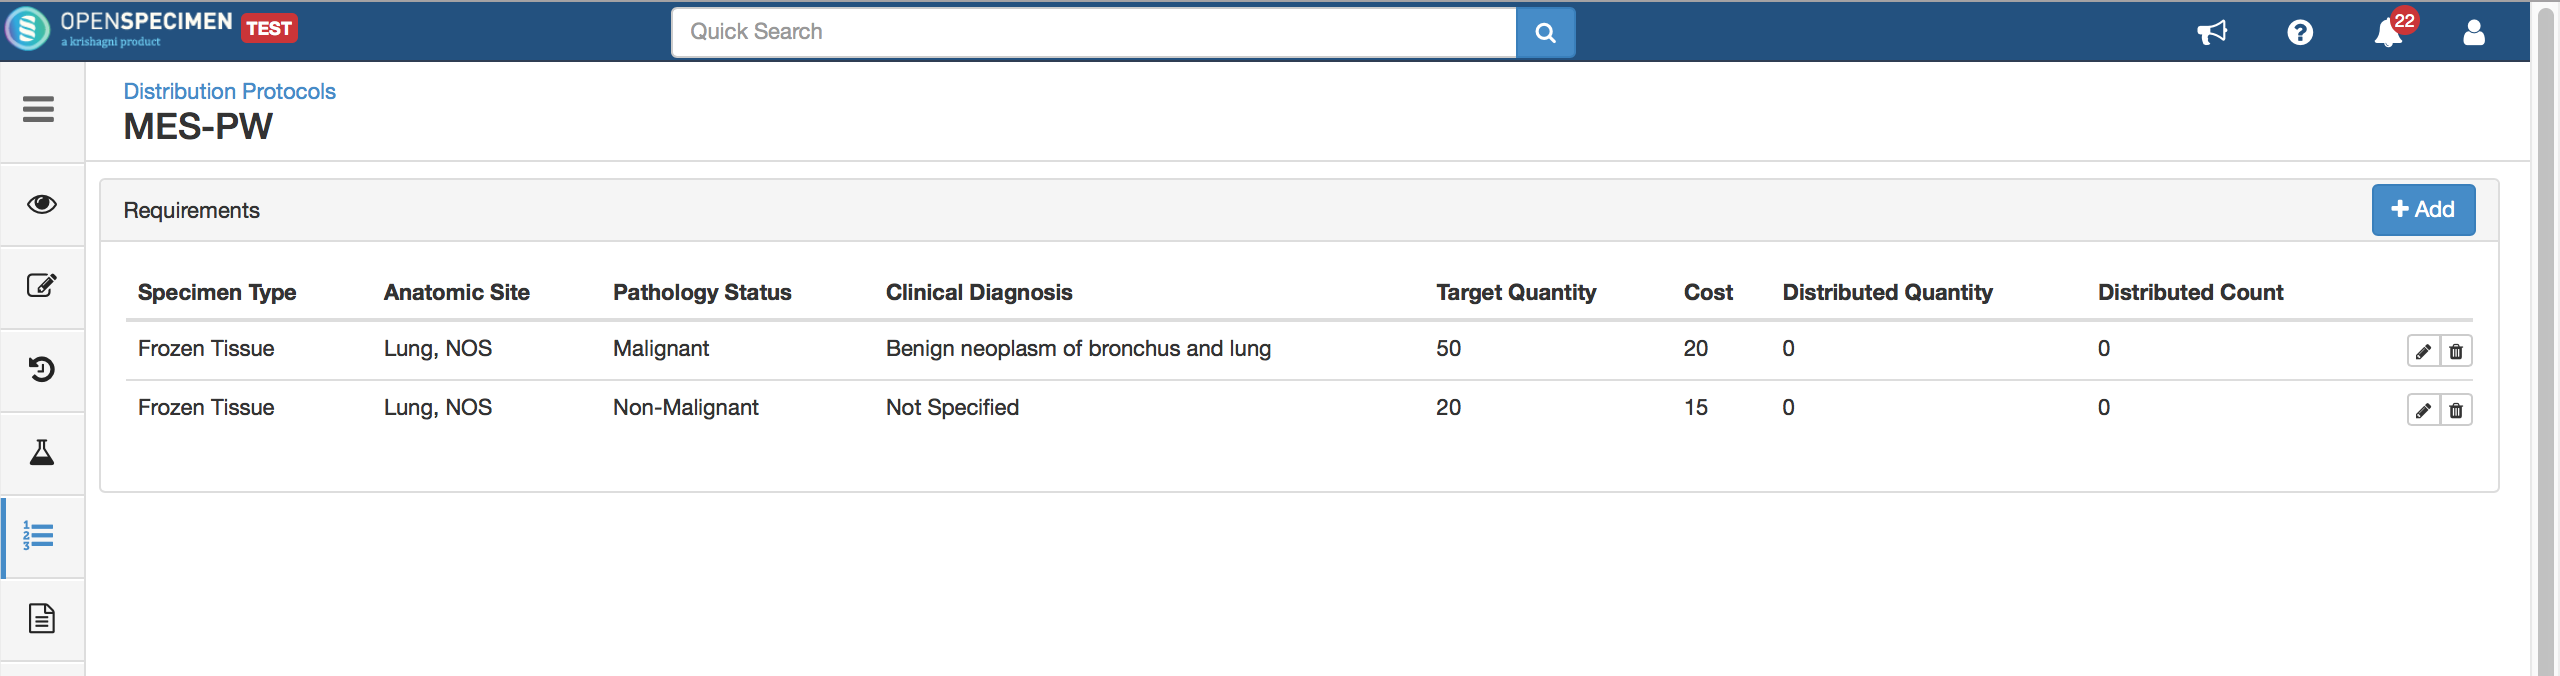
Specimen cost

When specimens are distributed, the researchers are billed with the specific cost. Most of the time, the cost per specimen is fixed per project. Admins can pre-define the rate in the requirements of a DP. During distribution, the rate is displayed based on the configuration in the DP.


Define at the requirement level

Cost is displayed at the "Requirements" tab in the DP:


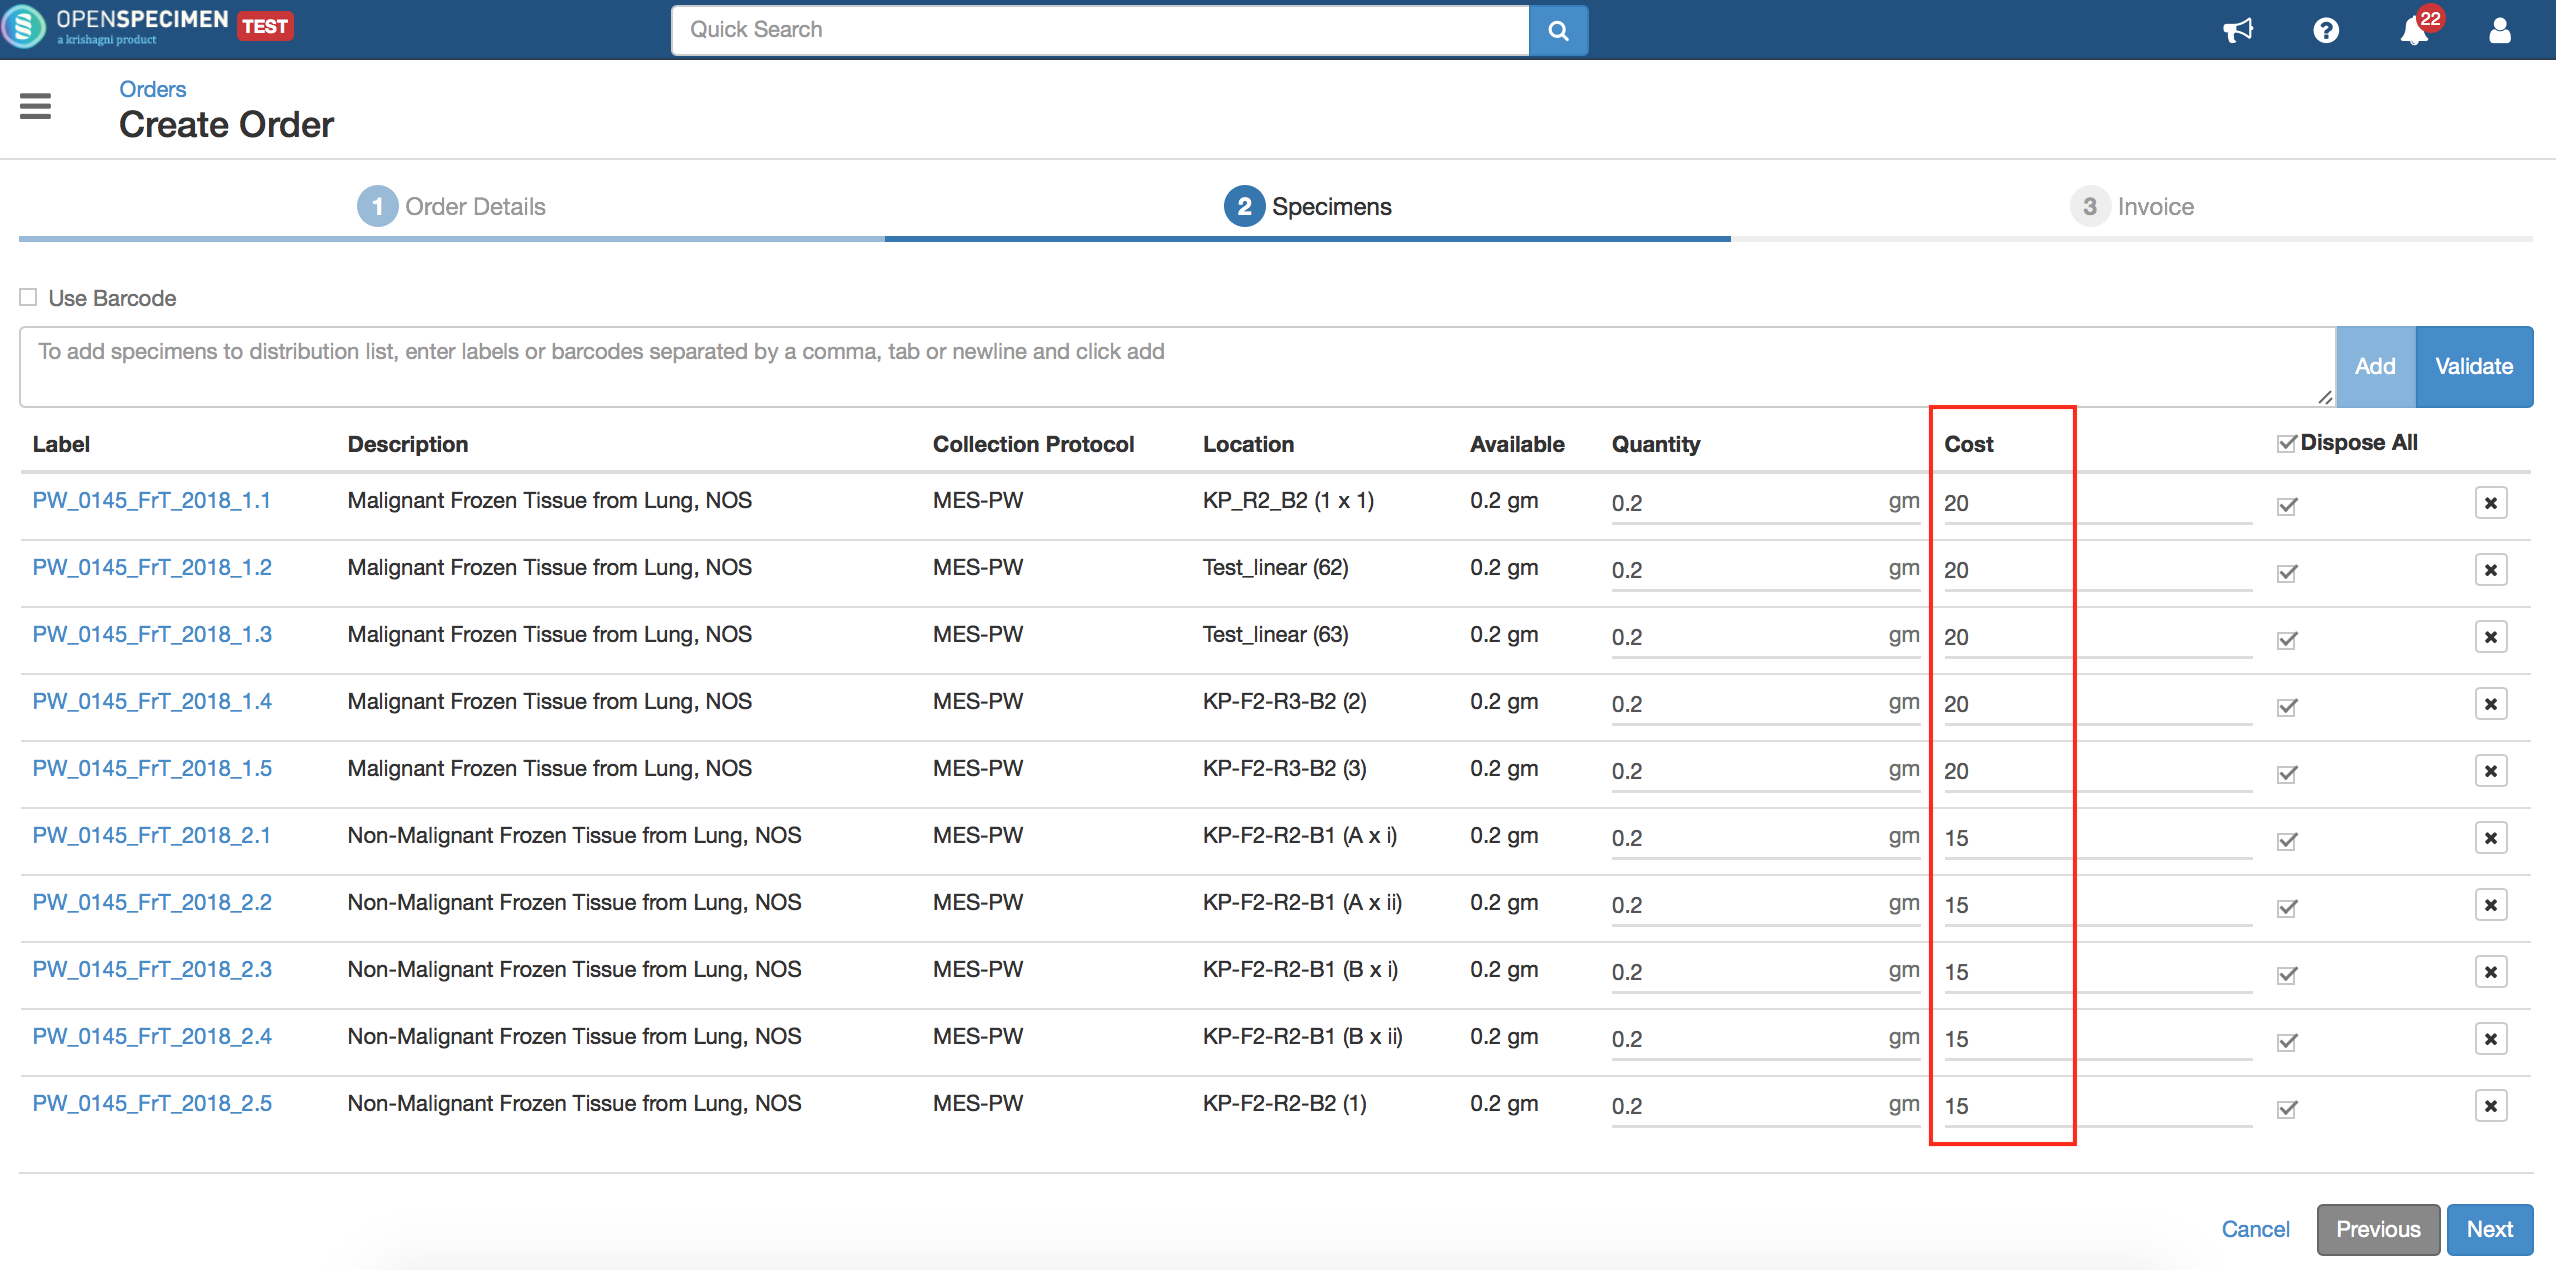
Define during distribution

The billing rate is displayed based on the DP configuration. The distributor can edit the rates for that order if needed.

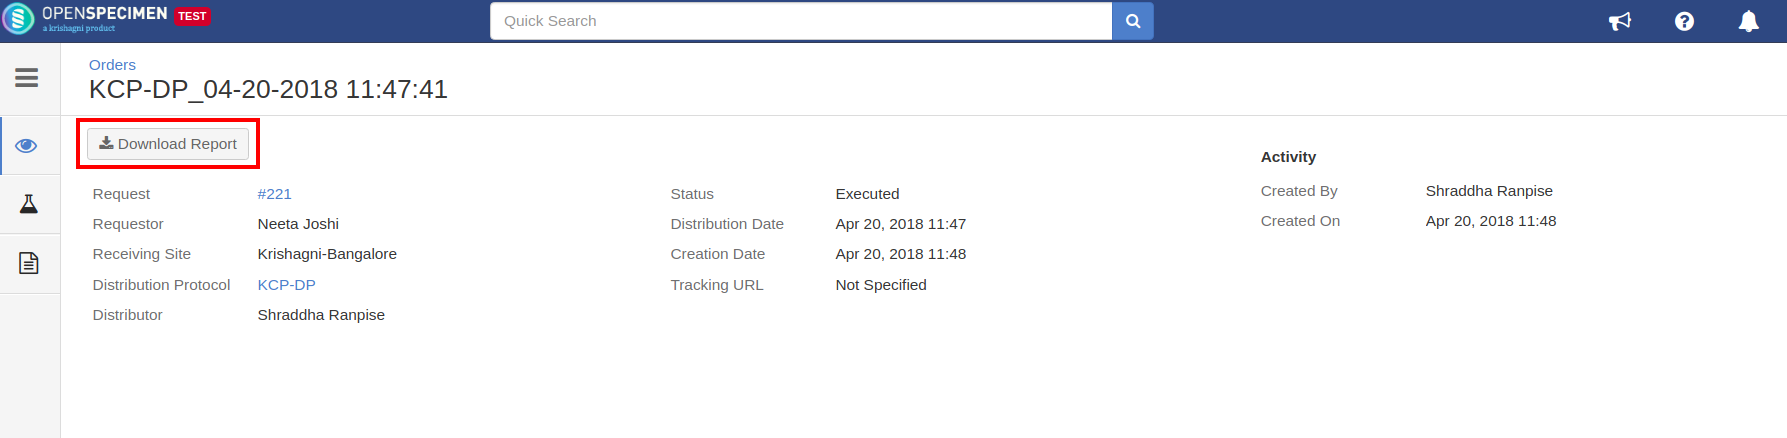
In the above example, five specimens were mapped to 'Malignant Frozen Tissue Lung' specimens in the requirements, and the corresponding cost '20' was populated. The other five specimens were mapped to 'Non-Malignant Frozen Tissue Lung' specimens in the requirements, and the corresponding cost '15' was populated.


Export report

You can export a distribution report in CSV format by clicking on the "Download report" from Orders detail page.

...

Expand

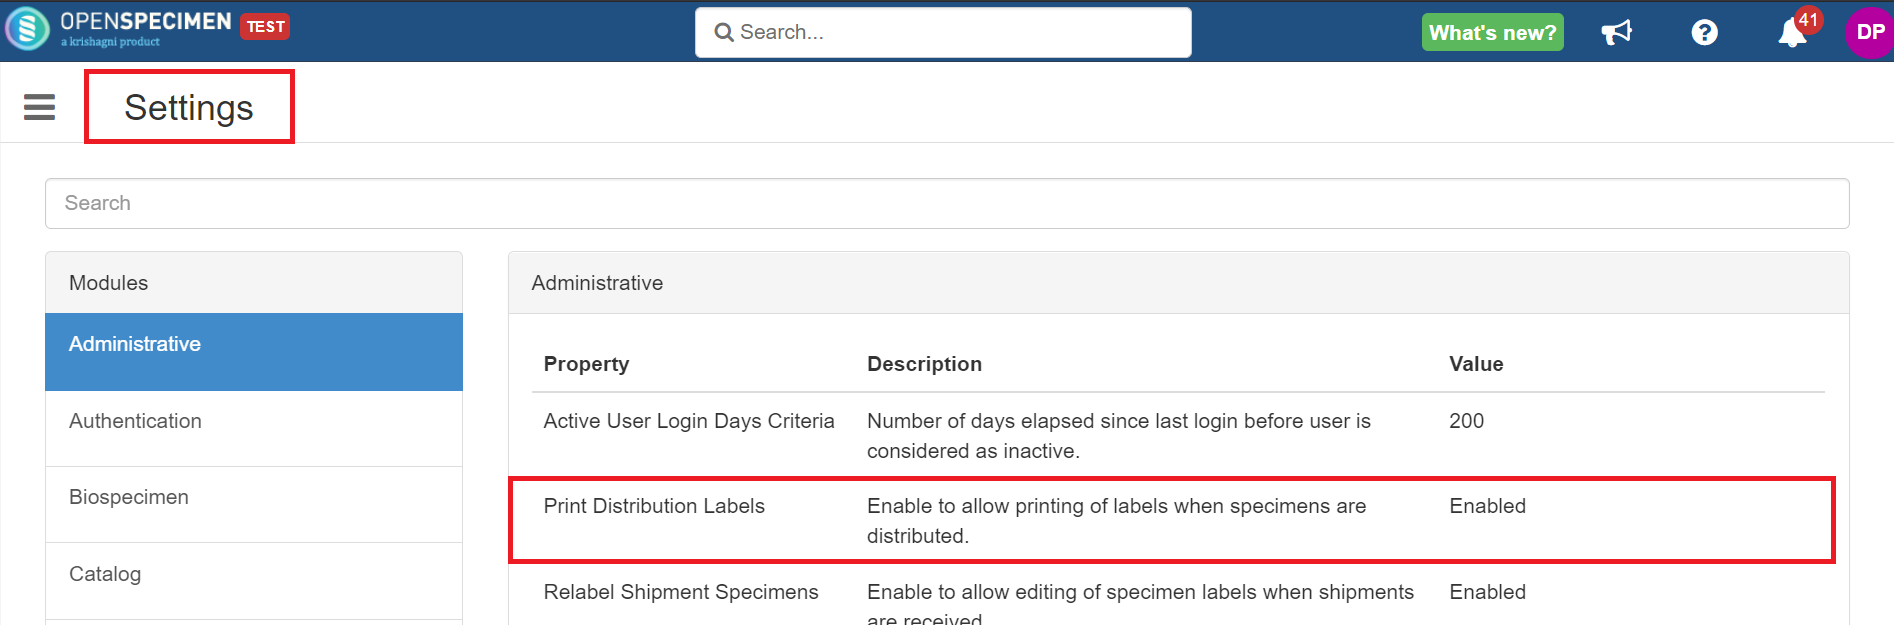
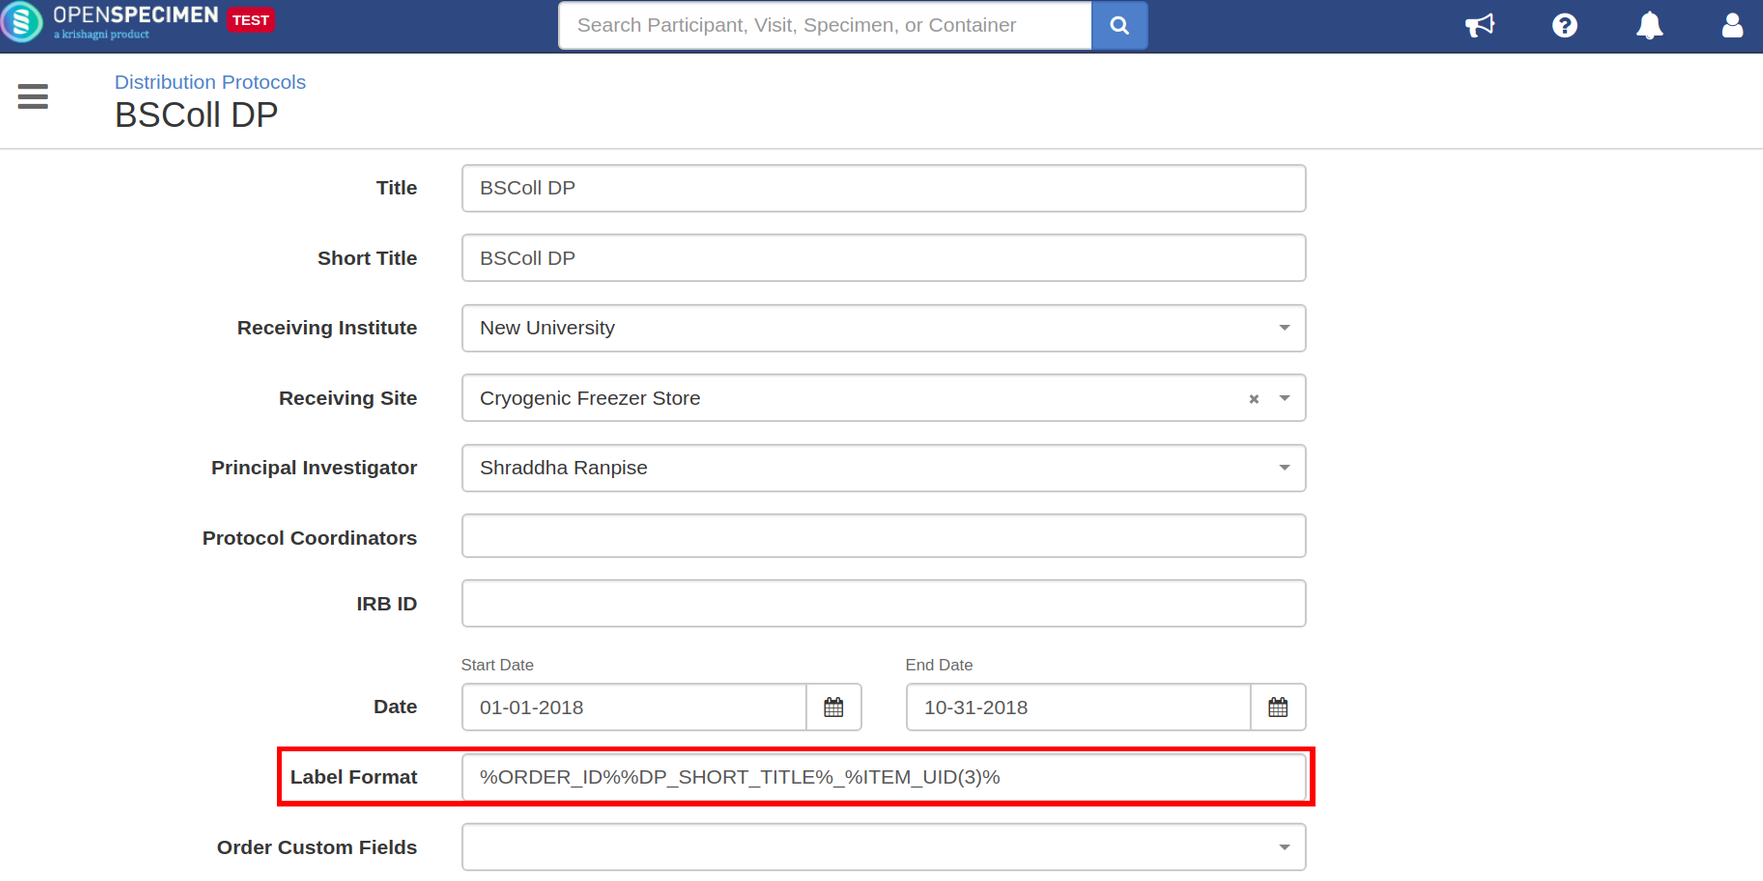
During specimen distribution, you might want to generate and print an "anonymized" label for the specimen. I.e. instead of sending the specimen with the label (sticker) created for an internal purpose, print a new label just the anonymized specimen label. This can be configured in the distribution protocol.

Note
titleNote:

To print labels during distribution, you need to enable "Print Distribution Labels" from "Settings" card.

Steps

  1. Navigate to the distribution protocols page
  2. Click on 'Create' button or select an existing DP and click 'Edit'
  3. Add label format created using any of the above-listed tokens

4. Click create/ update


Tokens

TokenDescription
DP_IDA unique system-generated identifier for Distribution protocol
DP_SHORT_TITLEDistribution protocol short title
DP_UID(n)The unique sequence number for each specimen (order item) distributed to the DP
ITEM_UID(n)The unique sequence number for each specimen within the order
ORDER_IDAuto-generated distribution order ID
SP_PATH_STATUSPathology status abbreviation of the distribution specimen


Examples

Example Description
%DP_ID%%DP_SHORT_TITLE%_%DP_UID(3)%This will generate label as '68BSColl_DP_001', where 68 is the system-generated DP identifier, BSColl_DP is the DP short title and 001 is the unique sequence number for specimen within DP.
%ORDER_ID%%DP_SHORT_TITLE%_%ITEM_UID(3)%This will generate label as '153BSColl DP_001' where 153 is the order identifier, BSColl_DP is the DP short title and 001 is the unique sequence number for specimen within the order


Link CP

Expand

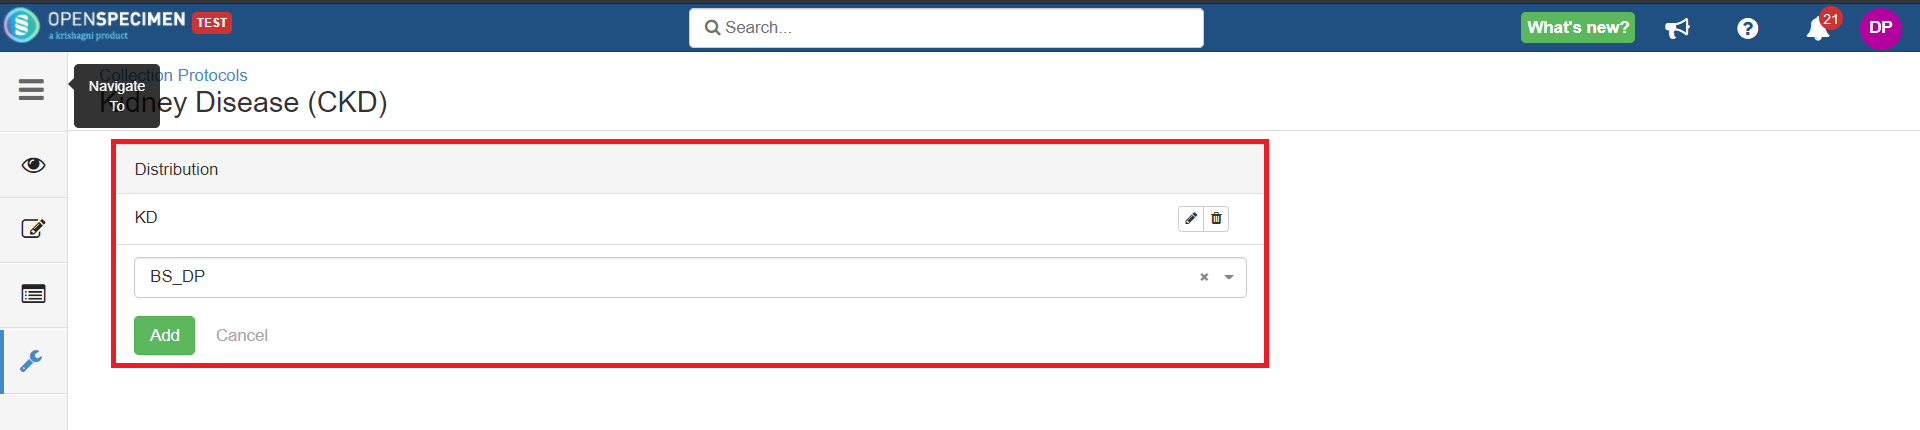
You can link one or more distribution protocols to the collection protocol. This has many uses:

  • Once linked, you can distribute specimens without forcing them to enter order details. During distribution from visit page, the linked DP is pre-populated, and distribution can be done with minimal steps.

  • Suppose specimens from a collection protocol are always distributed to a specific PI or distribution protocol. This linking helps in confirming that.

Steps

  • Go to the collection protocols list page and click on the ‘View Details’ icon of any CP.

  • Click on ‘Settings’ icon from the left side menu and select option ‘Distribution.’

  • Select any distribution protocol from the drop-down and click on ‘Add’ button (Refer ‘Create DP manual’ to create DP). Only those DPs are shown in the dropdown which have same distributing sites as the CP site.


Note
titleNote:
You can link multiple distribution protocols to a CP. In such cases
  1. If you've linked a DP to a CP, you cannot distribute the specimens of that CP to any other distribution protocol.
  2. If multiple DPs are linked to a CP, you can select one of the linked DPs for distribution.