| Info |
|---|
For Enterprise Edition Only - This feature is available only in the Enterprise Edition |
Introduction
Using this plugin, super admins can update any dropdown list values in the application. To access, go to Home → Extras → Dropdown Manager.
...
Add a new dropdown
Add new value
Edit or delete existing values
Import/Export values
Set properties like units for specimen types, abbreviations, etc.
Add a new dropdown
| Expand |
|---|
| title | Click here to view details … |
|---|
|
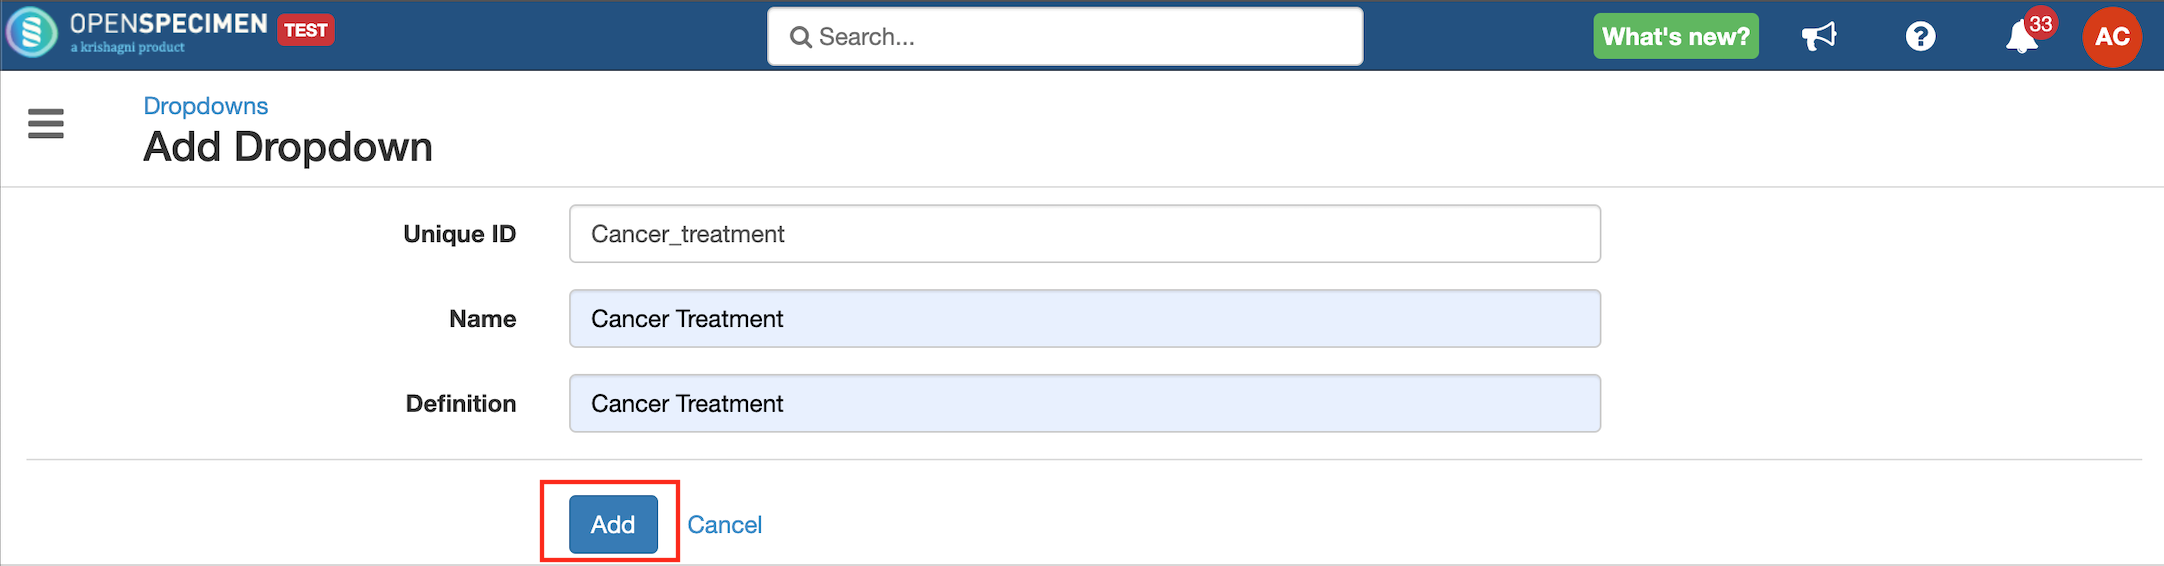
Users can add a new dropdown altogether. Follow the below steps: Go to: Home → Extras → Dropdown Manager. Click on the "+Add" button.
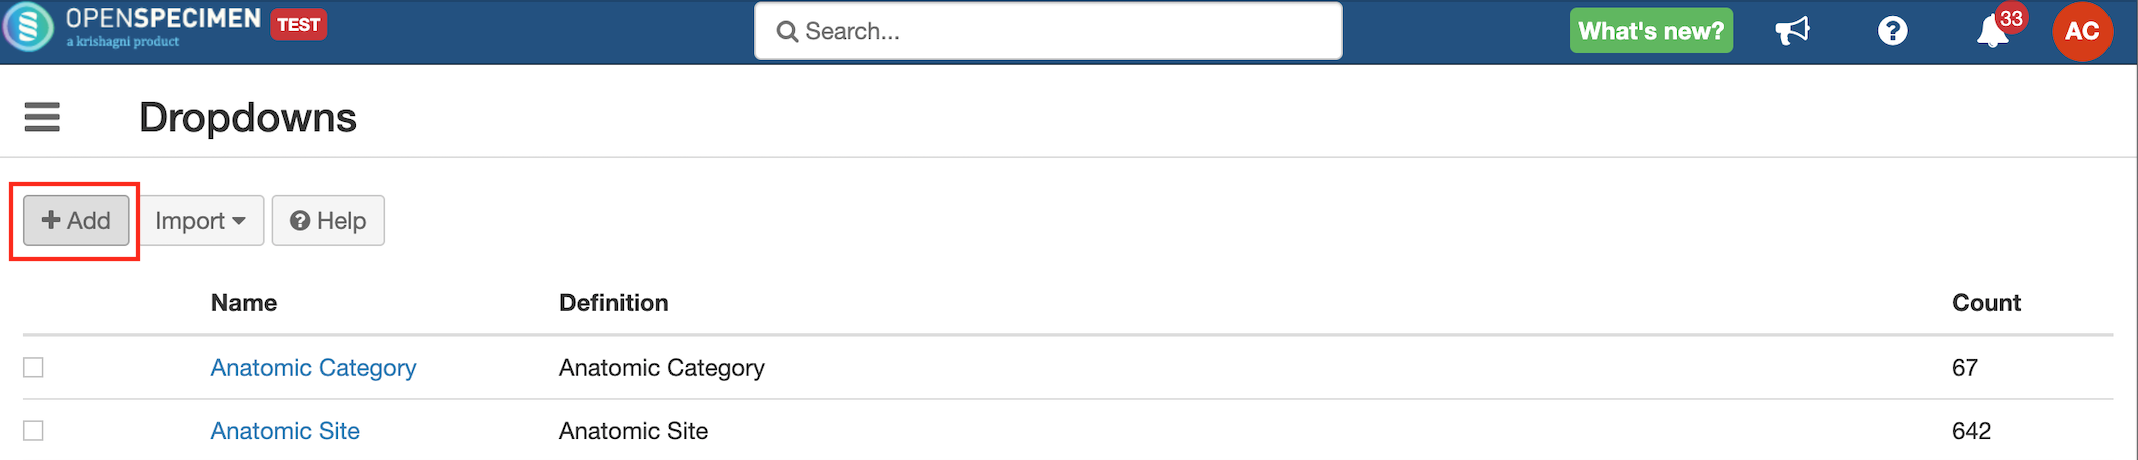
Enter the value of the 3 mandatory fields present on the screen
Unique ID: The unique attribute name of the dropdown. This is how the dropdown name will be saved in the database.
This appears in brackets once you click on an existing dropdown

Name: Name of the dropdown
Definition: Information regarding the dropdown
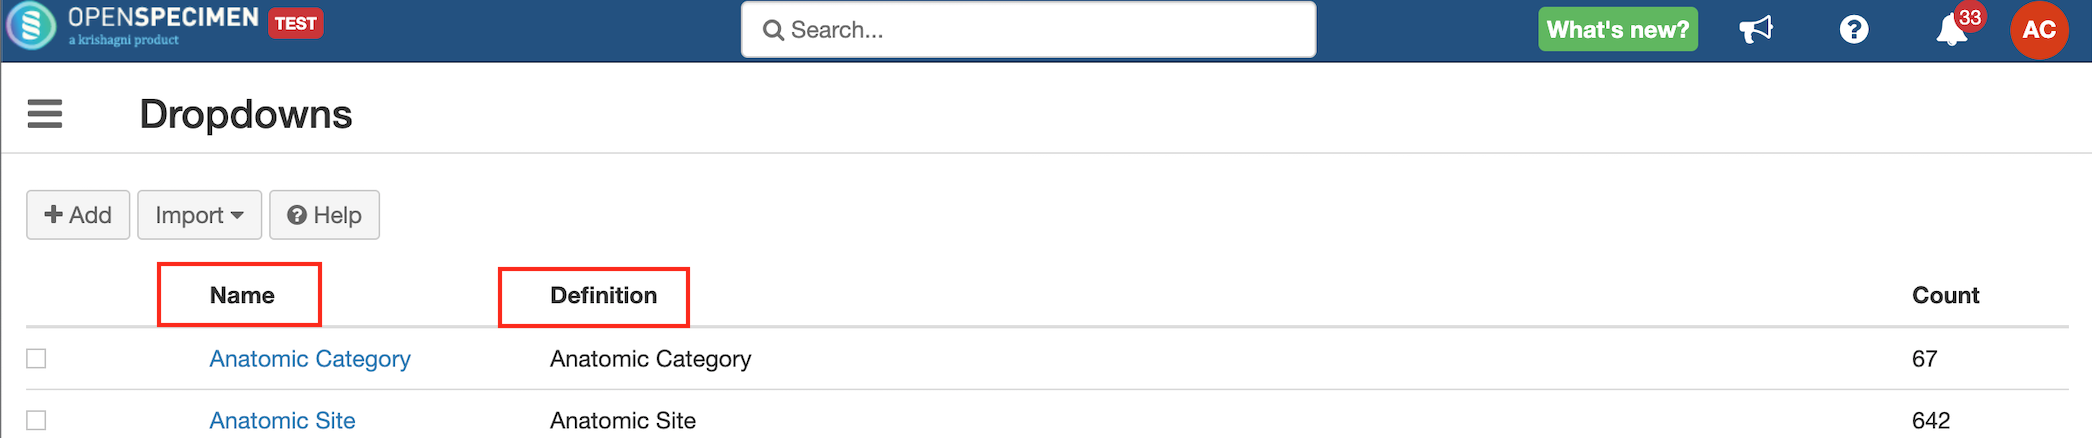
The name and definition appear on the dropdown list page as follows
 Fill in all the three values and click on Add.
|
Add values
| Expand |
|---|
| title | Click here to view details … |
|---|
|
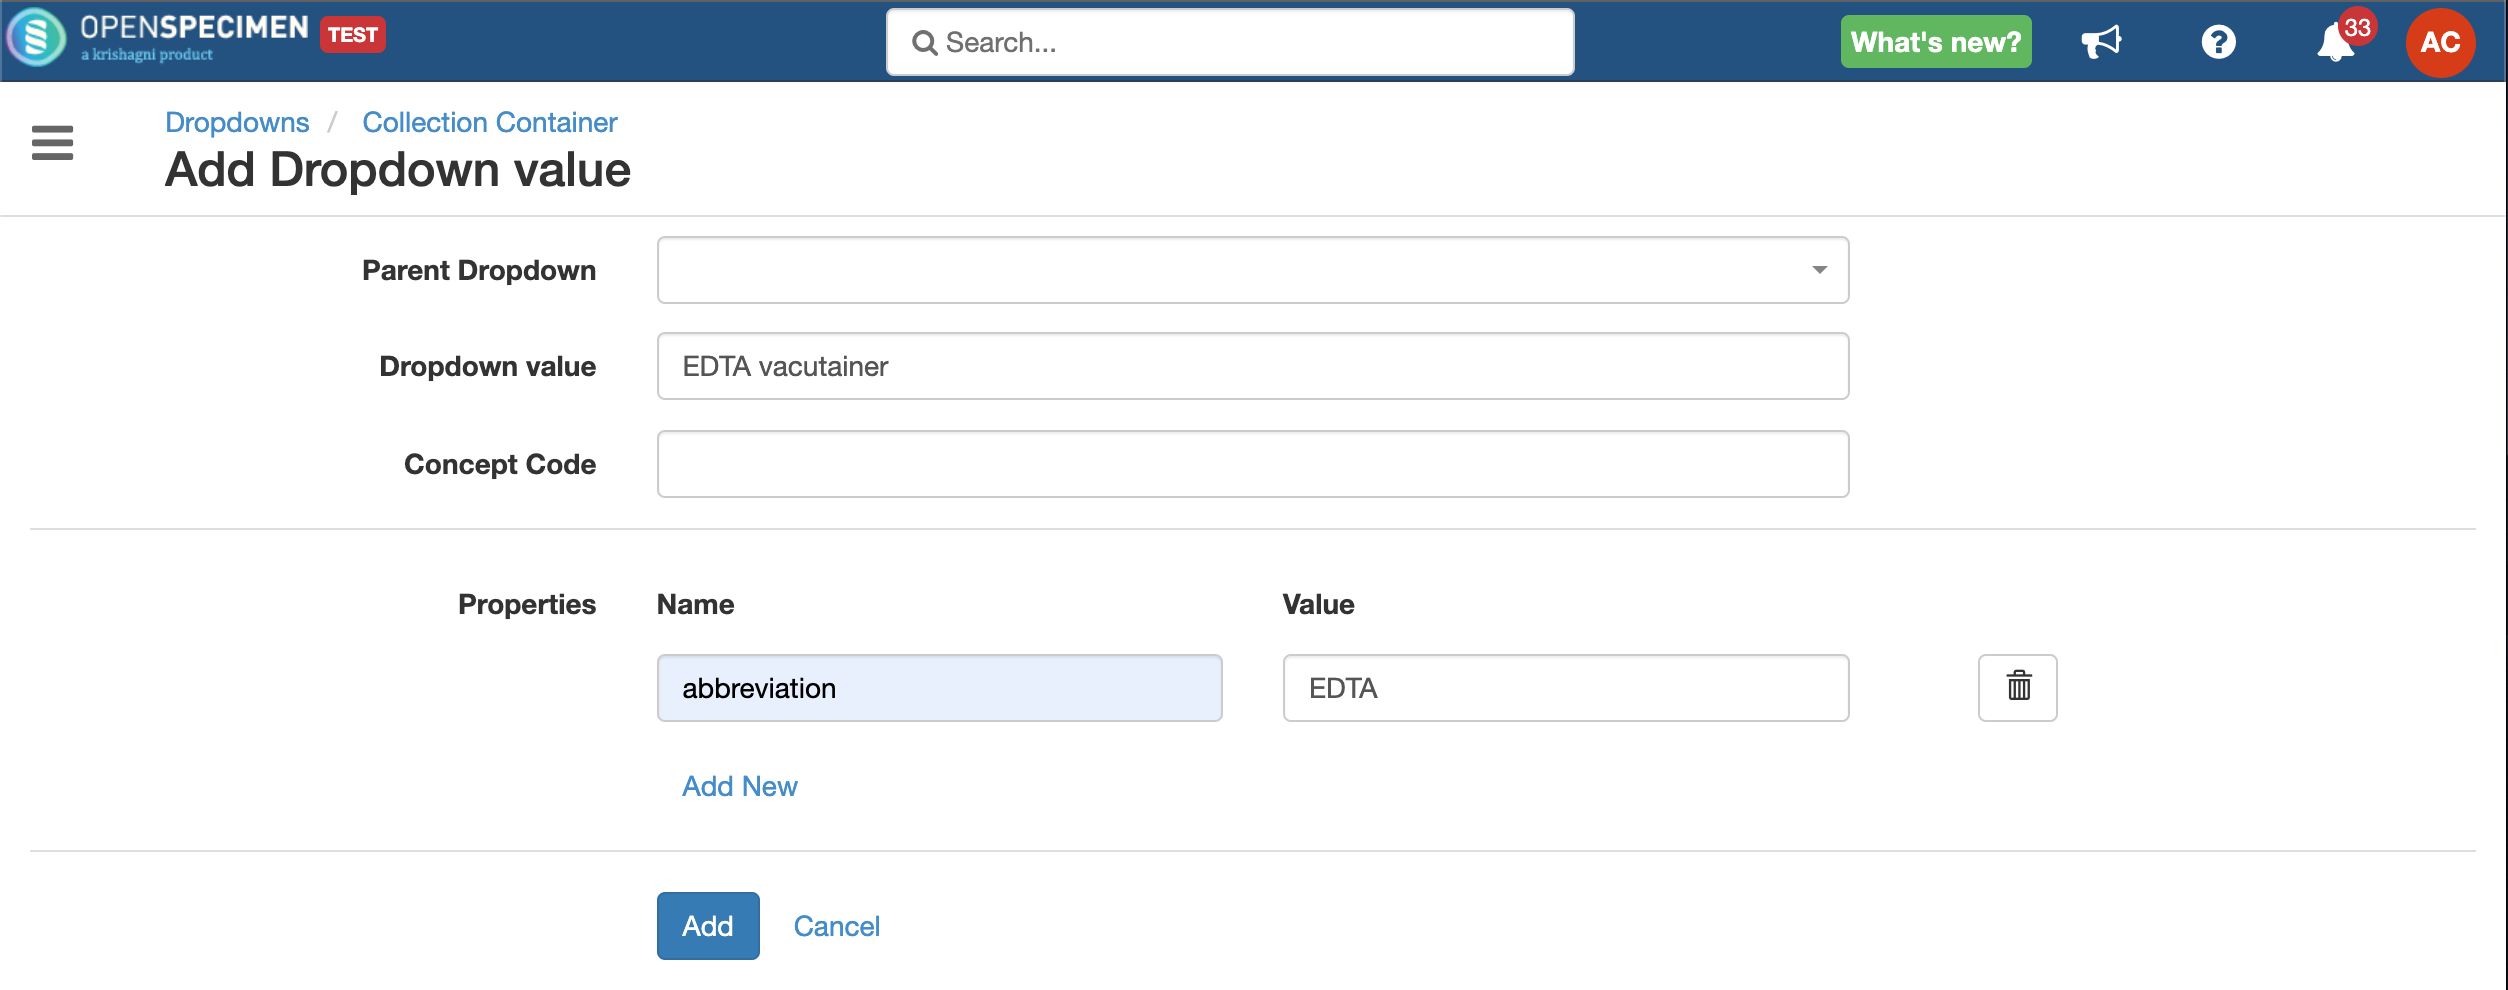
Go to: Home → Extras → Dropdown Manager. Look for the field of interest. E.g., 'Collection Container'. Click on the '+Add' to add new values.
 Fields | Description |
|---|
Parent Dropdown | Used only in the case of "Specimen Type" fields. This is to configure the parent-child relationship between dropdown values. | Dropdown value | The value of the field. | Concept code | If you want to assign a code to the value. E.g. SNOMED code, ICD code, or your own code (like 1 for Male, 2 for Female). If the concept code is set, it is displayed in the dropdown for that value. E.g. 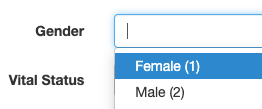 This is useful especially in dropdowns like clinical diagnosis which has 1) a lot of values 2) standard vocabulary like SNOMED or ICD etc. During data entry, you can search by concept code rather than free text to avoid errors (since often you get SNOMED codes from the labs rather than text). In the future, this will be available in the query interface to include the codes in the query results. | Properties | Some fields could have extra properties, like specimen type abbreviations, units, etc. Read the Properties section below. |
| Warning |
|---|
Parent Dropdown in case of Specimen Type In order to add a new specimen type, it is mandatory to add it under one of these 4 parent dropdowns: Cell, Fluid, Molecular, or Tissue. If you include it under any other parent class, there are some functionalities that might break. |
|
Add properties to the values
| Expand |
|---|
| title | Click here to view details … |
|---|
|
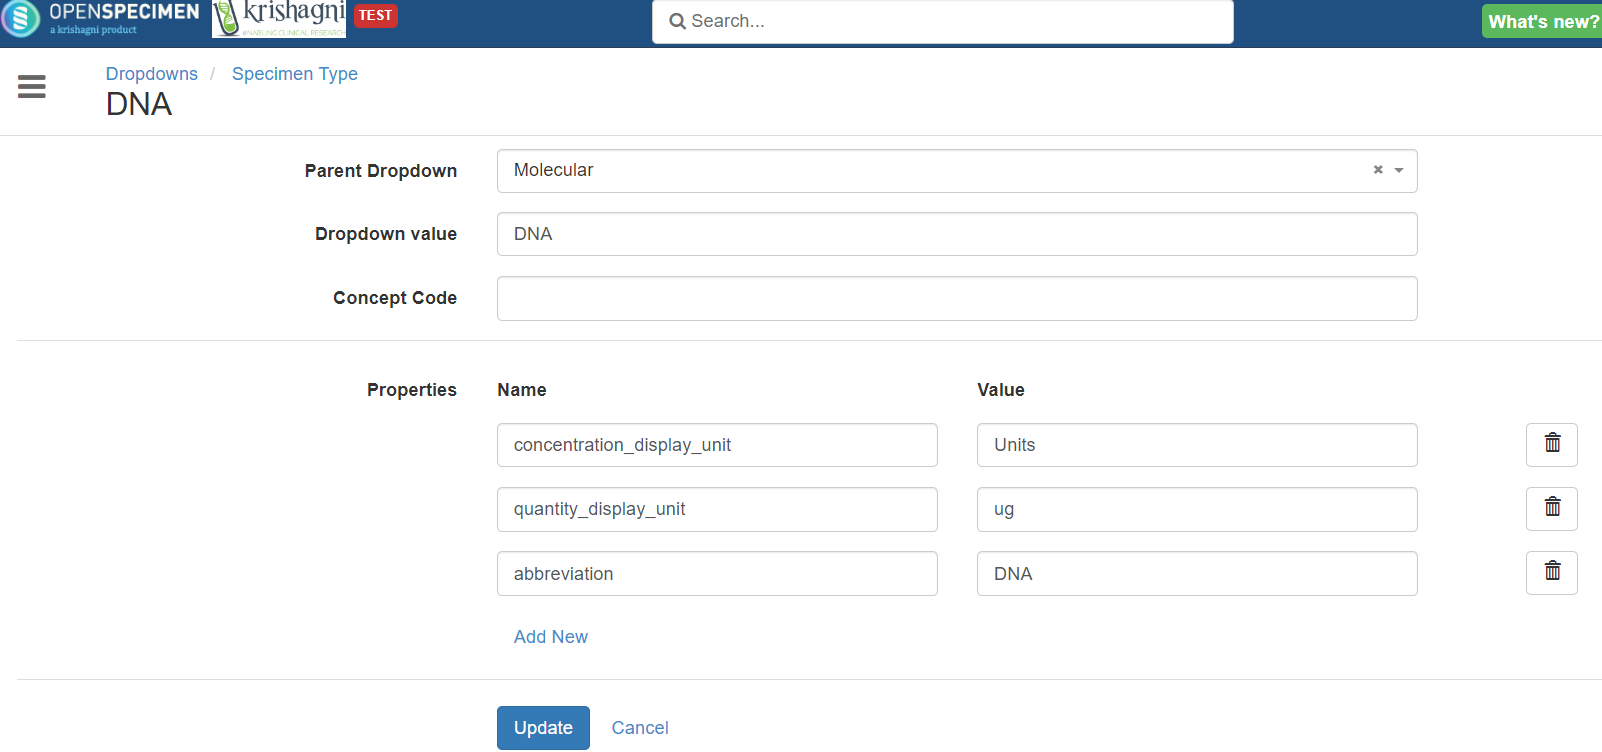
Go to: Home → Extras → Dropdown Manager. Look for the field of interest. E.g., 'Specimen Type'. Click on the '+Add' to add new values.
 Below are the specimen-type properties Attribute | Property Name | Property Value | Description |
|---|
Specimen Type | abbreviation | Abbreviation for the specific specimen type | Used for replacing the value of %SP_TYPE% token for specimen label auto-generation. | Specimen Type | quantity_unit | Quantity units for the specific specimen type | Used to display the units on the specimen pages. Value can only be plain text. If special characters like symbols need to be used, it needs to be specified under quantity_display_unit. For e.g., μg/m3 By default, the units are set at classes level which will apply to all types under it: Tissue: gm Fluid: ml Molecular: µg Cell: count
| Specimen Type | quantity_display_unit | Quantity display unit for the specific specimen type | Used to display the units on the specimen pages. For example - µg. If both quantity_unit and quantity_display_unit are specified, quantity_display_unit is used to display unit in all pages. | Specimen Type | concentration_unit | Concentration unit for the specific specimen type | For example - microgram/ml | Specimen Type | concentration_display_unit | Concentration display unit for the specific specimen type | For example - µg/ml. Similar to quantity unit, concentration_display_unit is only used when special symbols or characters need to be displayed. If its only plain text, then specifying concentration_unit is sufficient. |
|
Edit values
| Expand |
|---|
| title | Click here to view details … |
|---|
|
Since v6.2, editing of dropdown values is supported via Dropdown manager - even if it is already used. All the records are automatically updated if the value is already used. To edit, go to the overview page of the dropdown value and click 'Edit'. 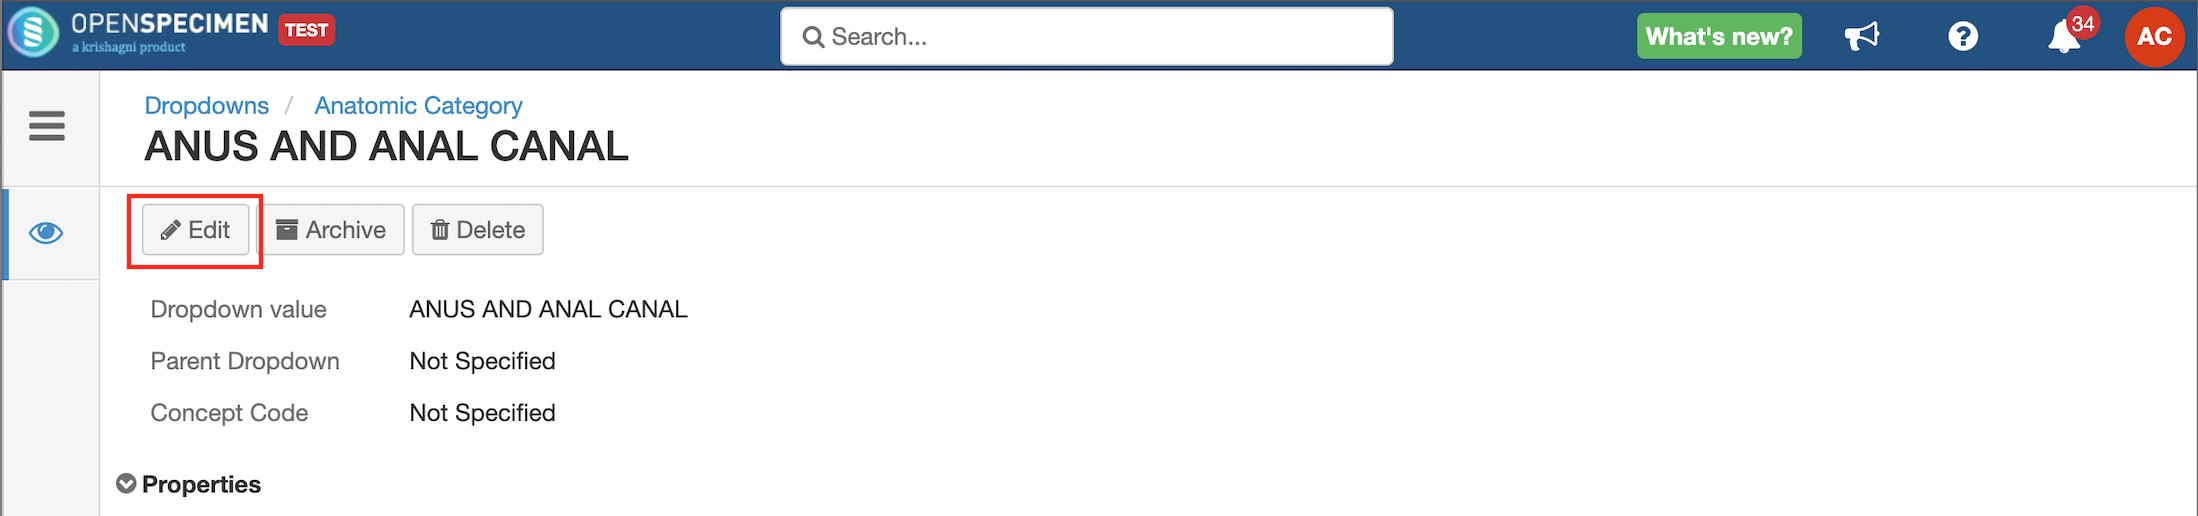 |
Delete values
| Expand |
|---|
| title | Click here to view details … |
|---|
|
Deleting of values is supported only if the value is not used. A value cannot be deleted if it is used in previous records. To delete, go to the overview page of the dropdown value and click 'Delete'. 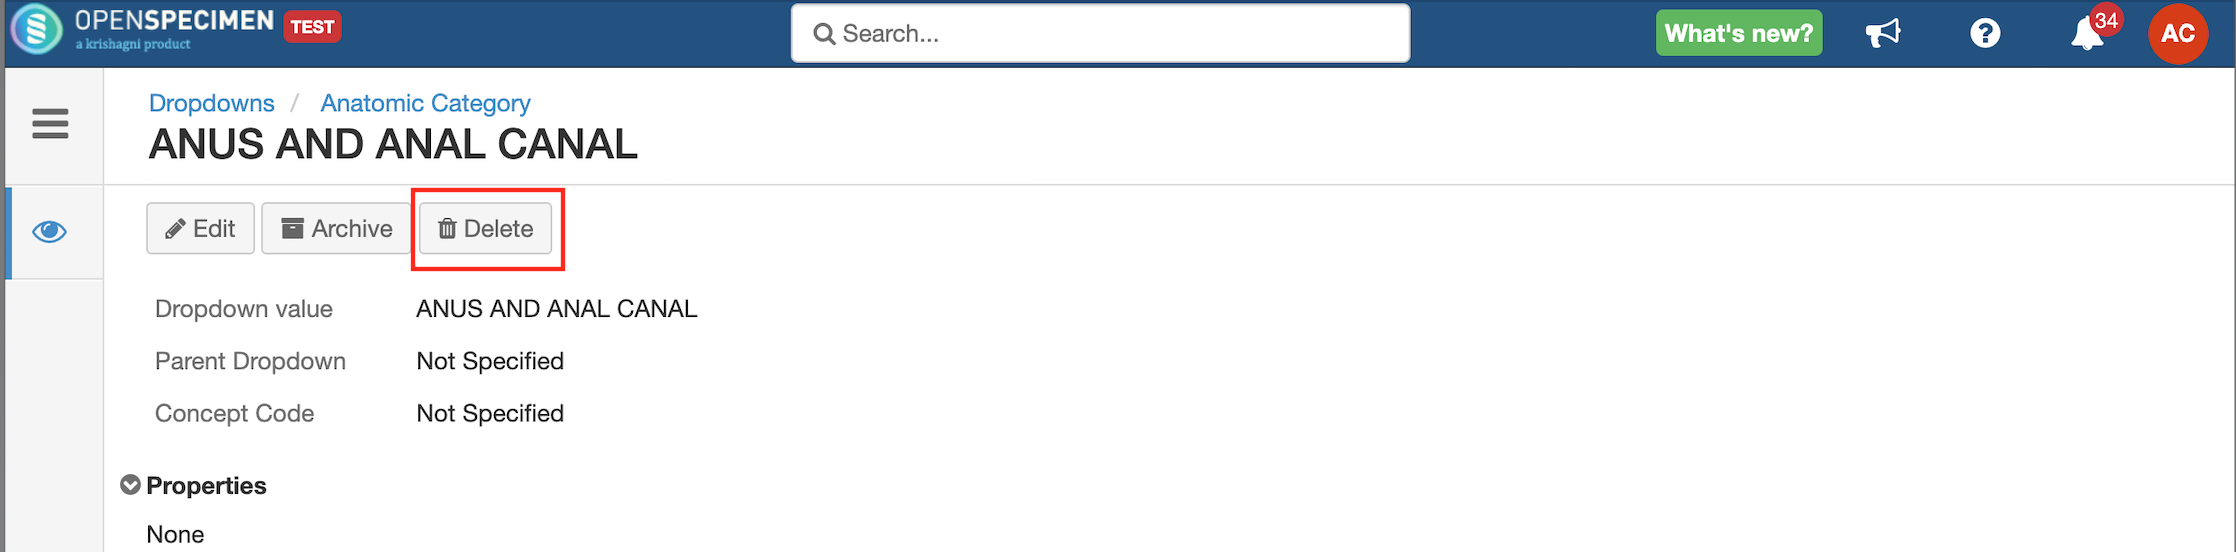 To delete all the values in a dropdown, go to the required dropdown → click on "Delete All". 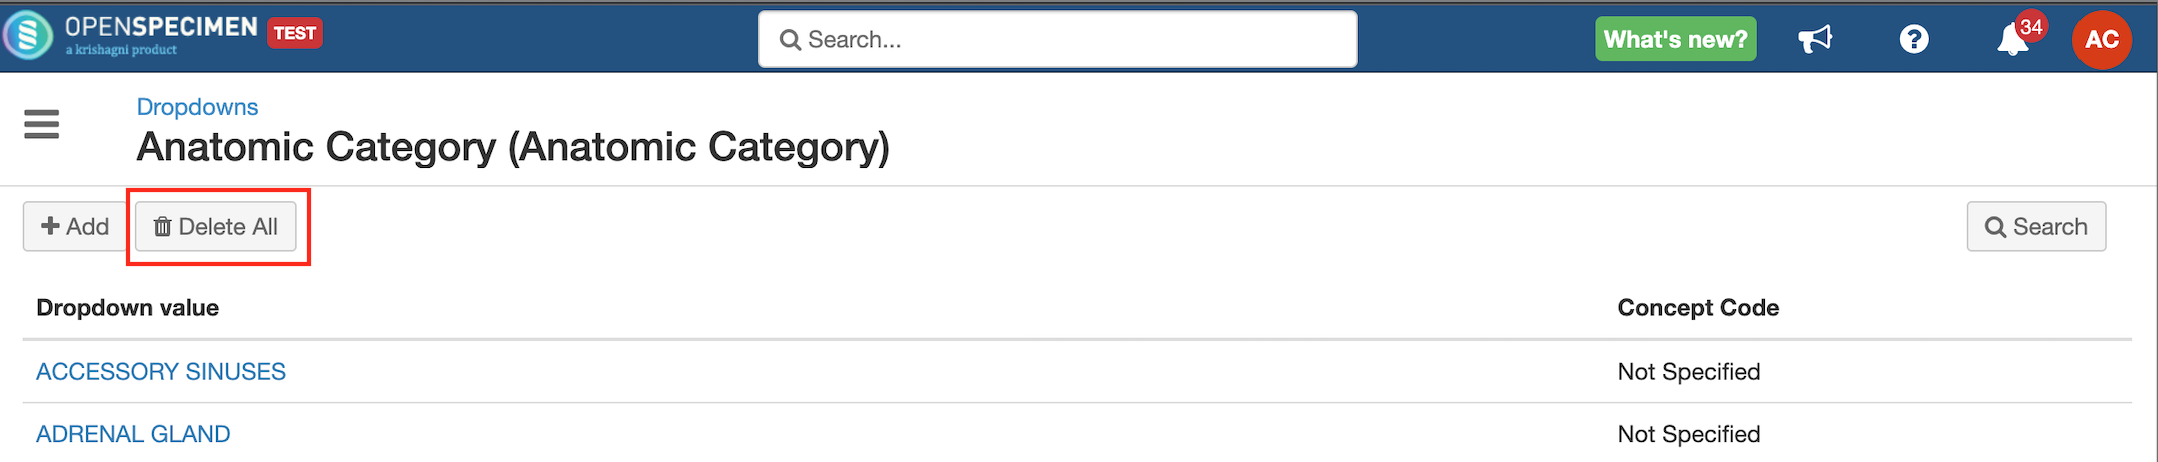 |
Archive values
| Expand |
|---|
| title | Click here to view details … |
|---|
|
From v6.2, it is possible to archive the drop-down values which are no longer in use. To archive, a value, go to the overview page of the value and click 'Archive'. When a parent PV is archived, all its descendants are archived too. 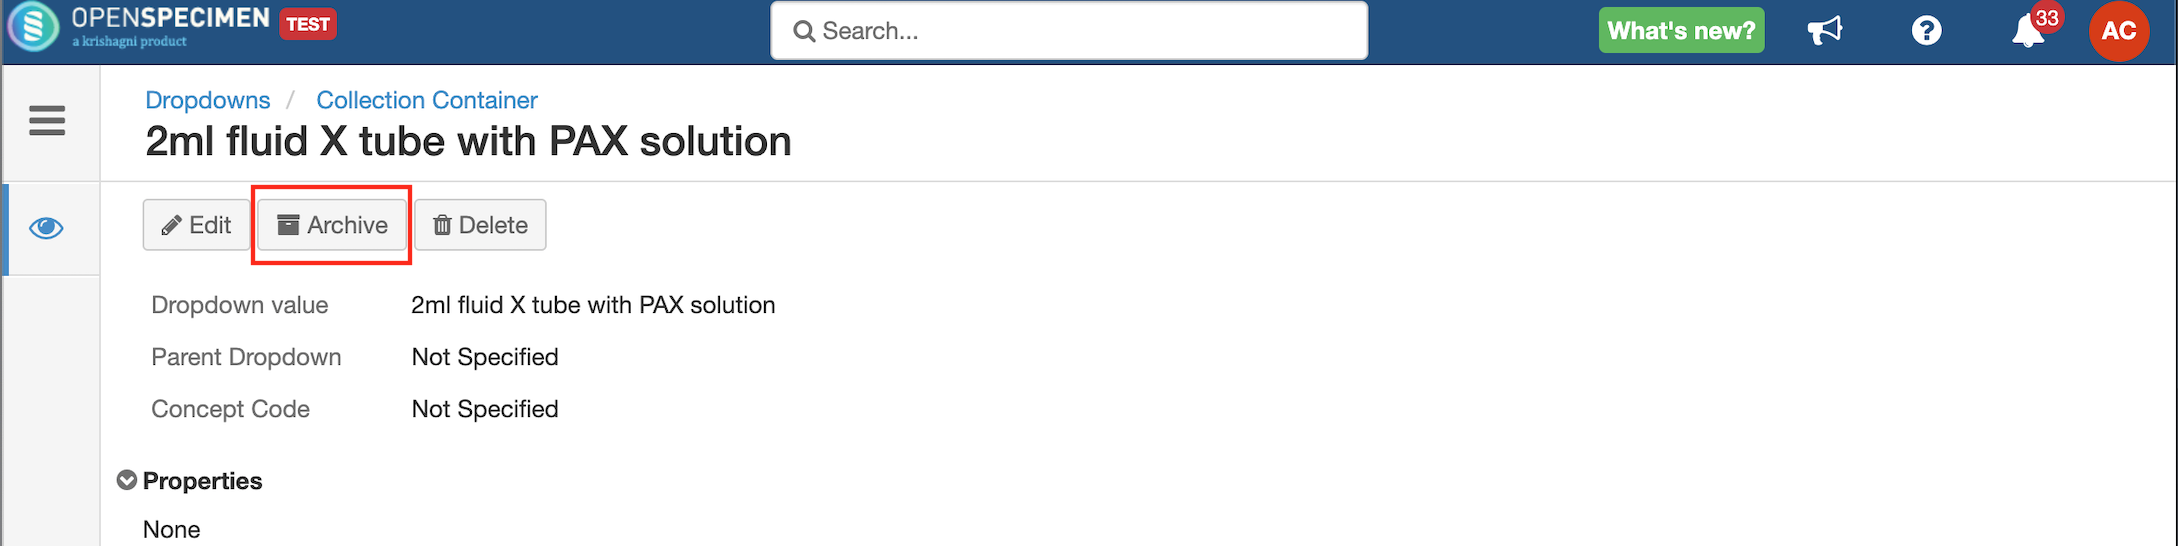 |
Re-activate the archived values
| Expand |
|---|
| title | Click here to view details … |
|---|
|
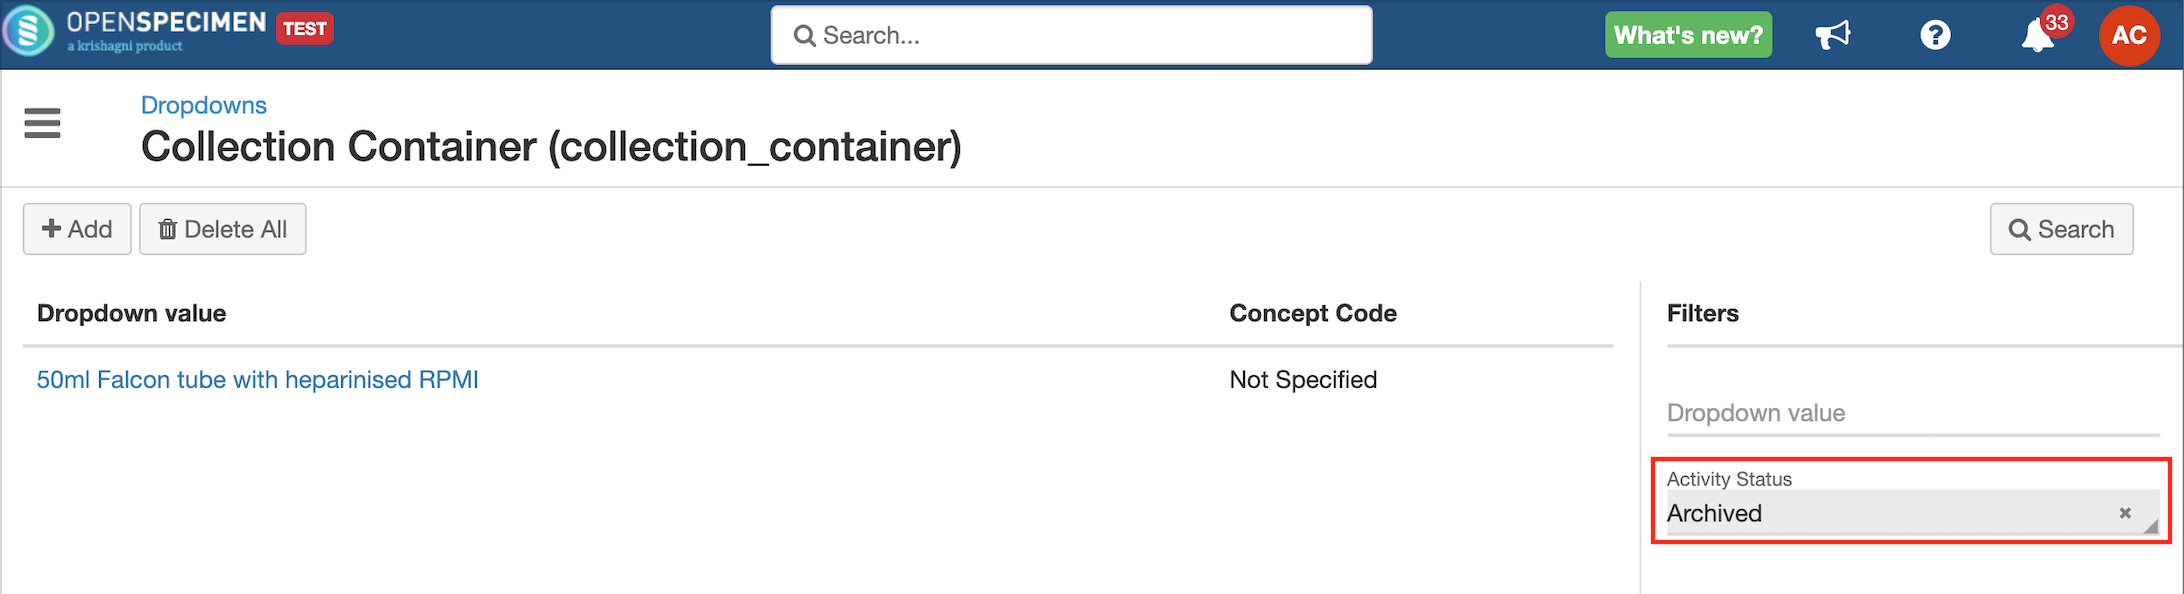
The archived values can be searched by selecting the activity status as 'Archived' in the search filter.
To reactivate the archived value search the archived value and click 'Reactivate'. 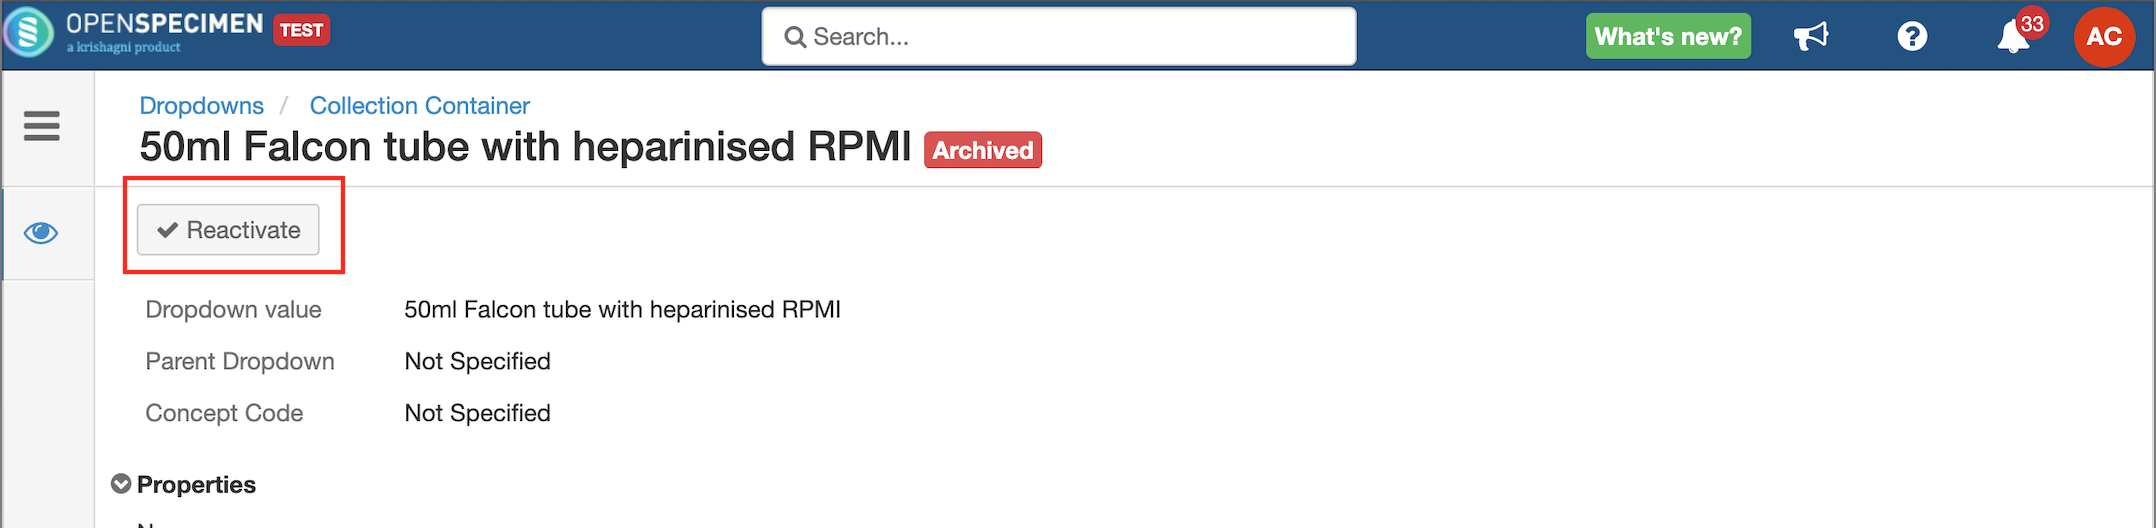 |
Import CSV
| Expand |
|---|
| title | Click here to view details … |
|---|
|
To add multiple values, OpenSpecimen supports the upload of these values. To add multiple values Click on 'Extras' → 'Dropdown Manager'. Click Import → Dropdown values. Download the template CSV file. Enter the details as mentioned in the below table. Upload the file and click ' Validate and import'.
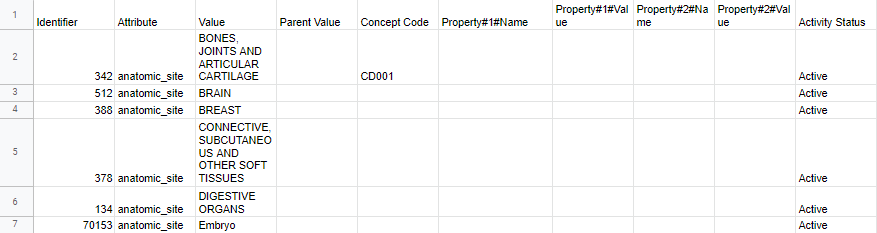
Example CSV Fields description Column name | Description |
|---|
Attribute | Attribute the name for which the value is to be added | Value | Value to be added | Parent Value | In the case of specimen type, mention the class (parent) | Property#1#Name | | Property#1#Value | | Activity Status | Should be 'Active' while adding a value To delete: set to 'Disabled'. To archive: set to 'Closed' |
Properties - For some fields, there are extra properties that can be set. Please refer to the 'Add properties to the values' section |
Export CSV (New in v6.1)
| Expand |
|---|
| title | Click here to view details … |
|---|
|
This is useful to move the dropdown values from test to production servers or use for reference during bulk imports. To export values for one or more fields, select the fields from the list and click on the 'Export' option: 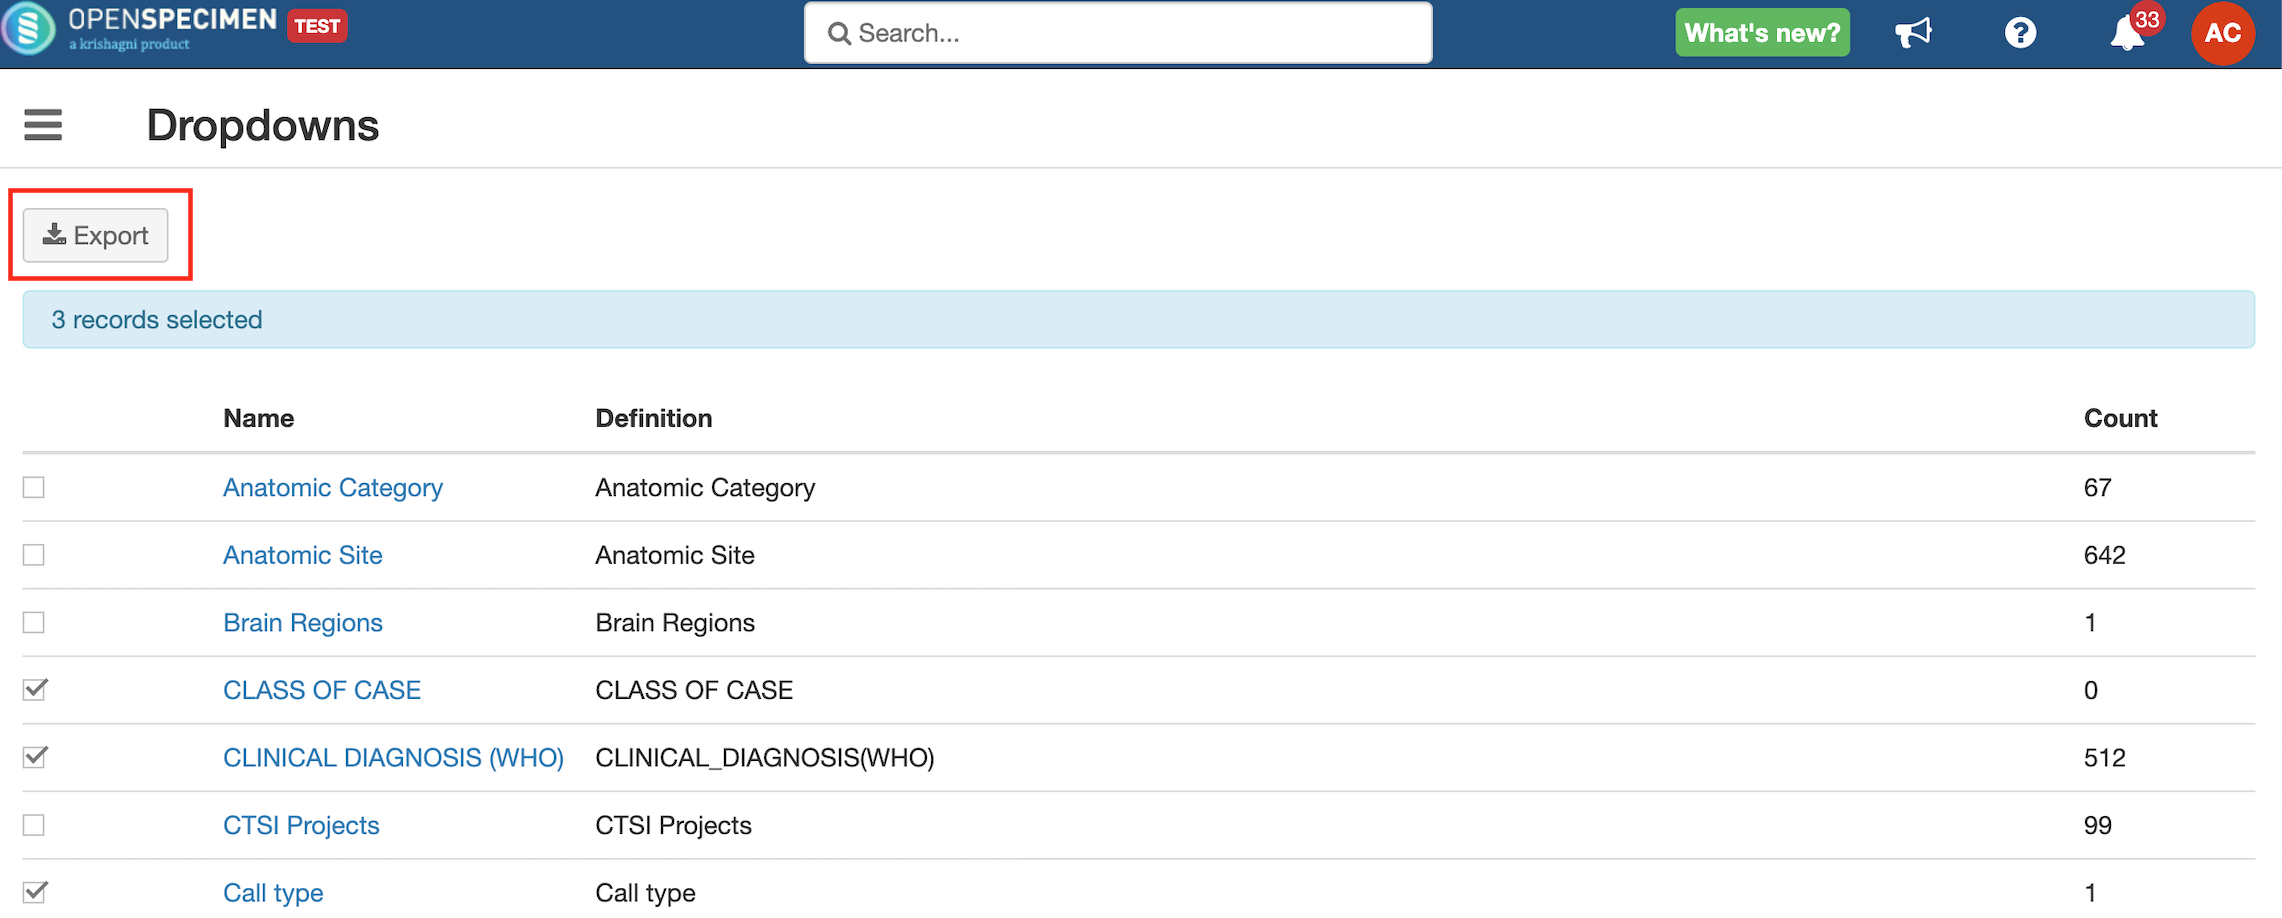 |
Update Dropdown Values
| Expand |
|---|
Update Concept Code (CSV) To bulk update the concept code of existing PVs: Navigate to Extras → Dropdown. Export the PVs of one or more selected attributes. In the downloaded CSV file, change the values for the concept code.
Click on Import → Dropdown Value → Upload the file as an update option.
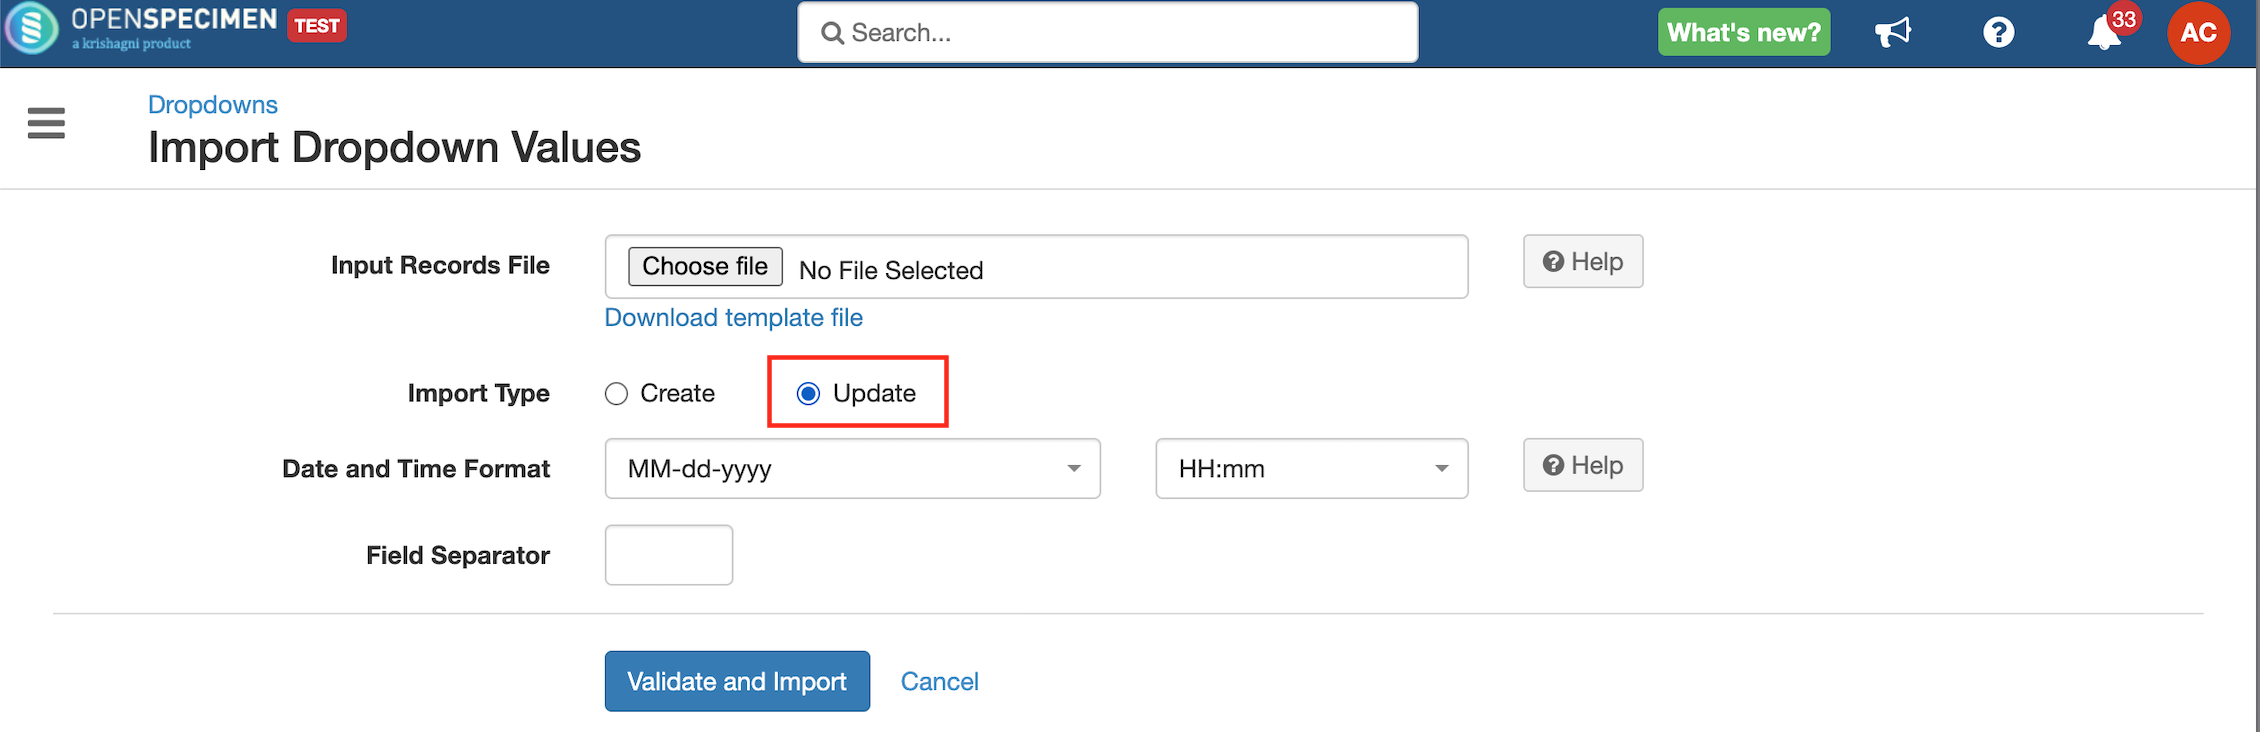
Update Properties (CSV) To bulk update the properties of existing PVs: Export the PVs of one or more selected attributes. In the downloaded CSV file, change the values or properties of PVs. Upload the file as PV update option.
Example file: Update_DropDown.CSV | Info |
|---|
Do not delete any columns from the exported file when importing for the update operation. |
|
Bulk Delete
| Expand |
|---|
| title | Click here to view details … |
|---|
|
To bulk delete the value on the basis of identifier set activity status as "Disabled" in the exported file. Navigate to Extras → Dropdown. Export the dropdown whose values need to be deleted. In the downloaded CSV file, change the Activity Status to disabled → Import using Update Option.
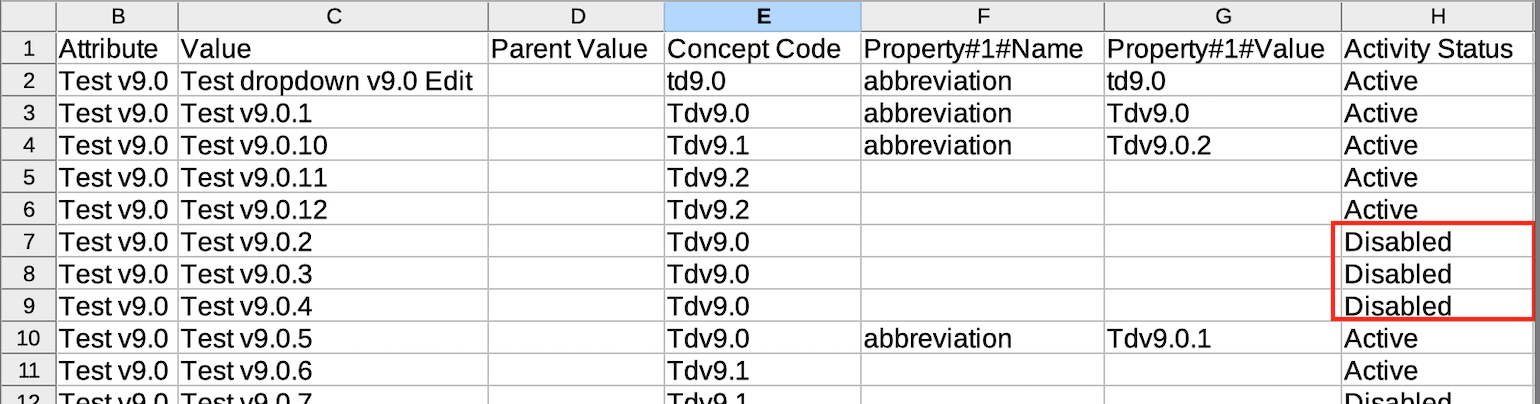 Example file: Delete_Dropdown_Values.CSV |
Changing Specimen Type's Units
| Expand |
|---|
| title | Click here to view details … |
|---|
|
Go to 'Dropdown Manager'. Select 'Specimen Type' Search for the type 'Fixed Tissue Slide' Click on it and 'Edit' Add a new property for 'quantity_unit' and set it to 'microns' like below:
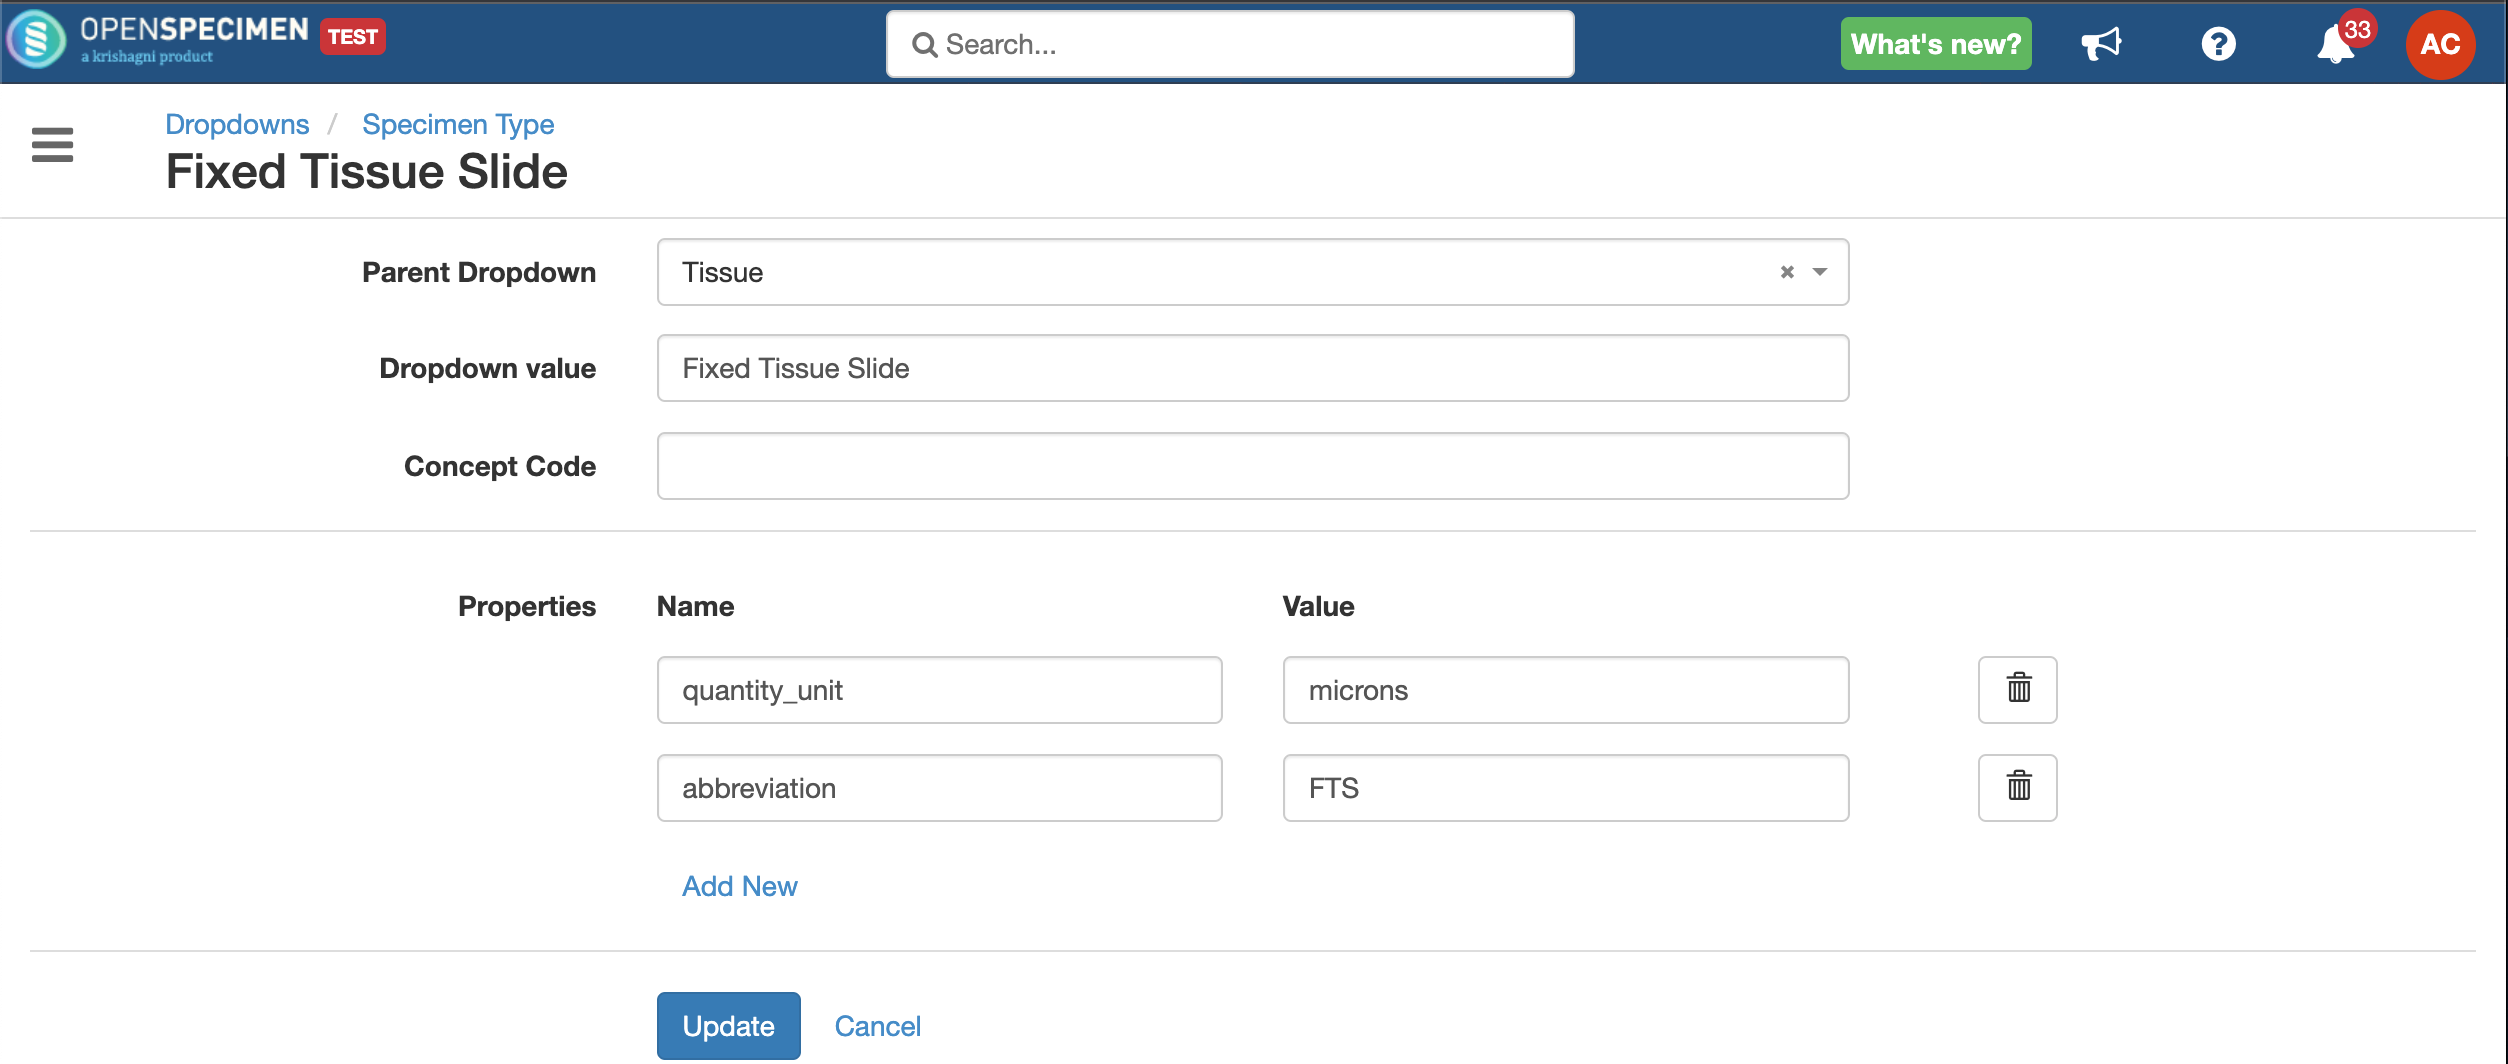
Once you update the type, refresh the data entry page once if you don't see the new values.
|
Adding new Specimen Classes
| Expand |
|---|
| title | Click here to view details … |
|---|
|
Note: from v10.3 onwards Go to 'Dropdown Manager'. Select 'Specimen Type' Click on 'Add' Enter the Class name in ‘Dropdown value', leaving 'Parent Dropdown’ blank. Add the mandatory properties: ‘quantity_unit', ‘concentration_unit’, and ’container_color_coding’:
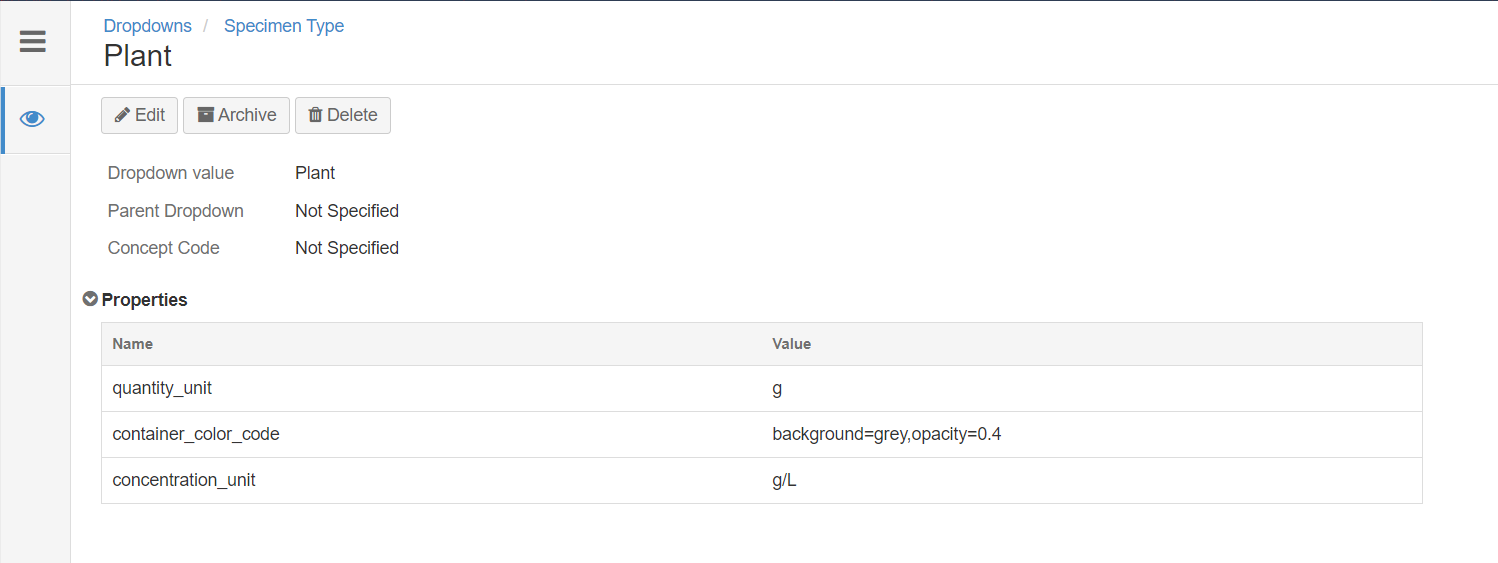 Image Added Image Added
Below are the specimen-type properties Attribute | Property Name | Property Value | Description |
|---|
Specimen Type | quantity_unit | Quantity units for the specific specimen type | Used to display the units on the specimen pages. Value can only be plain text. If special characters like symbols need to be used, it needs to be specified under quantity_display_unit. For e.g., μg/m3 By default, the units are set at classes level which will apply to all types under it: Tissue: gm Fluid: ml Molecular: µg Cell: count
| Specimen Type | concentration_unit | Concentration unit for the specific specimen type | For example - microgram/ml | Specimen Type | container_color_coding | The color representing the specimen class in the container location view | For example - background=red,opacity=0.5 |
|
Default values
| Expand |
|---|
| title | Click here to view details … |
|---|
|
Below are the default values during installation. |
...