| Table of Contents |
|---|
Specimen's microarraysconsist of paraffin blocks in which separate tissue cores are assembled in array fashion to allow histological analysis. OpenSpecimen allows enables the creation of such specimen arrays with existing specimens to be tracked, processed, and created into slides.
...
Specimen array supports below features:
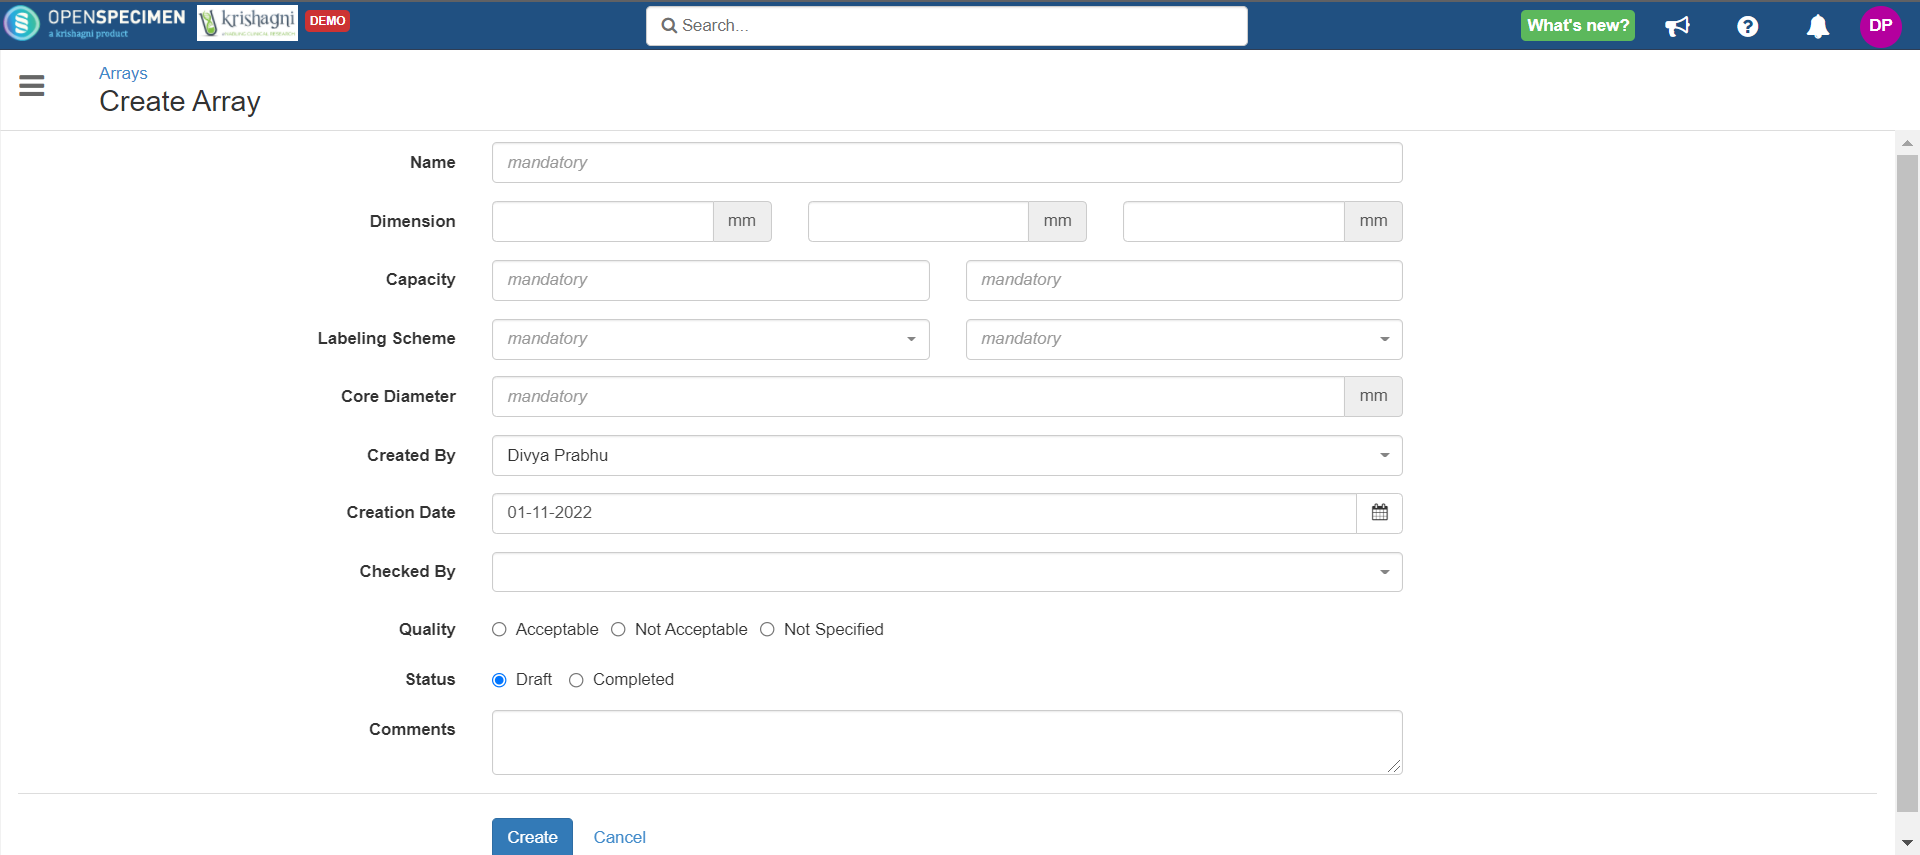
- Create a Specimen Arrayspecimen array
- Create slides
- Add events
- Export array details
- Import array arrays in bulk
Video
| Multimedia | ||
|---|---|---|
|
...
| Expand | |||||||||||||||||||||||||||||||||||||||||
|---|---|---|---|---|---|---|---|---|---|---|---|---|---|---|---|---|---|---|---|---|---|---|---|---|---|---|---|---|---|---|---|---|---|---|---|---|---|---|---|---|---|

|
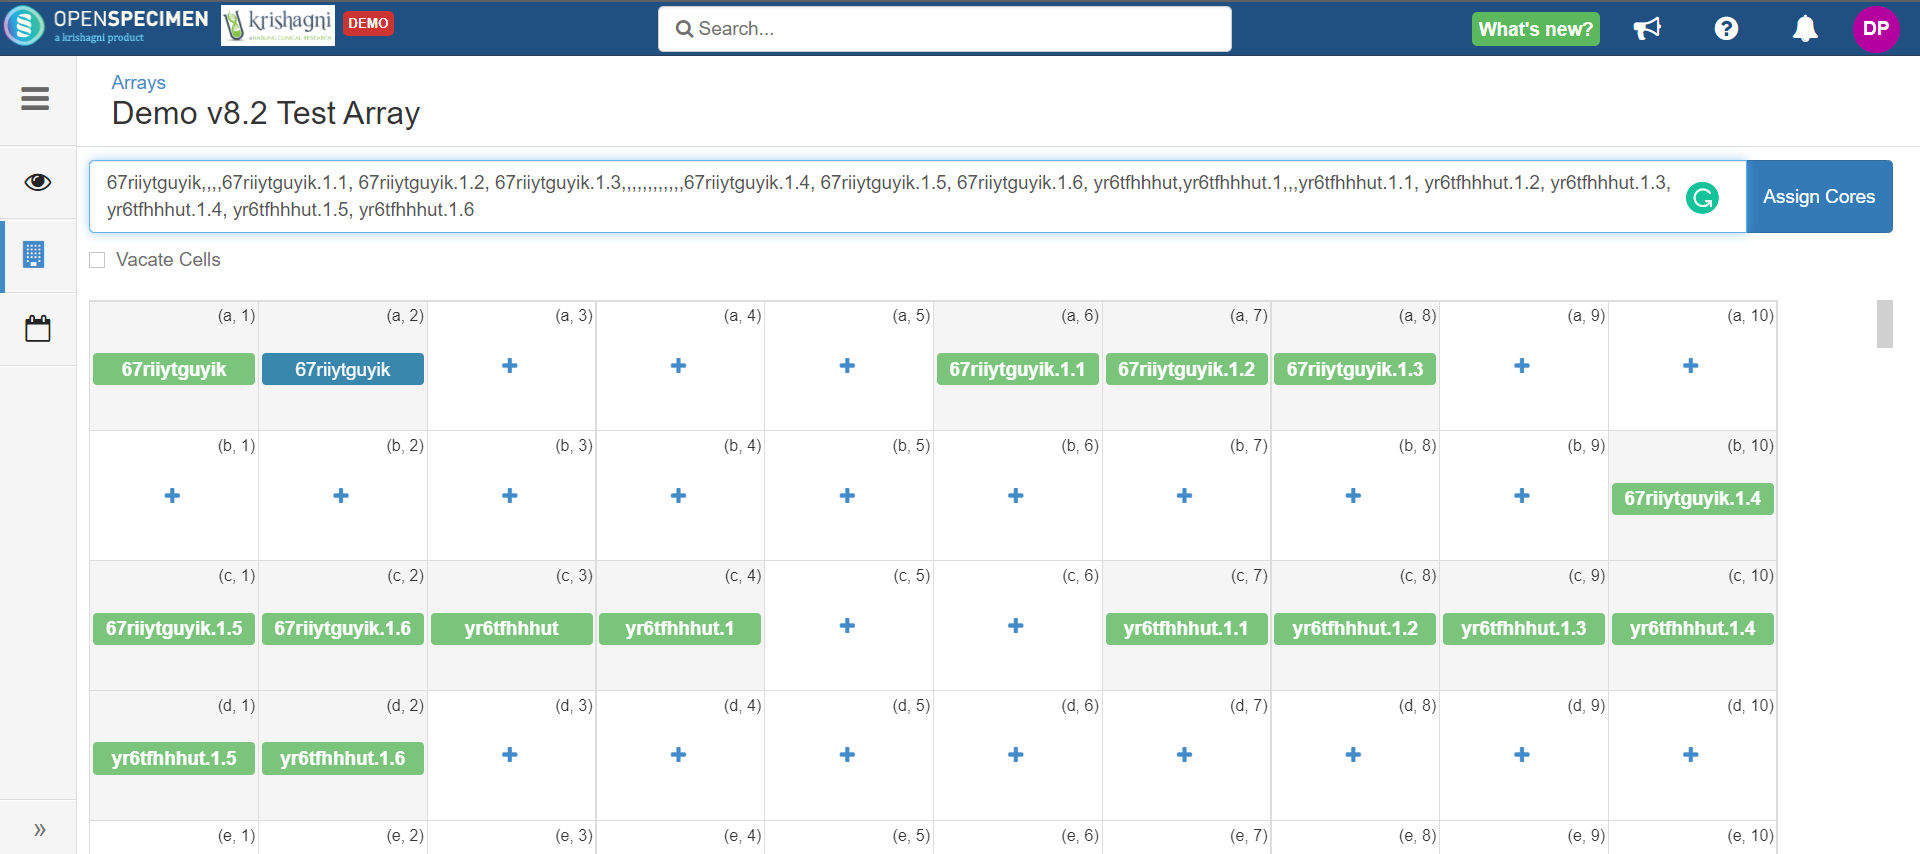
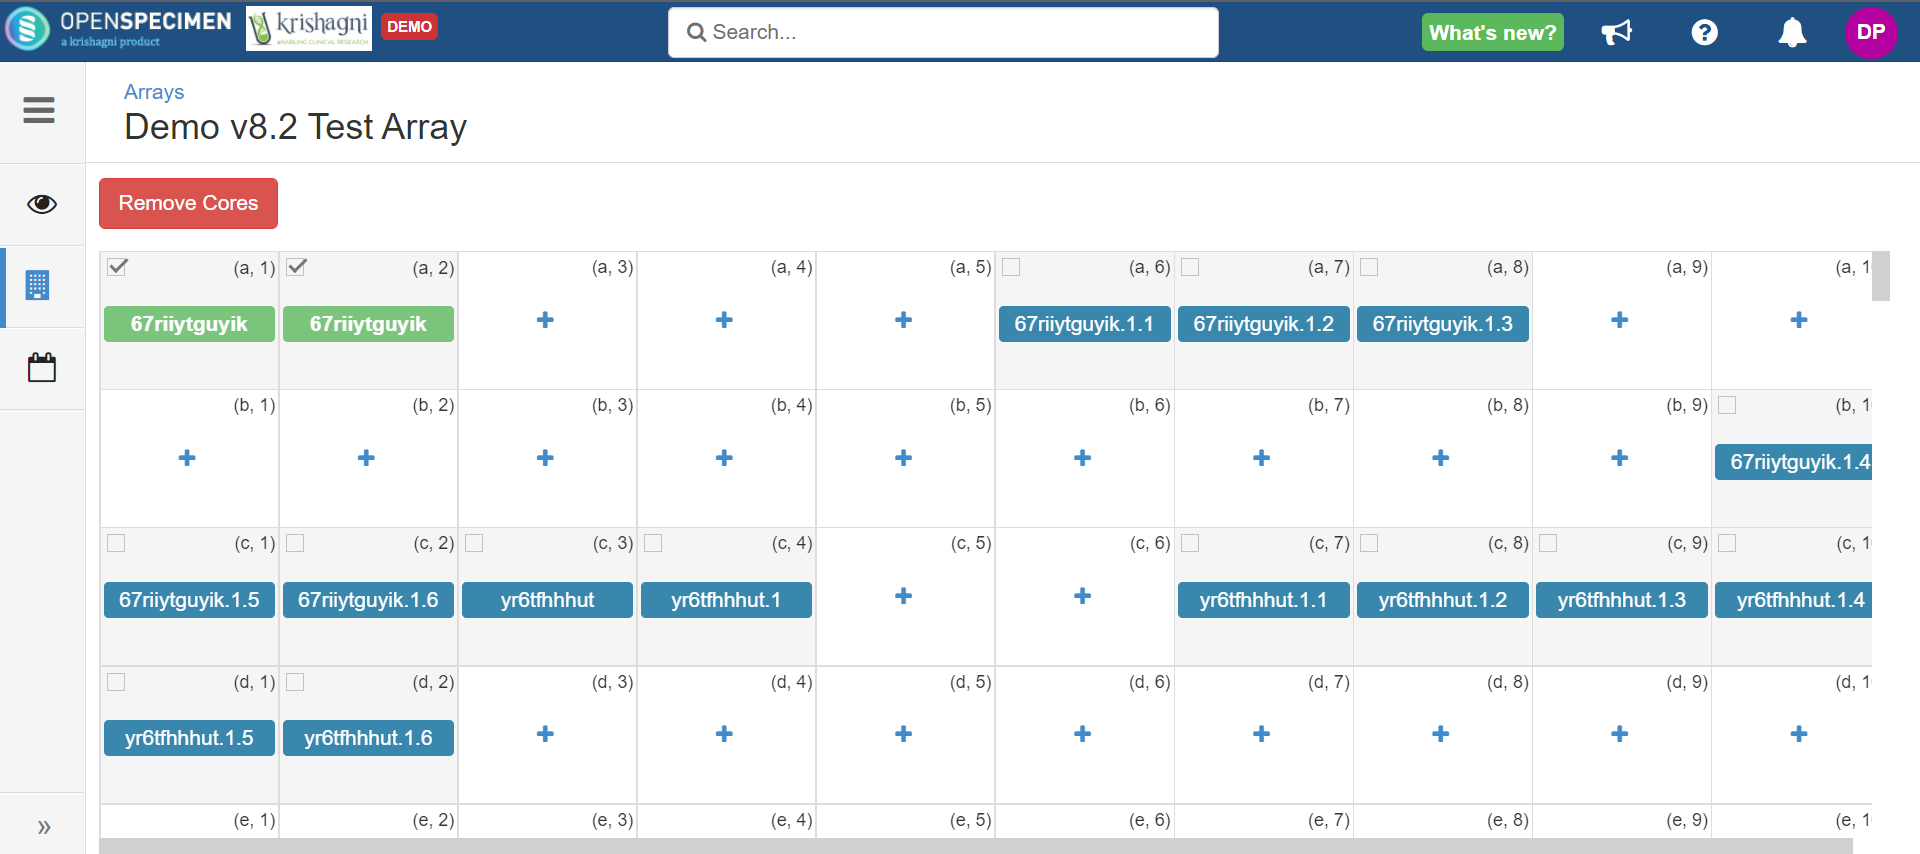
Add Specimens to Cores
| Expand | ||||
|---|---|---|---|---|
|


Remove
...
Specimens from
...
Cores
| Expand | ||
|---|---|---|
|

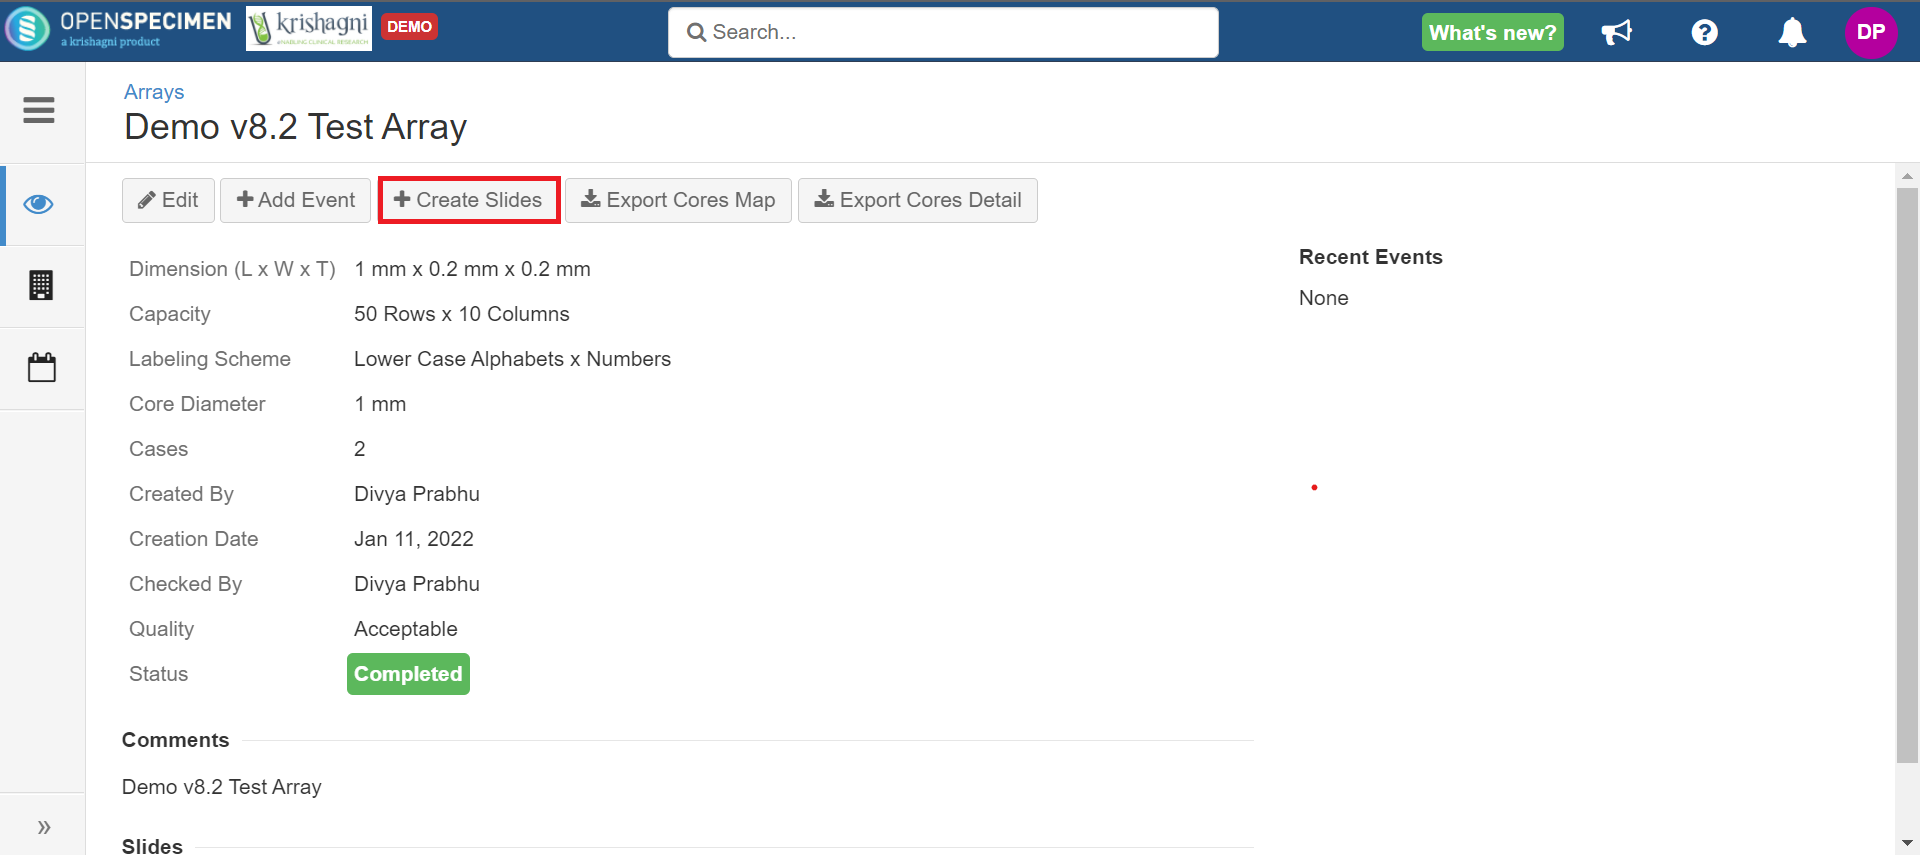
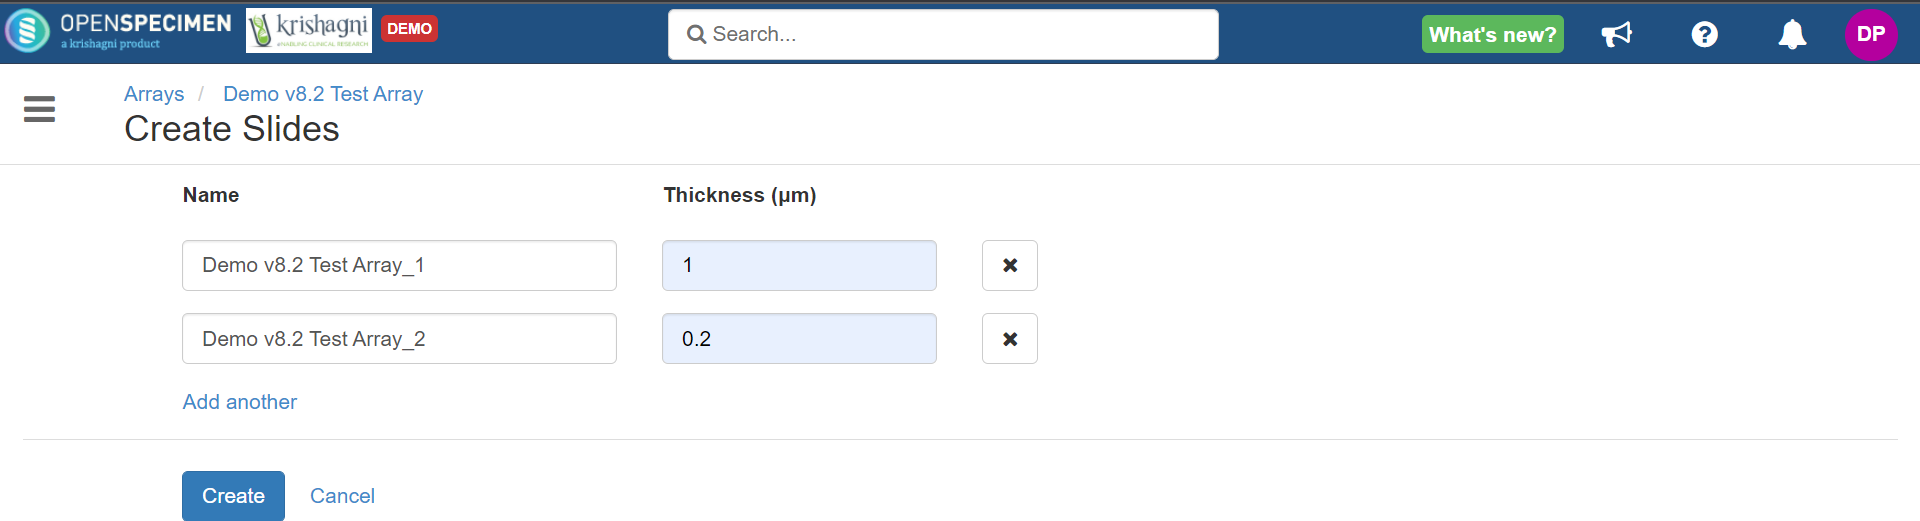
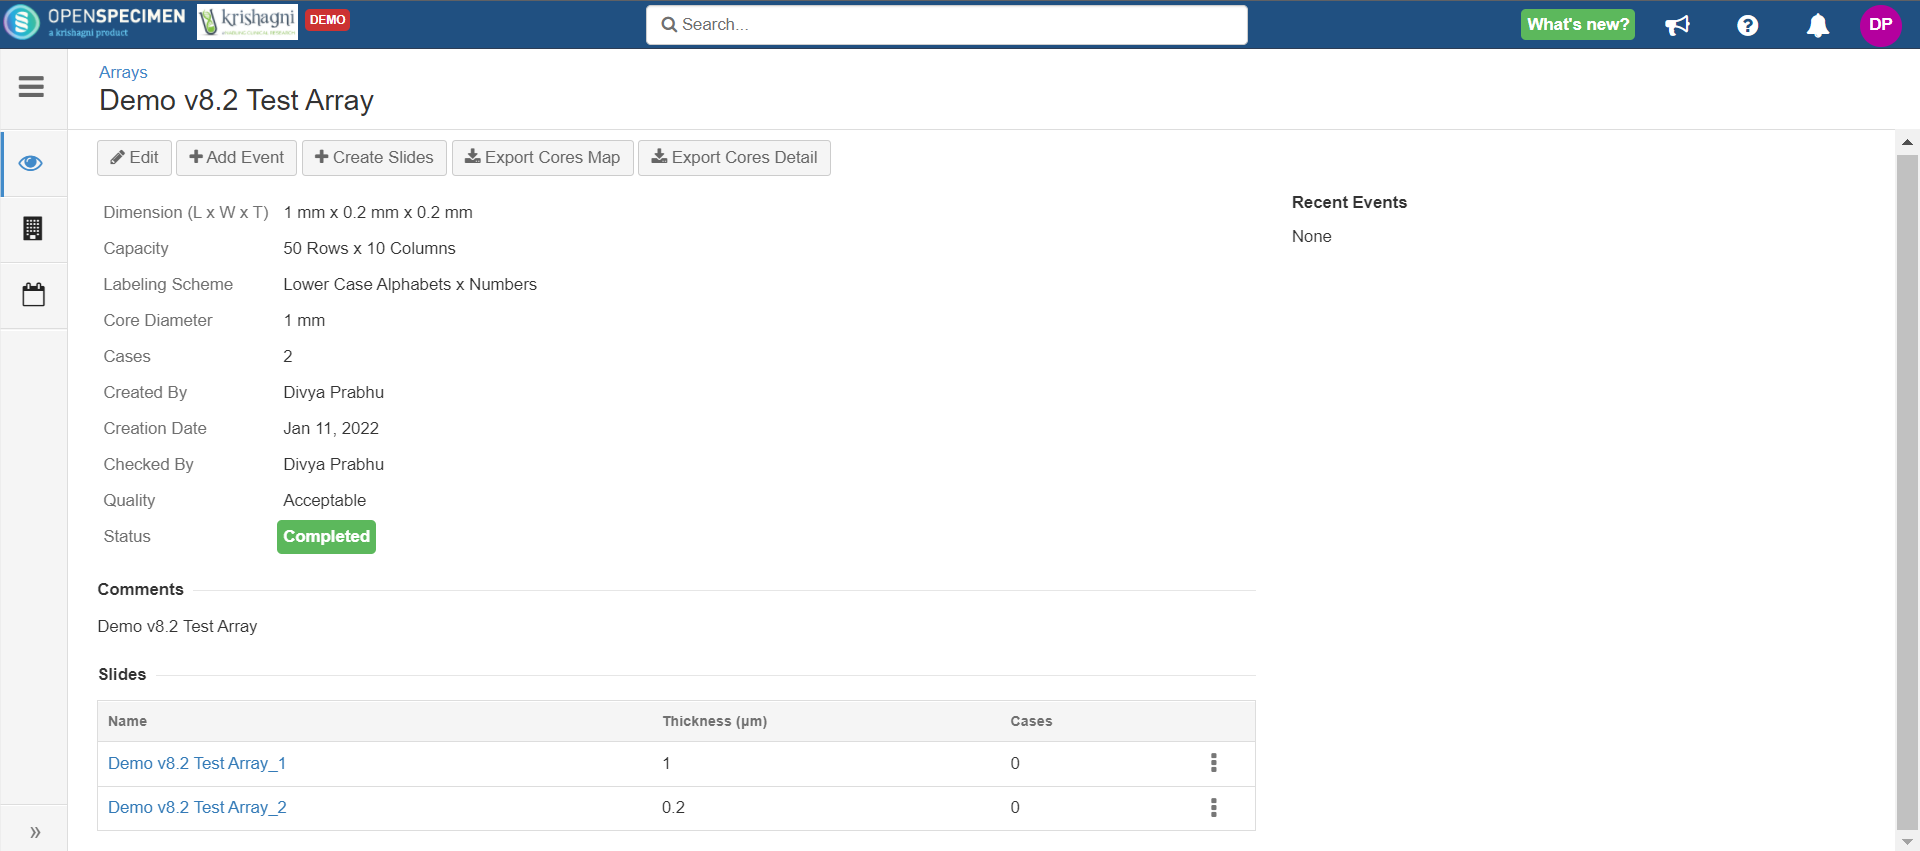
Create Slides
The specimen array can be processed into slides.
| Expand |
|---|
|


Add
...
Events
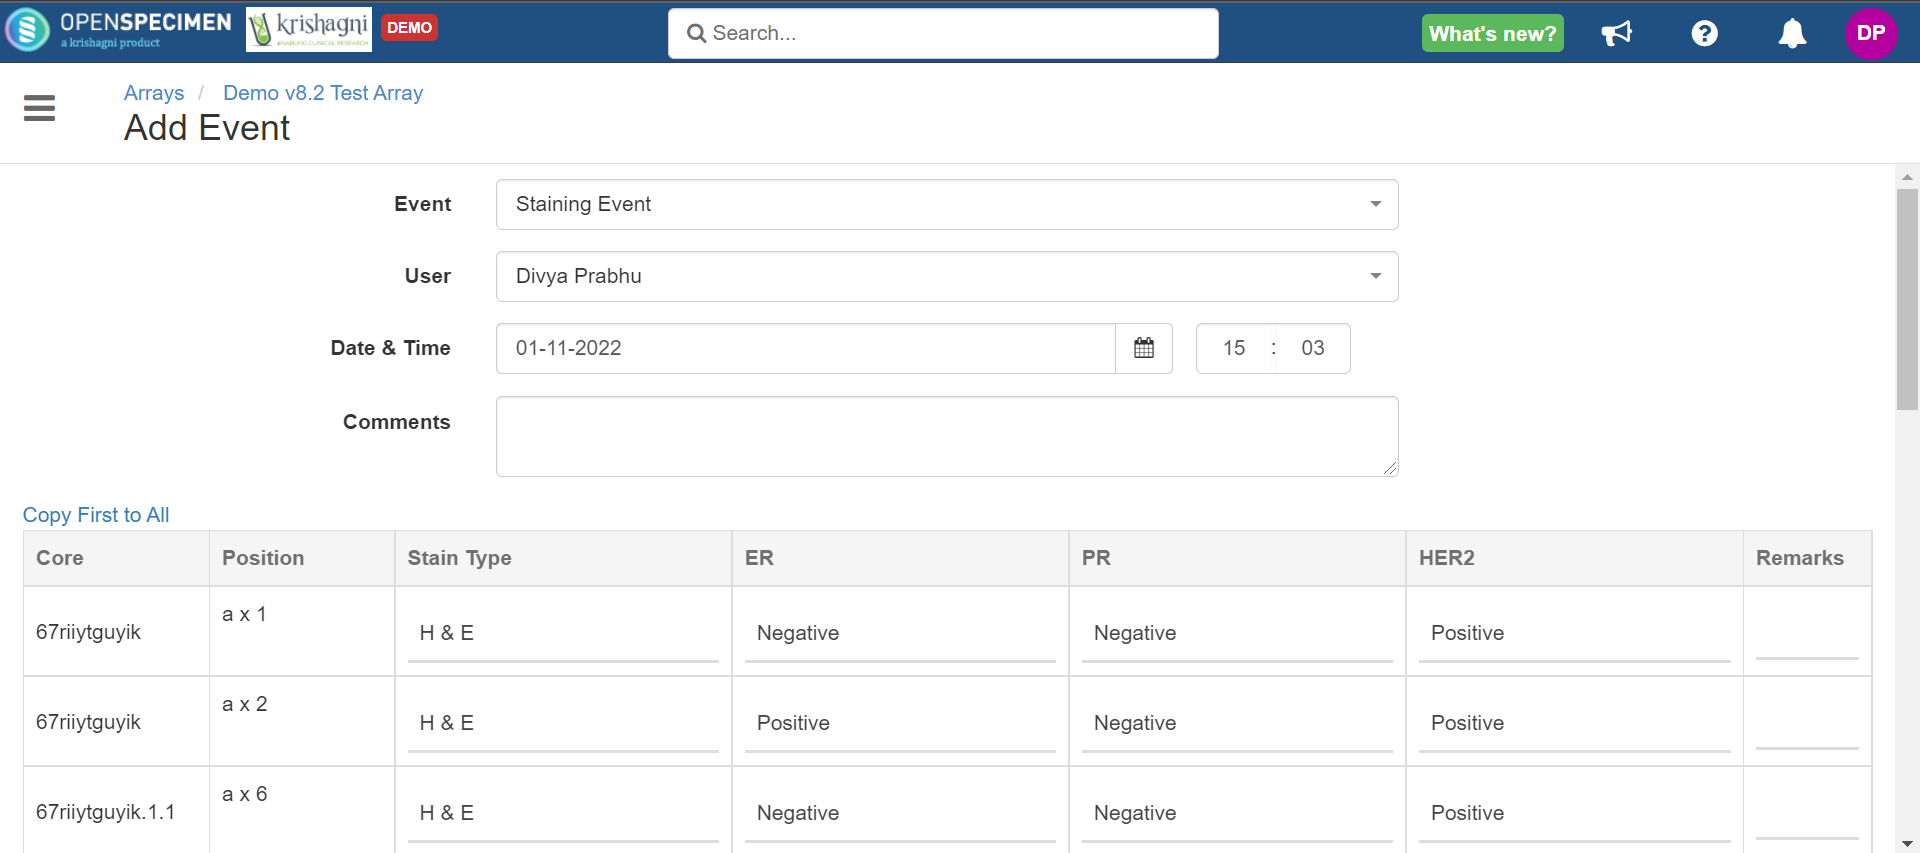
Once the slides are created, lab users might perform different analyses on the cores, like staining, and capture the details of the test results.
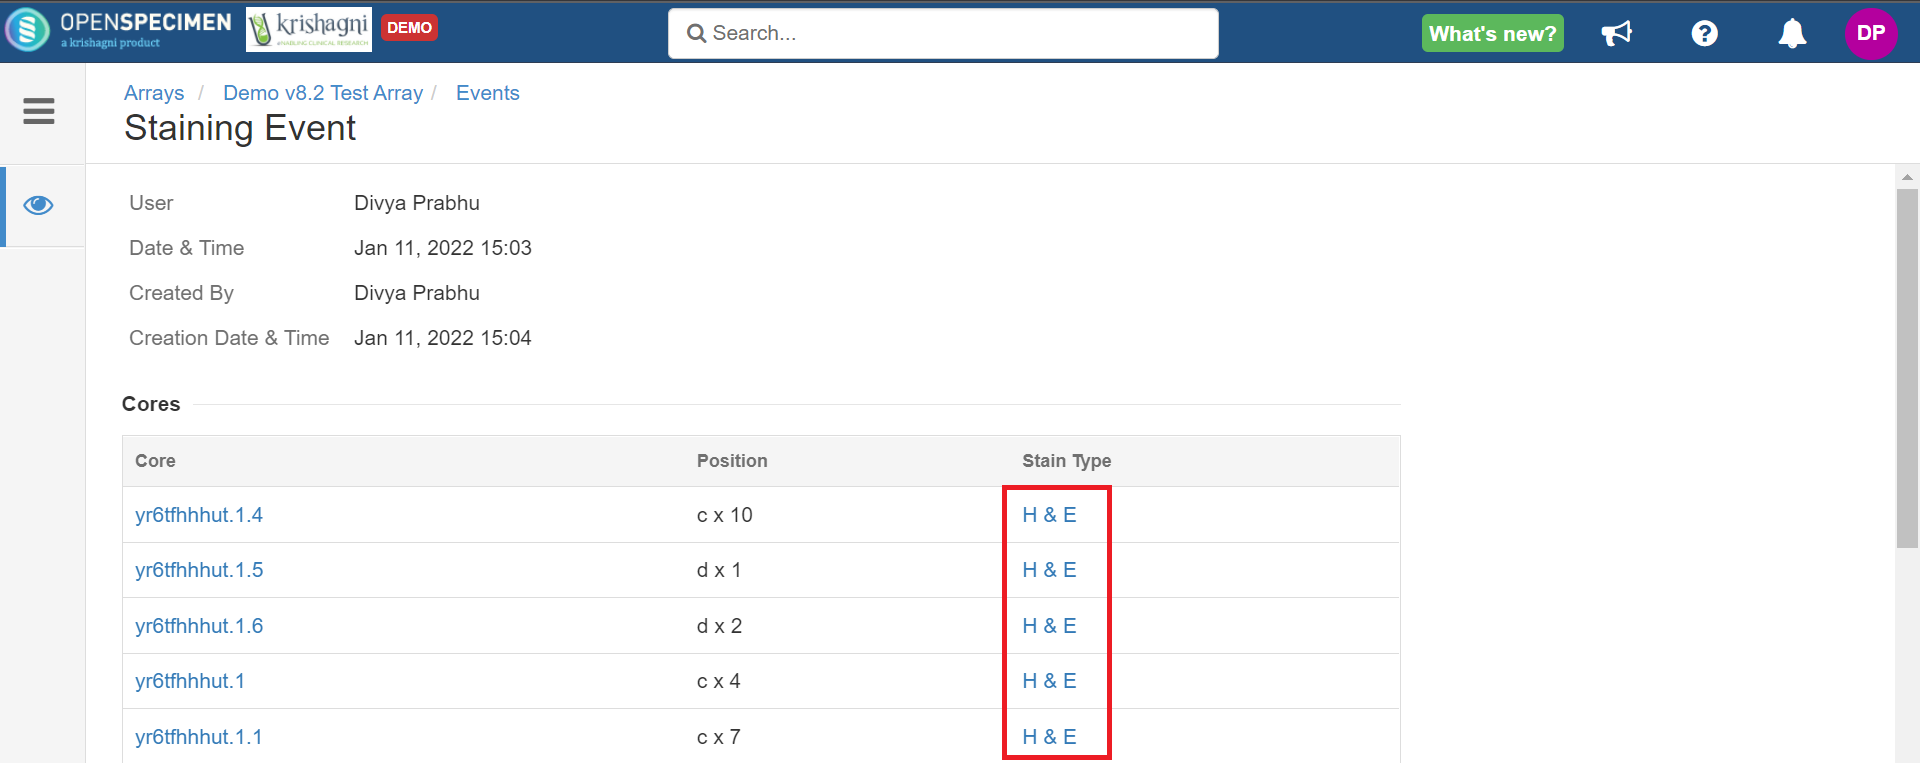
To do this, you can create new array events using 'Custom Forms' and attach them at the 'Specimen Array Event' or 'Specimen Slide Event' level, depending upon the level at which the information is to be entered. Check the 'Show In Grid' option for a field that should be displayed in the overview. In the below example, 'Stain Type' is shown in the grid.
...
| Expand |
|---|
|


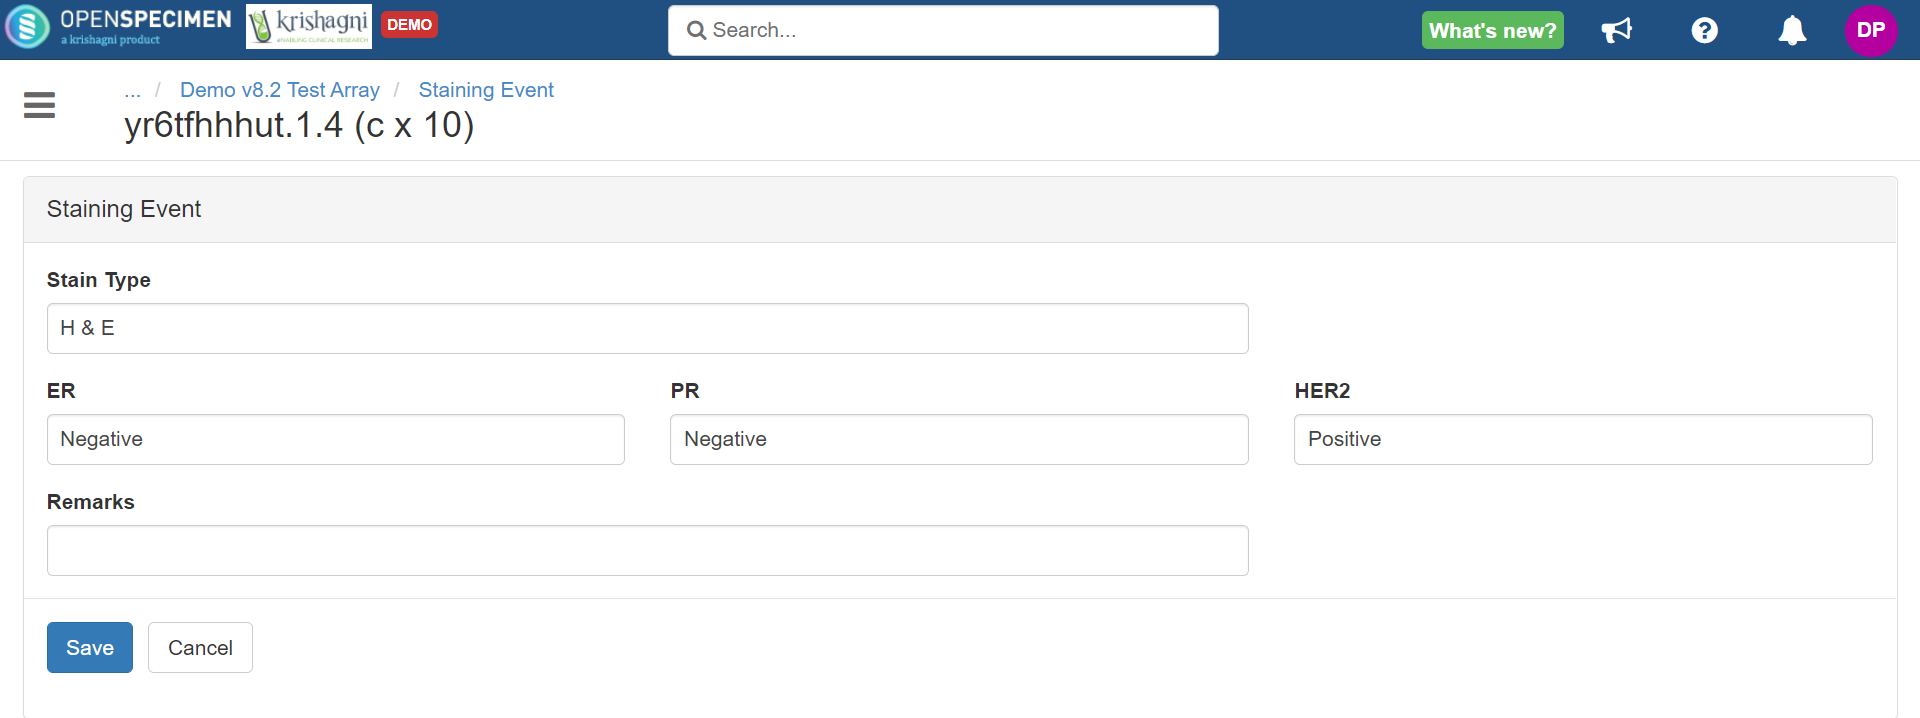
Edit Array Event
...
| Expand |
|---|
|

Delete Array Event
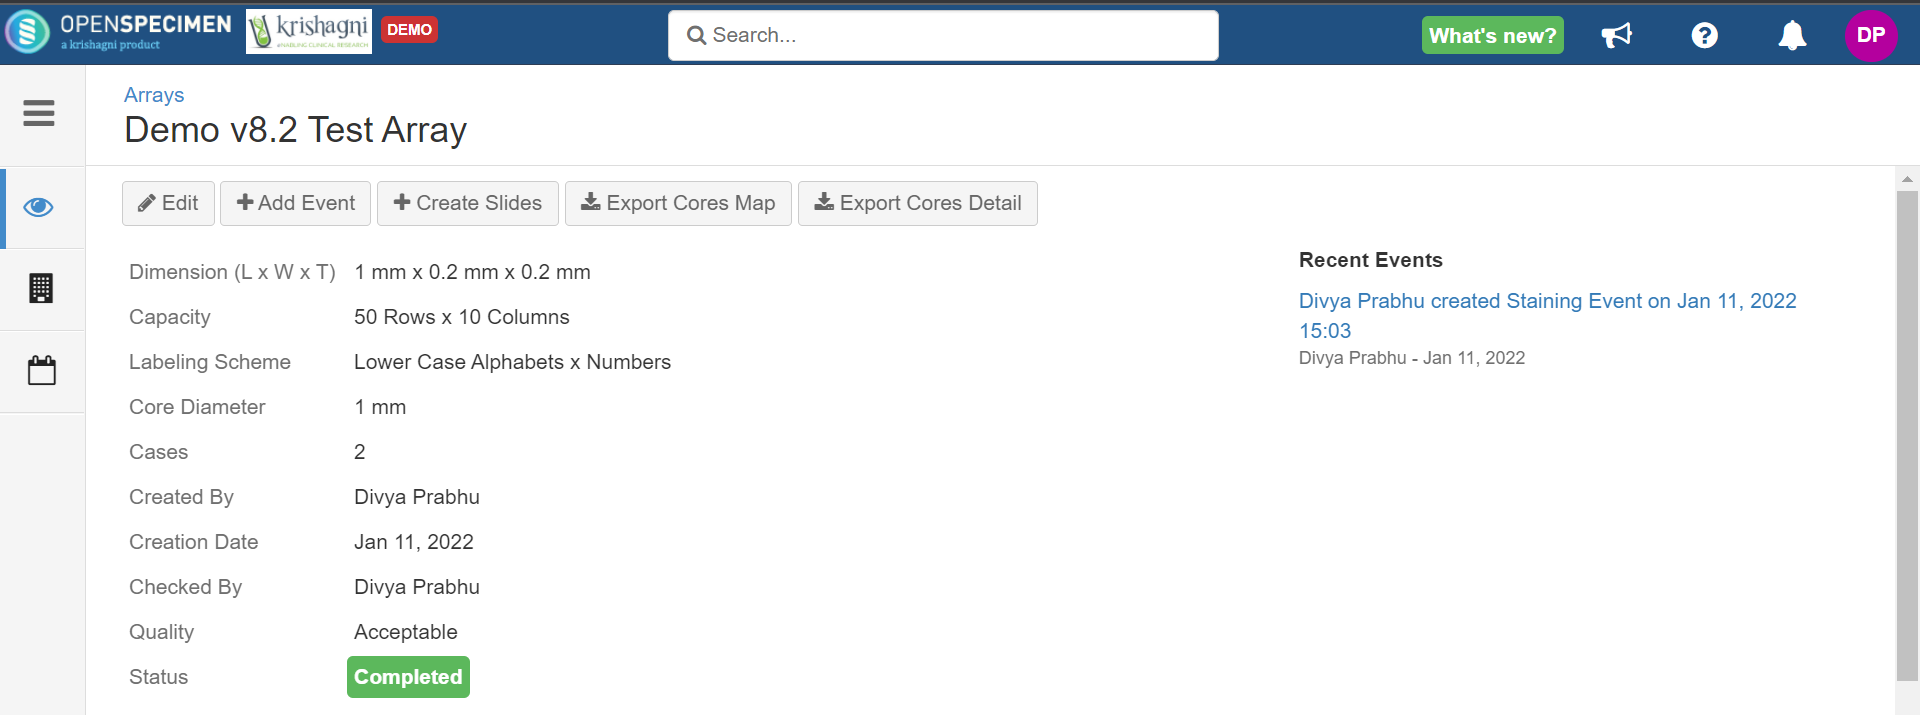
Suppose you accidentally added the 'Staining Event' accidentally and wish to delete the entire event. This can be done by going to the 'Events' tab.


In front of every event, there is a 'Delete' icon. You can delete the event from here for all the cores altogether.
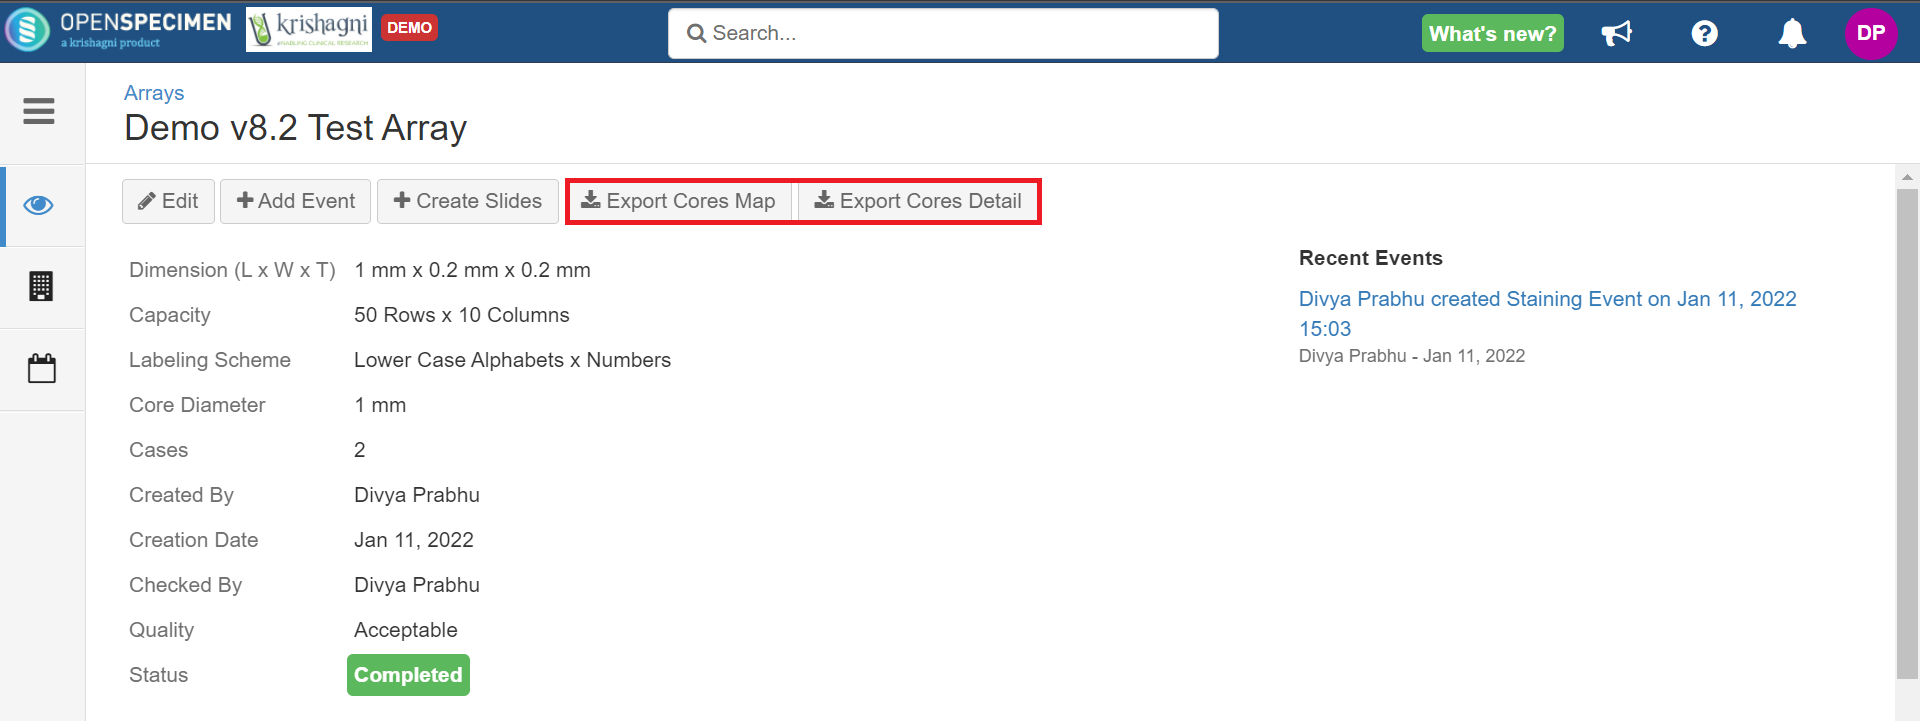
Export
...
Cores Detail and
...
Map
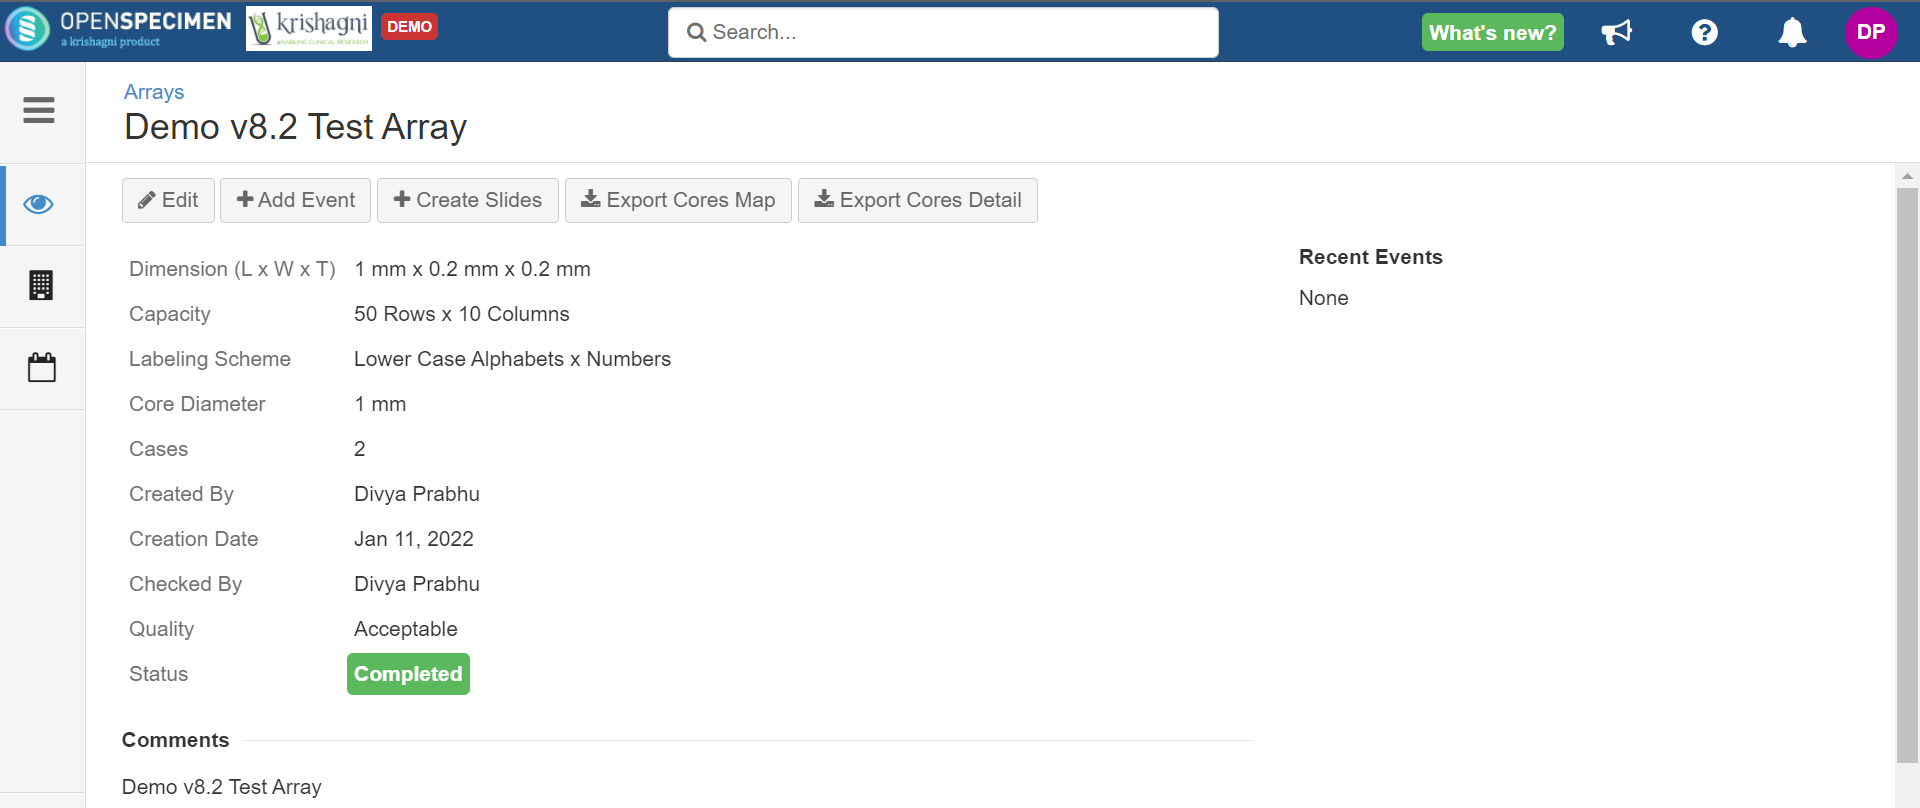
Array details and array map can be exported as a CSV file with all details of the specimens used in the array. To export details, click on or ‘Export Cores Detail’ button and export the core map. Click on the ‘Export Cores Map’ button from the array’s overview page.

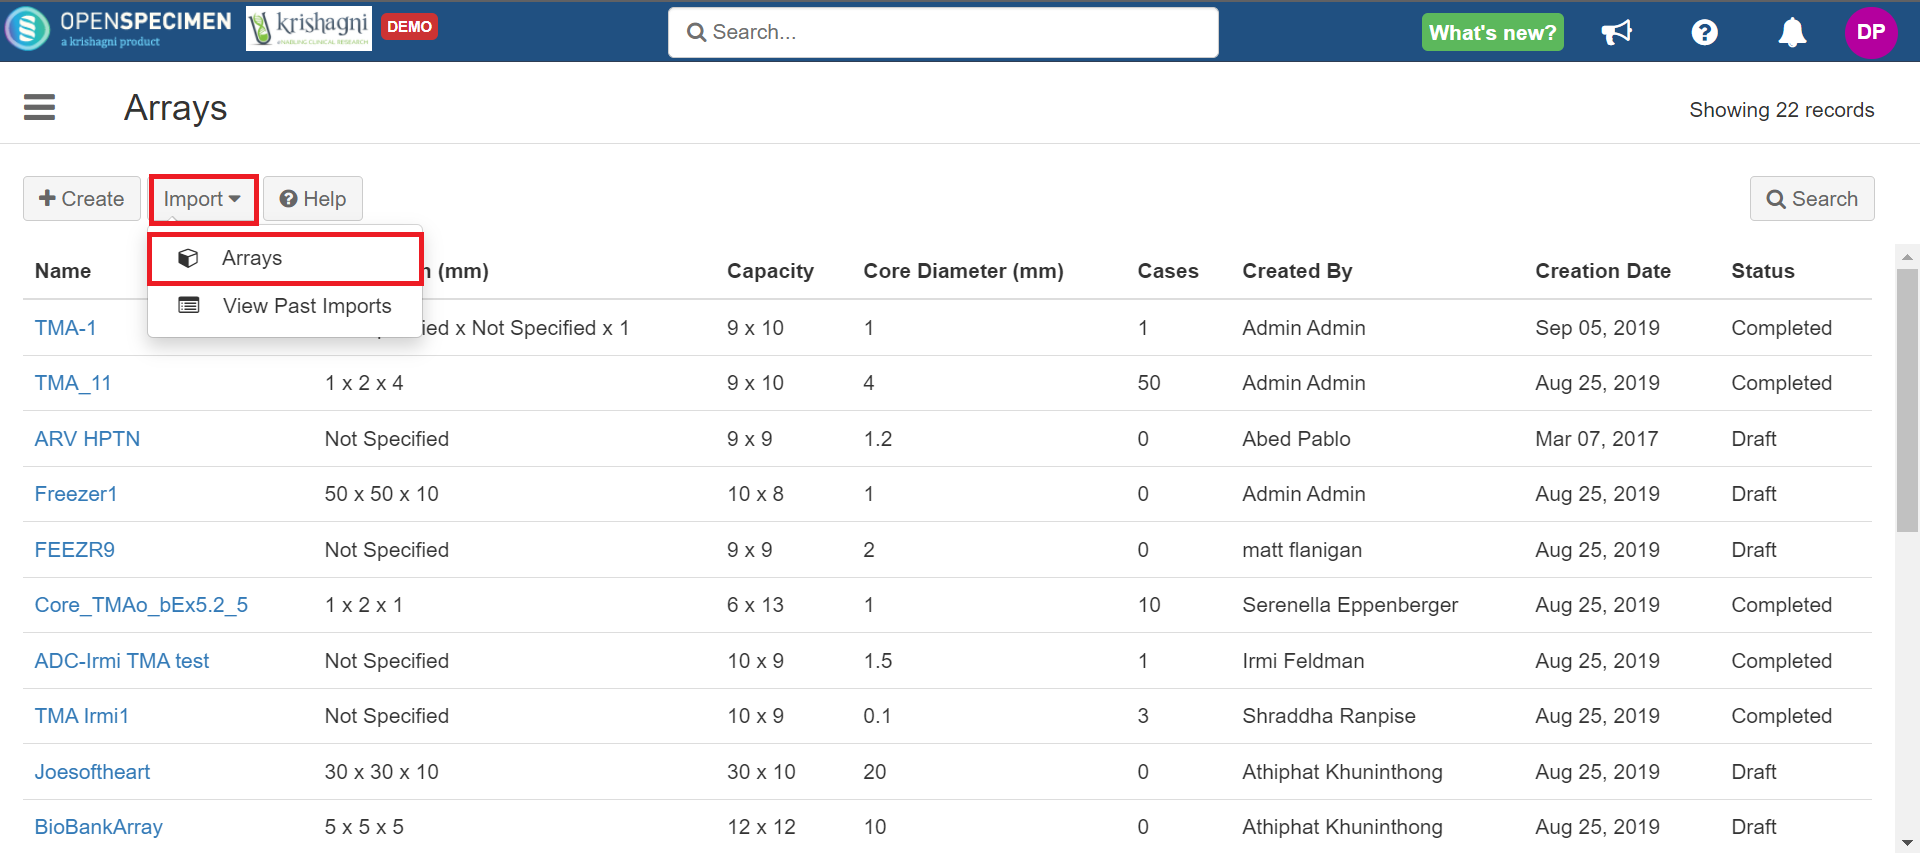
Import Array
Arrays can be imported in bulk using the CSV import option from the main array list page (Arrays > Import > Arrays→ Import → Arrays). More information on Bulk Import of Arrays: Array CSV
This is useful for uploading legacy data.

Sample CSV
...
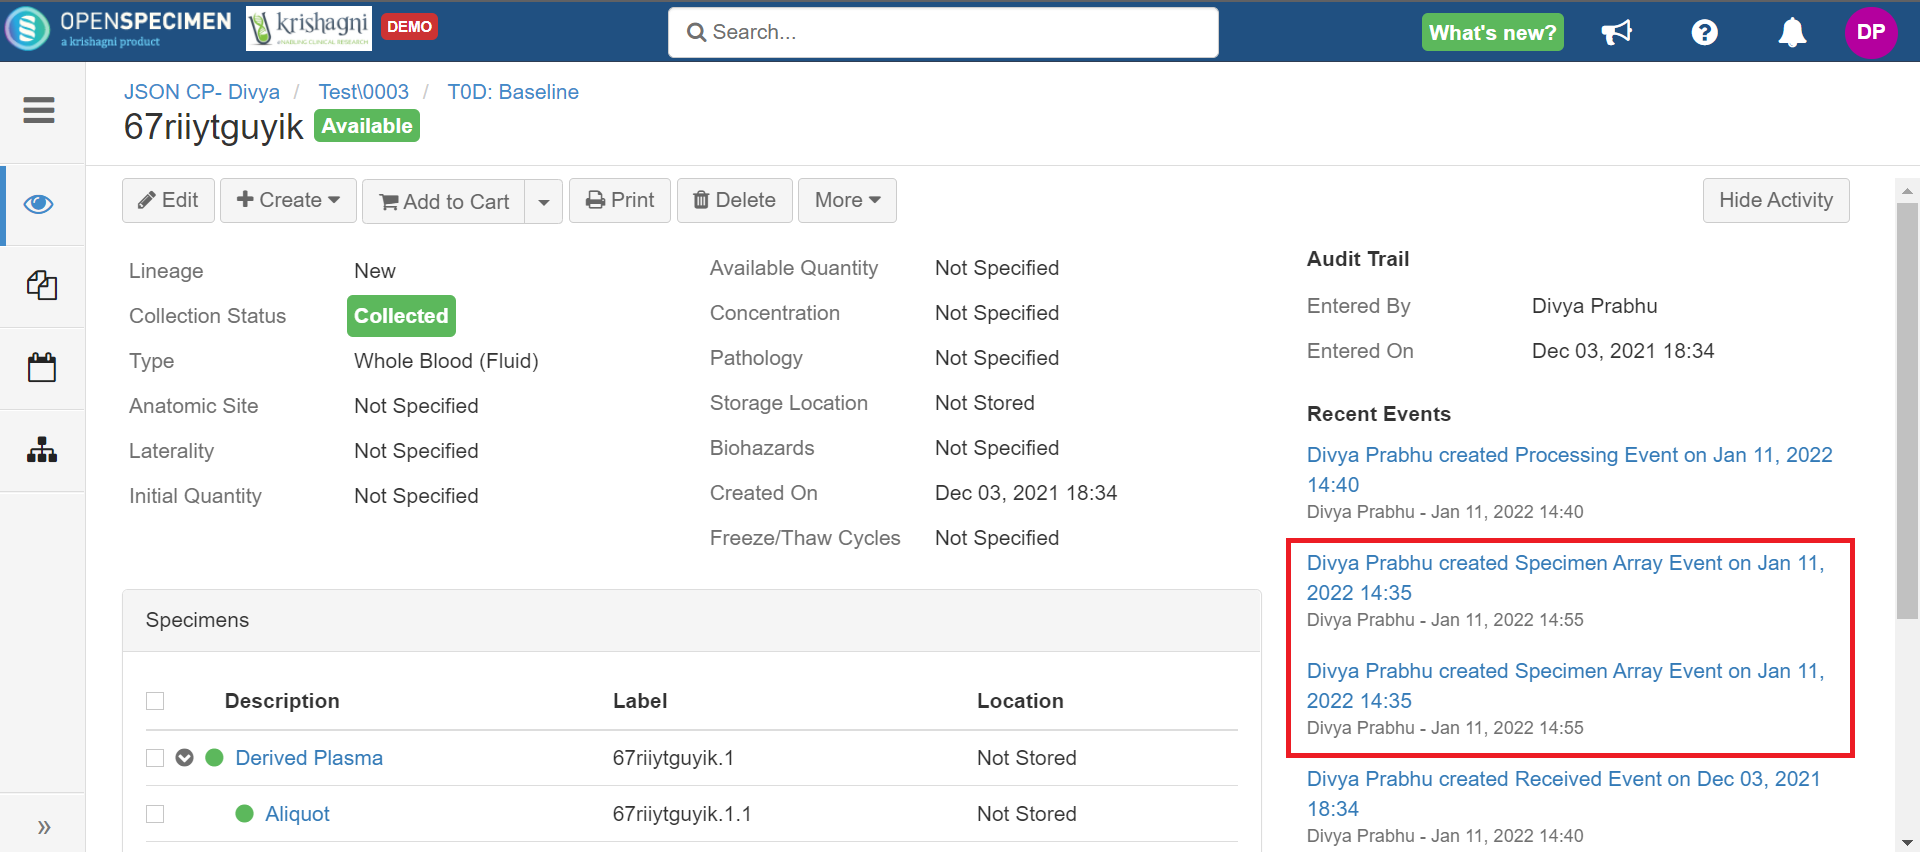
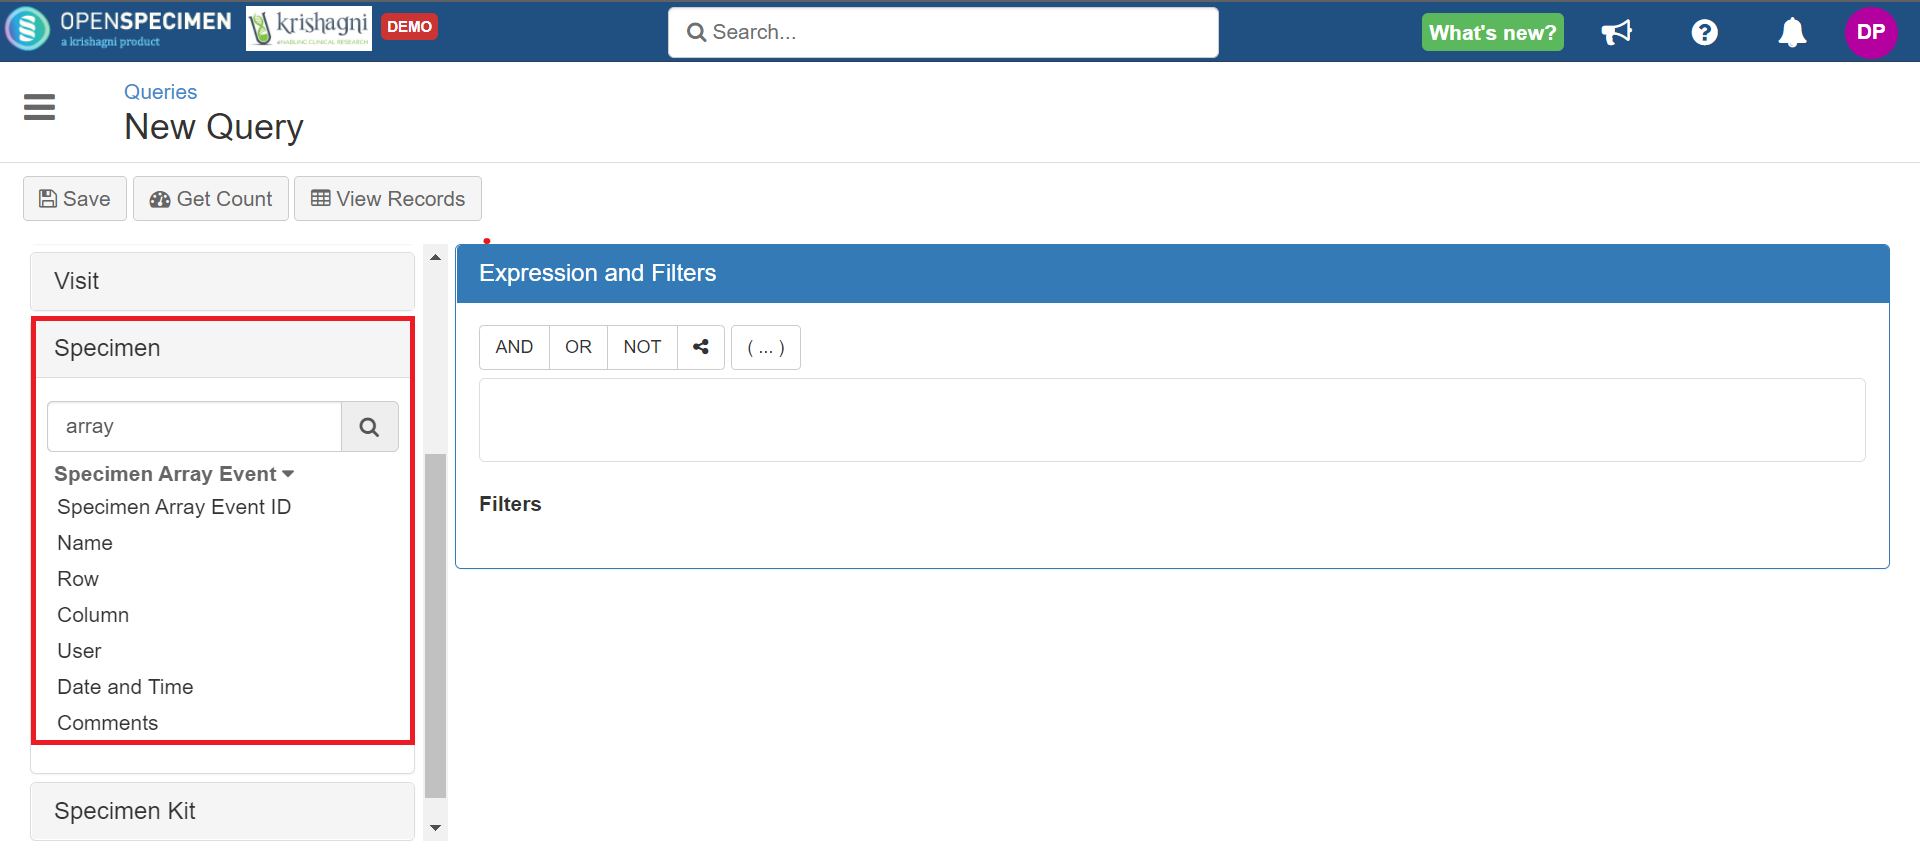
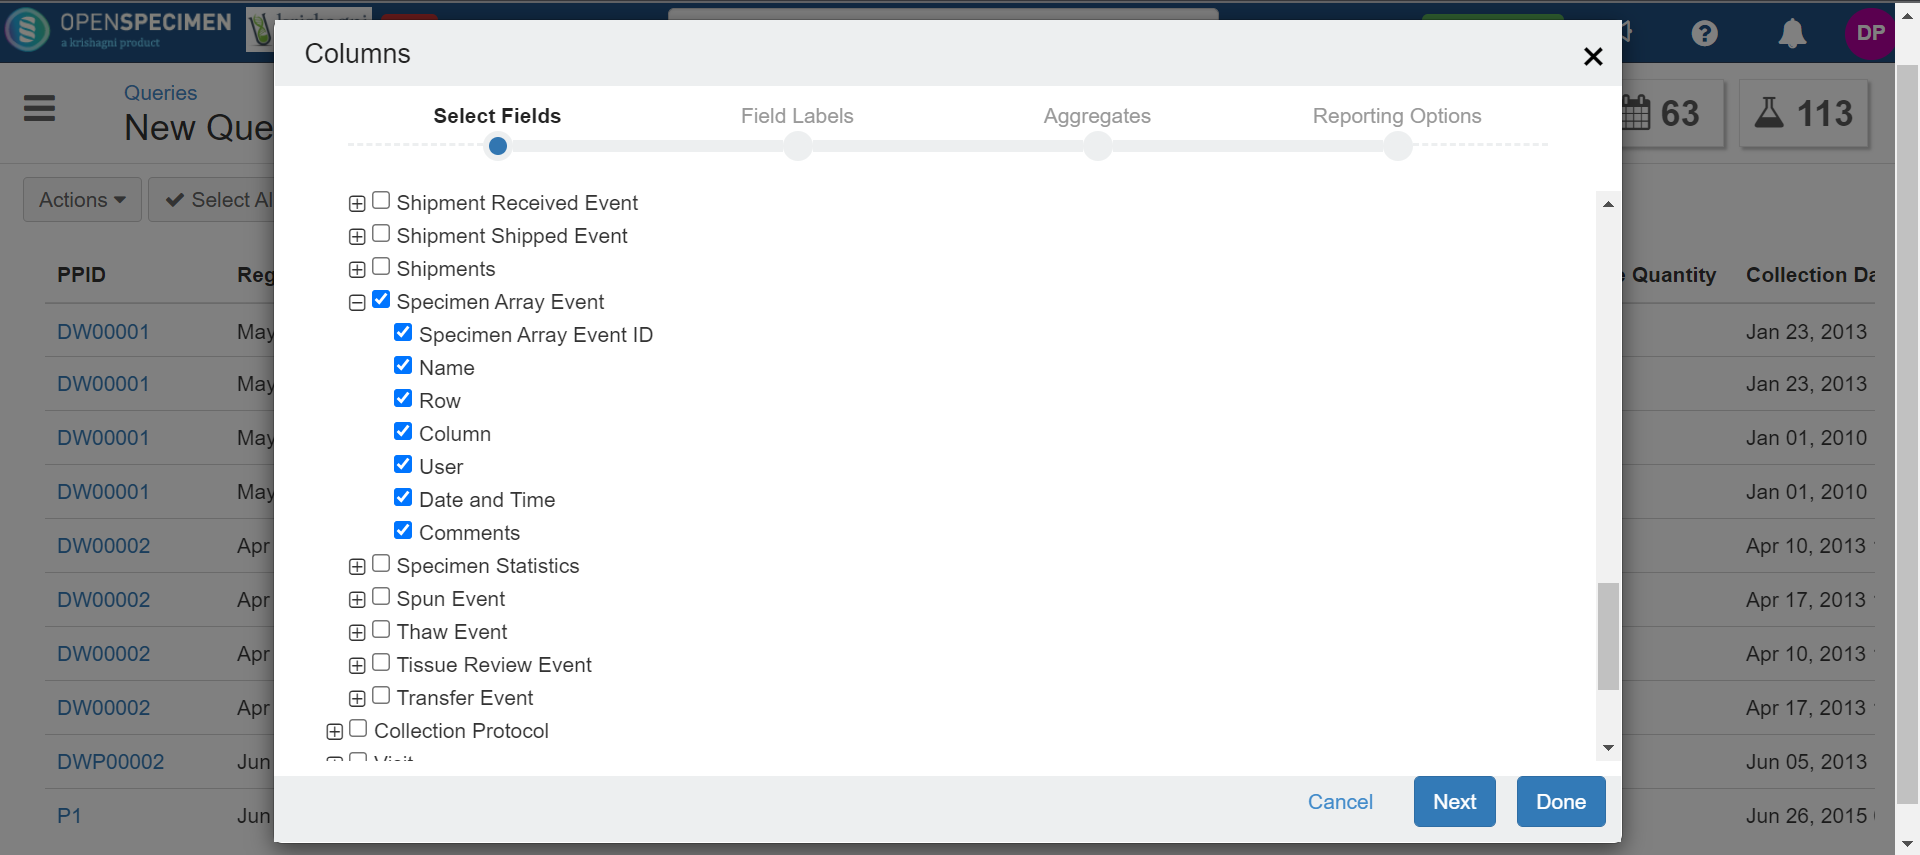
When the specimens are added to the array, a specimen array event is added to each specimen present in the cores. All the details related to the array can be queried through the query interface of OpenSpecimen.
| Expand | |||||
|---|---|---|---|---|---|
|


...