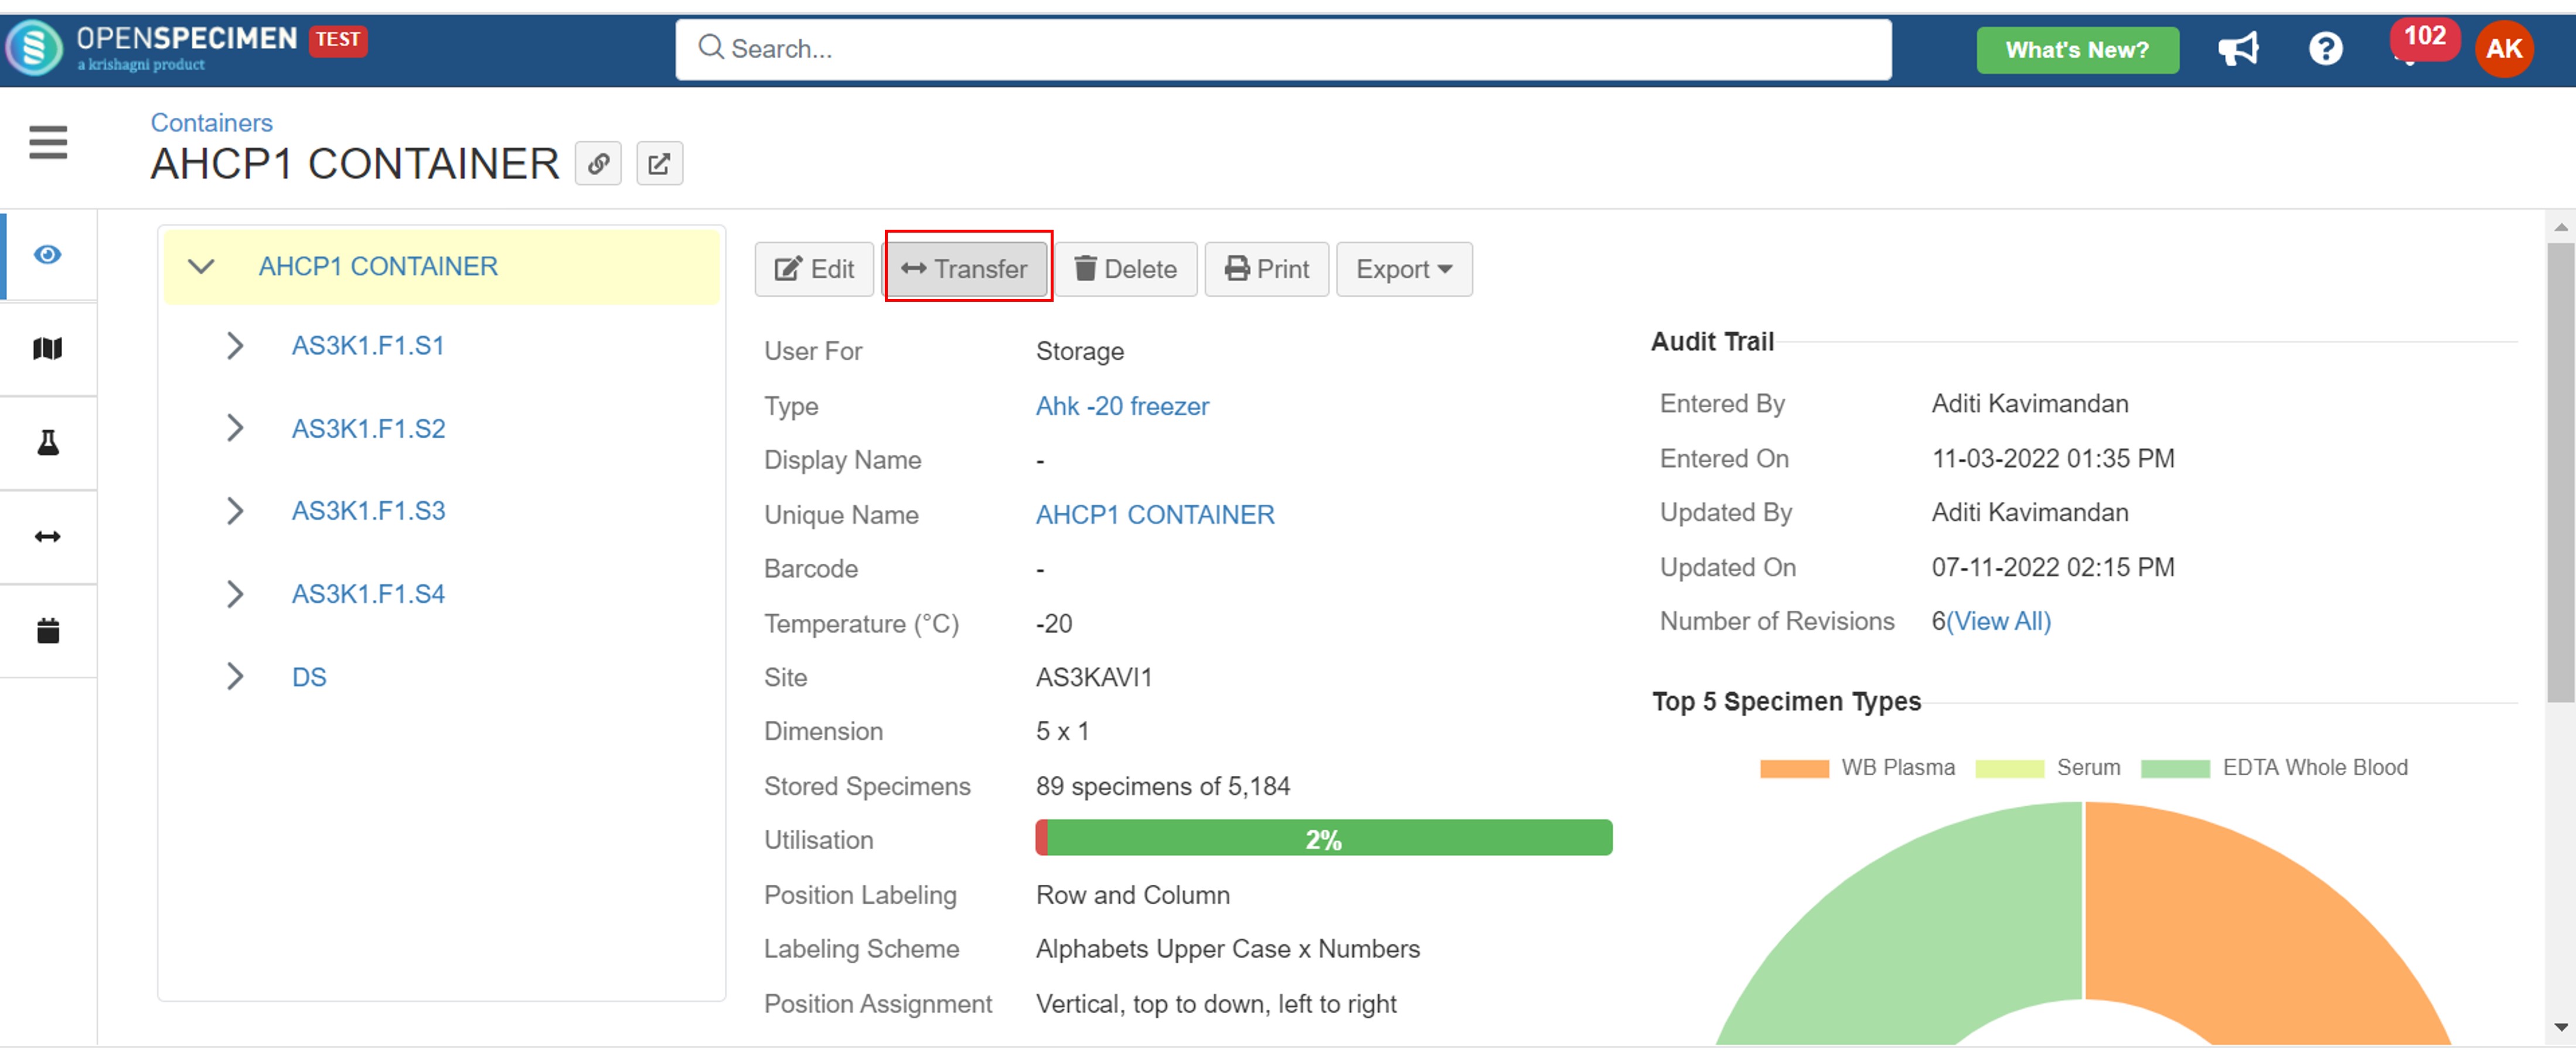
- Go to the containers page, and select the container to be moved.
- On the container overview page, click on 'Transfer'.
- The transfer tab is available at each container level, enabling its transfer. Hence a user can transfer a box, a rack, a shelf, etc., from one container to another.
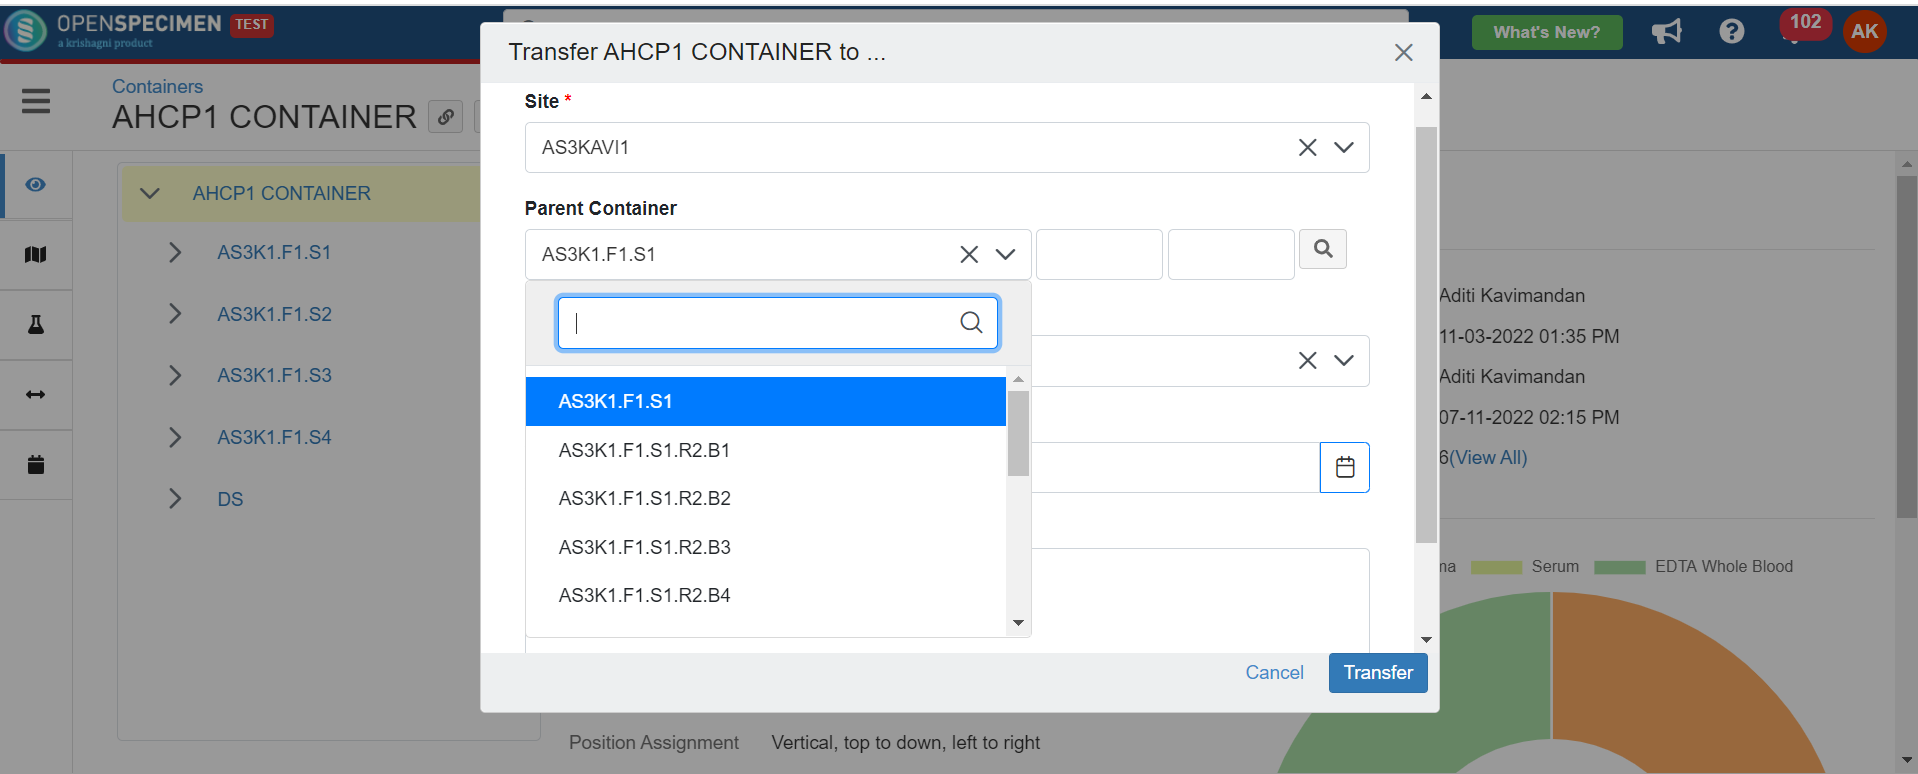
- Select the new container from the 'Parent Container' dropdown list and fill in the other mandatory details such as column number, row number, date & time, reason, etc.
| Note |
|---|
| - The dropdown shows the first 100 values that are available.
- You can click on the "Search" icon (magnifying glass) from the pop-up to see the containers eligible as a parent location for the transfer container.
- Alternatively, you can start typing the initials of the container name, and it will appear.
 Image Removed Image Removed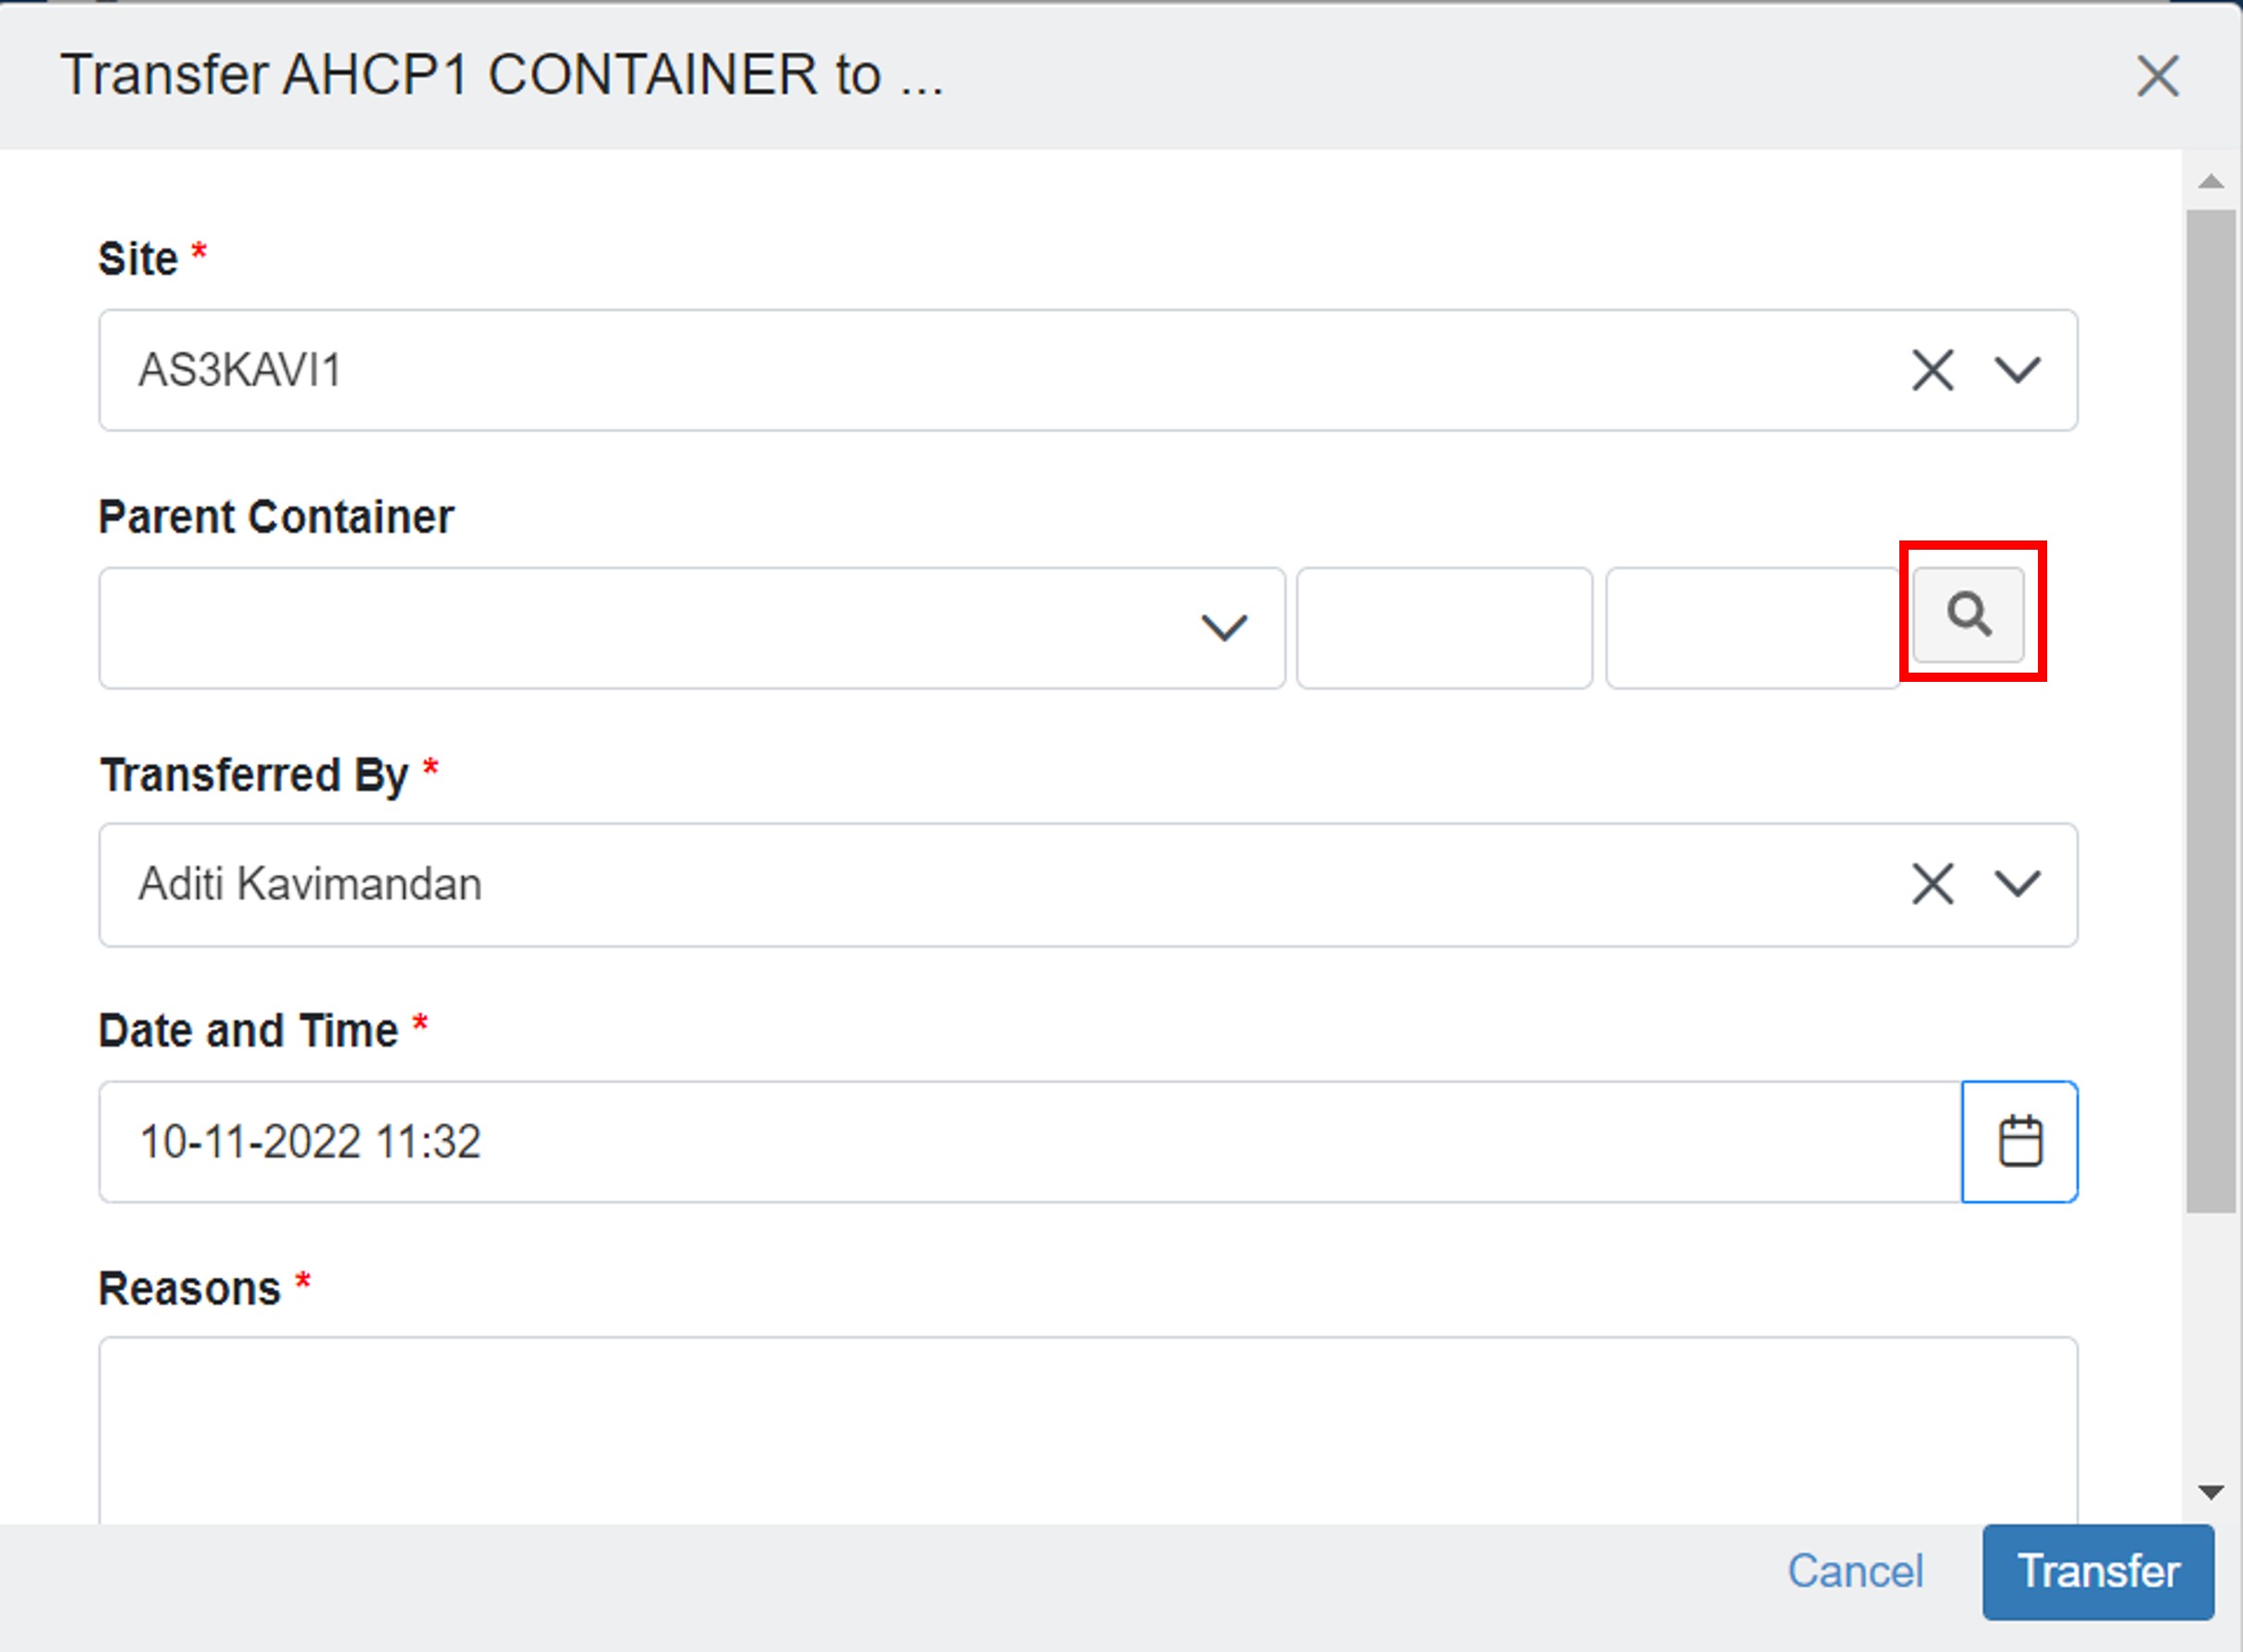 Image Added Image Added
- Select any container by clicking on "Select".
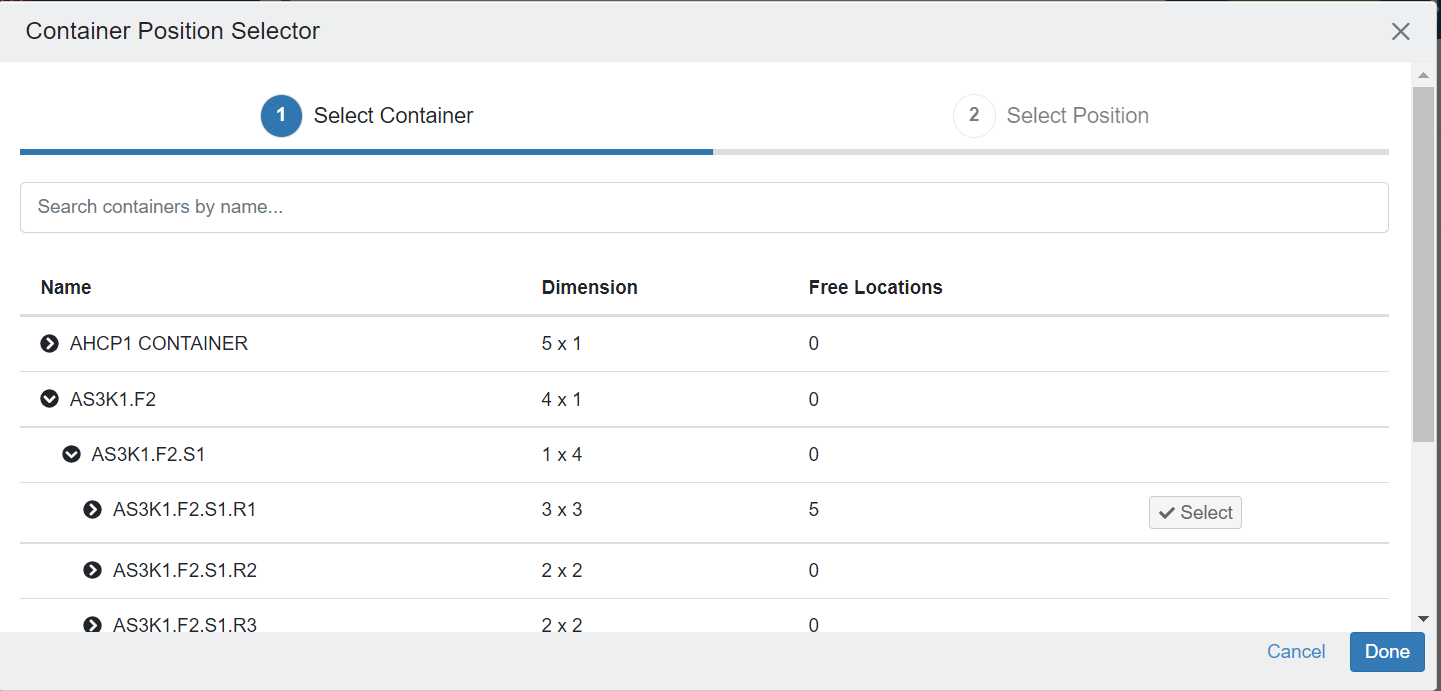
- Choose the location you want to move the container in and click on "Done".

|
| Fields | Description |
|---|
| Site | The parent site to which the container is to be transferred | | Parent Container | The name of the destination parent container under which the transfer is to be made transferred. A dropdown will show containers specific to the selected parent site. | | Transferred by user | User who is performing the transfer. It defaults to the logged-in user data | | Date and Time | The timestamp at which the transfer is made. By default, it is the current datetime | | Reasons | You can specify the reason for the transfer. |
|