...
| Info |
|---|
User needs to be well-versed with HTML to configure PDF settings. The HTML files can be created by hand or using online editors like this. |
...
Configure Print PDF (Headers/Footer)
OpenSpecimen allows importing the HTML format document to which control the consent printing PDF. Users can configure that in the individual consent form and can configure it in a setting(system level) that is applicable for all the consent forms.
How settings print template vs individual print template works:
When the print settings are missing in the consent document then the system-level settings are used.
System-level Print Setting:
Steps:
Go to the 'Home' page.
Click on the 'Settings' ‘Settings’ tab.
Search for 'Consent Document' as below
Upload the HTML file you created to configure the consent PDF.
...
Below are the details to create the HTML document to setup set up the printing consent PDF.
Designing the HTML document to configure the consent PDF
The System-level and Consent document level configuration is similar. It just when adding in system setting you need to uplaod the html in setting tab where as at consent document level you need to speified the print setting in consent document it self.
The consent form PDF is designed in HTML since it gives us the flexibility of easy formatting.
...
Header
Add a table with the patient and other information.
Footer
Example: Refer to the below HTML document and PDF (System-Level HTML and print example)
| View file | ||
|---|---|---|
|
| View file | ||
|---|---|---|
|
Consent document level print document and HTML example:
| View file | ||
|---|---|---|
|
| View file | ||
|---|---|---|
|
Configure headers
| Expand | ||||||||||
|---|---|---|---|---|---|---|---|---|---|---|
Below is the code block to set up the header in the consent PDF. Example1: Configure the university logo on the header
In the above code, the user can add the university logo in the header using the ' Screenshot: 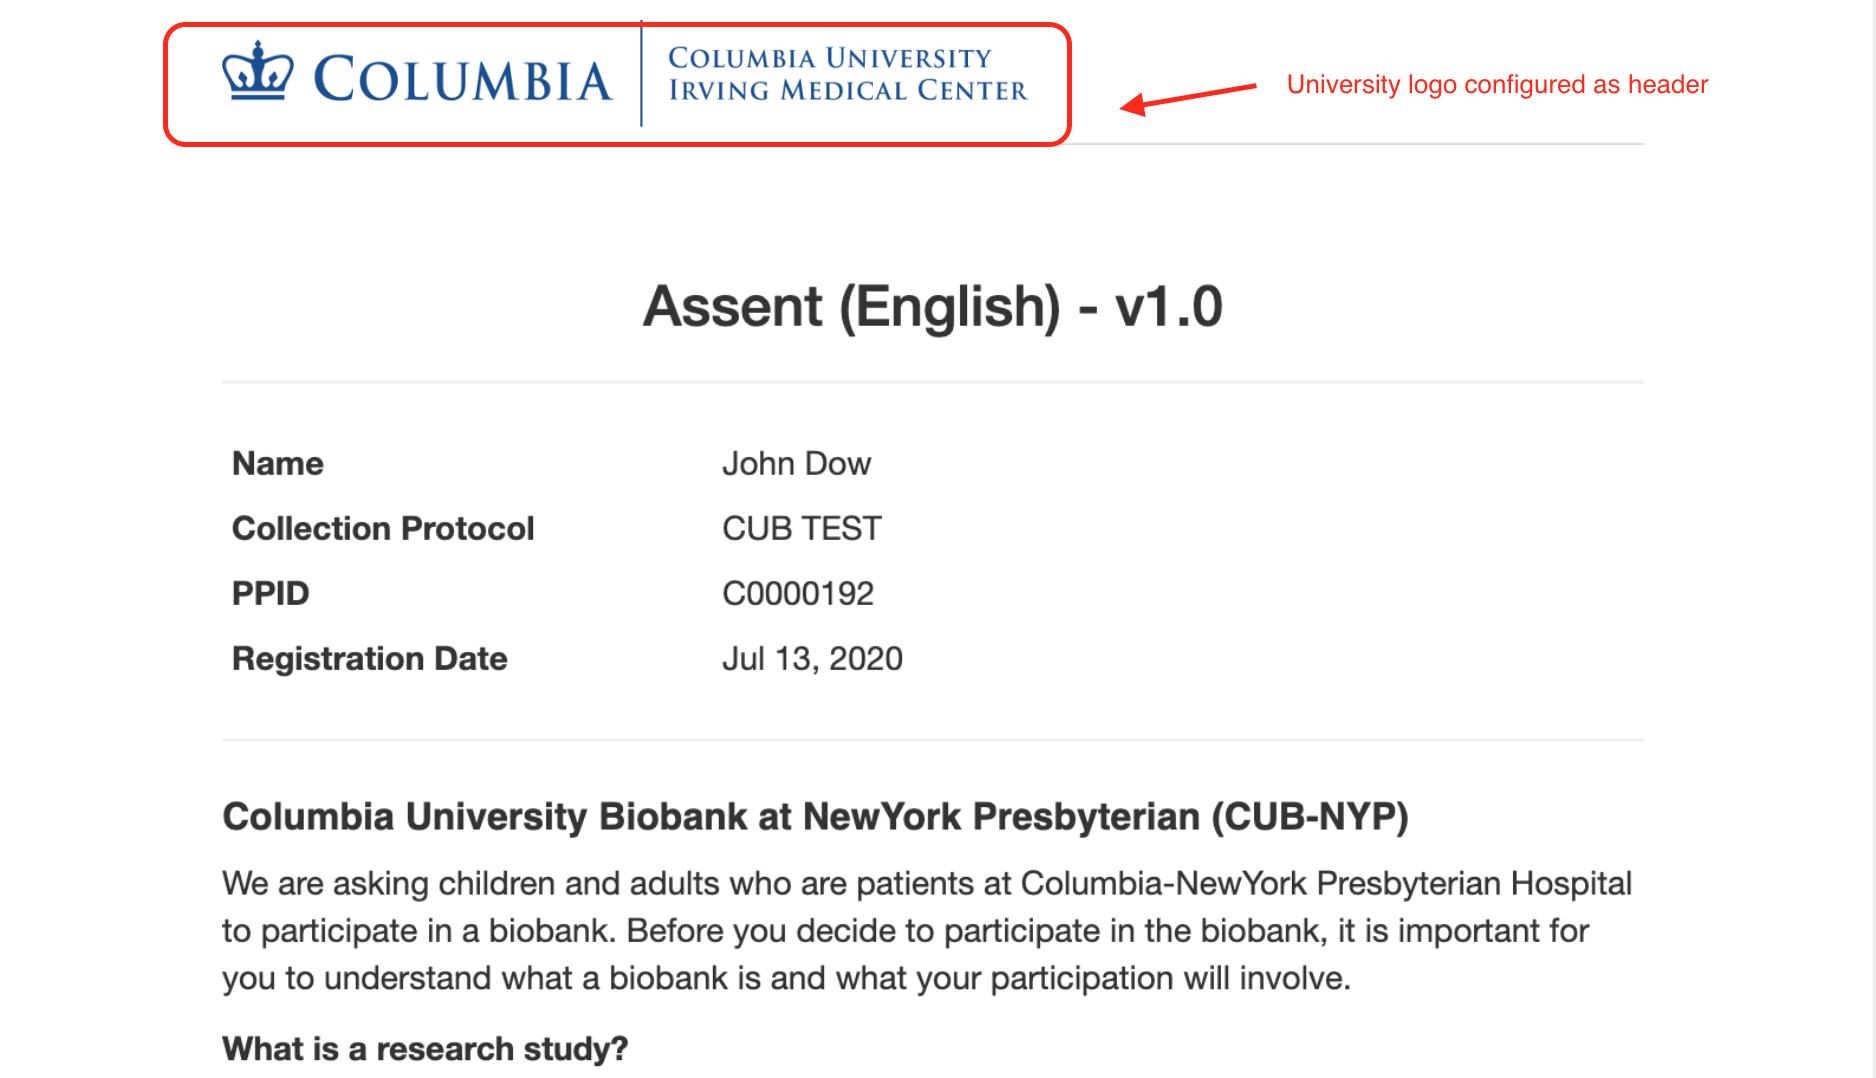 Example2: Configure the page numbers using the below example
Screenshot: 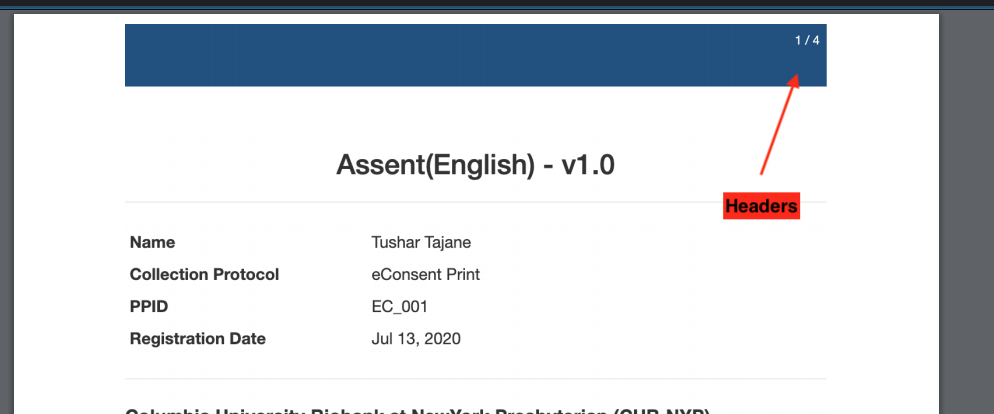 |
...
| Expand | |||||
|---|---|---|---|---|---|
Users can configure the footer similar to heders with the university logo, page number, etc. Refer to the below code block to set the footer.
In the above example, we configured the image in '<img' tag and page number in '<span tag> Screenshot: 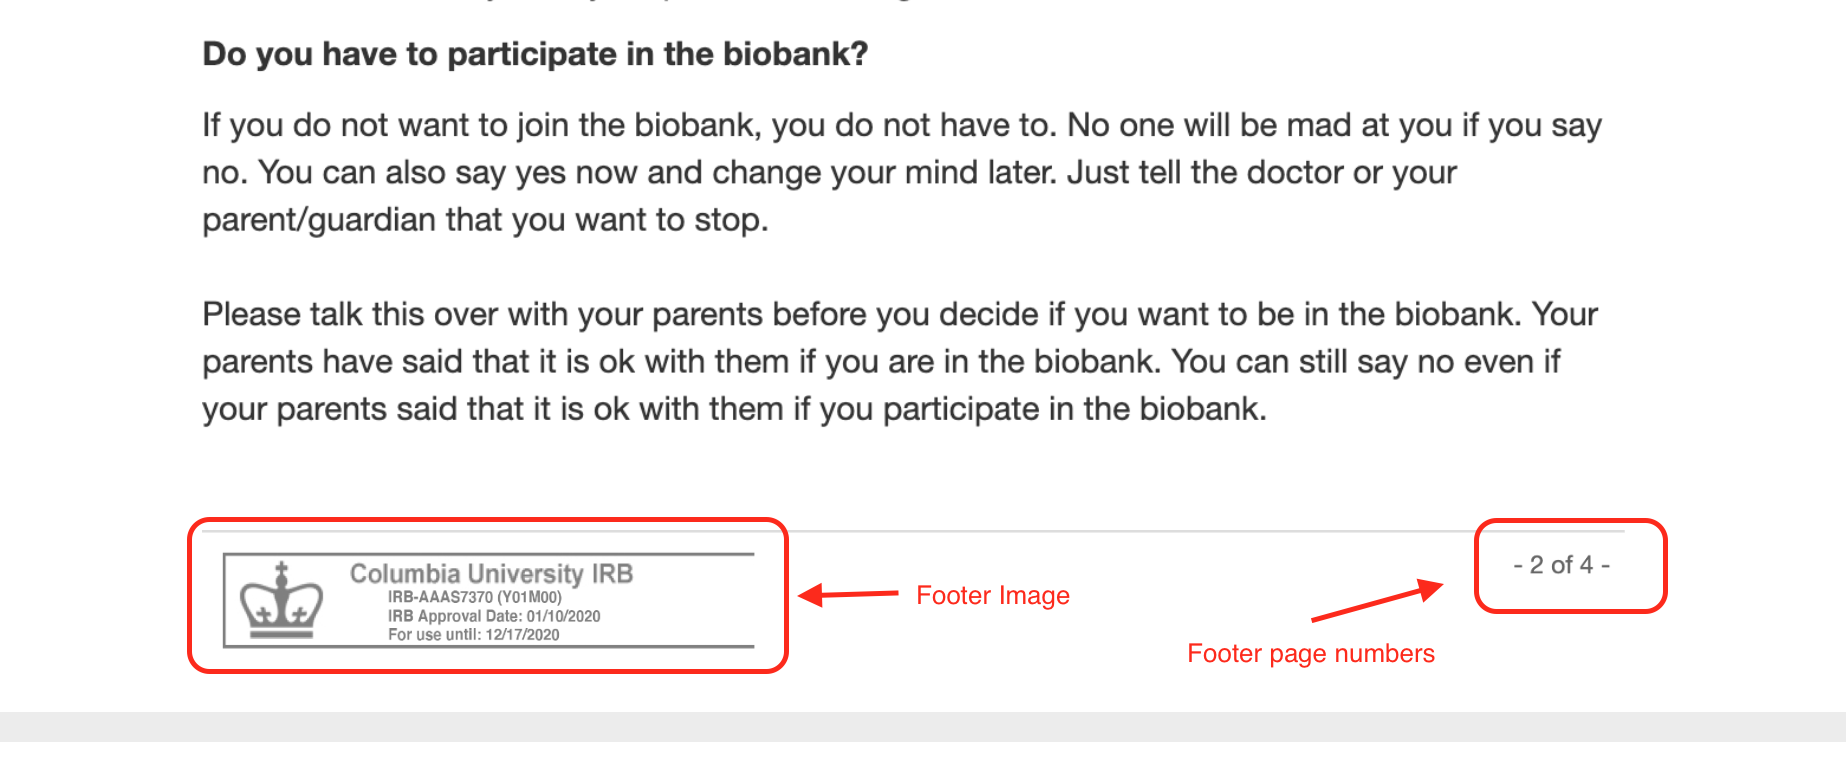 |
Add print-page
...
break in consent document PDF.
When the user downloads the consent form after filling it, they might notice that they need some information on a new page in the print document, or perhaps they want to move the content from the second half-page to the next page, etc.
...